background image

ENGLISH

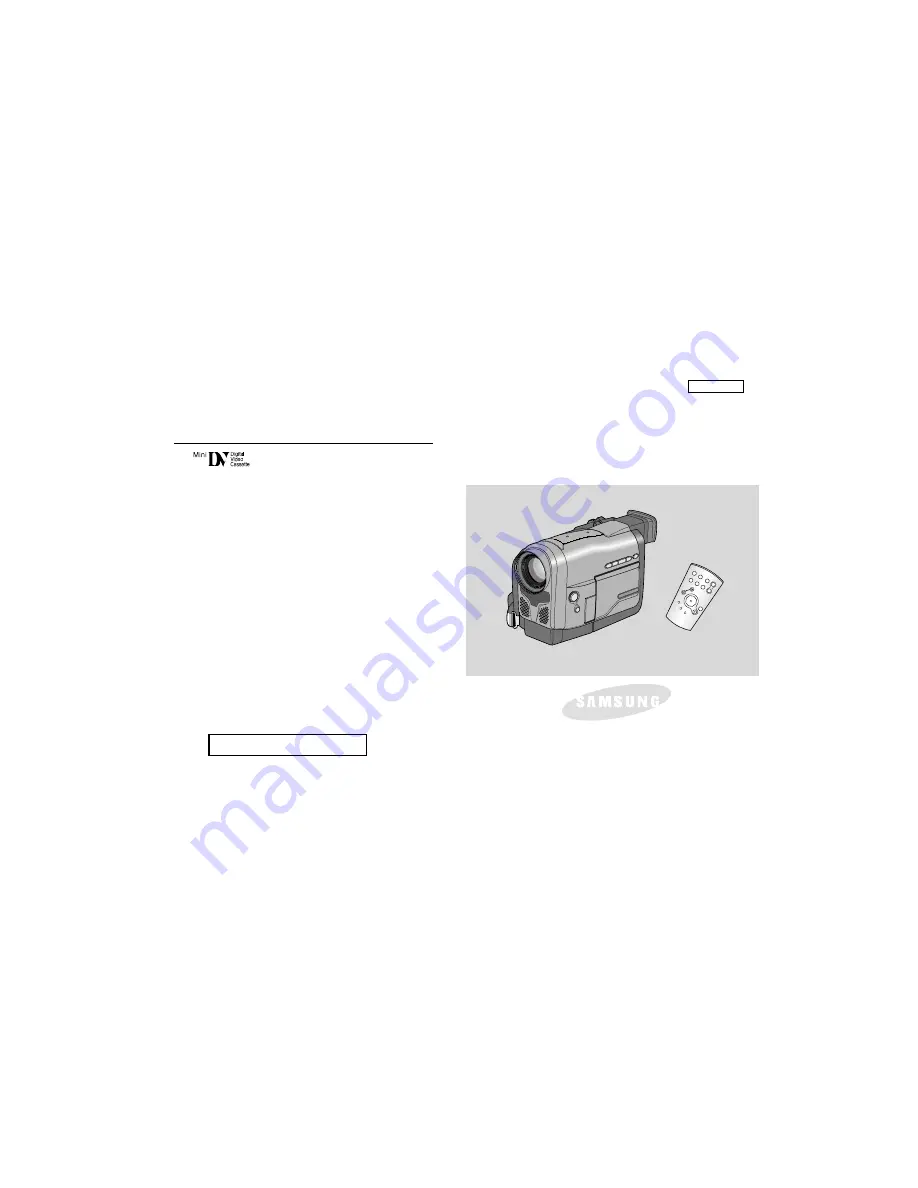
Digital Video Camcorder

AF

Auto Focus

CCD

Charge Coupled Device

LCD

Liquid Crystal Display

Owner’s Instruction Book

Before operating the unit, please read this instruction book
thoroughly, and retain it for future reference.

ELECTRONICS

START/
STOP

SELF

TIMER

X2

SLOW

F.ADV

A.DUB

ZERO

MEMORY

WIDE

TELE

STILL

PHOTO

DISPLAY

SCD67/D70

US PATENT 4415844

Summary of Contents for SCD67/D70

Page 1: ...ystal Display Owner s Instruction Book Before operating the unit please read this instruction book thoroughly and retain it for future reference ELECTRONICS ST AR T ST OP SE LF TIM ER X2 SL OW F A DV A D UB ZE RO ME MO RY WI DE TE LE ST ILL PH OT O DIS PL AY SCD67 D70 US PATENT 4415844 ...

Page 2: ...maintenance instructions should be followed 5 CLEANING Unplug this CAMCORDER from the wall outlet before cleaning Do not use liquid or aerosol cleaners Use a dry cloth used for dusting cabinets 6 ATTACHMENTS Do not use attachments not recommended by the CAMCORDER product manufacturer as they may be hazardous 7 WATER AND MOISTURE Do not use this CAMCORDER near water for example near a bathtub wash ...

Page 3: ...ls to fit contact your electrician to replace your outlet Do not defeat the safety purpose of the polarized plug 12 POWER CORD PROTECTION Power supply cords should be routed so that they are not likely to be walked on or pinched by items placed upon or against them paying particular attention to cords or plugs convenient receptacles and the point where they exit from the unit 13 OUTDOOR ANTENNA GR...

Page 4: ... to dangerous voltage or other hazards Refer all servicing to qualified service personnel 19 DAMAGE REQUIRING SERVICE Unplug this CAMCORDER from the wall outlet and refer servicing to qualified service personnel under the following conditions a When the power supply cord or plug is damaged b If any liquid has been spilled onto or objects have fallen into the CAMCORDER c If the CAMCORDER has been e...

Page 5: ... for proper grounding and in particular specifies that the cable ground shall be connected to the grounding system of the building as close to the point of cable entry as practical USER INSTALLER CAUTION Your authority to operate this FCC certified equipment could be voided if you make changes or modifications not expressly approved by this party responsible for compliance to part 15 FCC rules ...

Page 6: ...ry Pack 22 Inserting and Ejecting a Cassette 25 Making your First Recording 26 Hints for Stable Image Recording 28 Adjusting the LCD 29 Using the VIEWFINDER 29 Playing back a recording on the LCD 30 Controlling Sound from the Speaker 31 Using the various Functions Setting the menu item 32 Availability of functions in each mode 33 LCD ADJUST 34 CUSTOM SET 34 DIS 35 PIP 36 Zooming In and Out with DI...

Page 7: ...In and Out 56 Audio dubbing 57 PHOTO 58 Lighting Techniques 60 Various Recording Techniques 61 To watch with the LCD 62 To watch with a TV monitor 62 Playback 63 Various Functions in PLAYER mode 64 After finishing a recording 69 Cleaning and Maintaining the Camcorder 70 3 ENGLISH Contents Playing back a Tape Using Your Camcorder Abroad 71 Troubleshooting 72 Specifications 74 Index 76 Warranty 77 I...

Page 8: ...en to the Camcorder 1 LCD screen closed 2 Standard recording by using the LCD screen 3 Making a recording by looking at the LCD screen from the top 4 Making a recording by looking at the LCD screen from the front 5 Making a recording with the LCD screen closed Notices and Safety Instructions Notices regarding rotation of LCD screen 1 2 3 4 5 90 90 90 90 ...

Page 9: ...in a dry warm room with the cassette compartment opened and the battery removed Notices regarding COPYRIGHT Television programs video tapes DVD titles films and other program materials may be copyrighted Unauthorized copying of copyrighted material may be against the law Notices regarding CAMCORDER 1 Do not leave the camcorder exposed to high temperature above 60 C or 140 F For example in a parked...

Page 10: ... completely It is a good idea to use the viewfinder instead of the LCD when recording for a long time because the LCD uses up more battery power 6 ENGLISH Notices and Safety Instructions When the battery reaches the end of its life please contact your local dealer The batteries have to be dealt with as chemical waste Notices regarding the battery pack Notices regarding video head cleaning To ensur...

Page 11: ...y However there can be tiny dots red blue or green in color that appear on the LCD monitor These dots are normal and do not affect the recorded picture in any way 2 When you use the LCD monitor in direct sunlight or outdoors it may be difficult to see the picture If this occurs we recommend that the viewfinder is used 3 Direct sunlight can damage the LCD monitor To ensure a steady picture during f...

Page 12: ...tery maintains the clock function and user settings even if the battery pack or AC adapter is removed 2 The lithium battery for the camcorder lasts about 6 months under normal operation from time of installation 3 When the lithium battery becomes weak or dead the date time indicator will flash for about five seconds when you set the POWER switch to CAMERA In this case replace the lithium battery w...

Page 13: ...nal size Color TFT LCD A high resolution color TFT LCD with 112 320 pixels gives you clean sharp images as well as the ability to review your recordings immediately Digital Image Stabilizer The DIS compensates for hand shake reducing unstable images particularly at high magnification Various digital effects The DSE Digital Special Effects allows you to give your recordings a special look by adding...

Page 14: ...struction Book 2 AC Power Adapter 6 Shoulder Strap STA RT STO P SEL F TIM ER X2 SLO W F AD V A D UB ZER O MEM ORY WID E TEL E STIL L PHO TO DIS PLA Y 1 Lithium Ion Battery pack 2 AC Power Adapter 3 AC cord 4 AUDIO VIDEO cable 5 Instruction Book 6 Shoulder Strap 7 Lithium batteries for Remote Control and Clock TYPE CR2025 SCD67 1 EA SCD70 2 EA 8 S VIDEO cable SCD70 only 9 Remote Control SCD70 only ...

Page 15: ...Strap see page 20 5 Internal MICs Left and Right 6 CUSTOM button see page 53 7 EASY button see page 52 8 TFT LCD monitor 9 Viewfinder see page 29 Front Left View 1 Lens 2 REC indicator 3 Remote sensor 4 Hook for Hand Strap 5 Internal MICs 9 Viewfinder 8 TFT LCD monitor 7 EASY button 6 CUSTOM button ...

Page 16: ...12 Getting to Know Your Camcorder 1 Function Buttons PLAYER CAMERA STOP BLC see page 55 REW EDIT PLAY STILL FADE see page 56 FF EDIT SLOW MF AF see page 54 2 SPEAKER Left Side View 1 Function Buttons 2 SPEAKER ...

Page 17: ...er switch CAMERA or PLAYER see page 21 4 S VIDEO out 5 DV IN OUT 6 External MIC in see page 57 7 Audio Video out 8 OPEN EJECT button see page 25 Right Top View 8 OPEN EJECT button 7 Audio Video out 6 External MIC in 5 DV IN OUT 4 S VIDEO out 1 Zoom lever and Volume Control 2 PHOTO button 3 Power switch CAMERA or PLAYER ...

Page 18: ... 6 Hook for shoulder strap 7 DC jack see page 21 8 START STOP button see page 26 9 Battery Release button see page 69 10 Lithium Battery holder see page 19 Rear Bottom View 9 Battery Release button 8 START STOP button 10 Lithium Battery Holder 1 Charging indicator 2 MENU ON OFF button 3 ENTER DISPLAY button 4 MENU DIAL 5 LCD open button 6 Hook for shoulder strap 7 DC jack ...

Page 19: ...page 65 11 STOP 12 STILL 13 A DUB see page 57 14 Zoom TELE 15 Zoom WIDE 16 DISPLAY see page 17 Remote control SCD70 only ENGLISH START STOP SELF TIMER X2 SLOW F ADV A DUB ZERO MEMORY WIDE TELE STILL PHOTO DISPLAY 16 DISPLAY 15 Zoom WIDE 14 Zoom TELE 13 A DUB 12 STILL 11 STOP 10 Frame Advance 1 PHOTO 2 START STOP 3 SELF TIMER 4 ZERO MEMORY 5 FF 6 REW 7 PLAY 8 X2 9 SLOW ...

Page 20: ...on see page 72 13 PIP Picture in Picture see page 36 14 Photo shot see page 58 15 Digital zoom mode see page 38 16 Remaining Tape measured in minutes 17 Tape counter 18 Zero memory indicator SCD70 only see page 66 19 Operating mode 20 Record speed mode see page 45 21 Custom or Easy mode see pages 52 53 22 DIS Digital Image Stabilizer see page 35 23 Program AE see page 39 24 BLC Back Light Compensa...

Page 21: ... ENTER button on the rear side panel Each press of the button toggles the OSD function on and off When you turn the OSD off In CAMERA mode You can see those features being used In PLAYER mode All OSD messages flash for 3 seconds then disappear Turning on off the DATE TIME The DATE TIME is not affected when the OSD function is switched ON or OFF To turn the DATE TIME on or off access the menu and c...

Page 22: ...econds wait 30 seconds of recording WAIT 10S SELF END 10 seconds wait records until you press the START STOP button again 1 Set the camcorder to CAMERA mode 2 Press the SELF TIMER button until the appropriate indicator is displayed in the viewfinder WAIT 10S SELF 30S WAIT 10S SELF END 3 Press the START STOP button to start the timer After a 10 second wait recording starts If you have selected SELF...

Page 23: ...ds when you set the power switch to CAMERA When this occurs replace the lithium battery with type CR2025 1 Remove the Lithium battery holder from the camera 2 Position the Lithium cell in the holder with the positive terminal face down 3 Reinsert the holder into the lithium battery compartment Note The holder must be inserted in the correct direction or it will not fit properly Warning Keep the LI...

Page 24: ...b Adjust its length and stick it back onto the hand strap cover c Close the Hand Strap cover back up again The Shoulder Strap enables you to carry your camcorder around in complete safety 1 Insert the end of the strap into the Shoulder Strap hook on the camcorder Insert the other end of the strap into the ring inside the hand strap 2 Thread each end into the buckle adjust the length of the strap a...

Page 25: ...AC Power Adapter to the AC cord 2 Connect the AC cord to a wall socket Note The plug and wall socket type may be different depending on the country you re in 3 Connect the DC cable to the DC jack socket on the camcorder 4 Set the camcorder to the CAMERA or PLAYER mode by holding down the tab on the power switch and turning it to the CAMERA or PLAYER position 21 ENGLISH Preparing Connecting a Power...

Page 26: ...flash showing that the battery is charging 5 When it has finished charging disconnect the battery and AC Power Adapter from the camcorder Even with the power switched off the battery will still discharge is left connected to the camcorder Notes The battery pack may be charged a little at the time of purchase To prevent reduction in the life and capacity of the battery pack always remove it from th...

Page 27: ...reduced if it is used in temperatures below 32 F 0 C or left in temperatures above 104 F 40 C for a long period even when it is fully recharged Do not put the battery pack near any heat source fire or flames for example Do not disassemble process pressure or heat the Battery Pack Do not allow the and terminals of the battery pack to be short circuited It can cause leakage heat generation induction...

Page 28: ... recording time in the operating instructions is measured using a fully charged battery pack at 77 F 25 C As the environmental temperature and conditions may be different when you actually use the camcorder the remaining battery time may not be the same as the approximate continuous recording times given in these instructions Tips for Battery Identification A charge mark is provided on the battery...

Page 29: ...se the cassette door The camcorder will not operate with the cassette door open Note When you have recorded something that you wish to keep you can protect it so that it will not be accidentally erased a Recording Impossible Protection Push the safety tab on the cassette so that the hole is not covered b Recording possible If you no longer wish to keep the recording on the cassette push the protec...

Page 30: ...STBY is displayed If the protection tab of the cassette is open STOP will be displayed Make sure the image you want to record appears in the LCD monitor or viewfinder Make sure the battery level indicates that there is enough remaining power for your expected recording time 4 To start recording press the START STOP button REC is displayed in the LCD To stop recording press the START STOP button ag...

Page 31: ... Power off feature is designed to save battery power Edit Search You can view a recording using with the EDIT function in STBY mode EDIT enables you to play it backwards and EDIT enables you to play it forwards for as long as you keep pressing If you press the the EDIT button quickly in STBY mode your camcorder will play in reverse for 3 seconds and return to the original position automatically No...

Page 32: ...reater stability Do not forget to breathe gently 5 Use the LCD frame as a guide to determine the horizontal plane 6 Whenever possible use a tripod 1 Hold the camcorder firmly using the hand strap 2 Place your right elbow against your side 3 Place your left hand under the camcorder to support it Be sure not to touch the built in microphone 4 Choose a comfortable stable position for the shots that y...

Page 33: ...e MENU DIAL so that LCD ADJUST is highlighted 5 Press ENTER to enter the sub menu 6 Turn MENU DIAL so that it highlights the menu item you want to adjust BRIGHT COLOR 7 Press ENTER again You can adjust the LCD using MENU DIAL 8 Press ENTER For further adjustment repeat steps 6 7 8 9 Press the MENU ON OFF button to finish the setting Use the focus adjustment knob of the VIEWFINDER to focus the pict...

Page 34: ...le of the LCD monitor and set the brightness or the color if necessary 4 Press the REW button to rewind the tape to the start point To stop REWIND press the STOP button Camcorder stops automatically after rewinding 5 Press the PLAY STILL button to start playback You can see the picture you recorded on the LCD To stop the PLAY operation press the STOP button Notes You can also view the picture on a...

Page 35: ... SPEAKER 4 Press the ENTER button to change the setting 5 Press the MENU ON OFF button to finish the SPEAKER setting If you close the LCD monitor both the LCD and speaker are switched off If the speaker does not work properly check these points Is the LCD monitor closed Is the volume adjusted to a low Is the SPEAKER set to OFF in the menu The volume of the Speaker is controlled by moving the ZOOM ...

Page 36: ...TE TIME DEMO CLOCK SETTING LCD ADJUST PHOTO SEARCH AUDIO SELECT SPEAKER REC MODE DISPLAY DATE TIME MENU SP STBY LCD ADJUST CUSTOM SET DIS OFF PIP OFF D ZOOM OFF PROGRAM AE AUTO MENU Set the camcorder to CAMERA or PLAYER mode 1 Press the MENU ON OFF button The MENU OSD is displayed The cursor HIGHLIGHT indicates the feature you are currently adjusting 2 Using the MENU DIAL and ENTER buttons on the ...

Page 37: ...O When you set the PROGRAM AE mode to manual not AUTO mode The SHUTTER SPEED and IRIS mode will be changed to AUTO Advanced Recording Availability of functions in each mode Digital functions Digital Special Effects DIS O O O O D ZOOM O O O O O PHOTO PIP O O q q q GHOST q O q q DSE OTHER O O O q EFFECTS Requested Mode Operating Mode DIS D ZOOM PHOTO PIP GHOST OTHER EFFECTS O The requested mode will...

Page 38: ...OFF button to bring up the MENU list 3 Turning the MENU DIAL select CUSTOM SET and press the ENTER button 4 Using the MENU DIAL and ENTER button set the status of each item to what you want 5 To store settings and to exit the menu press the MENU ON OFF button Notes If you want to activate the CUSTOM function press the CUSTOM button in CAMERA mode If you set the SHUTTER to 1 8 1 15 1 30 the DIS wil...

Page 39: ...t will appear 3 Turn the MENU DIAL to highlight DIS 4 To activate the DIS function press the ENTER button The DIS menu is changed to ON If you do not want to use the DIS function set the DIS menu to OFF 5 To exit press the MENU ON OFF button Notes It is recommended that you deactivate the handshake compensation function when using a tripod The DIS function will not operate in the low SHUTTER 1 8 1...

Page 40: ...ar 3 Turn the MENU DIAL to highlight PIP 4 To activate the PIP function press the ENTER button The PIP menu is changed to ON If you do not want to use the PIP function set the PIP menu to OFF 5 To exit press the MENU ON OFF button Notes When you use the PIP function the PIP screen will be recorded on the tape The PIP function will not operate in the DSE function If you set the SHUTTER to manual 1 ...

Page 41: ... shots Please note that over use of the zoom feature can lead to unprofessional looking results and a reduction of battery usage time 1 Move the zoom lever a little for a gradual zoom move it further for a high speed zoom Your zooming is monitored on the OSD 2 T Telephoto side Subject appears closer 3 W Wide angle side Subject appears farther away Note You can record a subject that is a minimum of...

Page 42: ... Turn the MENU DIAL to D ZOOM 4 Press ENTER to enter the sub menu 5 Turn the MENU DIAL so that it highlights the zoom magnification Press ENTER to activate the digital zoom and return to main menu If you exit the sub menu without pressing the ENTER button the DIGITAL ZOOM mode is not changed 6 To exit press the MENU ON OFF button Note If you use the digital zoom function the picture quality may de...

Page 43: ... is out of focus The PORTRAIT mode is most effective when used outdoors The shutter speed automatically varies from 1 60 to 1 1000 second SPORT mode For recording people or objects moving quickly HSS mode For recording fast moving subjects such as golfers or tennis players Setting the PROGRAM AE 1 Press the MENU ON OFF button The menu list will appear 2 Turn the MENU DIAL to highlight PROGRAM AE 3...

Page 44: ... mode gives the images a mosaic effect c SEPIA mode This mode gives the images a reddish brown pigment d NEGA mode This mode reverses the colors of the image creating a negative image e MIRROR mode This mode cuts the picture in half using a mirror effect f B W mode This mode changes the images to black and white g EMBO mode This mode creates a 3D effect embossing h CINEMA mode This mode covers the...

Page 45: ...mode Press ENTER to confirm the DSE mode In MAKE UP mode a MENU list for selecting RED GREEN BLUE YELLOW will appear 6 To exit press the MENU ON OFF button Notes PIP will shut off when the DSE mode is operated GHOST function will not operate in DIS and 1 8 1 15 1 30 SHUTTER modes MENU SP STBY CUSTOM SET DIS OFF PIP OFF D ZOOM OFF PROGRAM AE AUTO DSE SELECT OFF MENU SESELECT SP STBY OFF OFF ART MOS...

Page 46: ...WHITE BALANCE value INDOOR Controls WHITE BALANCE according to the indoor ambience OUTDOOR Controls WHITE BALANCE according to the outdoor ambience 1 Set the camcorder to CAMERA mode 2 Press the MENU ON OFF button The menu list will appear 3 Turn the MENU DIAL to highlight W BALANCE 4 Press ENTER to enter the sub menu 5 Using the MENU DIAL select the WHITE BALANCE mode Press ENTER to confirm the W...

Page 47: ...er to CAMERA mode 2 Press the MENU ON OFF button The menu list will appear 3 Turn the MENU DIAL to highlight SHUTTER 4 Press ENTER to enter the sub menu 5 Using the MENU DIAL select the SHUTTER SPEED mode Press ENTER to confirm the SHUTTER SPEED mode 6 To exit press the MENU ON OFF button Note The SHUTTER SPEED function will not operate with either the DIS ON or the GHOST modes ON MENU SP STBY PIP...

Page 48: ...ng AUTO It selects the iris value for the proper exposure MANUAL 0 29 1 Set the camcorder to CAMERA mode 2 Press the MENU ON OFF button The menu list will appear 3 Turn the MENU DIAL to highlight IRIS 4 Press ENTER to enter the sub menu If you want to use manual mode select MANUAL and press ENTER Using the MENU DIAL select the IRIS value 5 To exit press the MENU ON OFF button MENU SP STBY D ZOOM O...

Page 49: ...he ENTER button The REC MODE is switches between SP and LP with each press 5 To exit press the MENU ON OFF button Notes We recommend that you use this camcorder to play back any tape recorded on this camcorder Playing back a tape recorded in other equipment may produce mosaic shaped noise When you record in SP and LP modes on one tape or you record some scenes in LP mode the playback picture may b...

Page 50: ... ON or OFF respectively If you want to turn off the indicator set the REC LAMP to OFF 5 To exit press the MENU ON OFF button WIND CUT The WIND CUT function works in CAMERA mode only The WIND CUT function minimizes wind noise or other noise during recording When the wind cut is on some low sounds are cut out along with the sound of the wind The WIND CUT menu selecting method is the same as the REC ...

Page 51: ...io dubbing is not possible when using this mode 1 Set the camcorder to CAMERA mode 2 Press the MENU ON OFF button The menu list will appear 3 Turn the MENU DIAL to highlight AUDIO MODE 4 To select the AUDIO MODE press the ENTER button The AUDIO MODE is switches between 12 BIT 16 BIT with each press 5 To exit press the MENU ON OFF button Note SCD67 cannot record dubbed audio However it can play bac...

Page 52: ...YER mode 2 Press the MENU ON OFF button The menu list will appear 3 Turn the MENU DIAL to highlight DISPLAY 4 To select the DISPLAY mode press the ENTER button The DISPLAY mode switches between LCD LCD V OUT with each press 5 To exit press the MENU ON OFF button 6 To turn the OSD ON or OFF press the ENTER button MENU SP STBY REC MODE SP REC LAMP ON WIND CUT OFF AUDIO MODE 12 BIT PHOTO MODE FIELD D...

Page 53: ... TIME mode Press ENTER to confirm the DATE TIME mode and return to the main menu If you exit the sub menu without pressing ENTER the DATE TIME mode is not changed 5 To exit press the MENU ON OFF button Notes The DATE TIME is not affected by the OSD ON OFF ENTER button The DATE TIME will read in the following conditions During playback of a blank section of tape If the tape was recorded before sett...

Page 54: ...activate the DEMO function press the ENTER button so DEMO ON appears Press the menu button to quit the menu The demonstration will start 5 To end the demonstration set the DEMO to OFF Notes The DEMO function only works without a TAPE inserted If you set the DEMO to ON during recording or STBY mode the demonstration will activate 3 minutes later after the tape is ejected If you press other buttons ...

Page 55: ...etting 5 Press the ENTER button The month will blink 6 Using the MENU DIAL change the month setting 7 Press the ENTER button The day will blink 8 You can set the day hour and minute following the same procedure used for setting the year and month 9 Press ENTER after setting the minute The COMPLETE OSD will blink and then a few seconds later the menu screen will return to the main menu MENU SP STBY...

Page 56: ...e same time The DATE TIME will only be seen if it has been set see page 49 3 Press START STOP to start recording Recording will begin using the basic automatic settings 4 Pressing the EASY button again turns the EASY mode off The camera will return to the settings that were set prior to the EASY mode being switched on Notes In the EASY mode BLC FADE MF AF and all MENU functions are not available I...

Page 57: ...l be displayed on the screen 3 Press START STOP to start recording Recording will begin using the CUSTOM settings 4 To switch the CUSTOM mode off press the CUSTOM button again The camcorder will revert to the settings that were set prior to the custom mode being selected Notes Once settings have been made in the Custom mode you turn the Custom mode off to make changes to these settings The CUSTOM ...

Page 58: ...uto Focus mode Manual Focusing In the following cases you could obtain better results by adjusting the focus manually a A picture containing several objects some close to the camcorder others further away b A person enveloped in fog or surrounded by snow c Very shiny or glossy surfaces like a car d People or objects moving constantly or quickly such as an athlete or crowd 1 Set power switch to CAM...

Page 59: ...o be recorded is wearing white or shiny clothes and is placed against a bright background the person s face is too dark to distinguish their features The subject is outdoors and the background is overcast The light sources are too bright The subject is against a snowy background 1 Set the POWER switch to CAMERA mode 2 Press the BLC button Normal BLC Normal BLC enhances only the subject BLC on BLC ...

Page 60: ...t the same time release the FADE button Recording starts and the picture and sound gradually appear fade in To Stop Recording use FADE IN FADE OUT 3 When you wish to stop recording hold down the FADE button The picture and sound gradually disappears fade out 4 When the picture has disappeared press the START STOP button to stop recording a FADE OUT Approx 4 seconds b FADE IN Approx 4 seconds Fade ...

Page 61: ...microphone connect the microphone to the external MIC input on the camcorder 2 Press PLAY STILL button and find the start position of the scene to be dubbed 3 Press PLAY STILL button to pause the scene 4 Press the A DUB button on the Remote Control A DUB will be displayed in the LCD The camcorder is in a ready to dub state 5 Press the PLAY STILL button to start dubbing Press the STOP button to sto...

Page 62: ... there may be some loss in sound quality SCD67 cannot record dubbed audio However it can play back 12 BIT dubbed audio recorded on other camcorders The PHOTO function works in CAMERA mode only The PHOTO function lets you capture an object as a still along with sound while in CAMERA mode You can select one of these PHOTO modes FIELD You can record a normal resolution still picture FRAME You can rec...

Page 63: ...press the START STOP button If you press the PHOTO button in the GHOST or PIP mode the GHOST or PIP mode will be shut off If you use the PHOTO function the picture quality may deteriorate Searching for PHOTO pictures PHOTO SEARCH works in the PLAYER mode only 1 Press the MENU ON OFF button The menu list will appear 2 Turn the MENU DIAL to highlight PHOTO SEARCH 3 Press ENTER to enter the sub menu ...

Page 64: ...the LENS cover 5 Remove the BATTERY PACK from the camcorder Situations Brightness Lux Recommendations Snow covered mountains or fields 100 000 Sandy beach on a hot summer s day Sunny around midday 100 000 Sunny day in the middle of the afternoon 35 000 Overcast day around midday 32 000 Overcast day one hour after sunrise 2 000 Office with fluorescent lighting near to a window 1 000 Sunny day one h...

Page 65: ...corder 1 General recording Making a recording by looking at the LCD screen from the top 2 Downward recording Making a recording by looking at the LCD screen from the bottom 3 Upward recording Making a recording by looking at the LCD screen from the front Note When the LCD screen faces front indicators are turned off 4 Self record In circumstances where it is difficult to use the LCD monitor the vi...

Page 66: ...ecting to a TV with Audio and Video input jacks Use the Audio Video cable supplied with your camcorder The yellow plug Video The white plug Audio L The red plug Audio R Notes You can use the S VIDEO cable SCD70 not supplied with SCD67 to obtain better quality pictures if you have a S VIDEO connector on your TV Even if you use S video cable you must still connect an audio cable While playing back o...

Page 67: ...recorded tape in PLAYER mode 1 Use the TV VIDEO button to select VIDEO on your TV 2 Connect a power source battery or AC Power adapter to the camcorder 3 Set the POWER switch to PLAYER 4 Insert the tape you want to see 5 Using FF and REW buttons find the part of the tape you want to see 6 Press the PLAY STILL button The picture you recorded appears on the TV after a few seconds If the tape reaches...

Page 68: ...or Slow playback To resume playback press the PLAY STILL button Picture search Forward Reverse Press FF or REW buttons once during Playback or Still mode To resume normal playback press the PLAY STILL button Keep pressing FF or REW buttons during Playback or Still mode To resume normal playback release the button Slow playback Forward Reverse Forward Slow Playback Press the SLOW button during Play...

Page 69: ...ntrol during Playback To resume normal playback press the PLAY STILL button Reverse X2 Playback Press the REW button during Forward X2 Playback To resume normal playback press the PLAY STILL button Notes Mosaic shaped noise appears on the screen during some playback modes Mosaic shaped noise can be experienced more when you playback tapes recorded in LP containing various playback functions There ...

Page 70: ...rewind the tape The tape stops automatically when it reaches the zero position When you finish recording turn the power switch PLAYER and press the REW button The tape stops automatically when it reaches the zero position 3 The tape counter with the Zero memory indicator disappears from the display and the tape counter is changed to time code Notes In the following situations the ZERO MEMORY mode ...

Page 71: ...digital connection video and audio signals are transmitted in digital allowing high quality images to be transferred Connecting to a PC If you want to transmit data to a PC you must install an IEEE 1394 add on card not supplied on the PC The frame rate recorded for video capturing is dependent on the capability of the PC Note When you transmit data from this camcorder to another DV device some fun...

Page 72: ... other DV device Make sure DV IN appears on the monitor 3 Press the START STOP button to enter the REC PAUSE mode PAUSE is displayed in the OSD 4 Start playback on the other DV device while you monitor the picture 5 Press the START STOP button to start recording If you want to pause recording for a while press the START STOP button again 6 To stop recording press the STOP button Note When making r...

Page 73: ... Wait until the tape is completely ejected 2 After removing the tape close the door and store the camcorder in a dust free environment Dust and other foreign materials can cause image degradation 3 Set the power switch to OFF mode 4 Disconnect the power source or remove the Lithium Ion Battery Pack When connecting a power supply separate it in reverse order by referring to page 21 Hold down the BA...

Page 74: ...s To ensure normal recording and clear pictures clean the video heads when the playback pictures display square block shape picture noise or only the blue screen appears during playback as the video heads may be dirty 1 Set the power switch to PLAYER mode 2 Insert the cleaning tape 3 Press the PLAY STILL button 4 Press the STOP button after 10 seconds Notes Check the quality of the picture using a...

Page 75: ... cassette recorder the television or VCR must be NTSC compatible and have the appropriate audio video jacks Otherwise you may need to use a transcoder PAL compatible area Australia Austria Belgium Bulgaria China CIS Czech Republic Denmark Egypt Finland France Germany Greece Great Britain Holland Hong Kong Hungary India Iran Iraq Kuwait Libya Malaysia Mauritius Norway Rumania Saudi Arabia Singapore...

Page 76: ...APE TAPE C EMG D EMG L EMG R EMG DEW Display Blinking Informs that Action Troubleshooting Before contacting a service center perform the following simple checks They may save you the time and expense of an unnecessary call Self Diagnosis Display Moisture Condensation If the camcorder is brought directly from a cold place to a warm place moisture may condense inside the camcorder on the surface of ...

Page 77: ...y pack is completely dead and cannot be recharged Use another battery pack The video heads may be dirty Clean the head with a cleaning tape The contrast between the subject and the background is too great for the camcorder to operate normally Make the background brighter to reduce the contrast or use the BLC function while you are recording The image in the viewfinder is blurred The Viewfinder len...

Page 78: ...ime SP 60 minutes when using DVM 60 LP 90 minutes when using DVM 60 FF REW time Approx 150 sec using DVM60 tape Image device CCD Charge Coupled Device Lens F1 6 22x Optical 500x Digital Electronic zoom lens Filter diameter Ø37 LCD monitor Viewfinder Size dot number 2 5inch 112 320 LCD monitor Method TFT LCD Viewfinder 0 24 B W LCD Connectors Video output 1Vp p 75Ω terminated S video output Y 1Vp p...

Page 79: ...4 F Storage temperature 20 C 60 C 4 F 140 F External dimension Length 158 mm 6 22 in Height 93 mm 3 66 in Width 87 mm 3 43 in Weight 580 g 1 28 lb Except for Lithium Ion Battery Pack and tape Built in MIC Omni directional stereo condenser microphone Remote control Indoors greater than 49 ft straight line Outdoors greater than 16 ft straight line These technical specifications and design may be cha...

Page 80: ...F F REW 64 IEEE 1394 67 IRIS 44 MF 54 MIRROR 40 MIX 58 MOSAIC 40 NEGA 40 ND FILTER 60 NTSC 71 PAL 71 PHOTO 58 PIP 36 PLAY 64 POWER ADAPTER 21 PROGRAM AE 39 REC LAMP 46 REC MODE 45 REMOTE CONTROL 18 SAFETY TAB red tab 25 SELF TIMER 18 SHUTTER SPEED 43 STBY 26 SOUND 1 58 SOUND 2 58 S VIDEO 62 TELE 37 VIEWFINDER 29 WIDE 37 WHITE BALANCE 42 ZERO MEMORY 66 ZOOM 37 A B C D E F I M N P R S T V W Z ...

Page 81: ...t must be presented to the authorized service center EXCLUSIONS WHAT IS NOT COVERED This warranty does not cover damage due to accident fire flood and or other acts of God misuse incorrect line voltage improper installation improper or unauthorized repairs commercial use or damage that occurs in shipping Exterior and interior finish lamps and glass are not covered under this warranty Customer adju...

Page 82: ...R IS MANUFACTURED BY ELECTRONICS Samsung Electronics Internet Home Page http www samsungusa com AD68 00395H SAMSUNG Electronics America Inc 105 Challenger Road Ridgefield Park N J 07660 0511 Tel 1 800 SAMSUNG 1 800 726 7864 ...

Reviews: