background image

(QJOLVK

(QJOLVK

)UDQoDLV

(VSDxRO

38%',0

176&

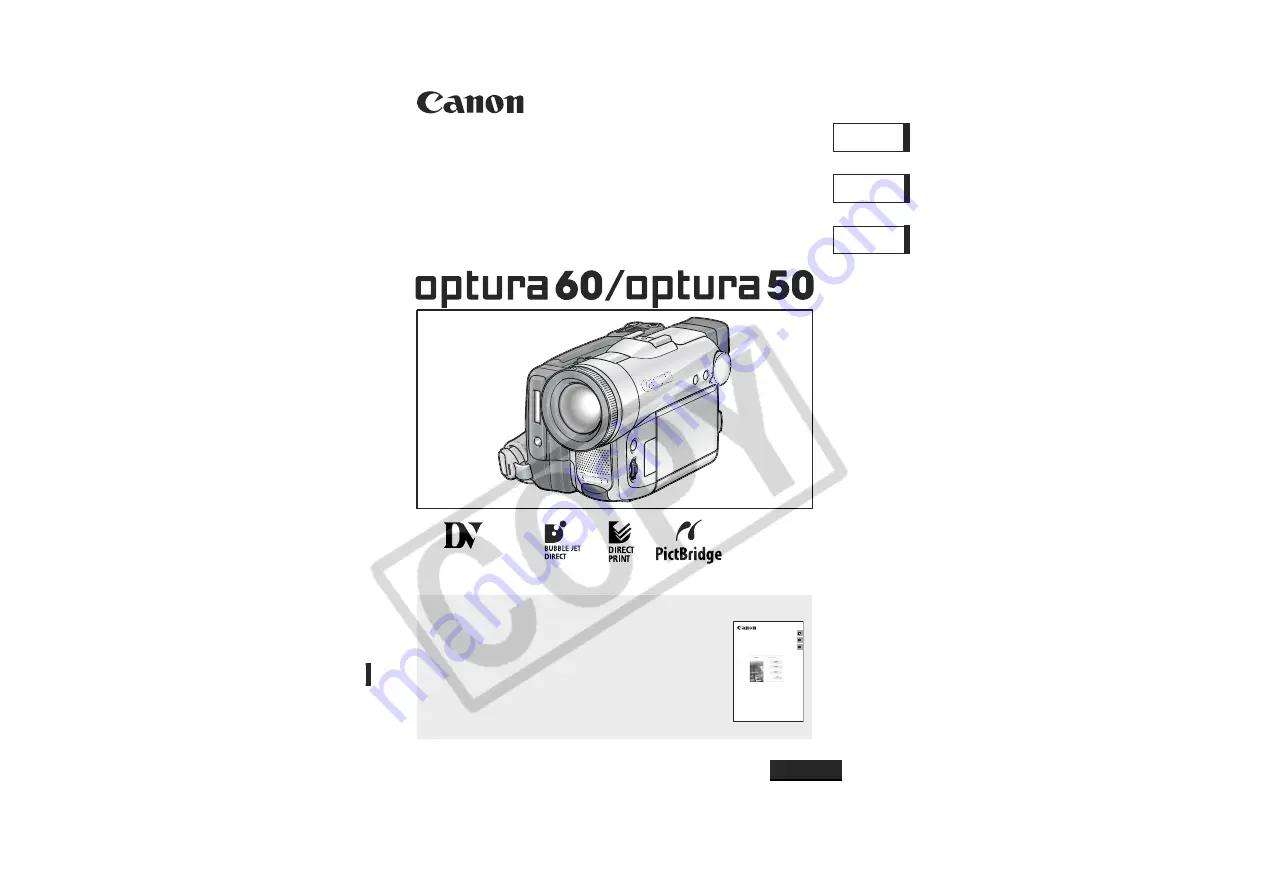
'LJLWDO9LGHR&DPFRUGHU

,QVWUXFWLRQ0DQXDO

&DPpVFRSHQXPpULTXH

0DQXHOG¶LQVWUXFWLRQ

9LGHRFiPDUDGLJLWDO

0DQXDOGH,QVWUXFFLRQHV

0LQL

'LJLWDO
9LGHR
&DVVHWWH

3OHDVHUHDGDOVRWKHIROORZLQJLQVWUXFWLRQPDQXDO

9HXLOOH]OLUHDXVVLOHPDQXHOG¶LQVWUXFWLRQVXLYDQW

/HDWDPELpQHOPDQXDOGHLQVWUXFFLRQHVVLJXLHQWH

‡'LJLWDO9LGHR6RIWZDUH

(

)

(V

'LJLWDO9LGHR6RIWZDUH

9HUVLRQ9HUVLRQ

,QVWUXFWLRQ0DQXDO
0DQXHOG¶LQVWUXFWLRQ
0DQXDOGH,QVWUXFFLRQHV

38%',0

7KLVLQVWUXFWLRQPDQXDOH[SODLQVKRZWRLQVWDOOWKHVRIWZDUHDQG&DQRQ86%9LGHR'ULYHU

:LQGRZV;3RQO\FRQQHFWWKHFDPFRUGHUWRDFRPSXWHUDQGGRZQORDGLPDJHVIURPD

PHPRU\FDUGWRDFRPSXWHU

&HPDQXHOG¶LQVWUXFWLRQH[SOLTXHFRPPHQWLQVWDOOHUOHORJLFLHOHWOHSLORWH&DQRQ86%

9LGHR'ULYHU:LQGRZV;3XQLTXHPHQWFRQQHFWHUOHFDPHVFRSHjO¶RUGLQDWHXUHW

WUDQVIpUHUGHVLPDJHVjSDUWLUG¶XQHFDUWHPpPRLUHVXUXQRUGLQDWHXU

(QHVWHPDQXDOGHLQVWUXFFLRQHVVHH[SOLFDFyPRLQVWDODUHOVRIWZDUH\HOFRQWURODGRU

&DQRQ86%9LGHR'ULYHU:LQGRZV;3VRODPHQWHFRQHFWDUODYLGHRFiPDUDDXQ

RUGHQDGRU\GHVFDUJDULPiJHQHVGHXQDWDUMHWDGHPHPRULDDXQRUGHQDGRU

Summary of Contents for optura50

Page 1: ...QVWUXFFLRQHV 38 0 7KLV LQVWUXFWLRQ PDQXDO H SODLQV KRZ WR LQVWDOO WKH VRIWZDUH DQG DQRQ 86 9LGHR ULYHU LQGRZV 3 RQO FRQQHFW WKH FDPFRUGHU WR D FRPSXWHU DQG GRZQORDG LPDJHV IURP D PHPRU FDUG WR D FRPSXWHU H PDQXHO G LQVWUXFWLRQ H SOLTXH FRPPHQW LQVWDOOHU OH ORJLFLHO HW OH SLORWH DQRQ 86 9LGHR ULYHU LQGRZV 3 XQLTXHPHQW FRQQHFWHU OH FDPHVFRSH j O RUGLQDWHXU HW WUDQVIpUHU GHV LPDJHV j SDUWLU G XQH FDU...

Page 2: ... UHFHSWLRQ ZKLFK FDQ EH GHWHUPLQHG E WXUQLQJ WKH HTXLSPHQW RII DQG RQ WKH XVHU LV HQFRXUDJHG WR WU WR FRUUHFW WKH LQWHUIHUHQFH E RQH RU PRUH RI WKH IROORZLQJ PHDVXUHV 5HRULHQW RU UHORFDWH WKH UHFHLYLQJ DQWHQQD QFUHDVH WKH VHSDUDWLRQ EHWZHHQ WKH HTXLSPHQW DQG UHFHLYHU RQQHFW WKH HTXLSPHQW LQWR DQ RXWOHW RQ D FLUFXLW GLIIHUHQW IURP WKDW WR ZKLFK WKH UHFHLYHU LV FRQQHFWHG RQVXOW WKH GHDOHU RU DQ H SH...

Page 3: ...ct and cart combination to overturn 10 Power Sources The CA 570 Compact Power Adapter should be operated only from the type of power source indicated on the marking label If you are not sure of the type of power supply to your home consult your product dealer or local power company Regarding other power sources such as battery power refer to instructions in this manual 11 Polarization The CA 570 C...

Page 4: ...ll often require extensive work by a qualified technician to restore the product to its normal operation e If the product has been dropped or the cabinet has been damaged f When the product exhibits a distinct change in performance This indicates a need for service 19 Replacement Parts When replacement parts are required be sure the service technician has used replacement parts that are specified ...

Page 5: ...ireless controller are used to refer to menu items displayed on the screen Screen refers to the LCD and the viewfinder screen Please note that the illustrations mainly refer to the OPTURA60 About the Operating Modes The operating modes are determined by the position of the POWER switch and the TAPE CARD switch Function can be used in this mode Function cannot be used in this mode Operating Mode PO...

Page 6: ...tates and or other countries Macintosh and Mac OS are trademarks of Apple Computer Inc registered in the United States and other countries HDV is a trademark of Sony Corporation and Victor Company of Japan Limited JVC Other names and products not mentioned above may be registered trademarks or trademarks of their respective companies ...

Page 7: ... Playback Playing Back a Tape 39 Playing Back a Memory Card 41 Adjusting the Volume 42 Playing Back on a TV Screen 43 Advanced Functions Recording Programs Using the Recording Programs 45 Using the Super Night Mode 47 Using the Special Scene Modes 48 Using the Program AE Mode 49 Using the Shutter Priority AE Mode 50 Using the Aperture Priority AE Mode 51 Recording Adjusting Exposure Manually 52 Ad...

Page 8: ... Still Image Right after Recording 100 Playing Back Searching Images 101 Protecting Images 103 Erasing Images 104 Formatting a Memory Card 105 Editing Recording to a VCR or Digital Video Device 106 Analog Line in Recording 108 DV Dubbing 110 Converting Analog Signals into Digital Signals Analog Digital Converter 112 Audio Dubbing 114 Recording from the Tape on a Memory Card 117 Printing Printing S...

Page 9: ...ction E Do s Don ts Handling Precautions 144 Cleaning the Video Heads 148 Maintenance Others 149 Additional Information System Diagram 150 Optional Accessories 151 Specifications 154 Product Codes 156 Index 157 ...

Page 10: ... Stereo Video Cable IFC 300PCU USB Cable MMC 16M MultiMediaCard DIGITAL VIDEO SOLUTION DISK The serial number of this product can be found at the battery attachment unit of the camcorder Write down the number and other information here and retain this book as a permanent record of your purchase to aid identification in case of theft Date of Purchase Model Name OPTURA60 OPTURA50 A Purchased From Se...

Page 11: ... CODE button 85 MENU button 71 EXP button 52 END SEARCH button 86 D EFFECTS button 62 LCD BACKLIGHT button 26 Mode dial 45 Terminal cover self timer button 55 REC PAUSE button 108 110 DC IN terminal 18 Power switch 5 136 RESET button 137 MIC terminal 56 flash button 92 play pause button 39 AV terminal 43 phones terminal 42 REC SEARCH button 32 record review button 32 rewind button 39 CARD button 4...

Page 12: ...BATTERY RELEASE button 18 Stereo microphone LIGHT button 54 Remote sensor 25 CHARGE indicator 18 USB terminal 119 132 POWER indicator S video terminal 44 Start stop button 30 33 Viewfinder 23 UNLOCK button 136 Dioptric adjustment lever 23 Serial number LCD screen 26 Battery attachment unit 18 Front view Back view ...

Page 13: ...tton 120 133 Cassette compartment 21 TAPE CARD switch 5 OPEN EJECT switch 21 PHOTO button 33 Cassette compartment cover 21 Zoom lever 36 Strap mount 24 Advanced accessory shoe 56 Accessory shoe 56 Tripod socket 38 Top view Bottom view ...

Page 14: ...m buttons 36 DATE SEARCH buttons 88 PLAY button 39 REW button 39 FF button 40 button 40 STOP button 39 PAUSE button 40 button 40 SLOW button 40 x 2 button 40 AUDIO DUB button 114 TV SCREEN button 74 WIRELESS CONTROLLER WL D85 START STOP PHOTO ZOOM CARD DATE SEARCH REW PLAY FF STOP PAUSE SLOW AUDIO DUB ZERO SET MEMORY TV SCREEN ...

Page 15: ... stabilizer 72 Recording mode 77 Tape operation 16 Time code 31 Recording Program 45 Remaining tape 31 White balance 59 Remaining battery charge 31 Image effect 61 Wind screen 80 Digital effects 62 Microphone attenuator 79 Condensation warning 140 Audio mode 74 Still image quality size 91 Widescreen mode 81 Headphones 79 Remote sensor mode 75 Mini video light 54 Remaining card capacity for still i...

Page 16: ... forward playback rewind playback 40 x2 x2 x2 playback 40 x1 x1 x1 playback 40 Slow playback 40 Frame advance playback frame reverse playback 40 Playback pause 40 Date search 88 Zero set memory 87 Audio dubbing 114 Metering mode 94 White balance 59 Image effect 61 Drive mode 96 Digital effects 62 Movie size 89 Still image quality size 89 Camcorder shake warning 72 Remaining card capacity for movie...

Page 17: ...17 Introduction E CARD PLAY Mode Protect mark 103 File number 73 Number of images Still image size Data code 85 Movie size playback time ...

Page 18: ...l it clicks To remove the battery pack 1 Move the viewfinder upward 2 Press the BATTERY RELEASE button and slide the battery pack upward Charging the Battery Pack 1 Connect the power cord to the adapter 2 Plug the power cord into a power outlet 3 Connect the power adapter to the camcorder s DC IN terminal The CHARGE indicator starts flashing It glows steadily when charging is complete To remove th...

Page 19: ...camcorder s DC IN terminal or to the power adapter You may hear some noise from the power adapter during use This is not a malfunction Do not disconnect and reconnect the power cord while charging a battery pack Charging may stop The battery pack may not be charged correctly even if the CHARGE indicator glows steady The battery pack may also not be charged correctly when a power outage occurs duri...

Page 20: ...tate Unlike conventional battery packs you do not need to completely use or discharge it before charging To conserve battery power turn off the camcorder instead of leaving it in record pause mode We recommend that you prepare battery packs 2 to 3 times longer than you think you might need Battery Pack NB 2LH NB 2L BP 2L12 BP 2L14 Charging Time 140 min 125 min 220 min 260 min Max Recording Time Vi...

Page 21: ...ark on the cassette compartment until it clicks 4 Wait for the cassette compartment to retract automatically and close the cassette compartment cover Do not interfere with the cassette compartment while it is opening or closing automatically or attempt to close the cover before the cassette compartment has fully retracted Be careful not to get your fingers caught in the cassette compartment cover ...

Page 22: ...t first pushing it in 1 Turn off the camcorder Make sure that the card access indicator is not flashing before you turn off the camcorder 2 Open the cover 3 Push the memory card to release it Remove the memory card 4 Close the cover Turn off the camcorder before inserting or removing the memory card Otherwise it may result in data damage If you use memory cards other than the supplied one make sur...

Page 23: ...tach the cord to the lens cap 2 Pass the grip belt through the loop on the cord Press the buttons on the lens cap when attaching removing it Hook the lens cap on the grip belt while you are recording and place it over the lens when you have finished Fastening the Grip Belt Hold the camcorder with your right hand and adjust the belt with your left Adjust the grip belt so that you can reach the zoom...

Page 24: ...24 Attaching the Shoulder Strap Pass the ends through the strap mount and adjust the length of the strap ...

Page 25: ...up 3 Insert the battery holder Using the Wireless Controller Point it at the camcorder s remote sensor when you press the buttons The wireless controller may not work properly when the remote sensor is subjected to strong light sources or direct sunlight If the wireless controller does not work check if the remote sensor is set to OFF 75 When the camcorder cannot be operated with the wireless cont...

Page 26: ...urself when recording with the self timer LCD Backlight You can switch the brightness of the LCD screen between normal and bright by pressing the LCD BACKLIGHT button This is useful for outdoor recordings Press the LCD BACKLIGHT button The brightness changes with each press of the button This setting does not affect the brightness of the recording or the viewfinder screen When using a battery pack...

Page 27: ... 3 Turn the SET dial to select DISPLAY SETUP and press the SET dial 4 Turn the SET dial to select LANGUAGE and press the SET dial 5 Turn the SET dial to select a language and press the SET dial 6 Press the MENU button If you have mistakenly changed the language follow the mark next to the menu item to change the setting The displays and at the bottom of the screen refer to the button names on the ...

Page 28: ...r daylight saving time select the time zone with the next to the area Setting the Date and Time 6 Turn the SET dial to select D TIME SET and press the SET dial The year display starts to flash 7 Turn the SET dial to select the year and press the SET dial The next part of the display starts flashing Set the month day hours and minutes in the same way 8 Press the MENU button to close the menu and to...

Page 29: ...zone No Time zone LONDON WELLGTN Wellington PARIS SAMOA CAIRO HONOLU Honolulu MOSCOW ANCHOR Anchorage DUBAI L A Los Angeles KARACHI DENVER DACCA CHICAGO BANGKOK N Y New York H KONG Hong Kong CARACAS TOKYO RIO Rio de Janeiro SYDNEY FERNAN Fernando de Noronha SOLOMON AZORES 1 24 1 2 3 4 5 6 7 8 9 10 11 12 13 14 15 16 17 18 19 20 21 22 23 2 3 5 6 7 9 8 10 4 12 11 13 24 19 20 18 17 21 23 22 15 14 16 1...

Page 30: ...ing any noise or blank sections between the recordings even if you turn the camcorder off Bright light may make it difficult to use the LCD screen In such case use the viewfinder instead When recording near loud sounds such as fireworks drums or concerts sound may become distorted or may be recorded not in the actual sound level This is not a malfunction The audio recording level can also be adjus...

Page 31: ...n Screen Displays during Recording Time Code Indicates the recording time in hours minutes and seconds Remaining tape Indicates the remaining time of the tape in minutes moves during recording END flashes when the tape reaches the end When the time left is less than 15 seconds the remaining tape time may not appear Depending on the type of the tape the indication may not be displayed correctly Rem...

Page 32: ...ease the record review button The camcorder rewinds the tape plays back the last few seconds and returns to record pause mode Record Search In record pause mode Press and hold the REC SEARCH button forward or button reverse Release the button at the point you wish to begin recording The camcorder returns to record pause mode CAMERA PLAY VCR CARD CAMERA CARD PLAY CAMERA PLAY VCR CARD CAMERA CARD PL...

Page 33: ...s The beep sounds When you press the PHOTO button on the wireless controller recording starts immediately 3 Press the PHOTO button fully and focusing frame disappear and you hear a shutter sound The card access indicator flashes Recording Movies on a Memory Card 1 Set the camcorder to CARD CAMERA mode Set the POWER switch to CAMERA and the TAPE CARD switch to The POWER indicator lights up 2 Press ...

Page 34: ...ges For best performance we recommend to keep the number of images on the memory card less than 100 When recording a still image step 2 the image may appear out of focus for a moment while the camcorder is focusing When the subject is too bright OVEREXP starts flashing In such case use the optional FS 34U ND filter Sound for movies recorded on the memory card will be monaural When you use a SD Mem...

Page 35: ... are displayed in green when a memory card is played back Card Access Display appears to indicate that the camcorder is writing on the memory card Movie size Indicates the movie size Card Access Display appears to indicate that the camcorder is writing on the memory card Remaining Card Capacity for Movies Indicates the remaining time in hours and minutes At less than 1 minute the remaining time wi...

Page 36: ... a slow zoom Press harder for a faster zoom You can also use the T and W buttons on the wireless controller However you cannot control the zoom speed The zoom speed is slightly faster in record pause mode Keep at least 3 3 ft 1 m to the subject At wide angle you can focus on a subject as close as 0 39 in 1 cm 14x optical zoom 10x optical zoom CAMERA PLAY VCR CARD CAMERA CARD PLAY Zoom in Zoom out ...

Page 37: ...ET dial 4 Turn the SET dial to select a setting option 5 Press the MENU button to close the menu A zoom indicator appears for 4 seconds It extends in light blue when the digital zoom is set to 56x OPTURA60 or 40x OPTURA50 and extends further in dark blue when set to 280x OPTURA60 or 200x OPTURA50 Digital zoom cannot be used in the following cases In the night modes With the multi images screen In ...

Page 38: ...h the microphone or lens For More Stability Lighting When recording outdoors we recommend recording with the sun at your back When using a tripod do not leave the viewfinder exposed to direct sunlight as it may melt due to concentration of the light by the lens Do not use tripods with fastening screws longer than 0 2 inch 5 5 mm as it may damage the camcorder Lean against a wall Put the camcorder ...

Page 39: ...n to stop playback To use the viewfinder close the LCD panel About the screen display During playback the time code gives the hours minutes seconds and frames The remaining tape time may not appear when the time left is less than 15 seconds You can display the audio level indicator 78 If the playback picture is distorted clean the video heads using a Canon Head Cleaning Cassette or a commercially ...

Page 40: ...ress and hold it to play back continuous frame advance frame reverse SLOW Slow Forward Slow Reverse Plays back at about 1 3 normal speed Press the button on the wireless controller during normal or reverse playback Press the play button to return to normal playback x2 Forward x2 Playback Reverse x2 Playback Plays back at 2 times normal speed Press the button on the wireless controller during norma...

Page 41: ...displays the first scene of the movie Images not recorded with this camcorder uploaded from a computer except the sample images 70 edited on a computer and images whose file names have been changed may not be played back correctly Do not turn off the camcorder change the position of the TAPE CARD switch disconnect the power source open the memory card cover or remove the memory card while the card...

Page 42: ...in Adjusting the Headphones Volume The headphones terminal also serves as AV terminal Headphones can only be used when is displayed on the screen If not change the setting following the procedure below 1 Press the MENU button and select VCR SETUP Select AV PHONES set it to PHONES and press the MENU button 2 Turn the SET dial to increase the volume and down to lower the volume The speaker does not ...

Page 43: ...e starting the connections 2 Connect the STV 250N Stereo Video Cable to the camcorder s AV terminal and the audio video terminals on the TV VCR Connect the white plug to the white audio terminal L left the red plug to the red audio terminal R right and the yellow plug to the yellow video terminal VIDEO 3 If connecting to a TV set the input selector to VIDEO If connecting to a VCR set the input sel...

Page 44: ...ed AUDIO terminal R right Do not connect the yellow plug 4 If connecting to a TV set the input selector to VIDEO If connecting to a VCR set the input selector to LINE We recommend powering the camcorder from a household power source The picture quality is higher when connecting to a TV with an S S1 terminal Optional S 150 S Video Cable required TVs with S1 terminal or Video ID 1 system Recordings ...

Page 45: ...ects to make them appear blurred such as the flow of rivers Aperture Priority AE Use this mode to select the aperture size The camcorder chooses the appropriate shutter speed 51 Night Use this mode to record in dimly lit places 47 Program AE The camcorder adjusts the camera settings automatically However you have the options of adjusting the settings manually 49 Shutter Priority AE Use this mode t...

Page 46: ...ode The blur effect of the background increases the more you zoom to telephoto The picture may not appear smooth when played back Landscape mode Zooming out W can result in more effective shooting Sports mode The picture may not appear smooth when played back Slow Shutter mode In CAMERA mode picture quality may not be as good as in other modes The camcorder may have difficulty to focus automatical...

Page 47: ...he SET dial 3 Turn the SET dial to select SUPER NIGHT and press the SET dial appears The symbol of the selected mode appears on the screen Moving subjects may leave a trailing afterimage Picture quality may not be as good as in other modes White points may appear on the screen Autofocus may not work as well as in other modes In such case adjust the focus manually CAMERA PLAY VCR CARD CAMERA CARD P...

Page 48: ...d back Fireworks mode To avoid camcorder shake we recommend using a tripod Use a tripod in CARD CAMERA mode as the shutter speed slows down FOLIAGE Use this mode to record images with flowers leaves or trees SNOW Use this mode to record in bright ski resorts It prevents the subject from being underexposed BEACH Use this mode to record on a sunny beach It prevents the subject from being underexpose...

Page 49: ... and exposure according to the brightness of the subject In Program AE mode you can point and shoot as in Auto mode however you have the option of changing some settings Set the mode dial to When you cannot achieve an appropriate exposure use the flash or change the metering method CAMERA PLAY VCR CARD CAMERA CARD PLAY ...

Page 50: ...s we recommend using the optional VFL 1 Video Flash Light or the VL 3 Video Light If the shutter speed is set to 1 1000 or higher in CAMERA mode and you switch to CARD CAMERA mode it automatically changes to 1 500 Do not point the camcorder directly at the sun when the shutter speed is set to 1 1000 or higher The image may flicker when recording with high shutter speeds Recording under fluorescent...

Page 51: ...ackground for a portrait or high aperture values small aperture to achieve a broad depth of field for recording landscapes 1 Set the mode dial to 2 Press the SET dial 3 Turn the SET dial to select an aperture value The shutter speed is adjusted automatically The aperture becomes smaller the bigger the aperture value The aperture number flashes when the selected aperture is not appropriate for the ...

Page 52: ...eworks mode SCN 2 Press the EXP button 0 appears on the screen When you operate the zoom during exposure lock the brightness of the image may change Exposure Adjustment During exposure lock Turn the SET dial to adjust the brightness of the image The adjustment range depends on the brightness at the time you locked the exposure CAMERA PLAY VCR CARD CAMERA CARD PLAY CAMERA PLAY VCR CARD CAMERA CARD ...

Page 53: ...you switch the mode dial to Readjust the focus when you have turned off the camcorder Infinity Focus Use this function when you wish to focus on faraway subjects such as mountains or fireworks Press the FOCUS button more than 2 seconds after step 2 in Adjusting the Focus Manually appears When you operate the zoom or turn the focus ring changes to MF and the camcorder change to manual focusing mode...

Page 54: ... on and off with each press of the button Do not point the mini video light at persons while they are driving Do not look at the mini video light for a long time Do not use the mini video light close to people s eyes In Super Night mode when the mini video light turns on automatically pressing the LIGHT button will not turn it off CAMERA PLAY VCR CARD CAMERA CARD PLAY LIGHT button Mini video light...

Page 55: ... using the wireless controller The count down appears on the screen To record a still image press the PHOTO button 33 To cancel the self timer press the self timer button Once the countdown has begun you can also press the start stop button when recording movies or the PHOTO button when recording still image to cancel the self timer The self timer will be canceled when you turn off the camcorder C...

Page 56: ...y available microphone connect it to the MIC terminal When recording in silent places the built in microphone may pick up the motor noise of the camcorder In such case we recommend using an external microphone When using a commercially available microphone Use a microphone with built in power supply condenser microphone Almost all stereo microphones with a plug diameter of 0 14 in 3 5 mm can be co...

Page 57: ...ymbols of the current settings are displayed 2 Turn the SET dial to select a function and press the SET dial 3 Turn the SET dial to select a setting option and press the SET dial The symbol changes to the one of the selected setting For setting the white balance SET image effect CUSTOM or digital effect MULTI S function refer to the relevant pages 4 Press the FUNC button The menu disappears Functi...

Page 58: ...FT SKIN DETAIL CUSTOM 61 Drive mode SINGLE CONT SHOOT HISPEED CONT SHOOT AEB STITCH AST 96 98 Digital Effects D EFFECT FADER EFFECT MULTI IMAGE SCREEN CARD MIX 62 D EFFECT FADER EFFECT MULTI IMAGE SCREEN D EFFECT BLK WHT Still image recording STILL I REC OFF S FINE 640x480 S NORMAL 640x480 91 Movie size 320x240 160x120 89 Still image quality S S FINE 640x480 S FINE 640x480 S NORMAL 640x480 117 Sti...

Page 59: ...ntil step 5 is completed flashes and stops flashing when adjustment is complete AUTO Settings are automatically set by the camcorder DAYLIGHT For recording outdoors on a bright day SHADE For recording in shaded places CLOUDY For recording on a cloudy day TUNGSTEN For recording under tungsten and tungsten type 3 wavelength fluorescent lighting FLUORESECENT For recording under warm white cool white ...

Page 60: ...e a previously made SET setting after selecting SET in step 3 press the FUNC button without pressing the SET dial When you have set the custom white balance Depending on the light source may keep flashing The result will still be better than with the auto setting Reset the white balance when the lighting condition changes Turn off the digital zoom Custom white balance may provide better results in...

Page 61: ... FUNC button The symbol of the selected setting appears SOFT SKIN DETAIL To obtain the best effect use this function when recording a person in close up Note that areas similar to the skin color may lack in detail IMAGE EFFECT OFF Records with no effect VIVID Emphasizes the contrast and color saturation to record in crisp colors NEUTRAL Tones down the contrast and color saturation to record in neu...

Page 62: ...unctions include a fader and effects multi image screen and Card Mix 68 Faders 64 Begin or end scenes with a fade to or from black Fade Trigger FADE T Wipe WIPE Corner Wipe CORNER Jump JUMP Flip FLIP Puzzle PUZZLE Zigzag ZIGZAG Beam BEAM Tide TIDE ...

Page 63: ...mage Screen 67 Captures moving subjects in 4 9 or 16 sequences of still images and displays them at one time Sound will be recorded normally Black and White BLK WHT Sepia SEPIA Art ART Mosaic MOSAIC Ball BALL Cube CUBE Wave WAVE Color Mask COLOR M Mirror MIRROR 4 Sequences 9 Sequences 16 Sequences ...

Page 64: ...der shows as an animation The selected fader animates the image that appears on the screen 4 Press the FUNC button The symbol of the selected fader appears 5 Press the D EFFECTS button The symbol changes to green Pressing the D EFFECTS button again deactivates the fader CAMERA mode 6 Fade in Press the start stop button in record pause mode Fade out Press the start stop button in record mode CAMERA...

Page 65: ... The symbol of the current setting is displayed 3 Select the effect type The selected effect shows as an animation The selected effect animates the image that appears on the screen 4 Press the FUNC button The symbol of the selected effect appears 5 Press the D EFFECTS button The symbol turns green and the effect is activated In PLAY VCR mode playback the tape first and press the D EFFECTS button P...

Page 66: ...s symbol followed by BLK WHT The symbol of the current setting is displayed 3 Press the FUNC button appears 4 Press the D EFFECTS button The symbol turns green and the effect is activated Pressing the D EFFECTS button again deactivates the effect CAMERA PLAY VCR CARD CAMERA CARD PLAY 57 D EFFECT ...

Page 67: ...ery 8 frames 12 frames in Slow Shutter mode 4 Select S SPLIT and select the number of sequences 5 Select SET and press the FUNC button appears 6 Press the D EFFECTS button The symbol turns green FAST MODERATE SLOW The set number of images will be captured at the set speed To cancel the multi image screen press the D EFFECTS button MANUAL Images will be captured each time you press the D EFFECTS bu...

Page 68: ...ecordings The live video recording will appear in place of the light area of the card mix image Mix level adjustment light area of the still image Camera Chroma Key CAM CHROMA Combines backgrounds with your recordings Record your subject in front of a blue curtain and the subject not blue will be superimposed on the card mix image Mix level adjustment blue area of the live video recording Card Ani...

Page 69: ... with the CARD button 6 Select MIX TYPE and select the mix type matching the sample image you have selected When you have selected C ANIMATION select the animation type and press the SET dial 7 To adjust the mix level select MIX LEVEL adjust it with the SET dial and select SET 8 Press the FUNC button appears 9 Press the D EFFECTS button turns green and the combined image appears Turn off the digit...

Page 70: ...re intended only for the personal use with this camcorder Do not use these sample images for other purposes PhotoEssentials Royalty Free Stock Photography The PhotoEssentials suite of royalty free images on CD ROM features premium quality assignment photography and is ideally suited for use in advertising brochures reports multimedia websites books packaging and more For more information please vi...

Page 71: ...nu Items MENU 72 Selecting Menus and Settings 1 Press the MENU button The menu appears 2 Turn the SET dial to select a submenu and press the SET dial 3 Turn the SET dial to select a menu item and press the SET dial 4 Turn the SET dial to select a setting option and press the SET dial 5 Press the MENU button The menu disappears Pressing the MENU button at any time closes the menu Items that are not...

Page 72: ...ge stabilizer is designed to compensate a normal degree of camcorder shake The image stabilizer may not be effective when recording in dark places using the night modes The image stabilizer cannot be turned off when the mode dial is set to We recommend turning off the image stabilizer when using a tripod or when panning FOCUS PRI The camcorder records the still image once focus is adjusted Set it ...

Page 73: ...memory card the consecutive number will be assigned This is useful for organizing images on a computer We recommend setting FILE NOS to CONTINUOUS CARD OPERATIONS CARD OPERATIONS in index screen display VCR SETUP FILE NOS RESET CONTINUOUS PRINT ORDERS ALL ERASE NO YES 129 TRANS ORDERS ALL ERASE NO YES 135 ERASE ALL IMAGES NO YES 104 FORMAT CANCEL EXECUTE 105 PROTECT 103 PRINT ORDER 128 TRANSFER OR...

Page 74: ...PUT CH L R L L R R AUDIO DUB AUDIO IN MIC IN 114 WIND SCREEN AUTO OFF 80 MIC ATT ON OFF 79 MIC LEVEL AUTO MANUAL 78 12bit AUDIO STEREO1 STEREO2 MIX FIXED MIX VARI 116 MIX BALANCE 116 AUDIO MODE 16bit 12bit VOLUME 79 BRIGHTNESS LCD MIRROR ON OFF TV SCREEN ON OFF ON OFF DISPLAYS ON OFF PLAYBK 6SEC DATE ON OFF AUDIO LEVEL ON OFF 78 DATA CODE DATE TIME CAMERA DATA CAM D T 85 D TIME SEL DATE TIME DATE ...

Page 75: ...e and time for 6 seconds when you begin playback or to indicate that date or time zone has changed The 6 second auto date appears even if DISPLAYS is set to OFF DATE FORMAT Changes the displayed date format includes date format for printing DEMO MODE The demonstration mode displays the camcorder s main features It starts automatically when you leave the camcorder turned on without loading a record...

Page 76: ... MY CAMERA CREATE START UP IMAGE 82 SEL S UP IMG OFF CANON LOGO MY IMAGE S UP SOUND OFF DEFAULT MY SOUND SHTR SOUND OPER SOUND SELF T SOUND CAMERA PLAY VCR CARD PLAY CARD CAMERA Menu Items Setting Options ...

Page 77: ...io dubbing Depending on the nature and usage condition of the tape picture and sound recorded in LP mode may be distorted We recommend using the SP mode for important recordings If you record in both SP and LP modes on the same tape the playback picture may become distorted and the time code may not be written correctly If you play back a tape that has been recorded in LP mode with another digital...

Page 78: ...ing the adjustment level is not displayed press the AUDIO LEVEL button 3 Adjust the level with the SET dial The maximum level should only slightly exceed 12 dB Sound may be distorted if the indicator for 0 dB lights up in red 4 Press the AUDIO LEVEL button The green bar disappears Displaying the Audio Recording Level during Playback Press the MENU button and select DISPLAY SETUP Select AUDIO LEVEL...

Page 79: ...nd using headphones when manually adjusting the audio level or using the microphone attenuator When sound is distorted even though the audio level indicator shows an appropriate level Activate the microphone attenuator by setting MIC ATT to ON The microphone attenuator can also be used in CARD CAMERA mode Adjusting the Headphone Volume The headphones terminal also serves as AV terminal Headphones ...

Page 80: ...ssible Only when AUDIO DUB is set to MIC IN 1 In CAMERA mode set the mode dial to a mode other than 2 Press the MENU button and select AUDIO SETUP Select WIND SCREEN set it to OFF and press the MENU button appears when you turn the wind screen off The wind screen function can only be used with the built in microphone CAMERA PLAY VCR CARD CAMERA CARD PLAY MENU 71 AUDIO SETUP WIND SCREEN AUTO ...

Page 81: ...LCD screen switches to the letterbox display The picture on the viewfinder appears horizontally squeezed When playing back a widescreen recording on a TV switch the TV to widescreen mode refer to the instruction manual of your TV If you play back a widescreen recording on a normal TV the image appears horizontally squeezed TVs with S1 terminal or Video ID 1 system switch automatically to widescree...

Page 82: ...ct a setting option and press the MENU button Creating a Start up Image 1 Select a still image with the CARD buttons 2 Press the MENU button and select MY CAMERA 3 Select CREATE START UP IMAGE SET THIS AS START UP IMAGE YES and NO appears 4 Select YES OVERWRITE MY IMAGE NO and YES appears 5 Select YES The still image will be saved and the image that was saved to MY IMAGE is erased 6 Press the MENU...

Page 83: ...ained in the supplied software ZoomBrowser EX for Windows or ImageBrowser for Macintosh to the setting options MY IMAGE and MY SOUND For details refer to the Digital Video Software Instruction Manual Retain the original data of the still image you have set as the start up image on your computer or removable disk ...

Page 84: ...mage below 2 times magnification move the zoom lever toward W A will display for images that cannot be enlarged 2 Select the magnified area with the SET dial Turn the SET dial to move the image to the right and left or up and down Pressing the SET dial switches between the directions To cancel the magnification move the zoom lever toward W until the frame disappears Movies played back from a memor...

Page 85: ...MENU button and select DISPLAY SETUP 2 Select D TIME SEL and select the date time display combination In CARD PLAY mode move to step 5 3 Select DATA CODE and select the data code combination 4 Press the MENU button 5 Play back a tape and press the DATA CODE button In CARD PLAY mode only date and time appear Pressing the DATA CODE button again makes the data code disappear The data code will not di...

Page 86: ...rewinds fast forwards the tape plays back the last few seconds of the recording and stops the tape Pressing the button again cancels the search End search cannot be used once you unload the cassette End search may not work properly if a blank section exists on the tape You cannot use end search to locate the editing end of audio dubbing CAMERA PLAY VCR CARD CAMERA CARD PLAY END SEARCH button ...

Page 87: ...s the ZERO SET MEMORY button at the point you wish to return to later 0 00 00 appears To cancel press the ZERO SET MEMORY button again 2 When you have finished playback rewind the tape appears The tape stops automatically at 0 00 00 The tape counter changes to time code If the time code has not been recorded consecutively the tape may not stop correctly at the scene marked with the zero set memory...

Page 88: ...ess the or button to begin searching Press more than once to search for further date changes up to 10 times Press the STOP button to stop searching A recording of longer than a minute per date area is required Date search may not function if the data code is not correctly displayed CAMERA PLAY VCR CARD CAMERA CARD PLAY STOP button DATE SEARCH buttons ...

Page 89: ... card Maximum recording time of a movie on a memory card The recording times specified above are the total amount of recording times with the supplied MultiMediaCard Still Image Quality SUPER FINE FINE NORMAL Image size Still Image L 1632x1224 M 1280x960 S 640x480 Movie 320x240 160x120 Image Size Image Quality No of Images File Size per Image Supplied card 128MB 512MB 1632X1224 Super Fine 10 85 35...

Page 90: ...ining on the memory card 4 Select the still image quality 5 Press the FUNC button Selecting the Movie Size 1 Press the FUNC button 2 Select the movie size symbol followed by the setting option The symbol of the current setting is displayed The number indicates the approximate recording time remaining on the memory card 3 Press the FUNC button CAMERA PLAY VCR CARD CAMERA CARD PLAY 57 L 1632x1224 FI...

Page 91: ...ng option The symbol of the current setting is displayed 3 Press the FUNC button 4 While you are recording a movie press the PHOTO button The still image is recorded on the memory card while the screen continues to show the video recording The quality of the still image is slightly lower than a still image recorded in CARD CAMERA mode The still image cannot be recorded on a memory card when the di...

Page 92: ...record pause mode when still image recording is set to anything other than STILL I REC OFF 3 Press the PHOTO button fully The flash fires auto The flash fires automatically according to the brightness of the subject red eye reduction auto The flash fires automatically according to the brightness of the subject With the OPTURA60 the assist lamp lights up to reduce the red eye effect With the OPTURA...

Page 93: ...the EXP button in auto or red eye reduction auto mode When recording movies When auto or red eye reduction auto is selected and a shutter speed of 1 2000 is set in CAMERA mode During auto exposure bracketing When flash on is selected and a shutter speed of 1 2000 is set in CAMERA mode the shutter speed becomes set to 1 1000 and the flash fires We recommend not using the flash when the optional Wid...

Page 94: ...vides images into several zones for light metering It evaluates complex lighting conditions such as the position and brightness of the subject background direct light or backlight and adjusts the exposure of the main subject accordingly CENT WEIGHT AVERAGE Averages the light metered from the entire screen giving more weight to the subject in the center SPOT Meters the area within the spot AE point...

Page 95: ... on the screen With Center point a frame displays in the center of the screen 3 Press the PHOTO button halfway A focusing frame appears 4 Press the PHOTO button fully When using the digital zoom the AF frame is fixed in the center Auto selection AiAF Depending on the shooting conditions an AF frame is automatically selected from the 9 frames and focused Center point Of 9 AF frames the center one i...

Page 96: ...not be used Single Records a single still image when you press the PHOTO button Continuous Shooting Captures a quick series of still images while you press the PHOTO button For the number of frames per second refer to the table on the next page High Speed Continuous Shooting AEB Auto Exposure Bracketing The camcorder records a still image in three different exposures dark normal light in 1 2 EV st...

Page 97: ...frames per second will be lower when camcorder shake warning is displayed on the screen In normal and high speed continuous shooting mode images are captured at 2 frames second when using the built in flash or the optional Video Flash Light VFL 1 OPTURA60 Auto Exposure Bracketing 1 Press the PHOTO button halfway 2 Press the PHOTO button fully Three still images in different exposures are recorded ...

Page 98: ...drive mode symbol followed by STITCH AST The symbol of the current setting is displayed 3 Press the SET dial The Stitch Assist screen appears 4 Select the direction with the CARD button CARD button clockwise CARD button counterclockwise 5 Select the recording program and zoom on the subject Adjust focus and exposure manually as necessary Once the sequence has started you cannot change the recordin...

Page 99: ...es can be recorded 8 Press the FUNC button after the last image For details on how to merge these images refer to the Digital Video Software Instruction Manual Compose each image so that it overlaps 30 to 50 of the adjoining image Try to keep the vertical misalignment within 10 Do not include a moving subject in the overlapping portion Do not try to stitch images that include both distant and clos...

Page 100: ...U button A still image is displayed as long as you hold the PHOTO button after recording You can erase 104 or protect 103 the image when you press the FUNC button while you are reviewing the image or when you press the FUNC button right after recording REVIEW cannot be selected when continuous shooting high speed continuous shooting or auto exposure bracketing is selected CAMERA PLAY VCR CARD CAME...

Page 101: ... Press the button to stop the slide show Index Screen 1 Move the zoom lever toward W Up to 6 images appear With movies the index screen can only be started when the first scene is displayed as a still image 2 Turn the SET dial to select an image Move the to the image you wish to view You can switch between the index pages by pressing the CARD or CARD button 3 Move the zoom lever toward T The index...

Page 102: ...one The number in the upper right of the screen indicates the image number of the current image by the total number of images Press and hold the CARD or CARD button When you release the button the image of the displayed image number appears CAMERA PLAY VCR CARD CAMERA CARD PLAY ...

Page 103: ...UNC button while reviewing an image or right after recording 2 Select PROTECT followed by ON and press the SET dial 3 Press the FUNC button appears and now the image cannot be erased To cancel the protection select OFF in step 2 Protecting during Index Screen Display 1 Move the zoom lever toward W Up to 6 images appear Select the image you wish to protect 2 Press the MENU button and select CARD OP...

Page 104: ...ode press the FUNC button while reviewing an image or right after recording 2 Select IMAGE ERASE followed by ERASE and press the SET dial 3 Press the FUNC button Erasing All Images 1 Press the MENU button and select CARD OPERATIONS 2 Select ERASE ALL IMAGES 3 Select YES and press the MENU button All still images or movies with exception of the protected ones are erased CAMERA PLAY VCR CARD CAMERA ...

Page 105: ...luding protected images Images erased by formatting cannot be recovered If you use a memory card other than the supplied one format it with the camcorder 1 Press the MENU button and select CARD OPERATIONS 2 Select FORMAT CANCEL and EXECUTE appears 3 Select EXECUTE ALL DATA WILL BE ERASED FORMAT THIS CARD NO and YES appears 4 Select YES and press the MENU button Formatting starts CAMERA PLAY VCR CA...

Page 106: ...ction manual of the digital video device Recording 1 Set the camcorder to PLAY VCR mode and load a recorded cassette If you are connecting via AV terminal check the setting 43 2 Connected device Load a blank cassette and set the device to record pause mode 3 Locate the scene you wish to copy and pause playback shortly before the scene 4 Play back the tape 5 Connected device Begin recording when th...

Page 107: ...ll be slightly lower than that of the original When connecting a digital video device If the picture does not appear reconnect the DV cable or turn the camcorder off and back on again Proper operation cannot be guaranteed for all digital video devices equipped with a DV terminal If operation does not work use the S video or AV terminal ...

Page 108: ...pause mode and during recording you can check the picture on the screen 4 Connected device Play back the tape 5 Press the button when the scene you wish to record appears Recording starts 6 Press the button to stop recording Press the button to pause recording Press the button again to restart recording 7 Connected device Stop playback Recording the Input Video on a Memory Card The size of the sti...

Page 109: ...capacity and other information appear When you press the PHOTO button on the wireless controller recording starts immediately 6 Press the PHOTO button fully The card access indicator flashes When recording a movie 5 Press the start stop button when the scene you wish to record appears Pressing the start stop button again stops recording Headphones cannot be used during analog line in recording Dep...

Page 110: ...nected Device Play back the tape 5 Press the button when the scene you wish to record appears Recording starts 6 Press the button to stop recording Press the button to pause recording Press the button again to restart recording 7 Connected Device Stop playback Recording the Input Video on a Memory Card The size of the still image recorded on the memory card will be 640 x 480 The still image qualit...

Page 111: ...ps recording Blank sections may be recorded as anomalous picture If the picture does not appear reconnect the DV cable or turn the camcorder off and back on again Do not connect any devices to the camcorder s USB terminal You can only record signals from devices with the logo recording in SD system in SP or LP format Note that signals from identically shaped terminals may be of different format 13...

Page 112: ...als via the DV terminal The DV terminal serves as output terminal only Connecting the Devices Turn off all devices before starting the connections Unload the tape from the camcorder Refer also to the instruction manual of the connected device You can also connect a VCR with S S1 VIDEO terminal 44 AUDIO VIDEO R L Signal flow Commercially available DV cable Signal flow STV 250N Stereo Video Cable su...

Page 113: ...ch as ghost signals For normal use set AV DV OPTURA60 or AV DV OPTURA50 to OFF If it is set to ON digital signals cannot be input via the camcorder s DV terminal Depending on the software and the specifications of your computer you may not be able to transfer converted signals via the DV terminal We recommend powering the camcorder from a household power source Users of Windows XP with Hi Speed US...

Page 114: ... the MENU button and select AUDIO SETUP Select AUDIO DUB set it to AUDIO IN or MIC IN and press the MENU button 3 Locate the scene you wish to start audio dubbing 4 Press the PAUSE button on the wireless controller 5 Press the AUDIO DUB button on the wireless controller AUDIO DUB and appear 6 Press the PAUSE button on the wireless controller to begin dubbing Audio device Begin playback Microphone ...

Page 115: ...s camcorder sound quality may decrease Sound quality may decrease when you add sound to the same scene for more than 3 times You can check the picture on the LCD screen When you connect an audio device check the sound via built in speaker or audio device You can also connect a TV via S video terminal When you use a microphone you can check the picture on a TV connected via the AV terminal and the ...

Page 116: ... in the same level MIX VARI Plays back stereo 1 and stereo 2 The mix balance can be adjusted 2 If you have selected MIX VARI adjust the mix level Press the MENU button and select AUDIO SETUP Select MIX BALANCE adjust the balance with the SET dial and press the MENU button Turn the SET dial down to increase the volume of Stereo 1 and up to increase the volume of Stereo 2 The camcorder resets to STE...

Page 117: ... An image recorded from an image in widescreen mode will be vertically compressed Recording a Still Image from the Tape The size of the still image recorded on the memory card will be 640 x 480 The still image quality can be selected 1 Selecting the still images quality Press the FUNC button Select the still image quality symbol followed by a setting option and press the FUNC menu 2 Press the PHOT...

Page 118: ...also record a still image by pressing the PHOTO button fully when the tape is in playback pause mode An image recorded from an image in widescreen mode will be vertically compressed The data code of the image will reflect the date and time it has been recorded on the memory card ...

Page 119: ...hanges to or Does not appear with movies or still images that cannot be played back with the camcorder The print share button lights up and the current print setting will be displayed for approx 6 seconds If continues to flash for more than 1 minute or if or does not appear the camcorder is not correctly connected to the printer In such case disconnect the cable from camcorder and printer turn off...

Page 120: ...the still image you wish to print with the CARD button 2 Press the print share button Printing starts The button flashes and glows steadily when printing is complete If you wish to continue printing select another still image with the CARD button Printing after Selecting the Print Settings You can select the number of copies and other settings for printing The setting options vary depending on you...

Page 121: ...print in progress cannot be stopped Printing stops when the current print is finished and the remaining prints are canceled Printing Errors If an error occurs during the printing process an error message appears 142 Canon PIXMA SELPHY DS printers Resolve the error When printing does not resume automatically select CONTINUE and press the SET dial If CONTINUE cannot be selected select STOP press the...

Page 122: ...g options and DEFAULT settings vary depending on the printer model For details refer to the instruction manual of your printer BORDERED The image area remains relatively unchanged from the recorded image when it is printed BORDERLESS The center portion of the recorded image is printed at an enlarged size The image s top bottom and sides may be cropped slightly VIVID VIVID NR and NR can be selected...

Page 123: ...the paper set in your printer 3 Turn the SET dial to select the paper type and press the SET dial Select the paper type of the paper set in your printer 4 Turn the SET dial to select a layout option and press the SET dial Including the Date in the Print 1 In the print setting menu turn the SET dial to select date and press the SET dial 2 Turn the SET dial to select a date print option and press th...

Page 124: ...e BORDERED The image area remains relatively unchanged from the recorded image when it is printed BORDERLESS The center portion of the recorded image is printed at an enlarged size The image s top bottom and sides may be cropped slightly 1 In the print setting menu turn the SET dial to select STYLE and press the SET dial 2 Make sure that PAPER is selected and press the SET dial PAPER CARD 1 CARD 2...

Page 125: ...ORDERED The image area remains relatively unchanged from the recorded image when it is printed BORDERLESS MULTIPLE The center portion of the recorded image is printed at an enlarged size The image s top bottom and sides may be cropped slightly MULTIPLE can only be selected when printing on card size paper The date print function is not supported by the CP Printers CP 10 and CP 100 1 In the print s...

Page 126: ...ecting the Borders 2 Turn the SET dial to select BORDERS and press the SET dial 3 Turn the SET dial to select a borders option and press the SET dial Pressing the MENU button brings you back to the print settings menu Including the Date 2 Turn the SET Dial to select DATE and press the SET dial 3 Turn the SET dial to select a date option and press the SET dial Pressing the MENU button brings you ba...

Page 127: ...itch between the directions up down or right left and the orientation of the frame vertical horizontal Pressing the MENU button brings you back to the print settings menu About the color of the trimming frame Canon CP printers only White No trimming settings Green Recommended trimming size The trimming frame may not appear in green depending on the image size paper size or borders settings Red The...

Page 128: ...ect PRINT ORDER and press the SET dial 3 Select the number of copies and press the SET dial 4 Press the FUNC button To cancel the print order set the number of copies to 0 in step 2 Selecting in Index Screen Display 1 Move the zoom lever toward W Up to 6 images appear Select the image you wish to print 2 Press the MENU button and select CARD OPERATIONS Select PRINT ORDER 3 Press the SET dial and s...

Page 129: ... is selected and press the SET dial Printing starts The print setting menu disappears when printing is complete Depending on the connected printer you can select style or paper settings before step 3 Cancel Printing Printing Errors 121 Restarting Printing Open the CARD PLAY menu and select PRINT Select RESUME or CONTINUE in the print setting menu and press the SET dial The remaining images will be...

Page 130: ...not work correctly depending on the software and the specifications settings of your computer If the computer freezes while you have connected the camcorder disconnect and reconnect the DV cable If the problem persists disconnect the interface cable turn off camcorder and computer turn camcorder and computer back on and reconnect them Before connecting the camcorder to the computer using a DV cabl...

Page 131: ...nual 1 Install the Canon USB Video Driver 2 Connect the power adapter to the camcorder 3 Set the camcorder to PLAY VCR mode When transferring video recordings from to a tape make sure that AV DV is not displayed When using the analog digital converter make sure that AV DV is displayed Change the settings as necessary 73 4 Connect the camcorder to the computer using the USB cable Operation may not ...

Page 132: ...ons settings of your computer The image files on your memory card and the image files saved on the hard disk drive of your computer are valuable original data files If you wish to use image files on your computer make copies of them first and use the copied file retaining the original Make sure that camcorder and computer are not connected with a DV cable before connecting the camcorder to the com...

Page 133: ... cable See Connecting the Camcorder to a Computer in the Digital Video Software Instruction Manual 4 Set the auto launch setting See Starting CameraWindow in the Digital Video Software Instruction Manual The direct transfer menu appears on the camcorder screen and the button lights up ALL IMAGES Transfers all images to the computer NEW IMAGES Transfers only those images that have not yet been tran...

Page 134: ...d in the Main Window of ZoomBrowser EX To continue transferring select another image with the CARD button WALLPAPER The selected image is transferred to the computer and displayed on the desktop Pressing the MENU button brings you back to the transfer menu You can press the SET dial in place of the button With ALL IMAGES NEW IMAGES or TRANSFER ORDERS a confirmation message appears Turn the SET dia...

Page 135: ...reen Display 1 Move the zoom lever toward W Up to 6 images appear 2 Press the MENU button and select CARD OPERATIONS Select TRANSFER ORDER 3 Press the SET dial on the image you wish to transfer appears on the image 4 Press the MENU button To cancel the transfer order press the SET dial again Erasing All Transfer Orders 1 Press the MENU button and select CARD OPERATIONS 2 SELECT TRANS ORDERS ALL ER...

Page 136: ...sing a USB cable you also need to install the Canon USB Video Driver 131 3 Connect the power adapter to the camcorder 4 Press the UNLOCK button and turn the POWER switch to NETWORK 5 Connect the camcorder to the computer using a USB cable or DV cable NETWORK MODE appears on the camcorder screen 6 Start DV Messenger In NETWORK mode the camcorder can only be operated from the computer except for the...

Page 137: ...tween 32 F and 104 F 0 C and 40 C Battery packs become hot with use and may not charge Wait until the battery pack temperature is below 104 F 40 C and retry charging The battery pack is damaged Use a different battery pack Problem Solution Buttons will not work Turn on the camcorder 30 Load a cassette 21 Abnormal characters appear on the screen The camcorder does not operate properly This camcorde...

Page 138: ...is distorted When recording near loud sounds such as fireworks drums or concerts sound may become distorted Sound may be recorded properly when you set MIC ATT to ON in the menu or when you adjust the audio recording level manually 78 Sound is recorded in a lower level than the actual level When recording near loud sounds such as fireworks drums or concerts sound may be recorded not in the actual ...

Page 139: ...d is protected Change the position of the protect switch 22 Memory card cannot be played back Set the camcorder to CARD PLAY mode 41 Insert a memory card 22 Image cannot be erased Image is protected Cancel the protection 103 SD memory card is protected Change the position of the protect switch 22 flashes red Card error occurred Turn off the camcorder Remove and reinsert the memory card Format the ...

Page 140: ...essage CONDENSATION HAS BEEN DETECTED appears for approx 4 seconds and starts flashing If a cassette is loaded the warning message REMOVE THE CASSETTE appears and starts flashing Remove the cassette immediately and leave the cassette compartment open Leaving the cassette in the camcorder may damage the tape A cassette cannot be loaded when condensation is detected Resuming use It takes about 1 hou...

Page 141: ...ttempted to perform audio dubbing on a tape recorded in HDV format WRONG FORMAT PLAYBACK NOT POSSIBLE You attempted to play back a tape recorded in HDV format CHECK THE CASSETTE REC MODE You attempted to perform audio dubbing on a tape recorded in a mode other than the SP mode 114 CHECK THE CASSETTE AUDIO MODE You attempted to perform audio dubbing on a tape recorded in 16 bit or 12 bit 4 channel ...

Page 142: ...USED AS START UP IMAGE You attempted to use an image recorded with another camcorder recorded with a compression not compatible with this camcorder or that has been edited on a computer 82 TOO MANY STILL IMAGES DISCONNECT USB CABLE Disconnect the USB cable decrease the number of still images on the memory card to less than 1800 If a dialog appeared on the computer screen close it Reconnect the USB...

Page 143: ...After a while turn the printer back on and reconnect the USB cable Check the printer status If the error persists consult your dealer or a Canon Service Center listed in the Contact List provided with the printer or the printer manual When you are printing using the button check the print settings HARDWARE ERROR Cancel printing Turn off the printer and turn it back on Check the printer status If t...

Page 144: ... camcorder rapidly between hot and cold temperatures may cause condensation to form on its internal surfaces 140 Battery Pack Charged battery packs continue to discharge naturally Therefore charge them on the day of use or the day before to ensure a full charge Attach the terminal cover whenever a battery pack is not in use Contact to metallic objects may cause a short circuit and damage the batte...

Page 145: ...pes or nonstandard cassettes as they may damage the camcorder Do not use tapes that have been jammed as video heads may become dirty Do not insert anything into the small holes of the cassette or cover them with cellophane tape Handle cassettes with care Do not drop or subject them to severe impact as this may damage the cassettes Rewind tapes from time to time if they are stored for a long time W...

Page 146: ...ge the memory card or the camcorder Do not remove the label from the memory card or affix other labels on the memory card Lithium Button Battery Do not pick up the battery using tweezers or other metal tools as this will cause a short circuit Wipe the battery with a clean dry cloth to ensure proper contact Keep the battery out of reach of children If it is swallowed seek medical assistance immedia...

Page 147: ...Align the pointed tool with the dent on the battery and move the battery to the right and left while you pull the battery Do not remove the cover for any other purpose than removing the battery for recycling when disposing the camcorder When you have removed the battery keep it out of reach of children If it is swallowed seek medical assistance immediately The battery case may break and the batter...

Page 148: ...intain the best picture quality we recommend cleaning the video heads frequently with the Canon DVM CL Digital Video Head Cleaning Cassette or a commercially available dry cleaning cassette Do not use wet type cleaning cassettes as this may damage the camcorder Tapes already recorded with dirty video heads may not be played back correctly even when you clean the video heads ...

Page 149: ...the viewfinder screen using blower brush or a commercially available cleaning cloth for glasses Using the Camcorder Abroad Power Sources You can use the compact power adapter to operate the camcorder and to charge battery packs in any country with power supply between 100 and 240 V AC 50 60 Hz Consult the Canon Service Center for information on plug adapters for overseas use Playback on a TV Scree...

Page 150: ... Carrying Case SC 1000 Soft Carrying Case WS 20 Wrist Strap SS 900 Shoulder Strap MultiMediaCard SDC 128M SD Memory Card TL H34 Tele converter WD H34 Wide converter FS 34U Filter Set NB 2L NB 2LH BP 2L12 BP 2L14 Battery Pack TV Computer VCR Digital Device MiniDV Video Cassette WL D85 Wireless Controller VL 10Li Battery Video Light BP 900 Series Battery Pack PC Card Adapter USB Reader Writer Canon ...

Page 151: ...ar battery charger to charge battery packs on the move The car battery cable plugs into your car s cigarette lighter and runs off a 12 24 V DC negative ground battery Use of genuine Canon accessories is recommended This product is designed to achieve excellent performance when used with genuine Canon accessories Canon shall not be liable for any damage to this product and or accidents such as fire...

Page 152: ...door shots or panoramic views When the Wide converter is attached a shadow may appear in the picture when you record with flash or assist lamp OPTURA60 FS 34U Filter Set Neutral density and MC protector filters help you to control difficult lighting conditions VL 10Li Battery Video Light This compact yet powerful video light can be used for both indoor and outdoor shooting It attaches to the camco...

Page 153: ...hes to the camcorder s advanced accessory shoe for cable free operation VL 3 Video Light This video light enables you to record brightly in color even in dark places It attaches to the camcorder s advanced accessory shoe for cable free operation DM 50 Directional Stereo Microphone This highly sensitive super directional microphone attaches to the camcorder s advanced accessory shoe It can be used ...

Page 154: ...uivalent Tape 4 3 recording 47 8 478 mm 16 9 recording 40 9 409 mm Card 37 6 376 mm Lens Configuration 11 elements in 9 groups Filter Diameter 34 mm AF system TTL autofocus manual focusing possible Minimum Focusing Distance 3 3 ft 1 m 0 39 in 1 cm on maximum wide angle White Balance Auto white balance pre set white balance DAYLIGHT SHADE CLOUDY TUNGSTEN FLUORESCENT FLUORESCENT H or custom white ba...

Page 155: ...86 Vp p 75 ohms C signal Power Others Power supply rated 7 4 V DC Power consumption AF on 3 5 W using viewfinder 3 6 W using LCD screen in normal brightness Operating temperature 32 104 F 0 40 C Dimensions W x H x D 2 8 x 3 2 x 5 2 in 70 x 82 x 133 mm excluding protrusions Weight camcorder body only 1 2 lb 530 g Power supply 100 240 V AC 50 60 Hz Power consumption 17W Rated output 8 4 V DC 1 5 A O...

Page 156: ...A CBC NB2 Car Battery Charger 7873A002AA S 150 S Video Cable 3062A002AA D82 0330 202 TL H34 Tele converter 9583A001AA WD H34 Wide converter 9584A001AA FS 34U Filter Set 8081A001AA VFL 1 Video Flash Light 8834A001AA VL 3 Video Light 3175A002AA D86 0121 201 DM 50 Directional Stereo Microphone 3176A002AA D84 0120 201 WS 20 Wrist Strap 3118A002AA D81 0190 202 SC 2000 Soft Carrying Case 9389A001AA SC 1...

Page 157: ... Connection TV 43 Continuous shooting 96 D Data code 85 Date and time 28 Date search 88 Daylight saving time 28 Digital effect 62 Digital zoom 37 Direct printing 119 Drive mode 96 DV IEEE1394 terminal 106 130 E Effects 63 End search 86 Exposure lock adjustment 52 F Faders 62 File numbers 73 Fireworks SCN mode 48 Flash 92 Focusing 53 Focusing frame 34 Focus priority 72 Foliage SCN mode 48 Formattin...

Page 158: ...25 RESET 137 Review 100 S S1 video terminal 44 Sample images 70 SCN mode recording program 48 Screen display 15 Screen messages 141 SD memory card 22 Self timer 55 Serial number 12 Shoulder strap 24 Shutter speed 50 Slide show 101 Slow Shutter recording program 45 Snow SCN mode 48 SP mode 77 Speaker 42 Special Scene recording program 45 Sports recording program 45 Spotlight SCN mode 48 Start up im...

Page 159: ... or failure to follow operating instructions B If the equipment is defective as a result of leaking batteries sand dirt or water damage C If defects or damages are caused by the use of unauthorized parts or by service other than our authorized agent D If the equipment is used for commercial or industrial use This Limited Warranty does not cover cabinet exterior finish video cassette tape head clea...

Page 160: ... equipment is used for commercial professional or industrial purposes This limited warranty does not cover the cabinet exterior finish of the digital video equipment video cassette tapes head cleanings nor does it apply to digital video equipment purchased outside Canada TO OBTAIN WARRANTY SERVICE Ship your Canon digital video equipment in its original carton box or equivalent properly packed full...

Page 161: ......

Page 162: ...LHVVH 4XHEHF 7 9 Q I RX KDYH DQ TXHVWLRQV FDOO WKH DQRQ DQDGD QIRUPDWLRQ HQWHU WROO IUHH DW 1 RQO Q 6L YRXV DYH GHV TXHVWLRQV YHXLOOH WpOpSKRQHU VDQG IUDLV DX DQDGD 1 VHXOHPHQW 0 2 121 0 1 6 5 9 3HULIHULFR 6XU 1R RO 5DQFKR GH Q DOGR 3 0p LFR 0p LFR 121 8 6 1 1 56 2 DPHVEXUJ 5RDG DPHVEXUJ 1 86 175 121 7 1 0 5 1 685 0e5 DWHUIRUG D 6XLWH 0LDPL 86 6 121 21 21 203 1 7 7KH 0HWURSROLV 7RZHU 0HWURSROLV UL...

Reviews: