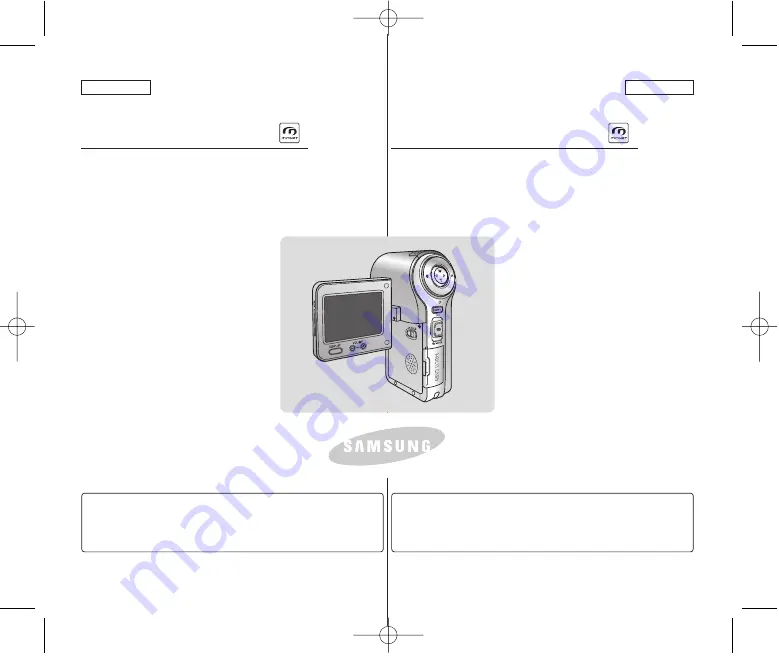
background image

ESPAÑOL

ENGLISH

Digital Camcorder

Owner’s Instruction Book

Before operating the unit, please read
this Instruction Book thoroughly, and
retain it for future reference. 

AF

Auto Focus

CCD

Charge Coupled Device

LCD

Liquid Crystal Display

SC-M2050S(B)/M2100S(B)/

M2200S(B)

Videocámara digital

SC-M2050S(B)/M2100S(B)/

M2200S(B)

AD68-00906E

Use only approved battery packs.
Otherwise there is a danger of overheating, fire or explosion.
Samsung is not responsible for problems occurring due to using
unapproved batteries.

Manual de instrucciones

Antes de utilizar la cámara

,

lea

detenidamente este manual de
instrucciones y consérvelo para
consultas posteriores.

AF

Enfoque automático

CCD

Dispositivo acoplado por
carga

LCD

Pantalla de cristal líquido

Utilice únicamente baterías aprobadas.
De lo contrario, existe peligro de sobrecalentamiento, incendio o
explosión. Samsung no se hace responsable de problemas que se
produzcan debido al uso de baterías no aprobadas.

00906E M2100 USA+ESP ~007  2/14/06 10:40 AM  페이지C   001 PagePro 9100

Summary of Contents for SC-M2050S

Page 1: ...re or explosion Samsung is not responsible for problems occurring due to using unapproved batteries Manual de instrucciones Antes de utilizar la cámara lea detenidamente este manual de instrucciones y consérvelo para consultas posteriores AF Enfoque automático CCD Dispositivo acoplado por carga LCD Pantalla de cristal líquido Utilice únicamente baterías aprobadas De lo contrario existe peligro de ...

Page 2: ...referentes a la condensación de humedad 9 Notas referentes a la CAM 9 Notas referentes a la batería 10 Nota referente al objetivo 11 Notas referentes a la pantalla LCD 11 Precauciones referentes al servicio 11 Precauciones referentes a las piezas de repuesto 11 Características 12 Accesorios incluidos con la CAM 13 Vistas posterior y lateral izquierda 14 Vistas lateral derecha e inferior 15 Pantall...

Page 3: ...4 Uso de la pantalla LCD 24 Antes de empezar a utilizar la CAM 25 Utilización del botón de funciones 26 Utilización del botón DISPLAY 27 Ajuste de la pantalla LCD 28 Estructura de carpetas y archivos 29 Tiempo y capacidad de grabación 30 Selección del tipo de memoria 32 Utilización de una tarjeta de memoria Accesorio opcional 33 Selección de modo y menú 34 Grabación 36 Grabación 36 Acercamiento y ...

Page 4: ...Ajuste de Program AE Exposición automática programada 52 Ajuste de BLC Compensación de luz de fondo 53 Ajuste del efecto 54 Ajuste del zoom digital 55 Ajuste del control automático de luz de fondo 56 Captura 58 Captura de imágenes 58 Acercamiento y alejamiento de las imágenes 59 Visualización 60 Visualización de archivos de fotos en la pantalla LCD 60 Selección de opciones de archivo 61 Eliminació...

Page 5: ...de reproducción 75 Eliminación de archivos de música 76 Bloqueo de archivos de música 77 Copia de archivos de música 78 Ajuste de reproducción aleatoria 79 Grabación 80 Grabación de voz 80 Reproducción 81 Reproducción de archivos de voz 81 Selección de opciones de archivo 82 Eliminación de archivos de voz 82 Bloqueo de archivos de voz 83 Copia de archivos de voz 84 Eliminación de archivos o carpet...

Page 6: ...de fecha 94 Ajuste del formato de hora 95 Ajuste del sistema 96 Ajuste de Auto Shut off 96 Ajuste de la función Demostración 97 Ajuste del modo Start up 98 Ajuste de la función File No 99 Ajuste de Beep Sound 100 Visualización de la información de versión 101 Ajuste de la memoria 102 Selección del tipo de almacenamiento 102 Formato de la memoria 103 Visualización de espacio en memoria 104 Ajuste d...

Page 7: ... con la función PictBridge 119 Impresión de fotos con los archivos DPOF 120 Limpieza y mantenimiento de la CAM 121 Después de utilizar la CAM 121 Limpieza de la carcasa 122 Utilización de la batería recargable incorporada 122 Información sobre la batería 123 Utilización de la CAM en el extranjero 124 Pantalla de autodiagnósticos 125 ENGLISH Contents Índice 7 Specifications 129 Index 131 Using the ...

Page 8: ...nes sobre el cuidado de la CAM Tenga en cuenta las siguientes precauciones de uso Mantenga este dispositivo en un lugar seguro El dispositivo contiene una lente que puede dañarse al recibir golpes Manténgala lejos del alcance de los niños No coloque el dispositivo en lugares con humedad La humedad y el agua pueden provocar el mal funcionamiento de la cámara Para evitar una descarga eléctrica no to...

Page 9: ...probable que los programas de televisión las cintas de vídeo de películas los DVD las películas y otros materiales audiovisuales tengan registrados sus derechos de reproducción La grabación no autorizada de material con derechos de propiedad intelectual puede infringir los derechos de los propietarios con Copyright y es contraria a las leyes de propiedad intelectual Todos los nombres de marcas com...

Page 10: ...mical waste Be careful not to drop the Battery Pack when you release it from the CAM Notas referentes a la batería Se recomienda utilizar la batería original disponible en el centro de servicio técnico de SAMSUNG Asegúrese de que la batería esté completamente cargada antes de empezar a grabar Para ahorrar energía de la batería mantenga la CAM apagada cuando no la esté usando Si el dispositivo se d...

Page 11: ...arding Service Precautions Regarding Replacement Parts No grabe con el objetivo de la CAM dirigido directamente hacia el sol La acción de la luz directa del sol podría estropear el CCD el dispositivo acoplado por carga el sensor de imágenes 1 Para la fabricación del pantalla LCD se ha empleado tecnología de alta precisión Sin embargo pueden aparecer en ella puntitos rojos azules o verdes Esta situ...

Page 12: ...amiento de la CAM DSC digital integrada Dispositivo de imagen digital integrada que convierte fácilmente una CAM digital en una cámara fotográfica digital con una grabación cómoda y sencilla Calidad de imagen de alta resolución Cámara fotográfica digital Con el CCD Pixel de 2110 K puede obtener una resolución máxima de 2400 x 1800 Zoom digital x100 Permite al usuario ampliar la imagen hasta 100 ve...

Page 13: ...a la CAM 13 Make sure that the following basic accessories are supplied with your CAM Basic Accessories 1 Lithium Polymer Battery Pack 2 AC Power Adapter 3 Audio Video Cable 4 USB Cable 5 Earphones 6 Hand Strap Necklace Strap 7 Carrying Case 8 Instruction Book Quick Guide 9 Software CD 10 Lens Cover 11 Tripod Gender Optional Accessory 12 Extended life Battery Pack Accessories Supplied with the CAM...

Page 14: ...tón Record Stop 8 Botón œ œ Retroceder RPS 9 Botón W Alejar zoom pantalla reproducción múltiple Subir 10 Botón OK Reproducir Pausa 11 Botón Avanzar FPS 12 Botón T Acercar zoom Bajar 13 Indicador de grabación encendido carga 14 Botón MENU 15 Botón Bloquear Liberar 16 Selector POWER MODE 17 Ranura MULTI CARD 1 Built in MIC 7 Record Stop button 8 œ œ button Move backward RPS 9 W button Zoom out Multi...

Page 15: ...Tripod Receptacle 1 Objetivo 2 Flash 3 Batería 4 Entrada para audífonos y AV 5 Botón de expulsión de la batería 6 Puerto USB 7 Enganche de la correa 8 Ranura para Adaptador de Corriente 9 Ranura para Tripie 3 Battery Pack 1 Lens 4 Earphones AV jack 8 Power Adapter Receptacle 2 Flash 9 Tripod Receptacle 6 USB Port 5 Battery ejection button 7 Strap Hook Hanging Lens Cover on the CAM 00906E M2100 USA...

Page 16: ...memoria interna ENGLISH ESPAÑOL Location of Controls LCD Display Nombre de los componentes Pantalla LCD 16 OSD On Screen Display in Video Record Mode Video Play Mode Video Record Mode 1 Mode indicator 2 EIS indicator 3 Program AE indicator 4 White Balance indicator 5 BLC indicator 6 Focus indicator 7 Counter Elapsed time Remaining time 8 Record Standby indicator 9 Effect indicator 10 Zoom in out i...

Page 17: ...3 5 2 9 Photo View Mode Photo View Mode Photo Capture Mode Note Functions indicated with will not be retained when the CAM is turned off OSD Presentación en pantalla en modo Photo Capture Photo View Modo Photo Capture 1 Indicador de modo 2 Indicador de Flash 3 Indicador de balance de blanco 4 Indicador de BLC 5 Indicador de enfoque 6 Indicador de acercamiento alejamiento de zoom 7 Indicador de dur...

Page 18: ...1 01 12 51 04 5 0 Kbytes Stereo 8KHz 64Kbps 00 00 12 00 05 12 AM 1 4 2 3 8 7 6 5 5 1 2 3 4 7 6 Voice Play Mode Voice Record Mode MP3 Play Mode Note Functions will be retained when the CAM is turned off OSD Presentación en pantalla en modo MP3 Play Voice Record Voice Play Modo MP3 Play 1 Indicador de modo 2 Nombre formato de archivo 3 Velocidad de muestreo Velocidad de bits 4 Barra de progreso 5 Ti...

Page 19: ...tery Pack to prevent it from dropping to the floor Battery Standard Battery Pack Extended life Battery Pack option Instalación y extracción de la batería Se recomienda adquirir una o más baterías para poder utilizar la CAM de forma continua Para insertar la batería Deslice la batería en la ranura hasta que emita un click Para expulsar la batería Tire del botón de expulsión de la batería para expul...

Page 20: ... Pack that is available at the retailer where you purchased the CAM Mantenimiento de la batería La batería debe recargarse a una temperatura ambiente de entre 0 C 32 F y 40 C 104 F La batería nunca debe cargarse cuando la temperatura ambiente sea inferior a 0 C 32 F La vida útil y la capacidad de la batería se verán reducidas si se utiliza en ambientes con temperaturas inferiores a 0 C 32 F o si s...

Page 21: ...o de grabación continua basándose en el tipo de batería Si cierra la pantalla LCD se apaga automáticamente Los tiempos de grabación continuada que se facilitan en la tabla siguiente son aproximados El tiempo real de grabación depende del uso de la videocámara Notas Prepare una batería adicional si utiliza la CAM en el exterior Póngase en contacto con el centro de servicio técnico de Samsung para c...

Page 22: ...Aprox 13 h Apagada Aprox 1 h 50 min Aprox 3 h 20 min ENGLISH ESPAÑOL How to Use the Battery Pack Uso de la batería 22 Battery Level Display The Battery Level Display shows the amount of battery power remaining in the Battery Pack Tips for Battery Identification A charge indicator is provided on the Battery Pack to help you remember whether it has been charged or not If the battery has been fully c...

Page 23: ...M Carga de la batería 1 Conecte la batería a la CAM 2 Suba el Selector POWER MODE para apagar la CAM 3 Conecte el adaptador de CA en la CAM Puede desconectar el adaptador de CA pulsando los botones situados en los laterales del enchufe del cable del adaptador mientras tira hacia fuera 4 Inserte el adaptador de CA en la toma de corriente Nota Puede cargar la batería mientras utiliza la CAM pero lle...

Page 24: ...turns up to an angle of 270 You can close it at an angle of 180 Color del indicador LED Uso de la pantalla LCD El color del indicador LED varía dependiendo del estado de alimentación o de carga Cuando el adaptador de CA está enchufado con la batería insertada Color de LED Rojo Verde Naranja Verde Naranja intermitente Alimentación Grab vídeo voz Enc Apag Apag Estado de carga Cargando Completamente ...

Page 25: ...ss color date time system memory and language Antes de empezar a utilizar la CAM Antes de utilizar la CAM consulte esta página para facilitar su funcionamiento La tarjeta de memoria es un accesorio adicional y no se incluye 1 Instale la batería e inserte la tarjeta de memoria en la ranura MULTI CARD Consulte la página 33 2 Cargue la batería conectando el adaptador de CA directamente en la CAM Cons...

Page 26: ...e a selection move the cursor select the functions and exit from the menu Using Various Function buttons Utilización del botón de funciones Modo Record Capture Modo Play Modo Selección de menú Botón œ W T OK Alejar zoom W Acercar zoom T Grabación Ir a último archivo grabado Pantalla Repr múltiple RPS œœ Retroceder FPS Avanzar Ir al modo Record Grabar Pausa Seleccionar arriba Seleccionar abajo Volv...

Page 27: ...n DISPLAY 1 Abra la pantalla LCD 2 Baje el Selector POWER MODE para encender la CAM Aparece la pantalla Video Record Puede seleccionar el modo Video o Previous como el modo de inicio en System Settings Consulte la página 98 3 Presione el botón DISPLAY Si pulsa el botón DISPLAY en modo Video Photo Una vez desaparece el indicador de pantalla Dos veces se apaga la luz de fondo Tres veces se apaga el ...

Page 28: ...lay monitor which enables you to view directly what you are recording or playing back Depending on the conditions under which you are using the CAM indoors or outdoors for example you can adjust the LCD Brightness or Color 1 Move POWER MODE Selector down to turn on the CAM 2 Move POWER MODE Selector down repeatedly to select System Settings and press the OK button The system is automatically conve...

Page 29: ...ara antes de introducir o de extraer la tarjeta de memoria para evitar pérdida de datos Guarde los archivos importantes aparte ESPAÑOL ENGLISH Getting Started Introducción 29 Structure of the Folders and Files The video files and photo files are stored in internal memory or external memory Memory Card as below Notes Refer to page 33 for details about Memory Card You can store general data in files...

Page 30: ...ad de grabación Soportes Memoria interna Memory Stick SD MMC Capacidad 512MB SC M2050S B 1GB SC M2100S B 2GB SC M2200S B 32 MB 64 MB 128 MB 256 MB 512 MB 1 GB 32 MB 64 MB 128 MB 256 MB 512 MB 1 GB Super Fine 352p aprox 21 min aprox 43 min aprox 86 min X X X aprox 10 min aprox 21 min aprox 43 min Aprox 1 min 20 seg aprox 3 min aprox 4 min aprox 11 min aprox 21 min aprox 43 min 720i 720p aprox 14 mi...

Page 31: ... of the Memory Card is slow We recommended using a Memory Card of 1 25MB sec or greater Capacidad en fotos Tiempo de grabación de voz Soportes Memoria interna Memory Stick SD MMC Capacidad 512MB SC M2050S B 1GB SC M2100S B 2GB SC M2200S B 32 MB 64 MB 128 MB 256 MB 512 MB 1 GB 32 MB 64 MB 128 MB 256 MB 512 MB 1 GB Calidad 1600 1200 aprox 756 aprox 1513 aprox 3027 aprox 46 aprox 93 aprox 188 aprox 3...

Page 32: ...1 Insert a Memory Card Refer to page 33 2 Move POWER MODE Selector down to turn on the CAM 3 Move POWER MODE Selector down to select System Settings and press the OK button The system is automatically converted into the selected mode in two seconds even when the OK button is not pressed 4 Move the W T button to select Memory and press the button 5 Move the W T button to select Storage Type and pre...

Page 33: ...nserción de una tarjeta de memoria 1 Abra la pantalla LCD 2 Abra la tapa de la ranura MULTI CARD 3 Inserte la tarjeta de memoria en la ranura hasta que emita un chasquido suave 4 Cierre la tapa de la ranura Precaución esta pantalla aparecerá si se inserta una tarjeta de memoria con la CAM encendida Si selecciona OK el tipo de memoria cambia a External y si selecciona Cancel los archivos se almacen...

Page 34: ... the desired mode 2 The menu screen disappears when you press the MENU button again Selección de modo y menú Puede seleccionar el modo y el menú de la siguiente forma Selección de modo 1 Deslice hacia abajo el Selector POWER MODE para encender la CAM 2 Baje el Selector POWER MODE hasta seleccionar el modo que desea y presione el botón OK El sistema cambia automáticamente al modo seleccionado en do...

Page 35: ...s imágenes 37 Reproducción 38 Reproducción en la pantalla LCD 38 Selección de opciones de archivo 40 Eliminación de archivos de vídeo 40 Bloqueo de archivos de vídeo 41 Copia de archivos de vídeo 42 Ajuste de selección múltiple 43 Ajuste de PB Option 44 Ajustes de diversas funciones 45 Ajuste del tamaño del archivo de vídeo 45 Ajuste de la calidad del archivo de vídeo 46 Ajuste del modo de grabaci...

Page 36: ...ersonas y objetos en movimiento y guardarlos en memoria 1 Baje el Selector POWER MODE para encender la CAM Aparece la pantalla Video Record Puede seleccionar el modo Video o Previous como el modo de inicio en System Settings Consulte la página 98 2 Presione el botón Record Stop para comenzar la grabación Aparece el indicador REC en la pantalla LCD Aparece el tiempo transcurrido y se inicia la grab...

Page 37: ...ESPAÑOL ENGLISH Video Mode Recording Modo Vídeo Grabación 37 Zooming In and Out Zooming lets you change the size of the subject captured in a scene 1 Move POWER MODE Selector down to turn on the CAM The Video Record screen appears 2 Press the Record Stop button to start recording Press the W button to zoom out The subject appears further away when you zoom out Press the T button to zoom in The sub...

Page 38: ...rchivos de vídeo utilizando el monitor LCD casi en cualquier sitio como en un coche en interiores o en exteriores 1 Baje el Selector POWER MODE para encender la CAM Aparece la pantalla Video Record 2 Presione el botón OK Va al modo Video Play 3 Presione el botón W Aparece la pantalla de reproducción múltiple 4 Mueva el botón W T œ para buscar el archivo de foto que desea reproducir Cada vez que mu...

Page 39: ...nicio de Samsung Electronics para obtener el archivo de instalación del códec Consulte la página 116 ESPAÑOL ENGLISH Video Mode Playing Modo Vídeo Reproducción 39 1 2 BLC Video Play 720X480 BLC Video Play 720X480 The buttons you use In Video Play mode OK button Play or pause the video file W button The Multi play screen appears œ œ button When playing back Press it to move to the beginning of the ...

Page 40: ...vos de vídeo Los archivos de vídeo se pueden borrar en File Options 1 Baje el Selector POWER MODE para encender la CAM Aparece la pantalla Video Record 2 Presione el botón OK Va al modo Video Play 3 Presione el botón W Aparece la pantalla de reproducción múltiple 4 Mueva el botón W T œ para seleccionar el archivo de vídeo que desea eliminar Cada vez que mueva el botón W T œ se desplaza horizontal ...

Page 41: ... de vídeo Es posible bloquear archivos de vídeo importantes para evitar el borrado accidental 1 Baje el Selector POWER MODE para encender la CAM Aparece la pantalla Video Record 2 Presione el botón OK Va al modo Video Play 3 Presione el botón W Aparece la pantalla de reproducción múltiple 4 Mueva el botón W T œ para seleccionar el archivo de vídeo que desea bloquear Cada vez que mueva el interrupt...

Page 42: ... archivos de vídeo El archivo de vídeo puede copiarse en la memoria interna o externa 1 Baje el Selector POWER MODE para encender la CAM Aparece la pantalla Video Record 2 Presione el botón OK Va al modo Video Play 3 Presione el botón W Aparece la pantalla de reproducción múltiple 4 Mueva el botón W T œ para seleccionar el archivo de vídeo que desea copiar Cada vez que mueva el interruptor W T œ s...

Page 43: ...ota El archivo bloqueado no se puede eliminar ESPAÑOL ENGLISH Video Mode Selecting File Options Modo Vídeo Selección de opciones de archivo 43 3 4 5 Copy To Lock Delete PB Option Multi Select 7 Copy To Lock Delete PB Option Cancel Selected All Cancel Are you sure you want to delete selected file Setting Multi Selection You can delete copy or lock multiple video files 1 Move POWER MODE Selector dow...

Page 44: ...oducir de forma continua todos los archivos o reproducir únicamente el archivo seleccionado 1 Baje el Selector POWER MODE para encender la CAM Aparece la pantalla Video Record 2 Presione el botón OK Va al modo Video Play 3 Presione el botón W Aparece la pantalla de reproducción múltiple 4 Mueva el botón W T œ para seleccionar el archivo de vídeo para establecer la función Cada vez que mueva el int...

Page 45: ...endiendo de la capacidad de la tarjeta de memoria y el tamaño del archivo de vídeo 1 Baje el Selector POWER MODE para encender la CAM Aparece la pantalla Video Record 2 Presione el botón MENU Aparece la pantalla Video Settings 3 Mueva el botón W T hasta seleccionar Size y presione el botón 4 Mueva el botón W T hasta seleccionar el tamaño de archivo de vídeo y presione el botón OK 720 selecciona 72...

Page 46: ...ndiendo de la capacidad de la tarjeta de memoria y la calidad del archivo de vídeo 1 Baje el Selector POWER MODE para encender la CAM Aparece la pantalla Video Record 2 Presione el botón MENU Aparece la pantalla Video Settings 3 Mueva el botón W T hasta seleccionar Quality y presione el botón 4 Mueva el botón W T para seleccionar la calidad del archivo de vídeo y presione el botón OK Super Fine SF...

Page 47: ...AF Line In Out Out Size 720 Focus Focus AF System Line In Out Out Record Mode TV Size 720 Quality Fine Quality Fine Video Settings Video Settings AF Line In Out Out Size 720 Focus Focus AF System Line In Out Out Record Mode PC Size 720 Quality Fine Quality Fine Video Settings Video Settings Video Record ideo Record STBY STBY F 720p 00 00 00 00 43 41 Setting the Video file Record mode You can set t...

Page 48: ... de la CAM en el dispositivo externo y viceversa 1 Baje el Selector POWER MODE para encender la CAM Aparece la pantalla Video Record 2 Presione el botón MENU Aparece la pantalla Video Settings 3 Mueva el botón W T hasta seleccionar Line In Out y presione el botón 4 Mueva el botón W T hasta seleccionar el ajuste que desea y presione el botón OK Out se selecciona al grabar o reproducir el contenido ...

Page 49: ...us depending on the subject or the environment In most situations you can record best using AF Auto Focus 1 Move POWER MODE Selector down to turn on the CAM The Video Record screen appears 2 Press the MENU button The Video Settings screen appears 3 Move the W T button to select Focus and press the button 4 Move the W T button to select the desired setting and press the OK button AF Set the focus a...

Page 50: ...nción que compensa los temblores de la mano y otros movimientos mientras se graba EIS proporciona vídeo más estable Al grabar con zoom Al grabar objetos pequeños Al grabar mientras se camina o se está en movimiento Al grabar a través de la ventanilla de un vehículo 1 Baje el Selector POWER MODE para encender la CAM Aparece la pantalla Video Record Puede seleccionar el modo Video o Previous como el...

Page 51: ...g the White Balance The White Balance may vary depending on the lighting conditions The White Balance is used to preserve natural colors under different lighting conditions 1 Move POWER MODE Selector down to turn on the CAM The Video Record screen appears 2 Press the MENU button The Video Settings screen appears 3 Move the W T button to select White Balance and press the button 4 Move the W T butt...

Page 52: ...Baje el Selector POWER MODE para encender la CAM Aparece la pantalla Video Record 2 Presione el botón MENU Aparece la pantalla Video Settings 3 Mueva el botón W T hasta seleccionar Program AE y presione el botón 4 Mueva el botón W T hasta seleccionar el ajuste que desea y presione el botón OK Auto equilibra la velocidad de exposición y de obturación para obtener el mejor resultado La velocidad del...

Page 53: ...sation The Backlight Compensation function helps to make the subject brighter when the subject is in front of a window or the subject is too dark to distinguish You can use this function when using the CAM in bright or snowy backgrounds 1 Move POWER MODE Selector down to turn on the CAM The Video Record screen appears 2 Press the MENU button The Video Settings screen appears 3 Move the W T button ...

Page 54: ...onal looking effects on your video file 1 Move POWER MODE Selector down to turn on the CAM The Video Record screen appears 2 Press the MENU button The Video Settings screen appears 3 Move the W T button to select Effect and press the button 4 Move the W T button to select desired setting and press the OK button Off Cancel the Effect Art Artistic effects on your video file Mosaic A mosaic overlay a...

Page 55: ...ieved digitally up to X100 when combined with optical zoom The Digital Zoom processes data to enlarge the center portion of the image to fill the frame It may produce a less detailed and slightly grainy picture 1 Move POWER MODE Selector down to turn on the CAM The Video Record screen appears 2 Press the MENU button The Video Settings screen appears 3 Move the W T button to select Digital Zoom and...

Page 56: ...ática el brillo del monitor LCD 1 Baje el Selector POWER MODE para encender la CAM Aparece la pantalla Video Record 2 Presione el botón MENU Aparece la pantalla Video Settings 3 Mueva el botón W T hasta seleccionar B L Auto Ctl y presione el botón 4 Mueva el botón W T hasta seleccionar el ajuste que desea y presione el botón OK Off cancela la función B L Auto Ctl On ajusta la función B L Auto Ctl ...

Page 57: ...uto Control 71 Modo Foto Captura 58 Captura de imágenes 58 Acercamiento y alejamiento de las imágenes 59 Visualización 60 Visualización de archivos de fotos en la pantalla LCD 60 Selección de opciones de archivo 61 Eliminación de archivos de fotos 61 Bloqueo de archivos de fotos 62 Copia de archivos de fotos 63 Ajuste de la función DPOF Formato de orden de impresión digital 64 Ajuste de selección ...

Page 58: ...ENU button in the Photo Capture mode to see the Photo Settings screen Captura de imágenes Puede hacer fotos y grabar archivos de vídeo 1 Baje el Selector POWER MODE para encender la CAM Aparece la pantalla Video Record 2 Baje el Selector POWER MODE hasta seleccionar Photo mode y presione el botón OK Aparece la pantalla Photo Capture El sistema cambia automáticamente al modo seleccionado en dos seg...

Page 59: ...ay result in higher battery power consumption Acercamiento y alejamiento de las imágenes El uso de la técnica del zoom permite modificar el tamaño del encuadre de las escenas 1 Baje el Selector POWER MODE para encender la CAM 2 Baje el Selector POWER MODE hasta seleccionar Photo mode y presione el botón OK El sistema cambia automáticamente al modo seleccionado en dos segundos tras pulsar el botón ...

Page 60: ...ur PC may not be displayed Visualización de archivos de fotos en la pantalla LCD Resulta útil y práctico ver imágenes utilizando la pantalla LCD casi en cualquier sitio como en un coche en interiores o en exteriores 1 Baje el Selector POWER MODE para encender la CAM Aparece la pantalla Video Record 2 Baje el Selector POWER MODE hasta seleccionar Photo mode y presione el botón OK El sistema cambia ...

Page 61: ...ión de archivos de fotos Los archivos de foto se pueden borrar en File Options 1 Baje el Selector POWER MODE para encender la CAM Aparece la pantalla Video Record 2 Baje el Selector POWER MODE hasta seleccionar Photo mode y presione el botón OK El sistema cambia automáticamente al modo seleccionado en dos segundos tras pulsar el botón OK Aparece la pantalla Photo Capture 3 Presione el botón OK Va ...

Page 62: ...hoto Mode Selecting File Options Modo Foto Selección de opciones de archivo 62 3 5 6 7 Locking Photo files You can lock important photo files so they can not be deleted 1 Move POWER MODE Selector down to turn on the CAM The Video Record screen appears 2 Move POWER MODE Selector down again to select Photo mode and press the OK button The system is automatically converted into the selected mode in t...

Page 63: ...to Mode Selecting File Options Modo Foto Selección de opciones de archivo 63 Copying Photo files You can copy photo files to the internal or external memory 1 Move POWER MODE Selector down to turn on the CAM The Video Record screen appears 2 Move POWER MODE Selector down again to select Photo mode and press the OK button The system is automatically converted into the selected mode in two seconds e...

Page 64: ... imprimir de manera automática imágenes grabadas en una tarjeta de memoria con una impresora compatible con DPOF Inserte la tarjeta de memoria en la ranura MULTI CARD 1 Baje el Selector POWER MODE para encender la CAM Aparece la pantalla Video Record 2 Baje el Selector POWER MODE hasta seleccionar Photo mode y presione el botón OK El sistema cambia automáticamente al modo seleccionado en dos segun...

Page 65: ...POF cuando se utiliza la memoria externa ESPAÑOL ENGLISH Photo Mode Selecting File Options Modo Foto Selección de opciones de archivo 65 4 5 6 8 Copy To Lock Delete DPOF Multi Select Copy To Lock Delete DPOF Cancel Selected All Cancel Are you sure you want to delete selected file Setting Multi Selection You can delete copy or lock multiple photo files 1 Move POWER MODE Selector down to turn on the...

Page 66: ...e la tarjeta de memoria y el tamaño del archivo de fotos 1 Baje el Selector POWER MODE para encender la CAM Aparece la pantalla Video Record 2 Baje el Selector POWER MODE hasta seleccionar Photo mode y presione el botón OK El sistema cambia automáticamente al modo seleccionado en dos segundos tras pulsar el botón OK Aparece la pantalla Photo Capture 3 Presione el botón MENU 4 Mueva el botón W T ha...

Page 67: ...only works in Photo mode and allows the user to take photographs where there is insufficient light 1 Move POWER MODE Selector down to turn on the CAM The Video Record screen appears 2 Move POWER MODE Selector down again to select Photo mode and press the OK button The system is automatically converted into the selected mode in two seconds even when the OK button is not pressed The Photo Capture sc...

Page 68: ...ing on the subject or the environment In most situations you can record the best photo using AF Auto Focus 1 Move POWER MODE Selector down to turn on the CAM The Video Record screen appears 2 Move POWER MODE Selector down again to select Photo mode and press the OK button The system is automatically converted into the selected mode in two seconds even when the OK button is not pressed The Photo Ca...

Page 69: ... 5 6 Setting the White Balance The White Balance may vary depending on the lighting conditions The White Balance is used to preserve natural colors under different lighting conditions 1 Move POWER MODE Selector down to turn on the CAM The Video Record screen appears 2 Move POWER MODE Selector down again to select Photo mode and press the OK button The system is automatically converted into the sel...

Page 70: ...ttings 1600 1200 1600 1200 Flash Auto Flash Auto Focus AF Focus AF White Balance Auto White Balance Auto System Auto Size Size BLC On Photo Settings Photo Settings 1600 1200 1600 1200 Flash Auto Flash Auto Focus AF Focus AF White Balance Auto White Balance Auto 1600 Photo Capture BLC Setting the BLC Backlight Compensation The Backlight Compensation function helps to make the subject brighter when ...

Page 71: ...ave power consumption by controlling the brightness of LCD monitor automatically outdoors You can use this function when using your the CAM in bright or snowy backgrounds 1 Move POWER MODE Selector down to turn on the CAM The Video Record screen appears 2 Move POWER MODE Selector down again to select Photo mode and press the OK button The system is automatically converted into the selected mode in...

Page 72: ...tilización del explorador de archivos Modo MP3 Almacenamiento de música en la CAM 73 Copia de archivos de música en la CAM 73 Reproducción 74 Reproducción de archivos de música 74 Selección de opciones de archivo 75 Ajuste de repetición de reproducción 75 Eliminación de archivos de música 76 Bloqueo de archivos de música 77 Copia de archivos de música 78 Ajuste de reproducción aleatoria 79 Modo Gr...

Page 73: ...panel frontal del PC conecte el cable USB al Puerto USB del panel posterior del PC ESPAÑOL ENGLISH MP3 Mode Storing Music in the CAM Modo MP3 Almacenamiento de música en la CAM 73 Copying Music files to the CAM You can transfer music files from your PC to the internal memory SD MMC Memory Stick or Memory Stick Pro To copy music files the CAM must be connected to your PC with the USB cable You can ...

Page 74: ...os ni caracteres especiales ENGLISH ESPAÑOL MP3 Mode Playing Modo MP3 Reproducción 74 3 4 5 Playing Music files You can listen to music files in the internal or external memory Memory Card 1 Connect the earphones to the CAM You can also hear music from the Built in speaker without the earphones 2 Move POWER MODE Selector down to turn on the CAM The Video Record screen appears 3 Move POWER MODE Sel...

Page 75: ...os a la CAM Puede escuchar música desde el altavoz incorporado sin los audífonos 2 Baje el Selector POWER MODE para encender la CAM Aparece la pantalla Video Record 3 Baje el Selector POWER MODE hasta seleccionar el modo MP3 y presione el botón OK El sistema cambia automáticamente al modo seleccionado en dos segundos tras pulsar el botón OK Aparece la lista de música 4 Mueva el botón W T para sele...

Page 76: ...Deleting Music files You can delete the music file you want 1 Move POWER MODE Selector down to turn on the CAM The Video Record screen appears 2 Move POWER MODE Selector down again to select MP3 mode and press the OK button The system is automatically converted into the selected mode in two seconds even when the OK button is not pressed The music list appears 3 Move the W T button to select a MP3 ...

Page 77: ... 4 5 Locking Music files You can lock important music files so they can not be deleted 1 Move POWER MODE Selector down to turn on the CAM The Video Record screen appears 2 Move POWER MODE Selector down again to select MP3 mode and press the OK button The system is automatically converted into the selected mode in two seconds even when the OK button is not pressed The music list appears 3 Move the ...

Page 78: ...hivo 78 3 4 5 Copying Music files You can copy the music file to the internal or external memory 1 Move POWER MODE Selector down to turn on the CAM The Video Record screen appears 2 Move POWER MODE Selector down again to select MP3 mode and press the OK button The system is automatically converted into the selected mode in two seconds even when the OK button is not pressed The music list appears 3...

Page 79: ...ndom 1 Move POWER MODE Selector down to turn on the CAM The Video Record screen appears 2 Move POWER MODE Selector down again to select MP3 mode and press the OK button The system is automatically converted into the selected mode in two seconds even when the OK button is not pressed The music list appears 3 Press the MENU button Move the W T button to select Random and press the OK button 4 Move t...

Page 80: ... the unit stops recording Grabación de voz Puede grabar voz utilizando el micrófono incorporado en la CAM 1 Baje el Selector POWER MODE para encender la CAM Aparece la pantalla Video Record 2 Baje el Selector POWER MODE hasta seleccionar el modo Voice Recorder y presione el botón OK El sistema cambia automáticamente al modo seleccionado en dos segundos tras pulsar el botón OK Aparece la pantalla V...

Page 81: ...ón 81 2 4 5 Playing Voice files You can hear the voice file using the built in speaker or connecting earphones 1 Move POWER MODE Selector down to turn on the CAM The Video Record screen appears 2 Move POWER MODE Selector down again to select Voice Recorder mode and press the OK button The system is automatically converted into the selected mode in two seconds even when the OK button is not pressed...

Page 82: ...ece la pantalla Video Record 2 Baje el Selector POWER MODE hasta seleccionar el modo Voice Recorder y presione el botón OK El sistema cambia automáticamente al modo seleccionado en dos segundos tras pulsar el botón OK Aparece la pantalla Video Record 3 Presione el botón OK Aparece la lista de archivos de voz 4 Mueva el botón W T para seleccionar el archivo de voz que desea eliminar 5 Presione el b...

Page 83: ... to turn on the CAM The Video Record screen appears 2 Move POWER MODE Selector down again to select Voice Recorder mode and press the OK button The system is automatically converted into the selected mode in two seconds even when the OK button is not pressed The Voice Record screen appears 3 Press the OK button The voice file list appears 4 Move the W T button to select a voice file you want to lo...

Page 84: ...ernal memory 1 Move POWER MODE Selector down to turn on the CAM The Video Record screen appears 2 Move POWER MODE Selector down again to select Voice Recorder mode and press the OK button The system is automatically converted into the selected mode in two seconds even when the OK button is not pressed The Voice Record screen appears 3 Press the OK button The voice file list appears 4 Move the W T ...

Page 85: ... files AVI MP3 JPG WAV or folders you recorded 1 Move POWER MODE Selector down to turn on the CAM The Video Record screen appears 2 Move POWER MODE Selector down again to select File Browser mode and press the OK button The system is automatically converted into the selected mode in two seconds even when the OK button is not pressed The File Browser screen appears 3 Move the W T button to select t...

Page 86: ... important video or photo files so they can not be deleted 1 Move POWER MODE Selector down to turn on the CAM The Video Record screen appears 2 Move POWER MODE Selector down again to select File Browser mode and press the OK button The system is automatically converted into the selected mode in two seconds even when the OK button is not pressed The File Browser screen appears 3 Move the W T button...

Page 87: ...lders You can copy a file or folder to the internal or external memory 1 Move POWER MODE Selector down to turn on the CAM The Video Record screen appears 2 Move POWER MODE Selector down again to select File Browser mode and press the OK button The system is automatically converted into the selected mode in two seconds even when the OK button is not pressed The File Browser screen appears 3 Move th...

Page 88: ... ENGLISH ESPAÑOL Using File Browser Utilización del explorador de archivos 88 3 4 Viewing File Information You can see the file name format size and date 1 Move POWER MODE Selector down to turn on the CAM The Video Record screen appears 2 Move POWER MODE Selector down again to select File Browser mode and press the OK button The system is automatically converted into the selected mode in two secon...

Page 89: ...ing the CAM to a Printer 109 Ajuste de la CAM Ajuste de la pantalla LCD 90 Ajuste del brillo del LCD 90 Ajuste del color del LCD 91 Ajuste de fecha y hora 92 Ajuste de la hora 92 Ajuste de la fecha 93 Ajuste del formato de fecha 94 Ajuste del formato de hora 95 Ajuste del sistema 96 Ajuste de Auto Shut off 96 Ajuste de la función Demonstration 97 Ajuste del modo Start up 98 Ajuste de la función Fi...

Page 90: ...for ambient lighting conditions 1 Move POWER MODE Selector down to turn on the CAM The Video Record screen appears 2 Move POWER MODE Selector down again to select System Settings mode and press the OK button The system is automatically converted into the selected mode in two seconds even when the OK button is not pressed The System Settings menu appears 3 Move the W T button to select Display and ...

Page 91: ...ve POWER MODE Selector down to turn on the CAM The Video Record screen appears 2 Move POWER MODE Selector down again to select System Settings mode and press the OK button The system is automatically converted into the selected mode in two seconds even when the OK button is not pressed The System Settings menu appears 3 Move the W T button to select Display and press the button 4 Move the W T butt...

Page 92: ... The Video Record screen appears 2 Move POWER MODE Selector down again to select System Settings mode and press the OK button The system is automatically converted into the selected mode in two seconds even when the OK button is not pressed The System Settings menu appears 3 Move the W T button to select Date Time and press the button 4 Move the W T button to select Set Time and press the OK butto...

Page 93: ...n on the CAM The Video Record screen appears 2 Move POWER MODE Selector down again to select System Settings mode and press the OK button The system is automatically converted into the selected mode in two seconds even when the OK button is not pressed The System Settings menu appears 3 Move the W T button to select Date Time and press the button 4 Move the W T button to select Set Date and press ...

Page 94: ...ctor POWER MODE de nuevo hasta seleccionar el modo System Settings y presione el botón OK El sistema cambia automáticamente al modo seleccionado en dos segundos tras pulsar el botón OK Aparece el menú System Settings 3 Mueva el botón W T hasta seleccionar Date Time y presione el botón 4 Mueva el botón W T hasta seleccionar Date Format y presione el botón 5 Mueva el botón W T para fijar el formato ...

Page 95: ... nuevo hasta seleccionar el modo System Settings y presione el botón OK El sistema cambia automáticamente al modo seleccionado en dos segundos tras pulsar el botón OK Aparece el menú System Settings 3 Mueva el botón W T hasta seleccionar Date Time y presione el botón 4 Mueva el botón W T hasta seleccionar Time Format y presione el botón 5 Mueva el botón W T para fijar el formato que desea y presio...

Page 96: ... press the OK button The system is automatically converted into the selected mode in two seconds even when the OK button is not pressed The System Settings menu appears 3 Move the W T button to select System and press the button 4 Move the W T button to select Auto Shut off and press the button 5 Move the W T button to set the desired setting and press the OK button 5 Minutes The CAM turns off aft...

Page 97: ...on The system is automatically converted into the selected mode in two seconds even when the OK button is not pressed The System Settings menu appears 3 Move the W T button to select System and press the button 4 Move the W T button to select Demonstration and press the button 5 Move the W T button to set the desired setting and press the OK button Off Cancel the Demonstration function 5 Minutes S...

Page 98: ... Settings mode and press the OK button The system is automatically converted into the selected mode in two seconds even when the OK button is not pressed The System Settings menu appears 3 Move the W T button to select System and press the button 4 Move the W T button to select Start up and press the button 5 Move the W T button to set the desired setting and press the OK button Video Mode The CAM...

Page 99: ...AM The Video Record screen appears 2 Move POWER MODE Selector down again to select System Settings mode and press the OK button The system is automatically converted into the System Settings mode in two seconds even when the OK button is not pressed The System Settings menu appears 3 Move the W T button to select System and press the button 4 Move the W T button to select File No and press the but...

Page 100: ...ings mode and press the OK button The system is automatically converted into the selected mode in two seconds even when the OK button is not pressed The System Settings menu appears 3 Move the W T button to select System and press the button 4 Move the W T button to select Beep Sound and press the button 5 Move the W T button to select the desired setting and press the OK button On Turn the beep s...

Page 101: ...down again to select System Settings mode and press the OK button The system is automatically converted into the selected mode in two seconds even when the OK button is not pressed The System Settings menu appears 3 Move the W T button to select System and press the button 4 Move the W T button to select Version Info and press the OK button The firmware version of the CAM is displayed 5 Press the ...

Page 102: ...rs 2 Move POWER MODE Selector down again to select System Settings mode and press the OK button The system is automatically converted into the selected mode in two seconds even when the OK button is not pressed The System Settings menu appears 3 Move the W T button to select Memory and press the button If a Memory Card is not inserted you cannot select External 4 Move the W T button to select Stor...

Page 103: ...DE Selector down again to select System Settings mode and press the OK button The system is automatically converted into the selected mode in two seconds even when the OK button is not pressed The System Settings menu appears 3 Move the W T button to select Memory and press the button 4 Move the W T button to select Format and press the button If a Memory Card is not inserted you cannot select Ext...

Page 104: ...ctor down to turn on the CAM The Video Record screen appears 2 Move POWER MODE Selector down again to select System Settings mode and press the OK button The system is automatically converted into the selected mode in two seconds even when the OK button is not pressed The System Settings menu appears 3 Move the W T button to select Memory and press the button 4 Move the W T button to select Memory...

Page 105: ...tem Memory Memory System Display Memory Display Language English System System Settings System Settings System Settings Date Time Date Time System System Memory Memory System Display Memory Display Language Nederlands System System Settings System Settings System Settings You can select the desired language to display the menu screen and the messages 1 Move POWER MODE Selector down to turn on the ...

Page 106: ...chivos a un PC ENGLISH ESPAÑOL Setting the CAM Using USB Mode Ajuste de la CAM Utilización del modo USB 106 1 Connect the CAM to the PC with the USB cable 2 Move POWER MODE Selector down to turn on the CAM USB mode screen appears automatically 3 Move the W T button to select Mass Storage and press the OK button Windows 98SE doesn t recognize the USB device automatically You may install the USB Dri...

Page 107: ...t Conexión USB a una PC Entorno del sistema El USB de alta velocidad no se garantiza excepto en Microsoft Windows o Apple Mac OS X o el controlador suministrado Windows 98SE ME USB a toda velocidad Windows 2000 superior a Service Pack 4 USB de alta velocidad Windows XP superior a Service Pack 1 USB de alta velocidad Mac OS X superior a 10 3 USB de alta velocidad Pentium III 600MHz Windows 98SE ME ...

Page 108: ...the PC Utilización de PC Cam Puede utilizar esta CAM como una cámara de PC para chat con vídeo videoconferencia y otras aplicaciones de cámara en PC Para utilizar la función PC Camera deben instalarse en la PC los programas DV Driver Video Codec y DirectX 9 0 Consulte la página 116 1 Conecte la CAM a un PC utilizando el cable USB 2 Baje el Selector POWER MODE para encender la CAM Aparece automátic...

Page 109: ...g USB Mode Ajuste de la CAM Utilización del modo USB 109 Connecting the CAM to a Printer By connecting the CAM to printers with PictBridge support sold separately you can send images from the internal memory or external memory SD MMC Memory Stick or Memory Stick Pro directly to the printer with a few simple operations 1 Connect the CAM to a printer with PictBridge support with the USB cable 2 Move...

Page 110: ...with DPOF Files 120 Miscellaneous Information Conexión de la CAM con otros dispositivos 111 Conexión de la CAM a un TV 111 Conexión de la CAM a una videocasetera 112 Copia de archivos de vídeo en un videocasete 113 Grabación de contenido sin descodificar desde otros dispositivos digitales 114 Conexión de la CAM a un PC utilizando el cable USB 115 Instalación de programas 116 Instalación de DV Medi...

Page 111: ...nd also view the photo files on TV screen Conexión de la CAM a una TV Puede conectar la CAM directamente a un equipo de TV para reproducir archivos de vídeo en una pantalla de TV 1 Conecte el cable de audio vídeo a la toma de audífonos y AV de la CAM 2 Conecte el cable de vídeo audio al terminal de entrada externa del equipo de TV haciendo coincidir los colores de los terminales 3 Baje el Selector...

Page 112: ... a una videocasetera Puede conectar la CAM a una videocasetera para copiar los archivos grabados en la videocasete 1 Conecte el cable de audio vídeo a la toma de audífonos y AV de la CAM 2 Conecte el cable de vídeo audio al terminal de entrada externa de la videocasetera haciendo coincidir los colores de los terminales 3 Conecte el cable de audio vídeo a la salida de línea de vídeo y a la entrada ...

Page 113: ...hout OSD indicators Copying Video files to a VCR Tape Puede copiar los archivos grabados en un videocasete vacío Conecte la CAM a un videocasete utilizando el cable de audio vídeo antes de grabar Consulte la página 112 1 Inserte el videocasete vacío y seleccione la entrada de línea en la videocasetera 2 Baje el Selector POWER MODE para encender la CAM Aparece la pantalla Video Record 3 Presione el...

Page 114: ...sin descodificar desde otros dispositivos digitales ENGLISH ESPAÑOL Miscellaneous Information Connecting the CAM with other Devices Información diversa Conexión de la CAM con otros dispositivos 114 You can connect other external digital devices to the CAM to record non copyrighted contents 1 Connect the Audio Video cable to the Earphone AV jack of the CAM 2 Connect the Audio Video cable to the ext...

Page 115: ...C and then transfer the file back to the CAM again the CAM will not play it back Connecting the CAM to a PC using the USB cable Puede conectar la CAM a un PC que admita conexiones USB Utilice el cable USB que se suministra para la conexión al PC 1 Conecte el cable USB que se facilita al puerto USB de la CAM 2 Conecte el otro lado del cable USB al puerto USB de la PC 3 Baje el Selector POWER MODE p...

Page 116: ...ia Pro 1 0 Tiene que instalar DV Media Pro 1 0 para reproducir archivos de vídeo grabados en la CAM o los datos transferidos mediante cable USB en su PC Windows 1 Encienda la PC Salga de todas las aplicaciones 2 Inserte el CD del programa en la unidad de CD ROM Aparece automáticamente la pantalla de configuración Si no aparece presione el botón Start situado en la parte inferior izquierda de la pa...

Page 117: ...PC connect the USB cable to USB Port on the rear panel of the PC Interfaz USB para transferencia de datos Conecte la CAM y la PC utilizando el cable USB que se facilita Puede grabar el archivo de vídeo en el PC en tiempo real La función de transferencia USB se puede utilizar cuando los programas DV Driver Video Codec DirectX 9 0 ya están instalados en la PC Consulte la página 116 1 Encienda la PC ...

Page 118: ...ioned on page 107 may not operate in your system environment Desconexión de la conexión USB Tras completar la transferencia de datos debe desconectar el cable de la forma siguiente 1 Seleccione el icono del disco extraíble y haga clic en el botón derecho del mouse para seleccionar Quitar hardware con seguridad 2 Seleccione Detener y desconecte el cable USB cuando desaparezca la pantalla emergente ...

Page 119: ...dge puede controlar la impresora directamente a través de la CAM para imprimir imágenes almacenadas Para la impresión directa de imágenes almacenadas utilizando la función PictBridge debe conectar la CAM a una impresora PictBridge utilizando un cable USB 1 Conecte la CAM a una impresora PictBridge utilizando el cable USB 2 Baje el Selector POWER MODE para encender la CAM Aparece automáticamente la...

Page 120: ... JPEG file to the PC directly and print it Impresión de fotos con los archivos DPOF DPOF Digital Printing Order Format define la información de impresión para las fotos específicas y el número de cada foto en la tarjeta de memoria Puede fácilmente realizar impresiones en una impresora compatible con DPOF o solicitar copias Impresión de archivos DPOF de la tarjeta de memoria 1 Defina la información...

Page 121: ...spués de utilizar la CAM Para una conservación correcta de la CAM siga estos pasos Apague la CAM Retire la batería consulte la página 19 Retire la tarjeta de memoria consulte la página 33 Para evitar daños en la pantalla LCD no aplique fuerza excesiva en sus partes móviles No deje caer ni golpee la CAM Para el uso prolongado de la CAM evite utilizar lugares expuestos a humedad excesiva o al polvo ...

Page 122: ... date and other settings again Using the Built in Rechargeable Battery Limpieza de la carcasa Limpieza exterior de la CAM Para limpiar el exterior utilice un paño seco suave Limpie la carcasa con suavidad No aplique fuerza excesiva al limpiar frote con suavidad la superficie No debe presionarse la superficie del monitor LCD Utilice un paño seco y suave para limpiar la superficie Para limpiar el le...

Page 123: ...oduct be sure to remove the battery when no charge remains Información sobre la batería El rendimiento de la batería disminuye cuando la temperatura ambiente sea igual o inferior a los 10 C 50 F y acorta la vida de la batería En ese caso lleve a cabo una de las acciones que se incluyen a continuación con el fin de alargar la vida útil de la batería Coloque la batería en el bolsillo para calentarla...

Page 124: ...orea Taiwan United States of America etc Utilización de la CAM en el extranjero Los sistemas de electricidad y de color pueden variar de un país a otro Antes de usar la CAM en el extranjero compruebe lo siguiente Fuentes de alimentación Esta CAM se puede utilizar en cualquier país o región con el adaptador de CA que se suministra con ella siempre que el rango de entrada de corriente sea de 100V a ...

Page 125: ...a Pantalla de autodiagnósticos Si las siguientes instrucciones no le permiten solucionar el problema póngase en contacto con el distribuidor más cercano o con el centro de servicio técnico o personal autorizado de Samsung No hay espacio suficiente para guardar archivos El archivo está dañado Papel insuficiente Tinta baja El archivo es erróneo El error se produce al transferir datos Modo de ahorro ...

Page 126: ...o es natural El zoom digital no funciona Los archivos almacenados en la tarjeta de memoria no se pueden borrar Las imágenes del monitor LCD aparecen oscuras La parte posterior del monitor LCD está caliente Reproducir rebobinar y avance rápido no funciona La tarjeta de memoria no se puede reproducir Modo Foto No se captura ninguna imagen al presionar totalmente El foco incorporado se enciende No se...

Page 127: ...Normal Focus AF MF Record Mode TV PC Line In Out Out In EIS On Off Close Multi Select Close Video 1 Capture 2 View Delete Selected All Cancel Lock Selected All Cancel Copy To Selected All Cancel DPOF 3 Settings Size 2400 1800 1600 1200 1024 768 640 480 Flash Auto On Off Focus AF MF 1 Play Delete Selected All Cancel Program AE Auto Sports Spotlight Sand Snow HS Shutter Effect Off Art Mosaic Sepia N...

Page 128: ...Español Français Português Deutsch Italiano Nederlands Polski PÛÒÒÍËÈ Iran Arab Magyar ìÍ ªÌÒ Í Svenska Date Copies Print Next Photo Previous Photo Off On 1 Record 2 Play Delete Selected All Cancel Lock Selected All Cancel Copy To Selected All Cancel 1 Delete Selected All Cancel 3 Lock Selected All Cancel 2 Copy To Selected All Cancel Voice Recorder File Browser System Settings USB Mode 1 Display ...

Page 129: ...onal Stereo condenser microphone Nombre del modelo Sistema de CAM Sistema de grabación de vídeo Sistema fotográfico MP3 Voz Memoria Tiempo de grabación reproducción Píxeles de CCD Índice de Zoom Longitud focal Iluminación mínima Pantalla LCD Conectores USB Conector de CAM Común Audífono Conector Entrada salida de AV Conector de entrada de CC Generales Temperatura de funcionamiento Humedad en funci...

Page 130: ...seño están sujetos a cambios sin previo aviso AC 100 240V 50 60Hz DC 4 8V 1 0A 0 C 40 C 32 F 104 F 70mm x 30mm x 42mm 2 8inch x 1 2inch x 1 6inch 104g Including DC cable Adaptador de CA Requisitos de alimentación Salida de CC Temperatura de funcionamiento Dimensiones Peso 100 240 V de CA 50 60 Hz 4 8 V de CA 1 0 A 0 C 40 C 32 F 104 F 70 mm x 30 mm x 42 mm 104 g Incluido el cable de CC 00906E M2100...

Page 131: ...4 Memory Type 32 MENU button 14 MF Manual Focus 49 68 Multi Selection 43 65 A Acercamiento y alejamiento de las imágenes 37 59 AF Enfoque automático 49 68 Apagado automático 96 B Batería de polímero de litio 13 Balance de blanco 51 69 BLC 53 70 Botón de funciones 26 Botón DISPLAY 27 Botón MENU 14 Brillo de LCD 90 C Cable USB 13 Captura 58 Color de LCD 91 Cómo repetir la reproducción 75 Control aut...

Page 132: ... 51 69 Z Zooming In and Out 37 59 L Language 105 Limpieza y mantenimiento de la CAM 121 124 M MF Enfoque manual 49 68 Modo de inicio 98 Modo USB 106 109 O Opción PB 44 OSD 16 17 18 P PictBridge 119 Program AE 52 R Reproducción aleatoria 79 Reiniciar 23 S Selección múltiple 43 65 Selector POWER MODE 14 Solución de problemas 125 126 Sonido Beep 100 T Tarjeta de memoria 33 Tiempo 92 Tipo de almacenam...

Page 133: ...msung com latin ITALIA 199 153 153 www samsung com it SPAIN 902 10 11 30 www samsung com es Póngase en contacto con SAMSUNG WORLD WIDE Si tiene algún comentario o pregunta en relación con los productos de Samsung póngase en contacto con el Centro de atención al cliente de SAMSUNG U S A 1 800 SAMSUNG 726 7864 www samsung com U K 0870 242 0303 www samsung com uk FRANCE 08 25 08 65 65 0 15 Min www sa...

Reviews: