


Please read this user’s guide before installing,
setting up and using your new product
www.radioshack.com
mixer user’s guide quick start guide
Thank you for purchasing your 4-Channel Audio Mixer from
RadioShack.
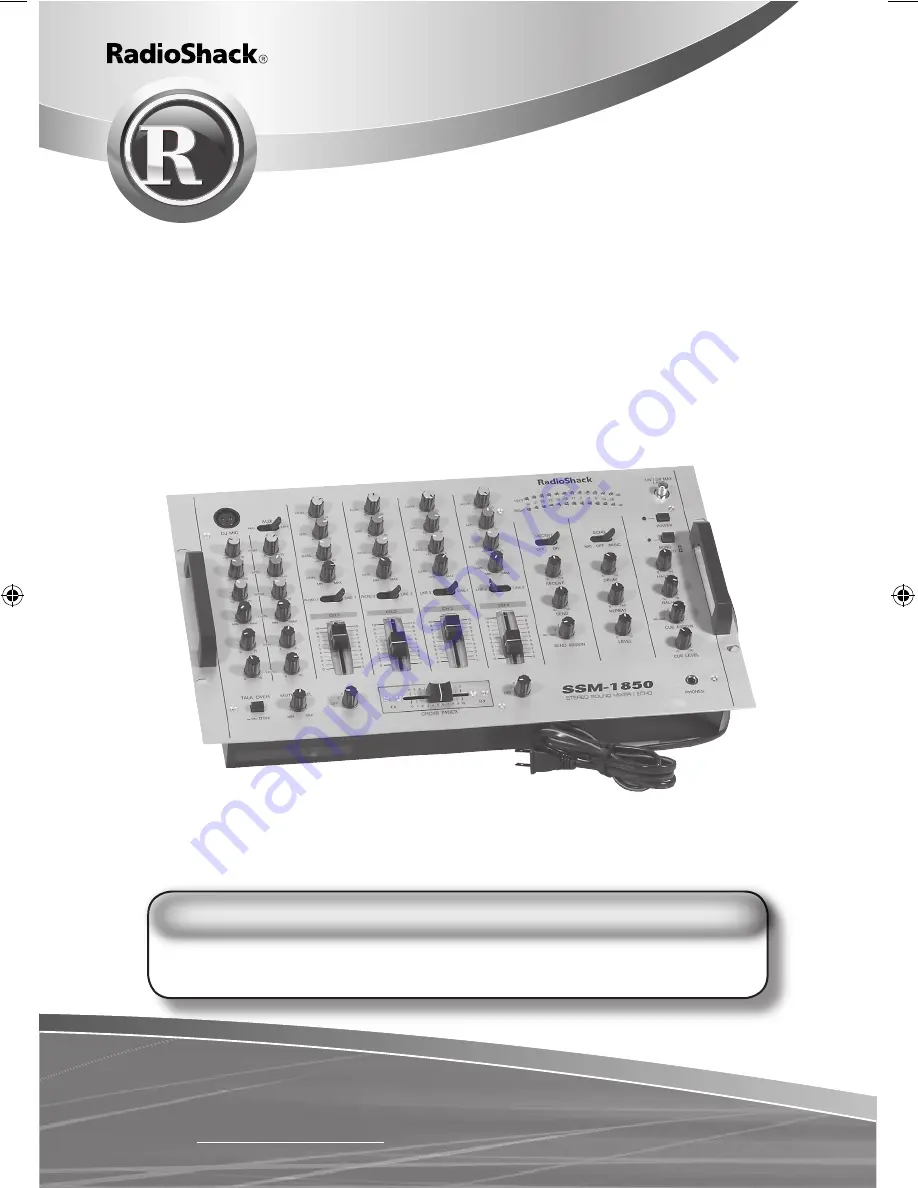
what’s included
32-2058
4-Channel Audio Mixer
with 3 Band EQ Controls & Echo
Your RadioShack 4-Channel Audio Mixer with 3 Band EQ
Controls & Echo is perfect for mixing sound from multiple
playback sources such as a microphone, tuner, CD player,
turntable, or the audio output from a VCR. It is ruggedly
constructed for home or professional use. Its volume
controls let you adjust sound for playing through your
speaker system or for recording.
Summary of Contents for 32-2058
Page 23: ...23 Beyond the Basics...


