background image

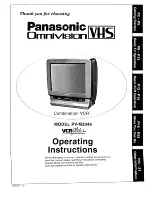
Cat. No. 16-420

OWNER’S MANUAL

Please read before using this equipment.

Model 28 9" Color TV

with Built-In VHS VCR

16-420.fm  Page 1  Tuesday, July 20, 1999  11:32 AM

Summary of Contents for 28

Page 1: ...Cat No 16 420 OWNER S MANUAL Please read before using this equipment Model 28 9 Color TV with Built In VHS VCR 16 420 fm Page 1 Tuesday July 20 1999 11 32 AM...

Page 2: ...ou select and return to a specific point on the tape Your RadioShack Model 28 9 Color TV with Built In VHS VCR combines a versatile color TV monitor and a VCR in one space saving cab inet The supplied...

Page 3: ...result in fines and or imprisonment Note how ever that in the United States it is not a violation of U S copyright laws for a consumer to record a broadcast television program for private in home vie...

Page 4: ...or rack unless proper venti lation is provided or the manufacturer s instruc tions have been adhered to 10 Power Sources This TV VCR should be operated only from the type of power source indicated on...

Page 5: ...om the wall outlet and refer servicing to qualified service personnel under the following conditions When the power supply cord or plug is damaged or frayed a If liquid has been spilled or objects hav...

Page 6: ...or circuits contact with them might be fatal SERVICE 1 Except as noted in this owner s manual do not attempt to service this TV VCR your self Instead unplug it and contact a quali fied service technic...

Page 7: ...e Control 16 Setting the On Screen Programming Language 17 Changing the On Screen Programming Language 17 Changing the Channels Stored in Memory 18 Adding Erasing Channels 18 Selecting the Input Signa...

Page 8: ...Recording Timer Numbers 1 7 30 Setting the Automatic Timer 31 Checking Changing Automatic Timers 32 Clearing an Automatic Timer 33 Today Timer Recording Timer Number 8 33 Setting the Today Timer 33 C...

Page 9: ...etropolitan areas AC Power Cord lets you power the Model 28 from standard AC power DC Power Cord lets you power the Model 28 from your vehicle s battery 300 to 75 ohm Matching Transformer lets you con...

Page 10: ...to select channels watch TV using the Model 28 s tuner adjust the picture mute the sound use the channel return feature and view an external device Basic VCR Operation on Page 22 explains how to load...

Page 11: ...power cord AC or DC until you complete all other connections CHOOSING A LOCATION Choose a location for your Model 28 where Air flows freely on all sides of the Model 28 The power cord AC or DC is not...

Page 12: ...Code that provides guide lines for proper grounding and in particular specifies that the cable ground shall be connect ed to the grounding system of the building as close to the point of cable entry...

Page 13: ...N jacks on the back of the Model 28 or the VIDEO INPUT and AUDIO INPUT jacks on the front of the Model 28 Note If you connect external devices to both sets of audio video input jacks on your Model 28...

Page 14: ...ted To use the Model 28 with AC power disconnect the DC power cord from the Model 28 The fuse supplied with the DC power cord helps protect your vehicle s electri cal system and the Model 28 For infor...

Page 15: ...on the Model 28 s front panel In addition the number buttons let you directly select channels and menu options VIDEO AUDIO POWER REWIND STOP EJECT PLAY F FWD REC OTR VOLUME CHANNEL MONITOR REC r q L...

Page 16: ...y or burn them 1 Press down on the battery compartment cover and slide it in the direction of the arrow to remove it 2 Insert fresh batteries into the compart ment as indicated by the polarity symbols...

Page 17: ...e channels TV or CATV then it tunes to the lowest stored channel num ber 4 Repeatedly press CH or CH to review the saved channels Notes If a channel you wanted was not stored you can add the channel I...

Page 18: ...s stored follow these steps to add or erase it 1 Press CH or CH or use the number keys on the remote control to enter the channel number you want to add or erase Note Precede a single digit number wit...

Page 19: ...r example 01 02 etc If you enter an incorrect number repeat edly press ADD DELETE to move back or SELECT to move forward to the incorrect number then enter the correct number When you enter the month...

Page 20: ...and third digits in the channel number VIEWING TV Follow these steps to view a broadcast using the TV 1 If necessary press POWER to turn on the Model 28 2 If necessary select the desired input signal...

Page 21: ...or VOL USING CHANNEL RETURN The Model 28 s channel return function lets you quickly switch between channels you tuned by using the remote control s number buttons Repeatedly press CHANNEL RETURN to sw...

Page 22: ...ust the volume Note To adjust the contrast brightness color tint or sharpness see Adjusting the Picture on Page 20 4 To stop playback before it automatically stops at the end of the tape press STOP EJ...

Page 23: ...advance the picture one frame at a time repeatedly press PAUSE STILL To return to the normal playback speed press PLAY Notes During freeze frame the picture quality is lower than during normal playba...

Page 24: ...icator appears on the TV screen When you change the channel the new channel number appears on the TV screen for about 5 seconds Note If you play back a poor quality worn or damaged tape the function i...

Page 25: ...e you fast forward or rewind through a blank section on the tape This is normal To reset the counter to 0 00 00 press ADD DELETE on the remote control Using Counter Return Follow these steps to easily...

Page 26: ...searches the tape in the direction you specified and stops when it reaches the time you speci fied in Step 3 The search time displayed under TIME SEARCH on the TV screen counts up or down as the Mode...

Page 27: ...apes such as tapes that are played often like rental videos Note When RENTAL PLAY is ON the image itself might not be as sharp 1 Press MENU The main menu appears on the TV screen 2 Press 7 on the remo...

Page 28: ...Model 28 plays back tapes at the speed in which they were recorded Tape Selection The quality of tape you use greatly affects record playback quality and the life of the Model 28 Use only video casset...

Page 29: ...PAUSE STILL to tempo rarily pause recording during commer cials for example To resume recording press PAUSE STILL again or press REC When you pause the Model 28 while recording it displays five n mark...

Page 30: ...ing is in progress During OTR recording the remaining recording time is displayed on the TV screen for 5 seconds When the recording stop time is reached during OTR recording the Model 28 turns off To...

Page 31: ...out each timer program you set PROG program number Note If you have not set any program numbers all program numbers flash If you already set any program numbers only the empty program numbers flash DA...

Page 32: ...28 The TIMER REC indicator turns on to indicate that the Model 28 is in the timer standby mode Important You can turn on and operate the Model 28 manually prior to the set recording times but the Mod...

Page 33: ...28 s today timer stored in program timer number 8 lets you quickly program the Model 28 to start and stop recording within the next 24 hours Note You cannot set a today timer while you are recording a...

Page 34: ...n on and operate the Model 28 manually prior to the set start time but the Model 28 makes a today timer recording only if the power is off at the set start time Be sure the TIMER REC indicator turns o...

Page 35: ...utomatic timer program If automatic timers overlap the one that starts first has priority When the first pro gram ends the Model 28 switches to record the remainder of the second pro gram The TIMER RE...

Page 36: ...EL to select one channel higher than the highest programmed channel or one channel lower than the lowest programmed channel AUX appears on the Model 28 s TV screen 4 Repeatedly press SPEED on the remo...

Page 37: ...Check the clock and reset it if necessary Tape not inserted or erase protection tab missing Insert a tape or place a piece of strong tape over the erase pro tection tab hole See Erase Protection on Pa...

Page 38: ...ay back to OFF See Using Au tomatic Repeat Playback on Page 26 Cannot record from the front back input jacks Connections are incorrect Use shielded audio video ca bles with phono type connec tors to c...

Page 39: ...he remote control Al ways remove old or weak batteries They can leak chemicals that can damage elec tronic circuits Handle the Model 28 gently and carefully Dropping it can damage circuit boards and c...

Page 40: ...wn If it is follow these steps to replace it with a 5 amp 11 4 x 1 4 fast acting fuse RadioShack Cat No 270 1011 not supplied Caution Using a fuse that does not meet these ratings or defeating the fus...

Page 41: ...boxes and store them in a cool dry dust free environment Store the cassettes on end not on their sides This prevents improper settling of the cassette s spools Note Tape can become wound too tightly a...

Page 42: ...connector Audio Input Output Phono connector Earphone 1 8 inch plug 3 5 mm Power Requirements AC 120V 60 Hz DC 12V Power Consumption AC 70 Watts DC 65 Watts Dimensions 121 4 x 1115 16 x 12 7 8 Inches...

Page 43: ...43 NOTES 16 420 fm Page 43 Tuesday July 20 1999 11 32 AM...

Page 44: ...ack store War ranty does not cover transportation costs Nor does it cover a product subjected to mis use or accidental damage EXCEPT AS PROVIDED HEREIN RADIOSHACK MAKES NO EXPRESS WARRAN TIES AND ANY...

Reviews: