Radiant Metric Series, Installation Manual
The Radiant Pools Metric Series offers top-of-the-line swimming pools for your backyard oasis. For easy set-up, make sure to download the Quick Start Manual for step-by-step instructions. This manual is available for free download from manualshive.com, ensuring a stress-free pool assembly experience. Dive into luxury with Radiant Pools.
Share
Download


Reviews:
No comments
Related manuals for Metric Series

SHER80
Brand: Jacuzzi Pages: 4
ProLED FLCN
Brand: Halco Pages: 8

DP30110
Brand: Intex Pages: 6

Vortex 3
Brand: Zodiac Pages: 16

Baracuda G3
Brand: Zodiac Pages: 20
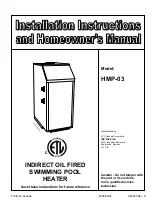
ICP HMP-03
Brand: UTC Pages: 13

Freestyle Pool
Brand: Freestyle Slides Pages: 3

Dolphin Supreme M3
Brand: Maytronics Pages: 21

30466
Brand: TIP Pages: 72

MAGNUS RTR
Brand: Piscine Solide Pages: 40

Aqua compact Series
Brand: Pahlen Pages: 7

EcoVISE
Brand: Pahlen Pages: 24

TOP
Brand: Latitude Pages: 12

CHEMIGEM DM52
Brand: Rainbow Pool Products Pages: 33

POWERCLEAN
Brand: laguna Pages: 2

TornaX
Brand: Zodiac Pages: 18

RP2100 ASME R185B
Brand: Raypak Pages: 7

Robo-Kleen PLUS
Brand: SmartPool Pages: 16


