Polaroid T737 - Digital Camera - Compact, Руководство пользователя
Компактная цифровая камера Polaroid T737 - отличный выбор для любителей фотографий. Скачайте бесплатное руководство по эксплуатации с нашего веб-сайта manualshive.com и начните создавать потрясающие снимки прямо сейчас. Не упустите возможность овладеть всеми функциями этой удивительной камеры!
Поделиться
Скачать


Отзывы:
Нет отзывов
Похожие инструкции для T737 - Digital Camera - Compact

EF35mm f/1.4L II USM
Бренд: Canon Страницы: 2

Digital IXUS 980 IS
Бренд: Canon Страницы: 36

EF LENS TS-E24MM F/3.5L
Бренд: Canon Страницы: 19

EF24-105MM
Бренд: Canon Страницы: 14

1236B001 - EOS Digital Rebel XTi Camera SLR
Бренд: Canon Страницы: 2

BL-C20
Бренд: Panasonic Страницы: 18

FL 50 - Hot-shoe clip-on Flash
Бренд: Olympus Страницы: 18

Backup Camera
Бренд: Yada Страницы: 20

CH-300
Бренд: CammSys Страницы: 37

BC 40
Бренд: Garmin Страницы: 8

XDS-2288
Бренд: IAdea Страницы: 9

PY0015
Бренд: Peiying Страницы: 44

ICA-W7100
Бренд: Planet Страницы: 10

IPC-100AC-AUS
Бренд: MAGINON Страницы: 64

E-410 - EVOLT Digital Camera SLR
Бренд: Olympus Страницы: 132

DZ-100
Бренд: Olympus Страницы: 79
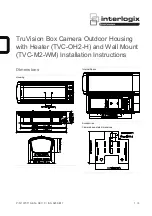
TruVision TVC-M2-WM
Бренд: Interlogix Страницы: 4

MEC-5-FSL-D3200-N85
Бренд: Miles Research Страницы: 8


