

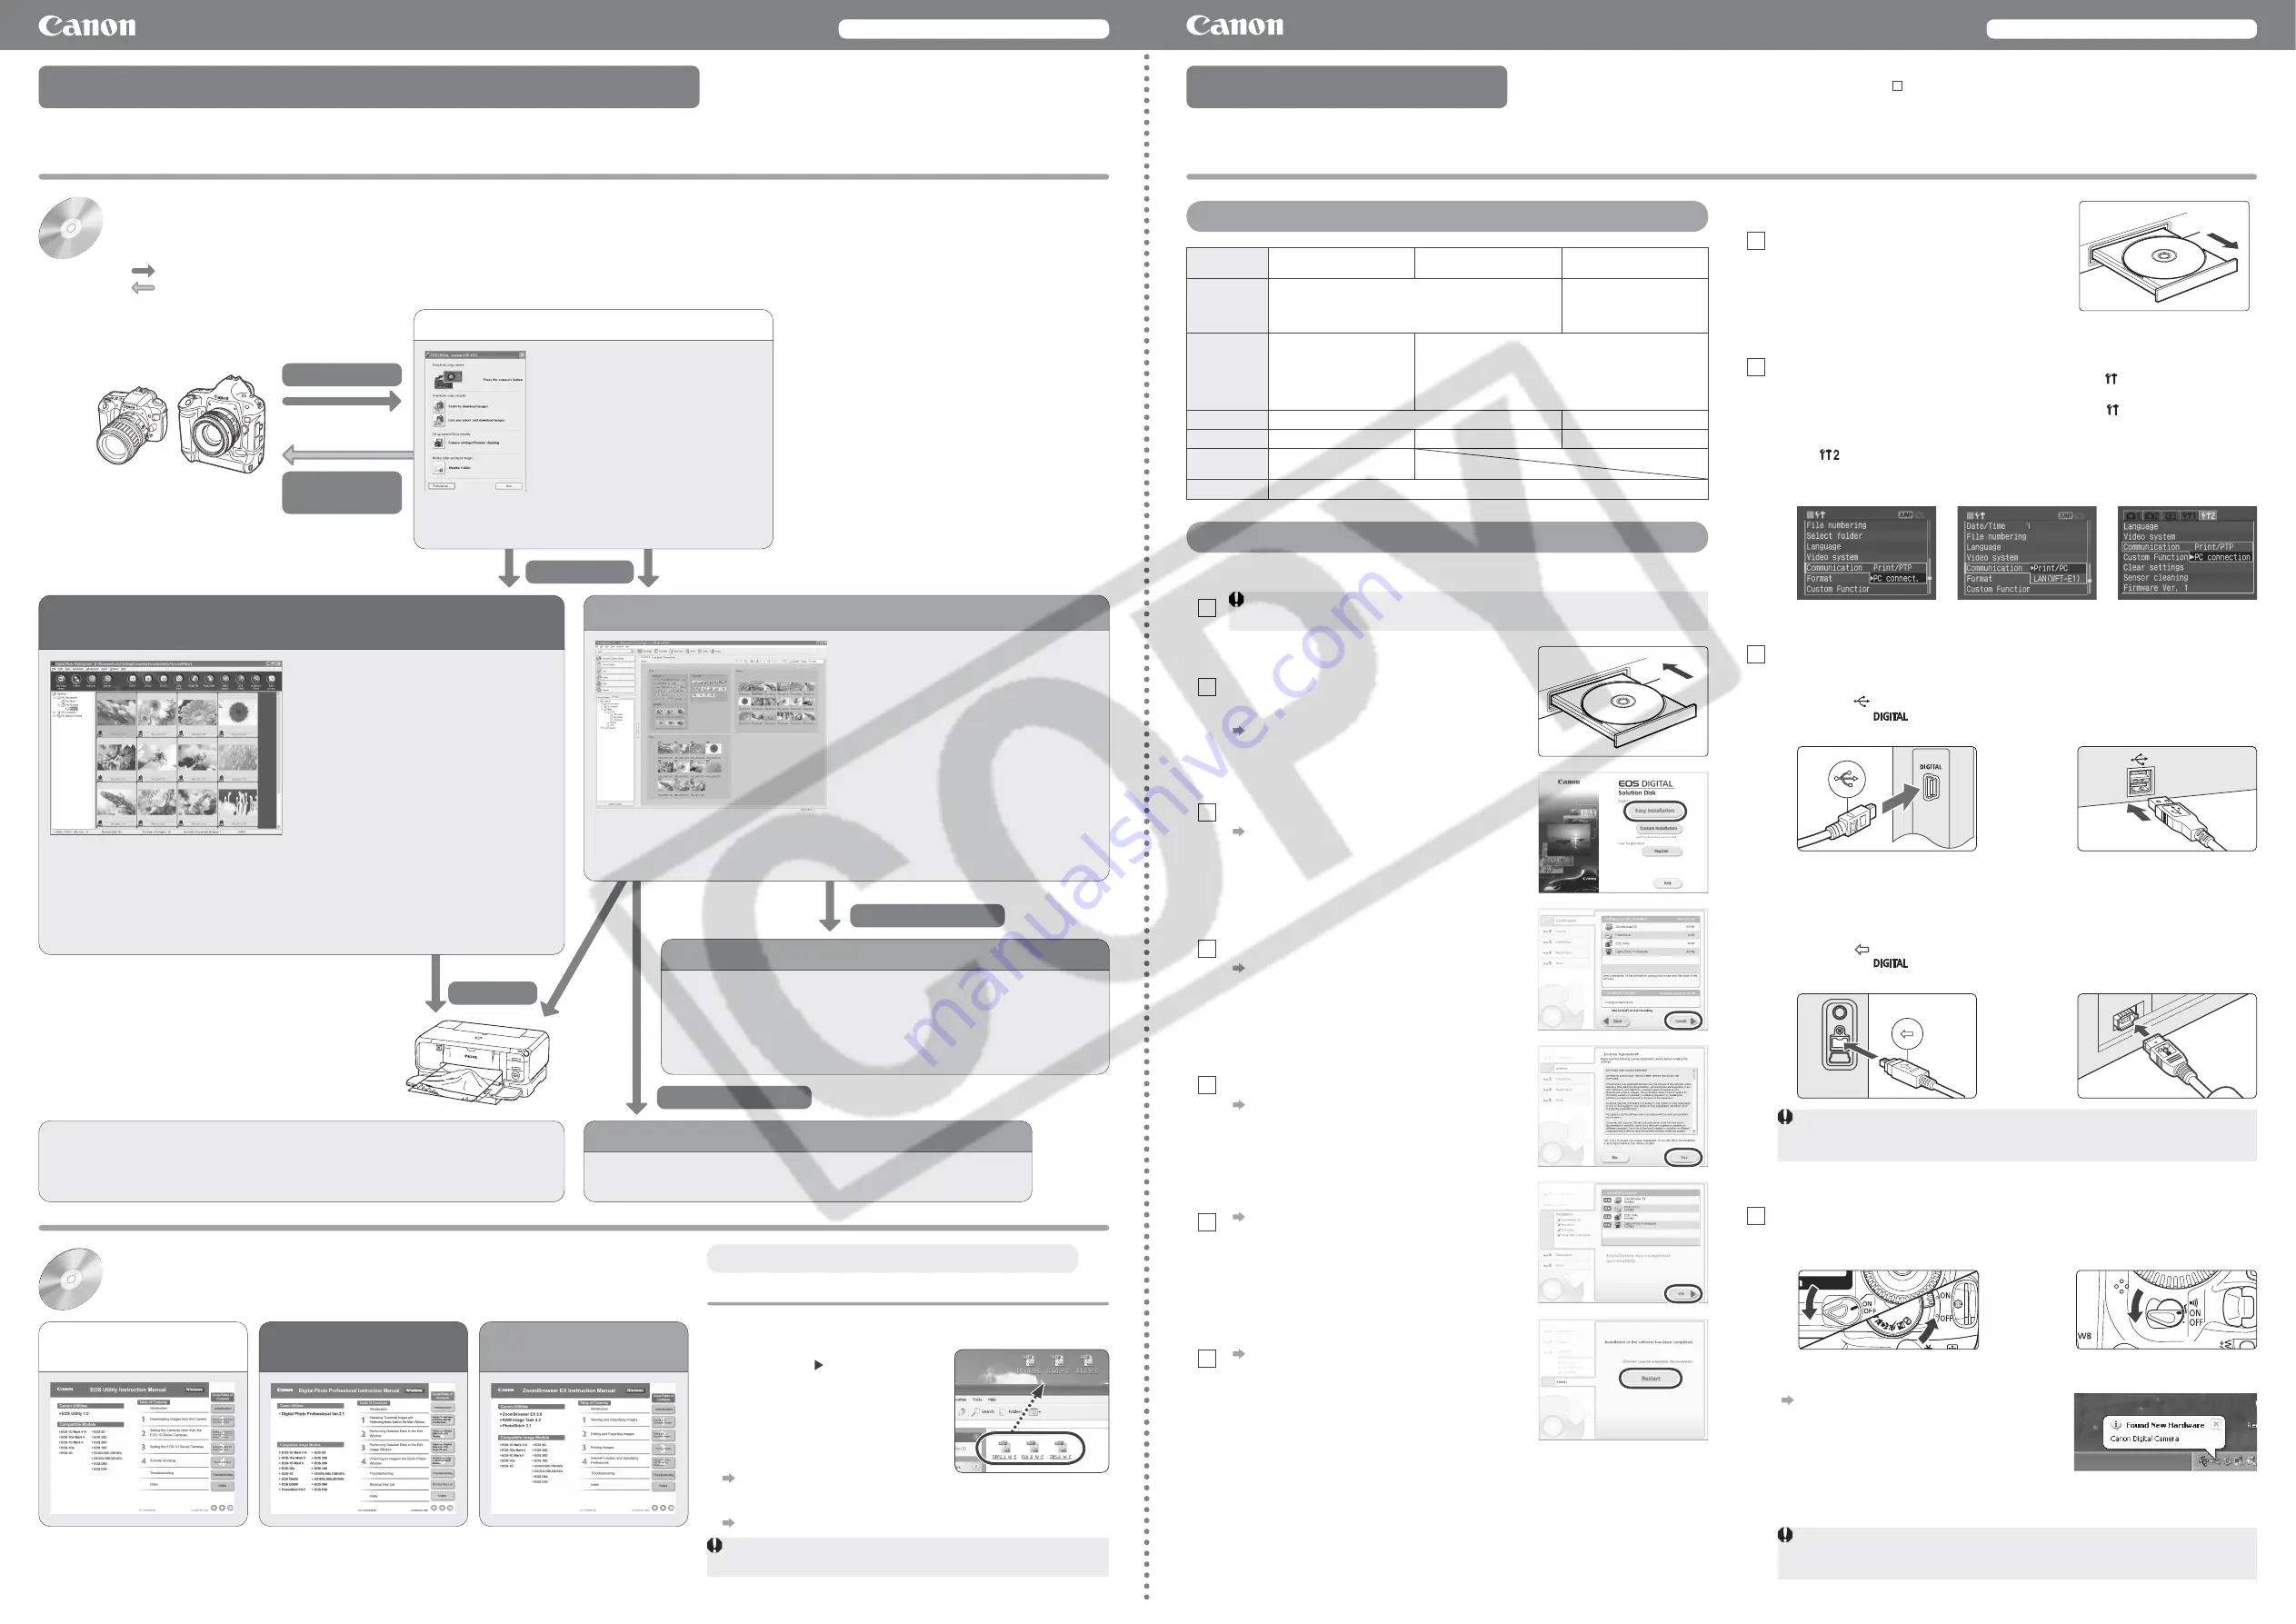
EOS DIGITAL Solution Disk
Contains software for use with Canon digital cameras.
The software on the EOS DIGITAL Solution Disk operates together as shown below.
Shows the shot image fl ow.
Shows the camera control information from the software.
Software Instruction Manual
Contains 3 PDF Software Instruction Manuals.
1
Insert the Software Instruction Manual (CD) into the CD-ROM drive of your
computer.
2
Open the CD.
Click
[Start]
[My Computer]
(in
versions other than Windows XP,
double-click
[My Computer]
on the
desktop) and then double-click the
CD-ROM drive into which you have
inserted the CD.
3
Drag and drop the PDF files in the
[English]
folder to the desktop.
The PDF files will be copied to the
desktop.
4
Double-click the PDF fi les.
Adobe Reader starts and the Instruction Manuals are displayed.
Copy the PDF Instruction Manuals contained on the CD to your computer.
Installing the Software
1
Check that the camera is not connected to the computer.
2
Start up your computer and insert
the EOS DIGITAL Solution Disk
(CD).
The Installer panel appears.
Windows Software Guide
Windows Software Guide
System Requirements
3
Click the [Easy Installation]
button.
The confirmation window for the software to be
installed appears.
Exit all programs that are running when a warning is
displayed for any other program, and click the
[OK]
button.
4
Check the details and then click
the [Install] button.
The License Agreement window appears.
6
Click the [OK] button.
The installation complete window appears.
7
Click the [Restart] button.
Your computer restarts.
CT1-1010-00
1
© CANON INC. 2006 PRINTED IN JAPAN
Never connect the camera to your computer before you install the software. The
software will not be installed correctly. Connect the camera to your computer in step 10.
See the PDF EOS Utility Instruction Manual for information on the following procedures.
8
Once the computer has restarted,
remove the CD.
9
Set the camera’s [Communication].
This setting is only for EOS 5D, EOS 30D and EOS DIGITAL REBEL XT/350D DIGITAL.
With EOS 5D, set the camera’s power switch to <ON>, set
[
Communication]
in menu
to
[PC connect.]
and then set the camera’s power switch to <OFF>.
With EOS 30D, set the camera’s power switch to <ON>, set
[
Communication]
in menu
to
[Print/PC]
and then set the camera’s power switch to <OFF>.
With EOS DIGITAL REBEL XT/350D DIGITAL, set the camera’s power switch to <ON>,
set
[
Communication]
in menu to
[PC connection]
and then set the camera’s power
switch to <OFF>.
10
Connect the camera to your computer.
Connection Procedure for EOS 5D, EOS 30D and EOS DIGITAL
REBEL XT/350D DIGITAL
Use the bundled interface cable to connect your camera to your computer.
Face the <
> mark on the plug to the front of the camera and then connect the plug to
the camera’s <
> terminal. (shown on left)
Connect the cable to the USB port on your computer. (shown on right)
Never use the bundled USB interface cable with EOS-1D Mark II N and EOS-1Ds
Mark II. The software cannot communicate correctly with your camera since the
installation cannot be completed correctly.
Connection Procedure for EOS-1D Mark II N and EOS-1Ds Mark II
Use the bundled interface cable for connection with the IEEE1394 port to connect your
camera to your computer.
For cameras supplied with the cable protector, attach the cable protector to the camera
fi rst, then connect the dedicated cable following the steps below.
Face the <
> mark on the plug to the top of the camera and then connect the plug to
the camera’s <
> terminal. (shown on left)
Connect the cable to the IEEE1394 port on your computer. (shown on right)
11
Set the camera’s power switch to <ON> to enable
communication between the camera and the installed
software.
How to turn on EOS DIGITAL
REBEL XT/350D DIGITAL
How to turn on EOS 5D, EOS 30D
Never set the camera’s power switch to <OFF> until the pop-up menu,
[Found
New Hardware]
dialog box, or
[Building driver information database]
dialog box
automatically disappears.
Contents of the CD and Structure of the Software
Installing the Software
Check that your computer complies with the “System Requirements” for the software and then
checkmark the checkboxes in this guide as you follow the installation procedure.
The screens used in the examples are from Windows XP.
If you were unable to successfully install the software or if you connected the camera to your
computer before installing the software, see “Troubleshooting” in EOS Utility Instruction Manual.
Software
EOS Utility, PTP WIA
Driver/PTP TWAIN Driver
Digital Photo Professional
ZoomBrowser EX, RAW
Image Task, PhotoStitch
OS
Windows XP (Home Edition/Professional),
Windows 2000
Windows XP (Home
Edition/Professional),
Windows Me, Windows
2000, Windows 98SE
Computer
PC with one of the above OS
preinstalled and a USB port as
a standard feature or an OHCI-
compliant IEEE1394 port
* Upgraded machines not
supported.
PC with one of the above OS preinstalled
* Upgraded machines not supported.
CPU
750MHz Pentium III or higher
500MHz Pentium or higher
RAM
Minimum 256MB
Minimum 512MB
Minimum 256MB
Interface
USB 1.1 to 2.0 Hi-Speed
or IEEE1394
Display
Screen resolution: 1024 × 768 pixels or more, Color quality: Medium (16 bit) or more
When the pop-up menu as right screen appears
and then disappears automatically, the camera can
communicate with the installed software.
For Windows Me, Windows 2000 and Windows 98SE, a dialog box such as
[Found New
Hardware]
or
[Building driver information database]
may appear. If this is the case,
the camera can communicate with the installed software when the dialog box disappears.
You will need Adobe Reader to view the Instruction Manuals. Install
Adobe Reader if it is not already installed on your computer.
5
Check the details and then click
the [Yes] button.
Installation begins. When installation ends, the
installation complete window appears.
It will take approximately
3
to
6
minutes.
Copying and Displaying the Instruction Manuals
Download image
Transfer image
Camera settings
Remote shooting
Process RAW image
Merge JPEG images
Print image
C o m mu n i c a t e s w i t h t h e c a m e ra t o
download to your computer images saved
on the memory card inside your camera,
and can transfer images to Digital Photo
Professional or ZoomBrowser EX.
You can download multiple images in a
single operation, display images as a list
and download only selected images.
You can set the various settings of the
camera.
Yo u c a n s h o o t p h o t o s r e m o t e l y by
controlling the camera from your computer
and download images to your computer.
EOS Utility (Software for the Camera)
Software recommended if you mainly shoot
JPEG images, and allows a standard workfl ow
from image downloading, viewing, and editing,
through to printing.
You can display and view 3 types of image lists,
display an individual image in enlarged view, or
display images as a slide show.
Images can be easily sorted and classified by
single-operation renaming of multiple files or
with the image organize function.
JPEG images can be edited and then converted
or saved using various functions.
ZoomBrowser EX (Image Viewing and Editing Software)
Software recommended if you mainly shoot RAW
images. Coupled with high-speed display and
processing of RAW images, you can edit RAW
images with a variety of adjustment functions.
You can also display and edit JPEG images.
You can select from 4 different windows, such
as the main window for thumbnail display or the
edit window for an individual enlarged image
display, as needed for viewing images.
You can edit images in a variety of ways, using
functions such as RAW image adjustment
functions that are richer and have a larger
degree of freedom than those of a camera, or
RGB image adjustment functions that allow you
to edit JPEG images.
Digital Photo Professional
(RAW Image Viewing and Editing Software)
You can print one image or arrange and print multiple images on one page.
Together with a Canon printer, you can obtain high quality printing in faithful colors.
Together with EOS Utility, you can download images from your camera and shoot photos
remotely.
Digital Photo Professional is compatible with Color Management System and 5 types of color
space.
Images can be exported using various functions.
You can print one image on one sheet of paper or print an index of multiple images.
You can attach an image to an e-mail and send it.
ZoomBrowser EX is compatible with Color Management System and 2 types of color space.
You can merge JPEG images selected in ZoomBrowser EX to create a
panorama image.
PhotoStitch (Image Merging Software)
RAW Image Task (RAW Image Processing Software)
You can process and display RAW images selected in ZoomBrowser EX and set
the same processing parameters as the camera or change the conditions.
You can convert or save a RAW image as a JPEG or TIFF image, and attach an
ICC profi le.
RAW Image Task is compatible with Color Management System and 2 types of
color space.
Software that controls communication between the camera and the computer. The driver for
your camera is automatically installed. (Windows XP: the driver will not be installed since an
OS function will be used for installing.)
PTP WIA Driver/PTP TWAIN Driver
Digital Photo Professional
Instruction Manual
EOS Utility Instruction Manual
ZoomBrowser EX
Instruction Manual
The EOS DIGITAL Solution Disk (CD) that came with your camera
contains the software for the camera. You can install the software by
inserting the CD in your computer.
The Software Instruction Manual (CD) that came with your camera
contains the Instruction Manuals (PDF format) for the software on the
EOS DIGITAL Solution Disk. You can copy the Instruction Manuals to
your computer by inserting the CD in your computer.
Macintosh users see the reverse side.
Set-up menu of EOS 5D
Set-up menu of EOS 30D
How to turn on EOS-1D Mark II N,
EOS-1Ds Mark II
Macintosh users see the reverse side.
Set-up menu of EOS DIGITAL
REBEL XT/350D DIGITAL


