Overview
Universal Serial Bus (USB) port technology has emerged in
response to the proliferation of external peripheral devices
(keyboards, mice, scanners, digital cameras, removable drives,
etc.), that are increasingly being connected to the latest generation
of PCs. The USB behaves in a similar fashion to conventional bus
ports (i.e., serial, parallel, PS/2), but is much faster, and since it
does not require any IRQs, more devices can be attached to the
system, and the problem of IRQ conflict is eliminated.
The PX-440C is a PC Card 2 port USB 2.0 host. This credit card
sized host is the perfect way to add two USB 2.0 ports to
standard notebook PCs. Installation is quick and easy, simply
slide the PC card into the Type II CardBus slot on your
notebook, and you’re USB ready!
The PX-440C represents the second generation of USB
standards. USB 2.0 technology offers the advantages of
high-speed data throughput, (up to 480Mbps), chainability - the
ability to daisy chain up to 127 USB devices, "Plug and Play",
Hot-Swapping (connection and disconnection) on the fly, and
allows users to take advantage of the USB 2.0 technology on
their current USB 1.1 systems.
With USB 2.0, the latest high-speed peripherals can be connected
externally, eliminating the need to install complicated hardware.
Features
M
Easy Installation
M
Compliant with USB Version 2.0 - transfer speeds of up to
480 Mbps (40 times faster than USB 1.1)
M
Fully Forward and Backward Compatible to USB 1.1
M
Provides Two External USB Type-A Ports
M
Automatically Switches to the Peripheral’s Highest Supported Speed
M
Supports 32-Bit CardBus Type II Slots
M
Improves peripheral performance for: Printers, Scanners, PC
Cameras, Device Storage Units, Broadband Network Connections
M
Compliant with OHCI v1.0a and EHCI v0.95
System Requirements
M
Windows XP, Windows 2000*
M
A Type II CardBus PC Card slot
Note: High USB 2.0 transfer speeds of up to 480 MBps can
only be obtained with USB 2.0 driver support.
Currently, Windows XP has native USB 2.0 support.
Support for other Windows versions will be
forthcoming.
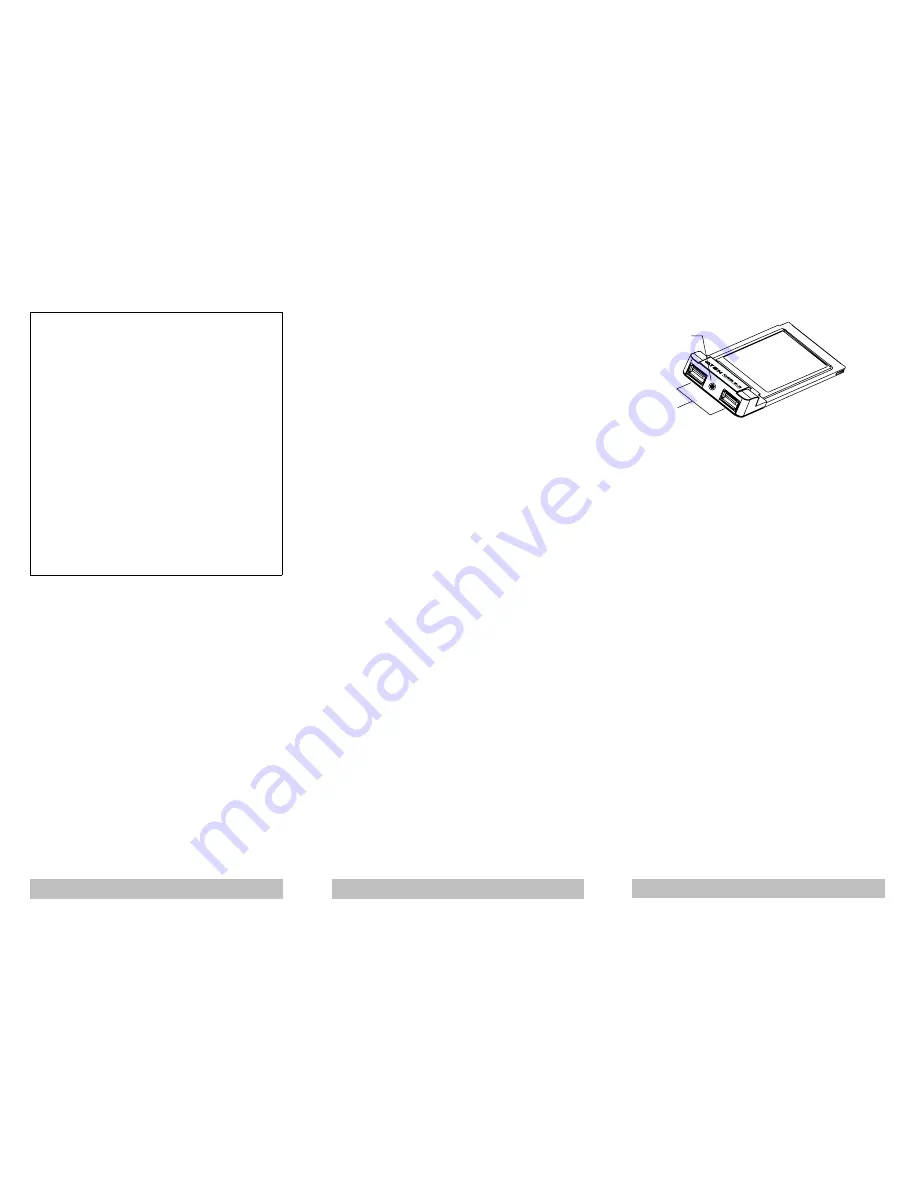
Introduction
1. DC Input Jack
If you choose to use an optional DC Power Adapter (requires
separate purchase), its cable plugs in here
Note: Ordinarily, the hub gets its power from the computer,
but if large, or power hungry peripherals are
connected, this might not be sufficient, and may result
in erratic operation. In this case, a DC Power Adapter
should be used.
2. USB Type A Ports
The cables from your USB peripherals can plug into either
port.
Installation
Windows Driver Installation
1. With your notebook booted up, slide the PX-440C into its Type
II Cardbus slot. Windows detects the PX-440C’s presence and
displays a Found New Hardware message.
2. When the New Hardware Wizard appears, Click on Next to
continue.
3. In the dialog box that comes up, leave the default choice:
Search for a suitable driver for my device...; Click on Next to
continue.
4. In the dialog box that comes up, check Floppy disk drives; put
the driver diskette that came with your card into the floppy
drive; Click on Next to continue.
5. In the confirmation dialog box that comes up, Click on Next to
continue. Files are now copied to your hard disk.
6. After the driver files have been copied to the hard disk, a
dialog box appears to tell you that the installation has
finished. Click on Finish. Windows now reboots.
- 2 -
- 1 -
NOTE: This equipment has been tested and found to comply
with the limits for a Class B digital device pursuant to Subpart
J of Part 15 of FCC Rules. These limits are designed to provide
reasonable protection against harmful interference in a resi-
dential installation. This equipment generates, uses and can
radiate radio frequency energy and, if not installed and used in
accordance with the instructions, may cause harmful interfer-
ence to radio communications. However, there is no guarantee
that interference will not occur in a particular installation. If this
equipment does cause harmful interference to radio or televi-
sion reception, which can be determined by turning the equip-
ment off and on, the user is encouraged to try to correct the
interference by one or more of the following measures:
M
Reorient or relocate the receiving antenna.
M
Increase the separation between the equipment and
receiver.
M
Connect the equipment into an outlet on a circuit different
from that which the receiver is connected.
M
Consult the dealer or an experienced radio/television
technician for help.
- 3 -
2
1