Philips Domestic Appliances and Personal Care
Published by Philips Domestic Appliances and Personal Care
Printed in the Netherlands
© Copyright reserved
Subject to modification
City
Line
Helsinki
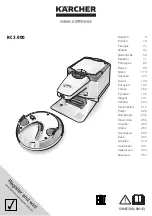
Vacuum
cleaner
FC8408
02/12
PRODUCT INFORMATION
- Electronic controled motor rpm
- Cordwinder build-in with flat cord
- Dustbag-full indicator in dustcover
- This product meets the requirements regarding
interference suppression on radio and TV.
- After the product has been repaired, it should function
properly and has to meet the safety requirements as
officially laid down at this moment.
TECHNICAL INFORMATION
- Maximum air displacement
: 34 l/sec
- Maximum vacuum water column
: 280 cm
- Power consumptio (IEC) 225V
: 1400 W
- Dust storage capacity
: 2 litres
- Cord length (depends on version)
: 6 m
- Filter system
: 6 filters
- Dimensions cleaner
: 37 x 28 x 23 cm
- accessoiries on board
: 4.3 kg
- Noise
: 80 dB
- Colour
: Icicle gold
DISASSEMBLY- AND RE-ASSEMBLY ADVISE
- To open the appliance, first remove the screws A,B,C,D.
- To reach the motor remove the screws E.
- To disassemble the cordwider use Torx screw driver no T10,
which is one of set consisting of :
T20, T15, T10, T9, T8, T7 and T6 = 4822 395 50145.
- First remove the two screws
B
of (item 15) hinge turn +
window. Remove (item 15)
hinge turn + window from (item
3) upper housing by means of a
flat instrument (e.g. screw driver)
as shown (to prevent demage).
The hinge turn + window has
snaps which fits into the upper
housing. Vario / knob turn
(item 10 ) can now be separated
as shown in next drawing.
- Place the knob turn in line with
the adjuster item 10A. Hook
(item 15) hinge turn + window
into the (item 3) upper housing.
Use the 2 screws (item
B
) to
fasten item 15 to item 3. Place
the cover of vario / knob turn
(item 10) in the correct way;
only on one way possible.
REPAIR INSTRUCTION
- Give attention that the contact fingers (item 45) are placed on
the cord-winder shaft in such a way that the pressure point of the
cordwinder knob to the cord winderlever (item 40) is vertical.
- The spare parts have been standardized as much as possible.
- Component configuration on exploded view may differ in case of
specific versions, however, the actual components are distinguished
by means of code numbers.
- Item 1 Cotton dustbag is used in those countries where paper
dustbags are not available
- Item 41 Cord-winder spring unit is provided with a long spring,
both long and short cords can be used in combination with this
spring.
- Cordwinder spring has to be tensioned till maximum minus
approx. 1,5 revolution.
B
B
1
2
4
2
1
3
B
B