Brookstone Rechargeable Hand Vac, User Manual
The Brookstone Rechargeable Hand Vac is a powerful and versatile cleaning tool that is portable and convenient to use. Ensure you get the most out of your device by downloading the User Manual for free from manualshive.com. Learn how to maximize performance and maintain your hand vac with ease.
Share
Download


Reviews:
No comments
Related manuals for Rechargeable Hand Vac

Filtrete FAP02
Brand: 3M Pages: 4

DAP290BAW
Brand: Danby Pages: 28

PurePro Multi Cyclonic Vacuum
Brand: Bissell Pages: 14

POWERLIFTER 2389 Series
Brand: Bissell Pages: 12
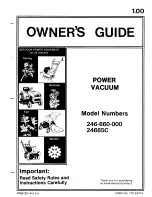
246-660-000
Brand: MTD Pages: 12

VT 7220 2in1 Simply Clean
Brand: ECG Pages: 88

Duovac 18
Brand: Wetrok Pages: 16

PAS 500 B1
Brand: Parkside Pages: 70

2741
Brand: ARIETE Pages: 50

Liliput
Brand: AEG Pages: 16

ergorapido 2in1
Brand: AEG Pages: 12

Ergorapido
Brand: AEG Pages: 17

LX9 X PRECISION
Brand: AEG Pages: 36

LX5
Brand: AEG Pages: 10

JetMaxx Dust & Gone
Brand: AEG Pages: 7

SMART 300
Brand: AEG Pages: 9

PowerForce APF6130
Brand: AEG Pages: 6

Rapido Wet & Dry
Brand: AEG Pages: 16


