background image

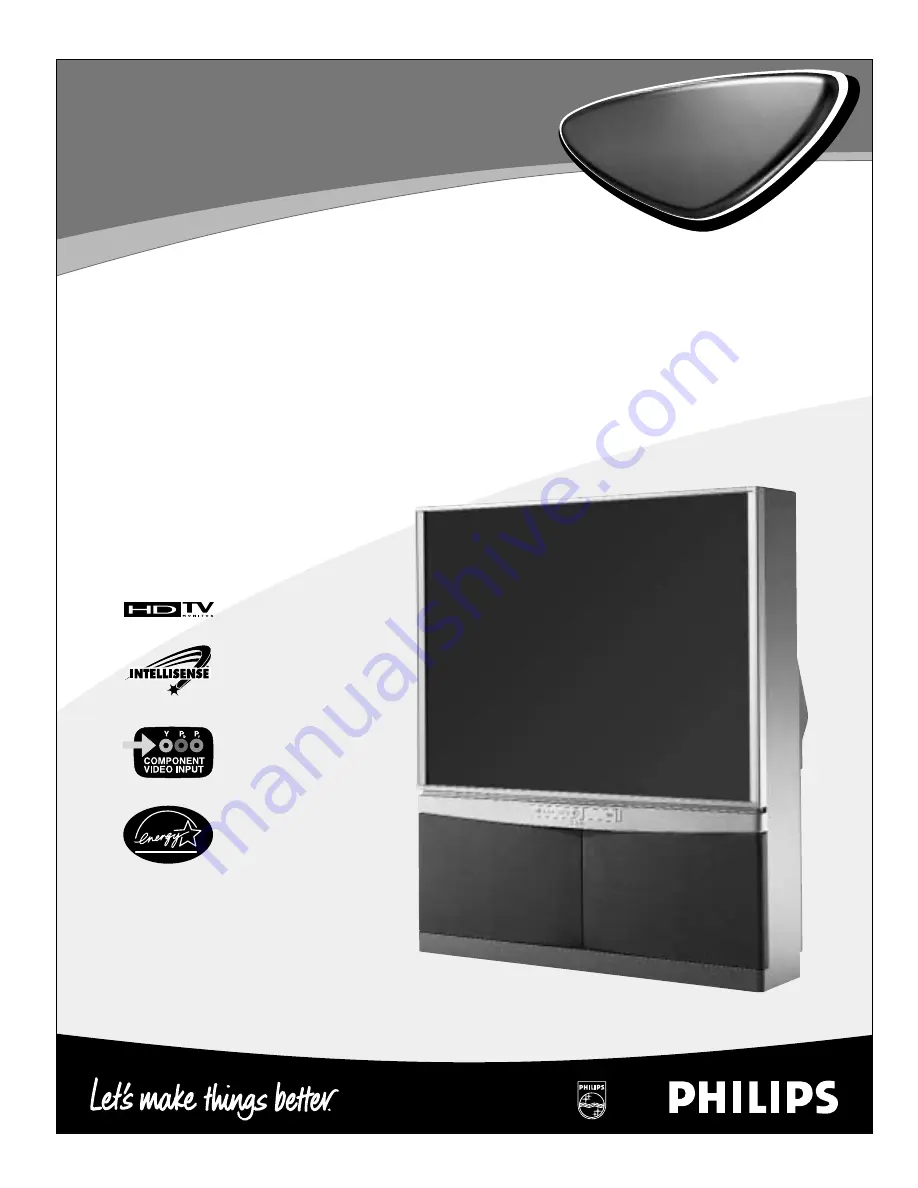
55PP9401
60PP9401

HDTV Monitor

55PP9401
60PP9401

HDTV Monitor

IB8304E002 H462942

Directions for Use

• 1080i/540p scan with line doubling
• 3D Y/C comb filter
• Auto IntelliSense

Focus

• First-surface mirror
• Component video inputs
• Front A/V convenience jacks
• Protective filter
• Dual-tuner 

Picture-in-Picture

Summary of Contents for 55PP9401

Page 1: ... HDTV Monitor IB8304E002 H462942 Directions for Use 1080i 540p scan with line doubling 3D Y C comb filter Auto IntelliSense Focus First surface mirror Component video inputs Front A V convenience jacks Protective filter Dual tuner Picture in Picture ...

Page 2: ...cause an electri cal shock For the safety of everyone in your household please do not remove product covering s The exclamation point calls attention to features for which you should read the enclosed literature closely to prevent operating and maintenance problems WARNING TO PREVENT FIRE OR SHOCK HAZARD DO NOT EXPOSE THIS EQUIPMENT TO RAIN OR MOISTURE CAUTION To prevent electric shock match wide ...

Page 3: ... by qualified service personnel when A The power supply cord or the plug has been damaged or B Objects have fallen or liquid has been spilled into the appliance or C The appliance has been exposed to rain or D The appliance does not appear to operate normally or exhibits a marked change in performance or E The appliance has been dropped or the enclosure damaged 17 Tilt Stability All televisions mu...

Page 4: ...n lead Wire Back of TV 300Ω to 75Ω Adapter 483521827003 Note A 300Ω to 75 Ω Adapter may be required if the UHF VHF antenna you are using has a twin lead wire instead of the single F type 75Ω coaxial cable connector Cable Converter Box TV Signal from Cable Company The TV signal coming into your home may be from a Cable TV company or a combination UHF VHF antenna In either case the basic con nection...

Page 5: ...nd Sound Select a Theater Mode to automatically tailor the TV s picture and sound to the type of program you are watching 24 Watt dbx Hi fi Stereo Sound Systemı offers 12 watts RMS per channel into 8 ohms from 50 Hz to 20 kHz with no more than 0 5 total harmonic distortion 12 1 2 3 4 5 6 7 8 9 10 11 Items Included with This TV As you unpack your TV please note that the following items have been in...

Page 6: ...60 channels when the Cable 1 or Cable 2 signal sources are selected Labeling the chan nels will make TV viewing easier and more enjoyable When the Antenna signal source is selected label up to 20 channels With the FEATURES menu on the TV screen Press the CURSOR DOWN button to highlight Channel Label Press the CURSOR RIGHT button to enter the Channel Label options area Then press the CUR SOR DOWN b...

Page 7: ...xt Ch Cho Chp Or Keys Menu To Menu Bar To Quit Exit P r e s s O K t o s e t OK FEATURES Channel Label Ch 10 Channel List Custom Ch Reset Are You Sure Next Ch Cho Chp Or Keys Menu To Menu Bar To Quit Exit P r e s s O K t o s e t OK FEATURES FEATURES MENU CHANNEL LABEL CONTINUED This page contains instructions for using the Channel Label Custom Ch option If ANT enna A and ANT enna B are in the same ...

Page 8: ... e L a b e l V C R AV 2 F R N T AV 3 AV 4 S o u r c e L i s t C u s t o m C h R e s e t M e n u To M e n u B a r To Q u i t E x i t OK FEATURES P r e s s O K t o s e t S o u r c e L a b e l AV 1 AV 2 F R N T AV 3 AV 4 S o u r c e L i s t C u s t o m C h R e s e t A r e Yo u S u r e 2 3 FEATURES MENU SOURCE LABEL Use the Source Label feature to name any of the five audio video inputs With the FEATU...

Page 9: ... n u B a r To Q u i t E x i t OK FEATURES o To c h a n g e l e t t e r p S o u r c e L a b e l AV 1 AV 2 F R N T AV 3 AV 4 S o u r c e L i s t C u s t o m C h T V 1 C u s t o m R e s e t M e n u To M e n u B a r To Q u i t E x i t OK FEATURES o To c h a n g e l e t t e r p S o u r c e L a b e l AV 1 AV 2 F R N T AV 3 AV 4 S o u r c e L i s t C u s t o m C h TAPE Custom R e s e t 2 3 M e n u To M e...

Page 10: ...e l e c t c h a n n e l u s i n g C H u p d o w n o r n u m b e r k e y OK FEATURES 1 2 3 4 4 FEATURES MENU FAMILY FAVORITES The Family Favorites feature allows you to group your favorite channels into six person alized categories that you can rename Thirty six channels can be stored in Family Favorites Channels stored using Auto Program see page 5 in the Quick Use and Setup Guide automati cally a...

Page 11: ...ote control The Set Favorite Ch screen will be displayed Press the MENU SELECT but ton and the category will be dis played as subpictures at the right edge of the screen This is useful for previewing a category Press the CURSOR DOWN or UP buttons to highlight a favorite channel The TV will automatically tune to that channel Press the CURSOR UP button until the Favorite Channel category name MOVIES...

Page 12: ...moderate violence V some sexual situations S infrequent coarse language L and some suggestive dialogue D TV 14 Unsuitable for children under 14 This type of programming contains one or more of the following intense violence V intense sexual situations S strong coarse language L or intensely suggestive dialogue D TV MA Mature audiences only This type of programming contains one or more of the follo...

Page 13: ... supernatural violence Other Content Guidelines May contain infrequent mild profanity or mildly suggestive lan guage Could also contain brief scenes of nudity 14 Programming contains themes or content which may not be suitable for viewers under the age of 14 Parents are strongly cautioned to exercise discretion in permitting viewing by preteens and early teens Violence Guidelines May contain inten...

Page 14: ...tton to enter the AutoLock options area Then press the NUM BER buttons to enter the factory preset Access Code 0711 To change the Access Code see the information below right Press the CURSOR DOWN button to highlight an option See the option descriptions on page 12 Then press the OK button center of ring to select To set AutoLock according to Moving Ratings press the CUR SOR DOWN button until Movie...

Page 15: ...K to set AutoLock Menu To Menu Bar To Quit Exit Change Access Code Channel 10 Video Lock Quick Lock Front Panel Lock Movie Ratings TV Ratings Canadian Ratings Eng Canadian Ratings F r n OK SETUP FEATURES PICTURE SOUND THEATER Menu To Menu Bar To Quit Exit Canadian Ratings Frn VIEW G BLOCK 8 ans BLOCK 13 ans BLOCK 16 ans BLOCK 18 ans OK FEATURES P ress OK to set Menu To Menu Bar To Quit Exit Canadi...

Page 16: ...el Once Daily Weekly Off OK FEATURES P ress OK to set 4 FEATURES MENU 4 EVENT TIMER Use the 4 Event Timer feature to automatically turn the TV on and off one time only every day or once a week You can pro gram the timer for up to four dif ferent on off occurrences events NOTE You must first set the clock before you can use the 4 Event Timer See the Clock Set section on page 7 in the Quick Use and ...

Page 17: ... the CURSOR LEFT DOWN and RIGHT buttons until Once Daily or Weekly is highlight ed Then press the OK button to select the option Once will turn the TV on off one time only Daily will turn the TV on off at the same time every day Weekly will turn the TV on off at the same time every week Off disables the 4 Event Timer feature To return to the FEATURES menu press the CURSOR LEFT button To go to the ...

Page 18: ...e FEATURES menu on the screen Press the CURSOR DOWN button repeatedly until Captions is highlighted Then press the CURSOR RIGHT button to enter the Captions options area See the descriptions of the options below on this page Press the CURSOR DOWN RIGHT or LEFT button to highlight an option Then press the OK button to select To return to the FEATURES menu press the CURSOR LEFT button To go to the M...

Page 19: ...y Shaded 1 3 2 Menu To Menu Bar To Quit Exit OK FEATURES P ress OK to select Channel Label Source Label Family Favorites AutoLock 4 Event Timer Captions Menu Background Gray Shaded FEATURES MENU MENU BACKGROUND This feature allows you to choose from two different menu backgrounds With the FEATURES menu on the screen Press the CURSOR DOWN button repeatedly until Menu Background is highlighted Then ...

Page 20: ...ENU PICTURE SETTINGS Use the Picture menu to adjust picture settings and improve picture quality With the PICTURE menu on the screen press the CURSOR DOWN button until the control you want to adjust is highlighted Press the CURSOR LEFT or RIGHT button to adjust the con trol The following are descriptions of the PICTURE menu controls Picture changes the contrast between black and white levels in th...

Page 21: ...Advanced Settings option has a in the box it is on When a Color Temperature setting has a in the circle it is on See the descriptions of the options to the right in making your selections To return to the PICTURE menu press the CURSOR LEFT button To go to the Menu Bar press the MENU SELECT button To clear the screen press the STA TUS EXIT button Functions of the PICTURE menu Advanced Settings and ...

Page 22: ...d Settings OK PICTURE P ress OK to set 1 3 2 SOUND MENU SOUND SETTINGS Use the SOUND menu to adjust the TV to your prefer ence and to improve the sound quality With the SOUND menu on the screen press the CURSOR DOWN button until the control you want to adjust is highlighted Press the CURSOR LEFT or RIGHT button to adjust the con trol The following are descriptions of the SOUND menu controls Bass c...

Page 23: ...ings options area Press the CURSOR DOWN or up button to highlight an option Then press the OK button to select the option A in a circle or a in a square means that a set ting is on See the descriptions of the options below in making your selections To return to the SOUND menu press the CURSOR LEFT button To go to the Menu Bar press the MENU SELECT button To clear the screen press the STATUS EXIT b...

Page 24: ...er Mode to auto matically tailor the TV s pic ture and sound to the type of pro gram you are watching This will enable you to enjoy a true home theater experience With the THEATER menu on the screen press the CURSOR DOWN button until the mode you want to select is highlighted Press the OK button to select the mode See the information about mode settings below These settings were made at the factor...

Page 25: ...he CURSOR RIGHT button to enter the Surround options area Press the CURSOR DOWN or UP button to highlight an option Then press the OK button to select the option SRS delivers an exciting and realistic 3D sound experience from just two external speakers or the two internal speakers of your TV If your TV is connected to an external audio system SRS will also create an incredible 3D sound experience ...

Page 26: ...yer camcorder etc to each input jack COMPONENT Y PbPr connections are provided for high performance accessory devices such as DVD players Use these connections in place of the standard video connection if your device has this feature When using the Y PbPr input jacks con nect your accessory device s audio output to the TV s AV 3 or AV 4 Left and Right Audio input jacks Your accessory device s outp...

Page 27: ... the SOURCE button until you access the input source to which you have connected the VCR or laserdisc player Press the SOURCE button until you return to the previous channel Or press the A CH button to return to the previous channel TV s Rear Panel VCR or Laserdisc Player Back of VCR or Laserdisc Player Completely insert the connec tion cord plugs when hooking up the Rear Panel jacks The picture a...

Page 28: ...return to the previous channel Or press the A CH button to return to the previous channel Completely insert the connec tion cord plugs when hooking up the Rear Panel jacks The picture and sound that are played back will be abnormal if the connection is loose A single VCR can be used for VCR 1 and VCR 2 Note how ever that a VCR cannot record its own video or line output See the setup on page 26 Ref...

Page 29: ...the laserdisc DVD player or HDTV set top box to the AV 3 AUDIO R jack Connect the cable from the AUDIO OUT L of the laserdisc DVD player or HDTV set top box to the AV 3 AUDIO L jack Press the SOURCE button until you access the input source to which you have connected the laserdisc DVD player or HDTV set top box Press the SOURCE button to return until you return to the previ ous channel Or press th...

Page 30: ...the external stereo sys tem amplifier to the AUDIO TO HI FI R jack Connect the cable from the INPUT L of the external stereo sys tem amplifier to the AUDIO TO HI FI L jack To prevent damage to the speak er as well as distorted sound set the volume control of the audio ampli fier lower and adjust the sound using the remote control of the TV set CHECK IT OUT TV s Rear Panel Stereo System Amplifier ...

Page 31: ...the device then the remote is ready and no further steps are need ed If NO first look up a four digit remote control Entry Code num ber for your brand of device before going through the simple steps on the following page You will find a list of four digit Entry Codes on pages 34 and 35 REMOTE CONTROL AND ACCESSORY DEVICES Your remote control is set to work your TV and many infrared remote IR contr...

Page 32: ...ng a VCR press the VCR MODE button While still holding down the desired MODE button Press the MENU SELECT button Within 30 seconds after releas ing the MODE and MENU SELECT buttons use the NUMBER buttons on the remote control to enter the four digit Entry Code number for the desired device The remote is now ready to send commands to the accessory device Point the remote at the device Press the POW...

Page 33: ...emote in the mode you choose The mode but tons are TV DVD VCR and ACC essory Example If using a VCR press the VCR MODE button Point the remote at the device you wish to control Stand at least six feet away from the front of the device Make sure the remote is in the line of sight with the device s remote sensor window While continuing to hold the correct MODE button press and HOLD the SURF button K...

Page 34: ...6 0090 Tandy 0285 Teleview 0067 Texscan 0028 Tocom 0039 0040 Toshiba 0027 Tusa 0042 Unika 0180 0049 United Artists 0034 Universal 0049 0083 0180 0218 Viewstar 0285 0090 Zenith 0027 0552 0926 Zentek 0427 Laserdisc Remote Code No Aiwa 0230 Carver 0221 0091 0350 Denon 0199 0086 Disco Vision 0050 Funai 0230 Harman Kardon 0221 Hitachi 0050 Magnavox 0221 0244 Marantz 0221 0091 Mitsubishi 0086 NAD 0086 O...

Page 35: ... 0236 0506 Philips 0108 0062 0645 1108 1208 Pilot 0064 Pioneer 0094 Polk Audio 0108 Profitronic 0267 Proscan 0087 0787 Protec 0099 Pulsar 0066 Quarter 0073 Quartz 0073 Quasar 0062 0189 1189 RCA 0087 0176 0069 0062 0075 0267 0787 Radio Shack 0027 1064 Radix 0064 Randex 0064 Realistic 0027 0131 0074 0075 0064 0062 0073 ReplayTV 0641 0643 Runco 0066 STS 0069 Samsung 0072 0267 Sanky 0066 0075 Sansui 0...

Page 36: ...ld the button down to view the pic ture moving rapidly in the forward direction VCR MODE Button Press once to set remote to send com mands to the VCR RECORD Button Hold the RECORD down to begin a VCR recording With some VCR mod els you may need to press the PLAY button with the RECORD button to begin recording STOP Button Press to stop the motion of a tape in playback rewind fast forward etc REWIN...

Page 37: ...n picture and the subpicture simultaneous ly ANT enna B can be viewed only as a main picture See pages 26 30 for information on connecting accessory devices Also see the Quick Use and Setup Guide that came with your TV After making the connections you can view the video from accessory device sources in the PIP window Press the PIP ON OFF button on the remote A subpicture will appear in one of the ...

Page 38: ...press the PIP ON OFF button again to show the Surf Mode PIP screen Press the PIP ON OFF button to remove PIP from the TV screen SURF MODE PIP Surf Mode PIP When you activate any of the AutoLock TV Movies or Canadian ratings to block programs Surf Mode PIP will be unavailable When you deactivate the blocks Surf Mode PIP will be available again See pages 12 15 for information on using the AutoLock f...

Page 39: ... action in the PIP subpicture Press the PIP SOURCE button to change the video source that appears in the PIP subpicture Remember that ANT enna B cannot be displayed as the PIP subpicture Choose an input to which you have connected an accessory VCR DVD or other video source Press the PIP POSITION button to move the PIP subpicture Each press moves the subpicture to a different corner of the screen P...

Page 40: ... correct Try another channel station trouble Check the antenna connections back of TV Check the antenna for a broken lead in wire Check the outside antenna Check for local interference Adjust the Contrast control Adjust the Brightness control Be sure the external connection is correct Try another channel station trouble Check the antenna connections back of TV Check the antenna for a broken lead i...

Page 41: ...t control Power Surge Protection Philips Projection Television incorporates advanced power surge protection technology designed to protect against component or circuit damage due to external or internal voltage power surges If your television should appear to have a loss of power please follow this procedure 1 Press the power switch ON OFF switch once 2 If there is still no power wait 30 seconds a...

Page 42: ...m tall buildings hills or other objects Changing the direc tion or position of the antenna may improve reception Ghosting may also be caused by defects in the antenna system such as unshielded leads Or it may be caused by connect ing several sets to the same antenna without using multiple antenna couplers Snow If your receiver is located in the fringe area of a television station where the signal ...

Page 43: ...roducts or cellophane tape on your television Do not touch the screen too often Do not subject the remote control to shocks such as dropping it on the floor and so forth Physical damage to the precision parts may result Do not place the remote control in a high humidity place or somewhere it can get wet Do not leave it on or near a heater Excessive heat or moisture may cause the unit to cease oper...

Page 44: ...casting signals in the 1940s 525 lines 30Hz On screen Displays OSD Refers to the wording or messages gener ated by the TV to help the user with specific feature controls color adjustment programming etc Picture in Picture PIP Picture in Picture PIP is the showing of more than one picture on the TV screen at the same time You see one main screen picture and a single subpicture or multiple subpictur...

Page 45: ...rvice Locations 46 47 Family Favorites Feature 10 Favorite Channels SURF 11 Features List 5 Freeze Control PIP 39 Front Panel Jacks Q 2 Q 3 Front Panel Lock 12 14 Glossary of Television Terms 44 ImageMax 21 ImageMax Sensor Q U 3 Jack Descriptions Q U 8 Language Control Q U 4 Loudness Control 23 Menu Q U 4 Menu Background Control 19 Movie Ratings 12 14 Movies Theater Mode 24 Music Theater Mode 24 N...

Page 46: ... garantie il suffira de présenter une preuve d achat pour bénéficier d un service sans frais Pour les produits non couverts par la garantie contactez le centre le plus près de chez vous NOTA Si Ud reside en una de nuestras zonas para sucursales Philips de servicio al de fábrica ver directorio más abajo Ud puede comunicarse con la sucursal de servicio más cercana para obtener una reparación oportun...

Page 47: ...PAIS PARA LA RECEPCION DE PRODUCTOS NECESITADOS DE REPARACIONES COMUNICARSE CON EL CENTRO DE SERVICIO DE FABRICA MAS CERCANO PARA ESTOS LUGARES DENTRO DE UN RADIO DE 80 A 120 KM 50 A 75 MILLAS DEL CENTRO DE SERVICIO LOCAL ATLANTA Philips Factory Service 200 N Cobb Pkwy Suite 120 Marietta GA 30062 800 273 1501 TAMPA Philips Factory Service 1911 US Highway 301 North Tampa FL 33619 800 442 2027 SAN F...

Page 48: ...le in all countries where the product is offi cially distributed by Philips Consumer Electronics Company In coun tries where Philips Consumer Electronics Company does not distribute the product the local Philips service organization will attempt to pro vide service although there may be a delay if the appropriate spare parts and technical manual s are not readily available MAKE SURE YOU KEEP Pleas...

Reviews: