Pentair Jet-Vac, Installation Manual
The Pentair Pool Products Jet-Vac offers efficient cleaning for your pool. With its powerful suction and innovative design, it ensures thorough removal of debris. To install and operate it correctly, make sure to download the free Installation Manual from our website. Dive into crystal-clear waters with Pentair today!
Share
Download


Reviews:
No comments
Related manuals for Jet-Vac

7175031
Brand: Clarke Pages: 16
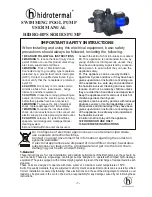
HIDRO-BPS050
Brand: Hidrotermal Pages: 4

HIDRO-SP Series
Brand: Hidrotermal Pages: 11

BADU Jet Smart KH
Brand: Speck pumpen Pages: 66

EHE
Brand: Teledyne Pages: 34

vipool 11 m3/h
Brand: ACIS Pages: 11

ORGPP2
Brand: VinylWorks Pages: 2

V Series
Brand: Oasis Aquatics Pages: 16

RobotClean 7
Brand: ubbink Pages: 40

EN27 Series
Brand: Jacuzzi Pages: 16

Pondomatic Vacuum Cleaner
Brand: Pontec Pages: 113

HI DELTA 1802B
Brand: Raypak Pages: 2

T3
Brand: Zodiac Pages: 20

Rotomag X22
Brand: JETStream Pages: 2

Sunheater
Brand: SmartPool Pages: 8

H3
Brand: Henden Pages: 4

Solar-breeze NX
Brand: SolarPool Pages: 24

SP3215X20 SP3015EEAZ SP3015X20AZSP3215EE SP3220X25 SP3020EEAZ SP3020X25AZSP3220EE
Brand: Hayward Pages: 15


