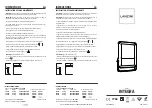
background image

7070R


INSTRUCTIONS MANUAL


WARNING:

 Before disassembling any part of the 7070R 

LED Torch, ensure that the Torch has not been operating for 

five (5) minutes. During operation, the LED module can become 

extremely hot and may cause injury if touched. 

Torch Operation


The 7070R LED is a high performance Torch for use by 

professionals. This Torch comes equipped with dual switches and 

includes a high output pre-focused LED lamp that emits a strong 

light beam of white light. There is no need to focus the 7070R LED. 

DO NOT SHINE THIS Torch DIRECTLY INTO ANY PERSON’S 

EYES: THIS MAY RESULT IN INJURY.


Your 7070R battery pack comes to you partially charged and needs 

to be fully charged prior to use (see charging instructions below). 

Momentary Activation

Partially depress either switch for momentary operation.

Constant Activation – 

Fully depress either switch (click), to lock in 

the selected mode. 

Bluetooth App Programming

Download the “Pelican Torch” app from either the Apple 


or Android stores.


1.     Activate the Pelican Torch app from

  your smartphone. 

See Image #1

2.    Turn on the Torch

3.       Select “Scan Pelican Products” 


from the menu on your smartphone  

and select your 7070R via the 


identified serial number. 


Your Torch will now show connected. 


1

4.      Once connected you can select up to 


5 different modes and the sequence of those modes as numbered in the app. 

Each selected mode allows for varied light output and/or varied strobe speed. 


See Image #2


Manual Programming 


2

To select a program using the  

manual input, select one of the 

five pre-set program options.  


Note, the 7070R is  

pre-programmed with Program #1.  


To change program, partially  

depress either switch (momentary 


press, do not click) the number 


of times as indicated in the table  

below and hold the last press until 


you see the coordinating number  

of confirmation flashes. 


Each press needs to be within .5 seconds of each other.  

Momentary 

presses

Confirmation 

flashes

Program 1 (default) High > Strobe > Medium > Low

8

*

Program 2

High Only

10

**

Program 3

High > Medium > Low > 

12

***

Program 4

Low > Medium > High >

14

****

Program 5

High >Low >

16

*****

Mode Selection

Partially depress either switch within .5 second increments to select the desired mode. 

Each press with provide the mode in its programmed sequence. Fully depress the switch 

to lock in the desired mode. 


Light Off


3

Fully depress either switch (click), to turn off 


the light from any activated mode. 

Charging: 

1.   Attach the USB Charge Cord to the 


bottom of the Charger Base. 

See Image #3  


Manual  7070R

EN

Summary of Contents for 7070R

Page 1: ...hone and select your 7070R via the identified serial number Your Torch will now show connected 1 4 Once connected you can select up to 5 different modes and the sequence of those modes as numbered in the app Each selected mode allows for varied light output and or varied strobe speed See Image 2 Manual Programming 2 To select a program using the manual input select one of the five pre set program ...

Page 2: ... are sold or directly from Peli Products Customer Service The 7070R is able to use 2 disposable CR123 lithium batteries with the included battery tube if recharging is not available Note CR123 batteries are not able to be charged NOTE Please act responsibly when disposing of the LI ION Battery Stick This part is recyclable and should not be disposed of in the municipal waste system Please check wi...

Page 3: ...ents et leur ordre est tel que numéroté dans l application Chaque mode sélectionné permet une émission lumineuse et ou une vitesse stroboscopique variables image 2 2 Programmation manuelle Pour sélectionner un programme manuellement sélectionner l une des cinq options de programme prédéfinies Noter que la torche 7070R est préprogrammée avec le programme 1 Pour changer de programme appuyer légèreme...

Page 4: ...e niveau de la batterie sont fournies comme suit 7 Vert 100 75 Jaune 75 50 Rouge 50 25 Rouge clignotant 25 0 Remarque La LED principale clignote toutes les 5 minutes une fois que le niveau de la batterie a chuté en deçà de 25 Remplacement de la batterie Quand la batterie LI ION rechargeable a besoin d être remplacée dévisser le couvercle et extraire le module de torche support de batterie du corps...

Page 5: ...nte de la linterna 7070R LED asegúrese de que la linterna no se haya utilizado durante cinco 5 minutos Durante su funcionamiento el módulo LED puede alcanzar una temperatura muy elevada lo que podría provocar quemaduras en caso de contacto Funcionamiento de la linterna La 7070R LED es una linterna de alta potencia de uso profesional Esta linterna cuenta con dos interruptores duales e incluye una l...

Page 6: ...ce un Modo de fallo que indica un error como un intento de carga con pilas CR123 desechables instaladas 5 Si fuese necesaria una fijación segura vuelva a colocar el cuerpo de la linterna en la base del cargador y la linterna se fijará en su posición Nota No es necesario que se descargue totalmente la linterna 7070R antes de cargar la batería La carga se puede realizar siempre que se necesite y la ...

Page 7: ...ría provocar una explosión o un incendio 7 Si las baterías se descargan demasiado pueden originar fugas de gases y electrolitos peligrosos Al final de su vida útil las baterías se deben depositar en un centro homologado de reciclaje LINTERNAS FRONTALES GARANTÍA LIMITADA DE POR VIDA Peli Products S L U Peli garantiza de por vida sus linternas y frontales contra roturas o defectos de fabricación Est...

Page 8: ...n leuchtet die Ladestatus LED beständig rot Abbildung 4 3 Schieben Sie die Lampe in die Ladestation und achten Sie dabei auf die Ausrichtung 4 4 Die 7070R lädt drahtlos ohne direkte Kontakte Nach richtiger Ausrichtung blinkt die LED der Ladekontrollleuchte rot Sobald der Ladevorgang abgeschlossen ist wechselt das rote Blinklicht zu einem beständig grünen Licht Es gibt auch einen Fehlermodus der ei...

Page 9: ...sionsgefahr vorliegt 4 Lampen sollten nur mit der Ladestation von Peli aufgeladen werden die mit der Lampe geliefert wurde 5 Die Lampen sollten innerhalb der nachfolgend angegebenen Temperaturbereiche aufge laden und verwendet werden Ladetemperatur 20 C bis 50 C Betriebstemperatur 20 C bis 50 C 6 Nicht mit eingelegtenAlkaline Batterien aufladen Dies kann zu einer internen Gas oder Wärmebildung und...

Page 10: ...lla modalità Premere parzialmente uno degli interruttori con incrementi entro 0 5 secondi per selezionare la modalità desiderata Ciascuna pressione fornirà la modalità nella sequenza programmata Premere completamente l interruttore per bloccare nella modalità desiderata Torcia spenta 3 Premere completamente uno degli interruttori scatto per spegnere la torcia da qualsiasi modalità attivata Ricaric...

Page 11: ...all uso di batterie danneggiate o contraffatte Per evitare lesioni e o danni materiali gravi prendere visione delle informazioni riportate di seguito Batterie ricaricabili 1 Le certificazioni di sicurezza in luoghi potenzialmente pericolosi relative agli ambienti esplosivi sono valide esclusivamente per il pacchetto batterie Peli fornito in dotazione con la torcia 2 Per la sostituzione del pacchet...

Page 12: ...тся различными уровнями светоотдачи и или изменяемой скоростью импульса См изображение 2 Программирование вручную 2 Для выбора программы с помощью ручного ввода выберите одну из пяти предварительно настроенных программ Обратите внимание что фонарь 7070R предварительно запрограммирован на программу 1 Для изменения программы нажмите один из переключателей не до конца кратко не до щелчка то количеств...

Page 13: ...еи отображается следующим образом См изображение 7 7 Зеленый 100 75 Желтый 75 50 Красный 50 25 Мигающий красный 25 0 Примечание Как только уровень заряды батареи опустится ниже 25 главный светодиодный индикатор начнет мигать каждые 5 минут Замена батарей Если требуется замена литий ионного аккумулятора открутите футляр и достаньте модуль лампы батарейный отсек от корпуса фонаря чтобы получить дост...

Page 14: ...ра может привести к утечке потенциально опасных газов и электролитов Сдавайте все отработанные батареи в установленном порядке только в утвержденный центр по утилизации батарей РУЧНЫЕ НАЛОБНЫЕ ФОНАРИ ОГРАНИЧЕННАЯ БЕССРОЧНАЯ ГАРАНТИЯ На ручные и налобные фонари компания Peli Products S L U далее Peli предоставляет бессрочную гарантию на случай поломок или дефектов технологического процесса Настояща...

Reviews: