Parrot ANAFI, Assembly/Disassembly Manual
Introducing the Parrot ANAFI, a cutting-edge drone designed to elevate your aerial photography and videography experience. Our Super Quick Start Manual ensures hassle-free setup and immediate takeoff. Download this comprehensive manual for free, exclusively from manualshive.com, and unlock the full potential of your Parrot ANAFI.
Share
Download


Reviews:
No comments
Related manuals for ANAFI
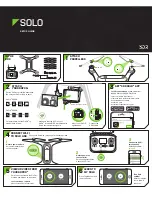
Solo
Brand: 3DR Pages: 2
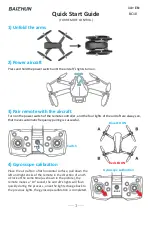
BC 10
Brand: BAICHUN Pages: 6

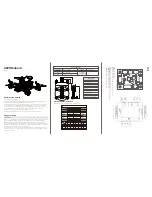
BC 10
Brand: BAICHUN Pages: 12
X220
Brand: BANGGOOD Pages: 2
Dream
Brand: C-Fly Pages: 8
obtain
Brand: C-Fly Pages: 18
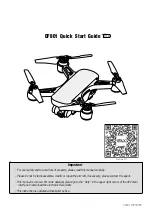
DF805
Brand: C-Fly Pages: 8
Aura
Brand: KD interactive Pages: 4
Racer 250
Brand: Eachine Pages: 6
EX3
Brand: Eachine Pages: 8
HYDROFOIL
Brand: Parrot Minidrones Pages: 2
ryze
Brand: tello Pages: 22
SAGA
Brand: GDU Pages: 10

ANAFI
Brand: Parrot Pages: 4
Rolling Spider
Brand: Parrot Pages: 2
Bluegrass
Brand: Parrot Pages: 300
H216A X4 STAR PRO
Brand: UBSAN Pages: 16

VOYAGER U845Wifi
Brand: UDI R/C Pages: 24


