background image

62-E

NGLISH

These Operating Instructions are printed on recycled paper.

Trademark acknowledgements

B

VGA and XGA are trademarks of International Business Machines
Corporation.

B

Macintosh is a registered trademark of Apple Computer, Inc.

B

S-VGA is a registered trademark of the Video Electronics Standards
Association.

All other trademarks are the property of the various trademark owners.

Dimensions

<Units: mm (inch)>

81.2(3-3/16)

297

(11-11/16)

41.8

(1-5/8)

7(1/4)

72

(2-13/16)

209

(8-7/32)

195(7-21/32)

ENGLISH

R

Before operating this product, please read the instructions carefully and save this

manual for future use.
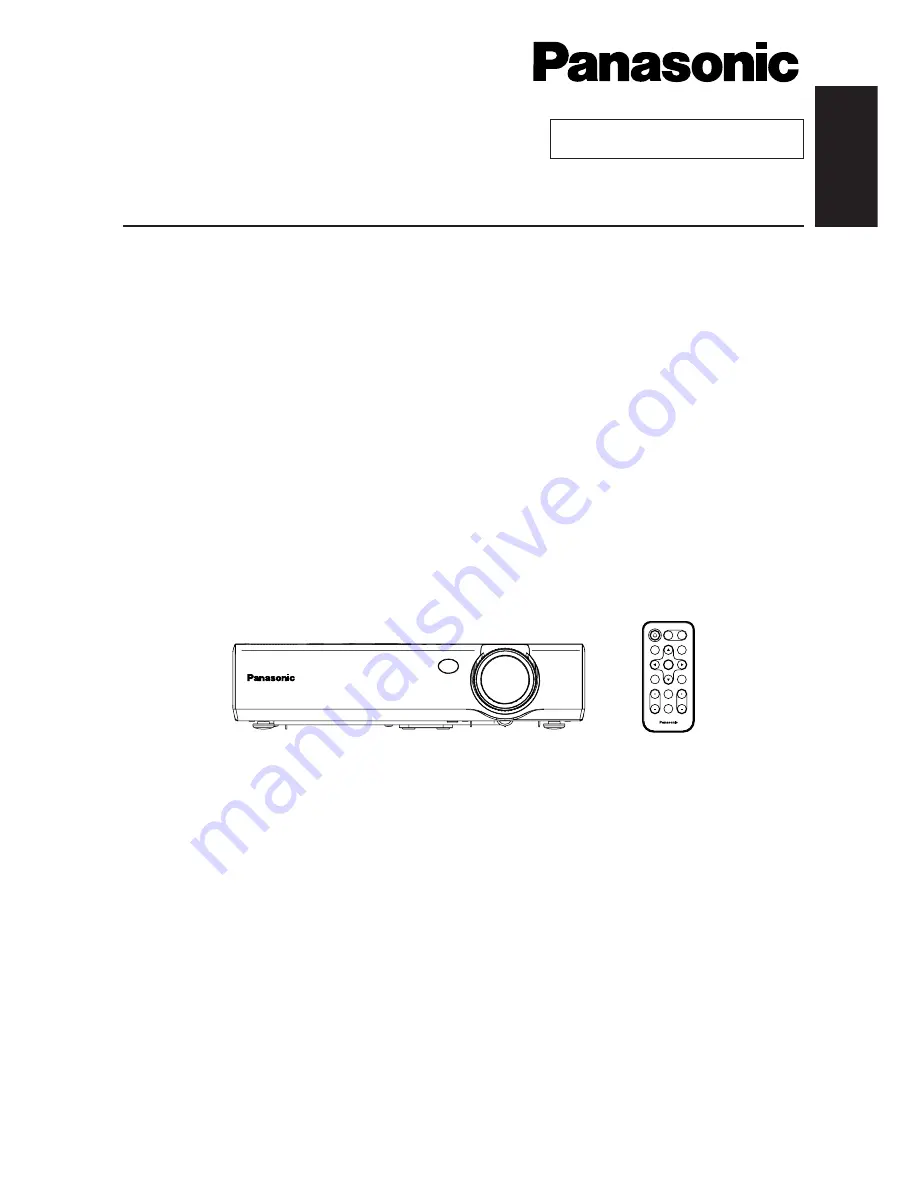
LCD Projector 

Operating Instructions

Model No.

PT-LC80E
PT-LC76E
PT-LC56E

ENTER

FREEZE

SHUTTER

INDEX

WINDOW

PROJECTOR

VOLUME

D.ZOOM

STD

AUTO

SETUP

VIDEO

INPUT

POWER

RGB

MENU

TQBJ 0123-2

Commercial Use

Summary of Contents for PT-LC56E

Page 1: ...instructions carefully and save this manual for future use LCD Projector Operating Instructions Model No PT LC80E PT LC76E PT LC56E ENTER FREEZE SHUTTER INDEX WINDOW PROJECTOR VOLUME D ZOOM STD AUTO SETUP VIDEO INPUT POWER RGB MENU TQBJ 0123 2 Commercial Use ...

Page 2: ...wire which is coloured BLUE must be connected to the terminal in the plug which is marked with the letter N or coloured BLACK The wire which is coloured BROWN must be connected to the terminal in the plug which is marked with the letter L or coloured RED How to replace the fuse Open the fuse compartment with a screwdriver and replace the fuse ASA 1 3 A 2 5 0 V B S 1 3 6 3 A H E 8 N AS A L FUSE IMP...

Page 3: ...could result in fire Pull the mains lead out from the mains socket and wipe it with a dry cloth BIf not using the projector for an extended period of time pull the mains lead plug out from the mains socket 4 ENGLISH Contents Preparation IMPORTANT SAFETY NOTICE 2 Precautions with regard to safety 5 Accessories 9 Before use 10 Location and function of each part 12 Getting started Setting up 17 Proje...

Page 4: ...ced and fall which could result in damage or injury Do not do anything that might damage the mains lead or the mains lead plug BDo not damage the mains lead make any modifications to it place it near any hot objects bend it excessively twist it pull it place heavy objects on top of it or wrap it into a bundle BIf the mains lead is used while damaged electric shocks short circuits or fire may resul...

Page 5: ... plug from the mains socket as a safety precaution before carrying out any cleaning BElectric shocks can result if this is not done Ask an Authorised Service Centre to clean inside the projector at least once a year BIf dust is left to build up inside the projector without being cleaned out it can result in fire or problems with operation BIt is a good idea to clean the inside of the projector bef...

Page 6: ...r more than 10 hours or the power is frequently turned on and off Before use Cautions when moving the projector Be sure to attach the lens cover before moving the projector The projection lens is extremely susceptible to vibration and shocks When moving the projector use the accessory carrying bag When placing the projector inside the carrying bag position it so that the lens is facing upward Caut...

Page 7: ...d by Kensington This security lock is compatible with the Microsaver Security System from Kensington Contact details for this company are given below Kensington Technology Group ACCO Brands Inc 2855 Campus Drive San Mateo CA 94403 USA Tel 650 572 2700 Fax 650 572 9675 http www kensington com http www gravis com Leg adjuster buttons L R page 23 These buttons are used to unlock the front adjustable ...

Page 8: ... correct any keystone distortion MENU button pages 30 and 32 This button is used to display the menu screens When a menu screen is being displayed this button can be used to return to a previous screen or to clear the screen Arrow F FG GI I and H H buttons page 32 These buttons are used to select and adjust items in the menu screens ENTER button page 32 This button is used to accept and to activat...

Page 9: ...R jacks pages 19 and 20 Remote control signal receptor page 21 Menu operation on connector panel page 14 Remote control unit holder Store the remote control unit as shown in the figure above ENT ER FRE EZE SHUT TER INDE X WIND OW PRO JECT OR VOL UME D ZO OM STD AUT O SET UP VIDE O INPU T POW ER RGB MEN U How to open Setting up Projection methods In way of installing projector any one of the follow...

Page 10: ... control use Red connect to PR signal connector Blue connect to PB signal connector Green connect to Y signal connector Projector position H1 L L SH SW 81 2 3 3 16 L Projection distance SH Image height SW Image width H1 Distance from centre of lens to bottom edge of projected image Top edge of screen Screen Bottom edge of screen Screen Projection distances NOTE BThe dimensions in the table above a...

Page 11: ...rol unit away from liquids BRemove the battery if not using the remote control unit for long periods BUse only CR2025 batteries as replacement batteries NOTE BIf the remote control unit is held so that it is facing directly in front of the front or rear remote control signal receptors the operating range is within approximately 7 m 23 from the surfaces of the receptors Furthermore the remote contr...

Page 12: ...ator is turned off but this is not a sign of a malfunction Press the input select button to select the input signal BA picture will be projected in accordance with the selected input signal Follow the procedure below when you set the projector up first and when you change the setup place Press the AUTO SETUP button to initiate automatic positioning BThe tilt of the projector and the input signal w...

Page 13: ... during standby mode A signal is being input to either the RGB1 IN or RGB2 IN connector Illuminated during projection A signal is being input to the connector selected using the input select buttons Projector status Press the POWER button B POWER OFF is displayed on the screen Select OK using the I I and H H buttons and then press the ENTER button BThe lamp unit will switch off and the picture wil...

Page 14: ...SETUP button the items given in the table below will be set automatically in addition to keystone distortion being corrected The setting details change according to the signal which is being input BThe picture being projected will be paused BPress the FREEZE button again to cancel the still picture NOTE B If the edges of the projected picture are indistinct or if a dark picture is being projected ...

Page 15: ...ill picture Moving picture Moving picture Still picture Enlarging the picture D ZOOM Adjusting the volume VOLUME Press a D ZOOM button Press the VOLUME button BPress the button to raise the volume BPress the button to lower the volume NOTE BThe enlargement ratio can be changed within the range of x1 to x2 in steps of 0 1 When RGB signals are being input the enlargement ratio can be changed within ...

Page 16: ... 34 For PT LC76E PT LC56E KEYSTONE 0 BKeystone distortion of the on screen display will not be corrected For PT LC80E KEYSTONE H 0 V 0 POSITION POSITION DOT CLOCK 32 CLOCK PHASE 16 ASPECT 4 3 RESIZING ON FRAME LOCK OFF STANDARD SELECT ENTER RETRN POSITION menu page 38 When an RGB YPBPR signal is being input POSITION POSITION ASPECT 4 3 RESIZING ON STANDARD SELECT ENTER RETRN When an S VIDEO VIDEO ...

Page 17: ...table items and unusable functions depending on the signal being input When an item cannot be adjusted or a function cannot be used the corresponding on screen menu display does not appear and the item or function will not work even if the ENTER button is pressed Returning a setting to the factory default If you press the STD standard button on the remote control unit you can return settings to th...

Page 18: ... of keystone distortion is carried out For PT LC76E PT LC56E Vertical keystone distortion correction only For PT LC80E KEYSTONE H 0 V 0 Use the F and G buttons on the projector or remote control unit to select an item and then use the I and H buttons to change the setting for that item For items with bar scales press the ENTER button or the I or H buttons to display the adjustment screen and then ...

Page 19: ...ignals TV SYSTEM AUTO1 AUTO2 NTSC NTSC4 43 PAL PAL M PAL N SECAM TV SYSTEM S VIDEO VIDEO only Press the H button to make the selected colour stronger COLOR TEMP STANDARD HIGH LOW NOTE BThis should normally be set to AUTO1 or AUTO2 If the signal is of such poor quality that the correct format cannot be automatically distinguished change the setting manually to the required TV system STILL MODE To r...

Page 20: ... signal is RGB first press the AUTO SETUP button to initiate automatic positioning If the optimum setting is not obtained when AUTO SETUP is carried out adjust by the following procedure NOTE BIf signals with a dot clock frequency of 100 MHz or higher are being input interference may not be completely eliminated when the DOT CLOCK and CLOCK PHASE adjustments are carried out POSITION H 64 V 32 S4 3...

Page 21: ... Use the F and G buttons on the projector or remote control unit to select a language then press the ENTER button to accept the setting Indicates the language which is currently set LANGUAGE ENGLISH ENGLISH DEUTSCH FRANÇAIS ESPAÑOL ITALIANO SELECT ENTER RETRN NOTE BThis projector is equipped with an aspect ratio selection function However if a mode which does not match the aspect ratio of the inpu...

Page 22: ...ing input select RGB or YPBPR in accordance with the input signal VGA60 525P When a VGA60 or 525p RGB signal is being input select the signal in accordance with the input signal SXGA MODE This setting is only for an SXGA signal SXGA Select this item normally SXGA When the projected image is contracted vertically select this item BLACKBOARD PT LC80E only Set to ON when PICTURE MODE is set to BLACK ...

Page 23: ...RITY function This projector is equipped with a security function A password input screen can be displayed or a company URL can be set up and displayed at the bottom of the projected image Use the F and G buttons on the projector or remote control unit to select SECURITY then press the ENTER button MENU KEYSTONE PICTURE POSITION INDEX WINDOW SHUTTER VOLUME LANGUAGE OPTION1 OPTION2 SECURITY SELECT ...

Page 24: ...yed on the screen BIf you enter the wrong password the letters PASSWORD and NEW will become red Enter the correct password again BS OK Cancel TEXT CHANGE ABCDEFGHIJKLMNO PQRSTUVWXYZ0123 456789 LAMP indicator TEMP indicator Problem Indicator display Flashing red Lamp unit on The surrounding temperature or the temperature inside the projector has become unusually high Illuminated red Lamp unit on Th...

Page 25: ...MP indicator NOTE BBe sure to turn off the MAIN POWER switch by following the procedure given in Turning off the power on page 24 before carrying out any of the procedures in the Remedy column BIf the main power turns off after the TEMP indicator starts flashing it means that an abnormality has occurred Please contact an Authorised Service Centre so that the necessary repairs can be made Replace t...

Page 26: ... to burst Dispose of the lamp with the same care that would be taken with a fluorescent light BA Phillips screwdriver is necessary for removing the lamp unit Make sure that your hands are not slippery when using the screwdriver Lamp unit replacement period The lamp is a consumable product Even when the full life of the bulb has not been exhausted the brightness of the light will gradually decline ...

Page 27: ...ore than 2 seconds It will then be turned ON 47 48 23 36 27 23 18 18 36 28 31 21 21 21 44 Press the ENTER button to display the OPTION2 screen and then use the F and G buttons to select LAMP RUNTIME Press and hold the ENTER button for approximately 3 seconds The LAMP RUNTIME will change to TIME RESET POWER OFF Turn off the power This will reset the cumulative usage time for the lamp unit to zero R...

Page 28: ...ignals may not be output from the computer BRGB2 SELECT in the OPTION1 menu is set to OUTPUT when the signals are input to RGB2 IN RGB1 OUT connector Page 36 58 14 25 42 Before carrying out cleaning and maintenance be sure to disconnect the mains lead plug from the mains socket Wipe the cabinet with a soft dry cloth If the cabinet is particularly dirty soak the cloth in water with a small amount o...

Page 29: ... DIN 8 pin D sub 9 pin Specifications Power supply 100 V 240 V 50 Hz 60 Hz Power consumption 220 W During standby when fan is stopped Approx 3 W Amps 2 5 A 1 0 A LCD panel Panel size diagonal 0 7 type 17 78 mm Aspect ratio 4 3 16 9 compatible Micro lens array PT LC80E PT LC76E Available PT LC56E Not available Display method 3 transparent LCD panels RGB Drive method Active matrix method Pixels PT L...

Page 30: ...024 x 768i 35 520 86 952 44 897 AA A RGB 1 152 x 864 63 995 71 184 94 200 A A RGB 1 152 x 864 67 500 74 917 108 000 B B RGB 1 152 x 864 76 705 85 038 121 500 B B RGB 1 152 x 870 68 681 75 062 100 000 B B RGB 1 280 x 960 60 000 60 000 108 000 B B RGB 1 280 x 1 024 63 981 60 020 108 000 B B RGB 1 280 x 1 024 79 977 75 025 135 001 B B RGB 1 280 x 1 024 91 146 85 024 157 500 B B RGB 1 400 x 1 050 63 9...

Page 31: ... ignored during lamp ON control BIf a PON command is received while the cooling fan is operating after the lamp has switched off the lamp is not turned back on again straight away in order to protect the lamp Power ON PON Power OFF POF Volume AVL Parameter 000 063 Adjustment value 0 63 Input signal selection IIS Parameter VID VIDEO SVD S VIDEO RG1 RGB1 YPBPR1 RG2 RGB2 YPBPR2 Lamp ON condition quer...

Page 32: ...ENGLISH ...

Reviews: