background image

LSQT1060 B

Multimedia Projection HDTV

Operating Instructions

PT-52LCX66/PT-56LCX66/PT-61LCX66/
PT-52LCX16/PT-56LCX16/PT-61LCX16

Models No.

(USA)

Three Important Reasons to Register Your Product 
Immediately!

1  Protect Your New Investment...


Register your new Projection Display for insurance purposes 
in case your new Projection Display is stolen.

2 Product 

safety 

notification...


Registering your product can help us to contact you in the 
unlikely event a safety notification is required under the 
Consumer Product Safety Act.

3  Improved Product Development...


Help us continue to design products that meet your needs.

Register online at 

www.panasonic.com/register

For assistance, please call : 
1-888-VIEW PTV(843-9788)

or, contact us via the web at:
http://www.panasonic.com/contactinfo

(Puerto Rico)

For assistance, please call : 
787-750-4300

or visit us at www.panasonicpr.com

Before connecting, operating or adjusting this product, please read the instructions completely.
Please keep this manual for future reference.

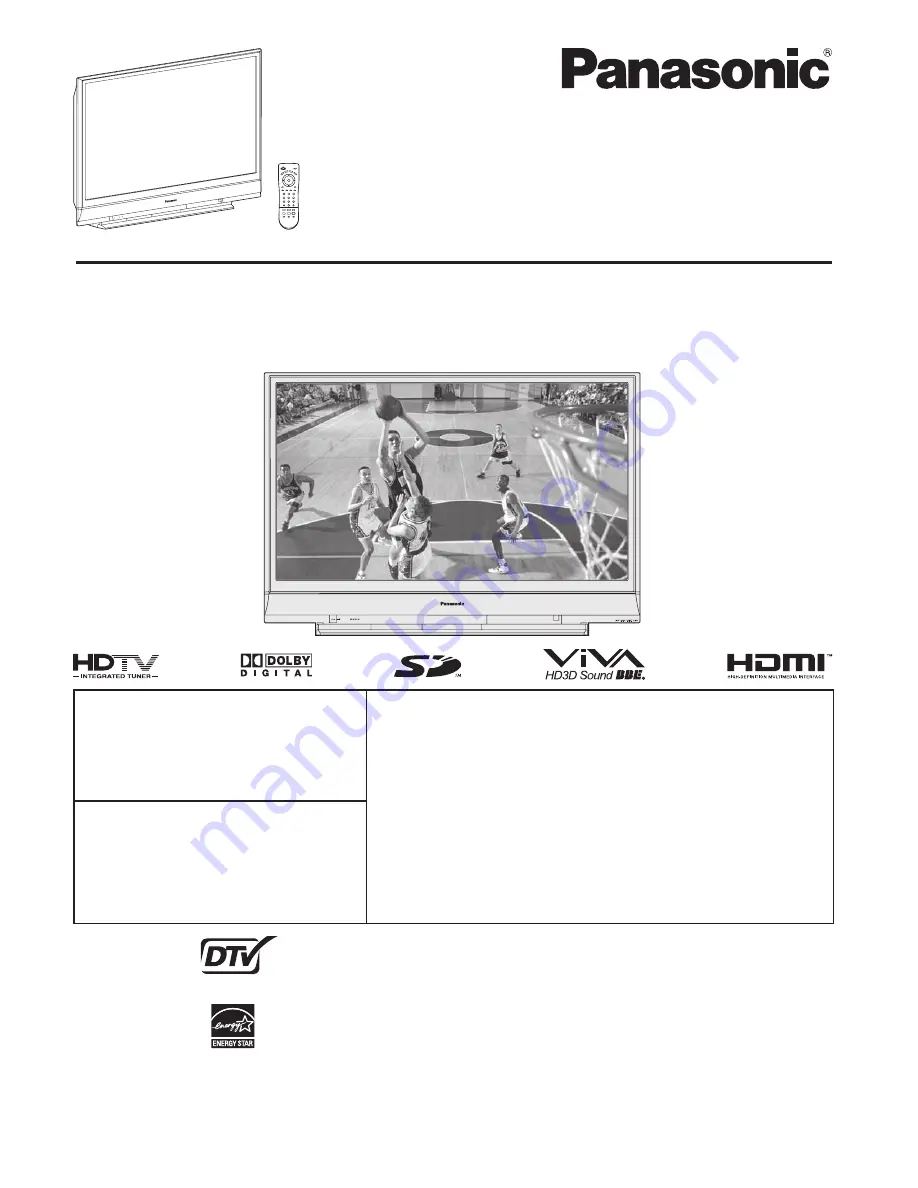
This operating instruction book is designed for use with models PT-52LCX66, PT-56LCX66, PT-61LCX66, 
PT-52LCX16, PT-56LCX16 and PT-61LCX16. Illustrations in this manual show the PT-56LCX16.

* The presence of the DTV certification mark indicates that this product will 

successfully receive digital television transmissions that conform to any and all of the 
video formats described in the ATSC Digital Television Standard.

ATSC CERTIFIED *

DIGITAL TELEVISION

As an 

E

NERGY 

S

TAR

®

 Partner, Panasonic Corporation of North America has 

determined that this product or product model meets the 

E

NERGY 

S

TAR

®

 guidelines 

for energy efficiency.

Summary of Contents for PT 52LCX66

Page 1: ... contact us via the web at http www panasonic com contactinfo Puerto Rico For assistance please call 787 750 4300 or visit us at www panasonicpr com Before connecting operating or adjusting this product please read the instructions completely Please keep this manual for future reference This operating instruction book is designed for use with models PT 52LCX66 PT 56LCX66 PT 61LCX66 PT 52LCX16 PT 5...

Page 2: ...ied by the manufacturer 12 Use only with the cart stand tripod bracket or table specified by the manufacturer or sold with the apparatus When a cart is used use caution when moving the cart apparatus combination to avoid injury from tip over 13 Unplug this apparatus during lightning storms or when unused for long periods of time 14 Refer all servicing to qualified service personnel Servicing is re...

Page 3: ...PT 52LCX16 TY 56LC66 for the PT 56LCX66 or PT 56LCX16 TY 56LC16 for the PT 56LCX66 or PT 56LCX16 and TY 61LC66 for the PT 61LCX66 or PT 61LCX16 Use with other stands may result in the Projection Display becoming unstable possibly causing injury 2 This Projection Display should not be exposed to direct sunlight extreme temperatures or moisture as this can result in serious irreparable damage 3 This...

Page 4: ...rt 15 of the FCC Rules These limits are designed to provide reasonable protection against harmful interference in a residential installation This equipment generates uses and can radiate radio frequency energy and if not installed and used in accordance with the instructions may cause harmful interference to radio communications However there is no guarantee that interference will not occur in a p...

Page 5: ...ls 36 Picture Adjustments 37 Audio Adjustments 40 Sleep Timer Feature 42 Lock Feature 43 Photo Viewer 47 Setup Features 52 Operating Peripheral Equipment 58 Remote Control Operation Code List 59 Warning Indicators 63 Replacing the lamp unit 64 Troubleshooting 66 Specifications 68 Cleaning 69 Customer Services Directory 70 Limited Warranty 71 Other Information 72 Index 79 Table of Contents Basic Op...

Page 6: ...cent lighting can reduce Remote Control transmitter range Adequate ventilation is essential to prevent internal component failure Keep away from areas of excessive heat or moisture Optional External Equipment The Video Audio connection between components can be made with shielded video and audio cables For best performance video cables should utilize 75 Ω coaxial shielded cables Cables are availab...

Page 7: ...eries 5 Battery replacement is necessary when the Remote Control acts sporadically or stops operating the Projection Display set Helpful Hints 1 Frequent Remote Control users choose long lasting Alkaline batteries as replacements 2 Whenever batteries are removed you may need to reset Remote Control infrared codes We suggest making a note of the codes on page 58 prior to setting up the remote Reset...

Page 8: ...ing and transmitting HDTV High Definition Television Television with improved picture quality by increasing vertical and horizontal resolution Glossary and Acronyms ATSC Advanced Television Systems Committee Standardization body that developed the Digital Television Terrestrial formats HDMI High Definition Multimedia Interface Interface that supports every uncompressed digital format as well as al...

Page 9: ...LAY While remote is in VCR or DVD mode press to play SD Accesses the Photo Viewer feature 11 PAUSE While remote is in VCR or DVD mode press to pause 12 TV VCR Press to switch to TV or VCR ASPECT Changes display aspect ratio 13 SAP In analog mode press to access audio modes Stereo SAP or Mono In digital mode press to access next audio track 14 OK Press to select menu and sub menu items 15 RETURN Pr...

Page 10: ... Press to adjust TV sound and to navigate menus 9 CH Press to change channels and to navigate menus 10 Remote Control Sensor Receives infrared signal from Remote Control Location of Controls continued Remote Control Sensor Buttons listed above operate the same as Remote Control buttons of the same name Open Door Press position 1 and slide Door open as shown by arrow Close Door Press position 2 and...

Page 11: ... Audio Input Connector 1 Connect from other component Component 1 9 Component Video Input Connector 2 Connect from other component Component 2 10 Audio Input Connector 2 Connect from other component Component 2 11 HDMI Input Terminal 1 Audio 1 Connect from other component HDMI 1 12 Audio Video 1 Connect from other component HDMI 1 13 HDMI Input Terminal 2 Audio 2 Connect from other component HDMI ...

Page 12: ...nt or available as an option you may need to fashion a cable to suit the component concerned Read the instruction manual for each system component carefully before connecting it If there is a lot of jitter in the video signal input from the video source the picture on the screen may flicker In this case it will be necessary to connect a TBC time base corrector Notes on connections Installation For...

Page 13: ... reduce interference or have Premium scrambled channels A cable converter box is required for proper reception Check with your local cable company for its compatibility requirements For reception of cable channels connect the cable supplied by your local cable company Connect the cable from the antenna or cable system to the VHF UHF Cable In terminal on the back of the Projection Display Cable Box...

Page 14: ...nput terminals p 10 11 Notes Select the desired VIDEO input position by pressing the TV VIDEO button p 32 When connecting video cables priority is given to the S Video cable when the S Video input terminal and the video input terminal are connected at the same time Similar connections are available at the INPUT 1 2 3 input terminals p 10 11 S VHS VCR VHS VCR Installation continued Input 3 is locat...

Page 15: ... to the output device Y PB PR Please read the operating instructions included with the output device DVD Player COMPONENT VIDEO AUDIO Mode type Signal data Information menu display No of dots H V Vertical frequency Hz DTV Format Signals 480i 720 480 59 94 60 00 480i 480p 720 480 59 94 60 00 480p 720p 1 280 720 59 94 60 00 720p 1080i 1 920 1 080 59 94 60 00 1080i Component Signals Y PB PR that can ...

Page 16: ...e VCR as shown below Notes This unit contains Video and Audio Outputs for the purpose of recording television programming to VCR Due to license restrictions if a device STB DVD etc is connected to the HDMI input of the unit no video or audio output is allowed AV OUT signal is available when receiving digital channel However all formats will be down converted to NTSC Never connect the VIDEO IN and ...

Page 17: ...ate stereo system connect an external audio amplifier to AUDIO OUT on back of unit Notes AUDIO OUT terminals cannot be connected directly to external speakers AV terminals will not output Component Video PC HDMI IN or SD card signals Audio Adjustments Select Speakers Off in Other adjust menu under Audio menu p 41 Set amplifier volume to the preferred level ...

Page 18: ...Digital decoder and a multichannel amplifier must be connected to the Digital Audio Out jack on the unit Procedure Connect the Digital Audio cable from the Digital Audio Out jack on the unit to the Digital Audio In connection on the Dolby Digital decoder Notes When ATSC channel is selected the output from the Digital Audio Out jack will be Dolby Digital But if NTSC channel is selected the output w...

Page 19: ...correctly recognize the connected equipment and check that DIGA RAM theater and Player theater playback operates Setting this unit after connections After making connections as shown above set Ctrl with HDMI under Other adjust first to Off and then On using the Setup Menu p 56 HDMI For DIGA Connect with HDMI cable HDMI 1 is recommended For models PT 52LCX16 PT 56LCX16 PT 61LCX16 For RAM theater an...

Page 20: ...After making connections as shown above set Ctrl with HDMI under Other adjust first to Off and then On using the Setup Menu p 56 Notes Individual HDMI devices may require additional menu settings specific to each model Please refer to their respective operating instruction manuals When audio from other equipment connected to this unit via HDMI is output using DIGITAL AUDIO OUT of this unit the sys...

Page 21: ...ay 1080i 1920 1080 59 94 60 1080i 720p 1280 720 59 94 60 720p 480p 720 480 640 480 59 94 60 59 94 60 480p 480i 720 480 59 94 60 480i If you cannot display the picture because your Digital Set Top Box does not have a Digital Out terminal setting use the Component Video Input or the S Video Input or Video Input In this case the picture will be displayed as an analog signal 2 Press TV VIDEO to select...

Page 22: ...bles shown are not supplied with this set Do not set the horizontal and vertical scanning frequencies for PC signals which are above or below the specified frequency range Select the desired PC input position by pressing the TV VIDEO button p 32 Pin No Signal name 1 R 2 G 3 B 4 NC 5 NC 6 Ground for R 7 Ground for G 8 Ground for B 1 6 7 8 3 9 4 5 10 15 14 13 12 11 2 NC Not connected Pin No Signal n...

Page 23: ...parate When an external video processor scaler is used it must have RGB H V sync separate output Mode type Signal data No of dots H V Horizontal frequency kHz Vertical frequency Hz Personal Computer Signals VGA400 70 Hz 640 400 31 47 70 08 VGA480 60 Hz 640 480 31 47 59 94 Macintosh 13 640 480 35 00 66 67 VGA480 75 Hz 640 480 37 50 75 00 SVGA 60 Hz 800 600 37 88 60 32 SVGA 75 Hz 800 600 46 88 75 00...

Page 24: ...into an AC outlet Press POWER on Projection Display or Remote Control to turn power off Note When the power cord is disconnected the internal cooling fan stops operating In this case the lamp will be insufficiently cooled and will take a while to turn ON again Power ON Power OFF The Power Indicator blinks Red for about 1 minute and then LED turns off Turning the Power ON and OFF LED ACTION Off Pow...

Page 25: ... factory setting You can select English Spanish or French as the on screen displays language Press to select Language Language English Language Press to display Language screen 1 Press to select English Español or Français 2 3 Press to go to previous screen Or select icon then press OK for same results ANT In Cable Mode All Start scan Auto program Press to select ANT In Press to select Cable or An...

Page 26: ... Adv adjust Normal No Dynamic iris On Gamma adj Full Blk extension 10 R level 10 G level 10 B level 10 Picture Audio Timer Lock Memory card Setup Menu Button operation during Menu display Menu navigation to exit menu Basic Menu Navigation Example of a procedure Depending on the signal being input some items may or may not be adjustable and some functions may or may not be available Note While Main...

Page 27: ...ust or set desired menu item C o l o r 5 Sub Menu Field Next Icon Other adjust Video NR On 3D Y C filter On Color matrix SD MPEG NR On Black level Light 3D I P On Color corr On Other adjust Video NR On 3D Y C filter On Color matrix SD MPEG NR On Black level Light 3D I P On Color corr On Other adjust Video NR On 3D Y C filter On Color matrix SD MPEG NR Off Black level Light 3D I P On Color corr On ...

Page 28: ...ess MENU to display the Main Menu screen Press to select Setup icon Press to display the Setup menu 1 Picture Audio Timer Lock Memory card Setup Menu CH scan All Language Program channel Input labels CC Other adjust Setup Language English Language Press to select Language Press to display Language screen 2 3 Press to select English Español or Français 4 Press to go to previous screen Or select ico...

Page 29: ...t time or whenever you change the antenna configuration Press to select ANT In 4 Press to select Antenna or Cable Press to select Mode 5 Press to select All or Analog Press to start Scan Press to select Start scan 6 Picture Audio Timer Lock Memory card Setup Menu Now scanning analog channel Progress CH scan All Language Program channel Input labels CC Other adjust Setup Auto Manual Signal meter Pr...

Page 30: ...ress to select Program channel CH scan All Language Program channel Input labels CC Other adjust Setup Edit CH 1 2 3 4 5 6 7 8 9 10 No No No No No No No No No No Caption Favorite Add Apply Press to select Edit Press to enter the edit mode Press to select the desired preset channel line Press to select edit area CH Caption Favorite Add 4 5 Tuning channels continued Note If Lock p 43 has been set yo...

Page 31: ...to select Yes or No Preview CH You can display a program by selecting it in the small window at the top left of the screen This preview only appears if a channel was added by selecting Yes Press to enter you selection Press to move cursor to Apply Press to enter the Caption Press to move cursor to Apply Press to enter your program 6 7 2 3 4 5 6 3 Edit Favorite Press to select Favorite Press to sel...

Page 32: ...ed HDMI 1 2 Signal of source connected to HDMI IN 1 is displayed HDMI 2 2 Signal of source connected to HDMI IN 2 is displayed Video 1 Signal of source connected to INPUT 1 is displayed Video 2 Signal of source connected to INPUT 2 is displayed Video 3 Signal of source connected to INPUT 3 is displayed PC Signal of source connected to PC IN is displayed Photo Photo Viewer Signal of source connecte...

Page 33: ...ning Step Action Channel Banner Display 1 Press 1 1 2 Press 5 15 3 Press OK 15 Unit Status display Channel Banner Minimized Press CH to minimize the displayed channel banner It will display the channel number and the station identification if available Channel Banner Maximized Press RECALL to maximize the displayed channel banner 15 2 ABC HD Channel Number Station Identifier Closed Caption Channel...

Page 34: ...E while it s position is highlighted 1 Display the channel to be placed on the Favorites list Press OK to display the highlighted channel 3 Projection Display operation continued Note The audio output from AV OUT is not muted Press FAVORITE Press FAVORITE repeatedly to change between pages 1 3 2 3 3 3 or exit Pressing also changes the page Press or a NUMBER keys 1 9 and 0 to highlight a channel on...

Page 35: ...dio Program sub language broadcasts are both being received simultaneously Select the Stereo or SAP audio mode MTS Stereo broadcast Multi channel Television Sound Stereo broadcast Select Stereo audio mode If stereo broadcast is weak and the display flickers select Mono audio mode for possibly better results SAP broadcast Secondary Audio Program sub language Select SAP audio mode for the sub langua...

Page 36: ...may occur around the edges so that part of the picture may no longer be visible We recommend viewing in 4 3 mode so you can enjoy the picture as it was intended to be seen During PC input the mode switches between 4 3 and FULL only When an HD signal 1080i 720p is received the mode switches between FULL H FILL JUST and ZOOM 4 3 FULL FULL ZOOM JUST 4 3 Mode Picture Explanation JUST JUST 9 16 JUST mo...

Page 37: ...icture Adjusts white areas of picture Brightness Adjusts dark areas of picture Color Adjusts desired color intensity Tint Adjusts natural fresh tones Sharpness Adjusts clarity of outline detail Color temp Color temperature To increase or decrease Warm red and Cool blue colors to suit personal preferences Color mng Color management Color mng On enhances green and blue color reproduction especially ...

Page 38: ... Vertical 48 120 Hz Lets you choose one of three pre set Picture Modes that best suits the program to which you are viewing Selecting this feature will also affect Color Temperature setting Vivid This is the default mode It provides enhanced picture contrast and sharpness for viewing in a well lit room Standard Recommended for normal viewing conditions with subdued room lighting Cinema Select this...

Page 39: ... receiving a strong signal 3D Y C filter Minimizes noise and cross color in the picture Color matrix Select SD or HD SD Color matrix is set same as a normal TV system NTSC HD Color matrix is set same as a High Definition system ATSC With a 480p signal from equipment connected to COMPONENT VIDEO INPUT Y PB PR or HDMI INPUT terminals or from the unit s DTV tuner you can select SD or HD color matrix ...

Page 40: ...tings Bass Increase or decrease the bass response Treble Increase or decrease the treble response Balance Emphasize the left right speaker volume Standard Emits the original sound Dynamic Sound suited to music or movie Speech Sound suited to dialogue Audio Mode Press to select Audio mode Press to select audio mode Picture Audio Timer Lock Memory card Setup Menu Audio Normal No Audio mode Standard ...

Page 41: ...dio Mode Standard Bass 10 Treble 10 Balance 10 BBE Off Other Adjust Other adjust AI sound On Speakers On HDMI in Auto Audio leveler 7 Depending on the signal being input some menu items may or may not be adjustable and some functions may or may not be available Other detailed audio adjustments can be made BBE Press to select BBE Press to select BBE setting Audio Normal No Audio mode Standard Bass ...

Page 42: ...th sleep timer set displays remaining time The on screen display will flash 3 2 and 1 to indicate the last three 3 remaining minutes prior to turn off Press MENU to display the Main Menu screen Press to select Timer icon Press to display Timer menu Sleep Timer Feature Sleep 60 Timer Picture Audio Timer Lock Memory card Setup Menu Set Sleep Timer Press to select 0 30 60 or 90 Sleep time may be set ...

Page 43: ...elines for blocking the programs The default mode for the Lock category is the Unlocked state In this state you can surf the various categories of the Lock menu After you have created a password you are prompted to enter it before you can make any changes in the Lock menu Note Use a code that is easy to remember and record it in a safe place Upon entering the 4 digit code the Lock menu is displaye...

Page 44: ...nnel Program Change password Lock CH 1 3 0 CH 2 CH 3 CH 4 CH 5 CH 6 CH 7 Channel lock Press to select Channel Press to display the Channel lock menu Press to select CH 1 7 Press to select the desired Block channel Block program This television incorporates V Chip technology to block the viewing of movies and television programs according to the rating category There are four 4 Content Advisory Cat...

Page 45: ...ocked All children The themes and elements in this program are specifically designed for a very young audience including children from ages 2 6 TV Y7 FV Fantasy Violence Viewable Blocked Directed to older children Themes and elements in this program may include mild physical or comedic violence or may frighten children under the age of 7 Guidance TV G Viewable Blocked General audience It contains ...

Page 46: ...e Entering the password will override the block condition However the ratings selection will be retained Message Possible cause Game locked The TV VIDEO button was pressed when the Game lock had been selected Channel Locked Tuned to the designated channel when the Channel lock had been selected All locked Tuned to CH 3 or CH 4 when the Game lock had been selected Lock all is selected Program locke...

Page 47: ...unit 2 The SD Card is precision devices Do not subject them to excessive pressure or strong impacts As with any small object SD cards can be swallowed by young children Do not allow children to handle the SD card Front Card Slot p 10 SD Card Press in lightly on SD Card then release Insert the Card Remove the Card Insert Remove the Card With the SD logo facing upward insert the Card horizontally in...

Page 48: ...mber of JPEG images on the inserted card is displayed 3 Info Selected picture information is displayed No Image number or file name is displayed Date Date of recording is displayed Pixel Display resolution is displayed Note Depending on the JPEG type Info contents may not be displayed correctly 4 Navigation Area Operational buttons are displayed as GUI Graphical User Interface 5 Index Area JPEG im...

Page 49: ...02 0007 102 0008 MENU RETURN OK Select Select Card Warning Messages Message Description Is memory card in A card may not be inserted or the card format may not be supported Use SD cards formatted in a digital camera No file The card may not contain image data or all images on the card may be incompatible If there is a problem with the card or card data the following messages will appear Pressing S...

Page 50: ...n Display Pressing RECALL during Slide Show mode allows you to display or remove the Navigation Area Example If Display Mode is set to Slide Disp time is set to 5 seconds and Repeat is Off Displayed 5 seconds Stop Press OK during a slide show to stop it The sub menu is displayed Press to select each item Press to set each item 1 3 Pressing RETURN during Slide Show mode allows you to exit the mode ...

Page 51: ...0006 Date 01 01 2000 Pixel 2048x1536 102 0002 102 0003 102 0005 102 0006 102 0004 102 0001 102 0007 102 0008 MENU RETURN OK Select Select Exit Single Play mode Change image Rotate image Press Each press right rotates image 90 Press Each press left rotates image 90 Navigation Display Pressing RECALL while in Single Play Mode displays or removes the Navigation Area screen Pressing the buttons change...

Page 52: ...Menu Press MENU to display the Main Menu screen Press to select Setup icon Press to display the Setup menu CH scan Press to select CH scan Press to select Fav or All CH scan All Language Program channel Input labels CC Other adjust Setup Auto Manual Signal meter Program channel CH 2 1 Signal strength Current 85 Peak level 85 Signal meter Press to select desired channel 3 Note The signal meter work...

Page 53: ...tion If analog connected equipment is used for displaying or recording closed caption CC should be set On Off on the connected equipment The CC mode setting of the TV will not affect the analog input If a digital program is being output in analog format the CC data will also be output in analog format If digital connected equipment is used for input CC should be set On on either the connected equi...

Page 54: ... Prop serif Mono Prop Casual Cursive Small caps Style Automatic None Raised Depressed Uniform Drop shadow Foreground The color of the font Automatic Black White Red Green Blue Yellow Magenta Cyan Fore opacity The opacity of the font Automatic Transparent Translucent Solid Flashing Background The color of the text box Automatic Black White Red Green Blue Yellow Magenta Cyan Setup Features continued...

Page 55: ...License Press to select About Press to display the About screen Press to select Version or License Press to display Version or License 1 2 Reset About Reset Setup Setup is reset Enter password Enter your password by pressing 0 9 keys to reset the Setup settings Press to select Reset Press to display the password screen The confirmation screen is displayed Select Yes and press OK Notes Performing R...

Page 56: ...t few seconds of playback Image sound may not function for the first few seconds after Input mode is switched Volume function will be displayed when adjusting the volume of the equipment Easy playback is also available by using the remote of the Amplifier Read the Amplifier manual Press to select the each item Press to select the setting 3 Notes Control with HDMI function does not work in countrie...

Page 57: ...ment on Turning off home theater Player theater RAM theater automatically switches unit to TV speakers One touch Theater Playback If the ONE TOUCH PLAY key is pressed on the AV amp or Player theater Remote Control the following sequence of operations is performed automatically 1 Home theater Player theater power switches On and playback begins 2 TV power switches On and the playback screen is disp...

Page 58: ...onds Release the buttons when the equipment selection buttons start flashing 5 Confirm the equipment with the Remote Control The external equipment turns On If the equipment does not operate with Remote Control When your equipment has a single code Input the remote control code again When your equipment has multiple codes Change the code with step 4 above and test again p 60 62 Caution Registratio...

Page 59: ... of all functions of all models KEY NAME VCR MODE DBS CBL MODE DVD MODE DBS CBL VCR Power STB Power Power DVD Power TV Input Switch TV Input Switch TV Input Switch TV Input Switch Channel Up Down Channel Up Down Channel Up Down TV Volume Up Down TV Volume Up Down TV Volume Up Down OK Cursor Up Down Right Left STB Menu Exit VCR Display DBS Display TV Recall DVD Display TV Mute TV Mute TV Mute TV Mu...

Page 60: ...535 Hitachi 0819 1250 HTS 0775 1775 Hughes 0749 1442 1749 Hughes Network Systems 0749 1142 1442 1443 1444 1749 iLo 1535 Janeil 0152 Jerrold 0869 JVC 0775 1170 1775 LG 1226 1414 Magnavox 0722 0724 Memorex 0724 Mitsubishi 0749 Motorola 0856 0869 NEC 1270 Next Level 0869 Panasonic 0152 0247 0701 1786 Paysat 0724 Philips 0099 0722 0724 0749 0819 1076 1142 1442 1749 Pioneer 1442 Proscan 0392 0566 Proto...

Page 61: ...ax 0042 Philco 0035 Philips 0035 0618 0739 1081 1181 Pilot 0037 Pioneer 0067 Proscan 0060 1060 Pulsar 0039 Quasar 0035 0077 1035 RadioShack 0000 Radix 0037 Randex 0037 RCA 0042 0060 0077 0807 0880 1035 1060 Realistic 0000 0035 0037 ReplayTV 0614 0616 Ricavision 1972 Runco 0039 Samsung 0045 0739 1014 Sanky 0039 Sansui 0000 0067 1479 Sanyo 0159 Brand Code Scott 0043 0045 Sears 0000 0035 0037 0042 12...

Page 62: ... 0792 Panasonic 0490 0503 0632 0703 1010 1011 1362 1462 1490 1762 1967 Philips 0503 0539 0646 0675 1267 1354 PianoDisc 1024 Pioneer 0525 0571 0631 0632 Polaroid 1061 1086 Polk Audio 0539 Proceed 0672 Proscan 0522 RCA 0522 0571 0822 Rio 0869 Rotel 0623 Sampo 0752 Samsung 0490 0573 0820 1075 Sansui 0695 Sanyo 0695 0873 1967 Brand Code Sensory Science 1158 Sharp 0630 0675 0752 1256 Shinsonic 0533 Son...

Page 63: ...ervice center 1 Flashes orange 3 times Power shuts off Malfunction 5 Contact service center 1 Flashes orange 5 times Power shuts off Malfunction 6 Contact service center 1 Flashes orange 7 times Power shuts off The Lamp Cover is unsecured Securely attach Lamp Cover Flashes orange 8 times Power shuts off Malfunction 7 Contact service center 1 Lights solid orange The screen isn t illuminated Malfunc...

Page 64: ...times lit the length of time between lightings etc may shorten lamp life Because of this we recommend having a replacement lamp on hand Failure to follow these warnings when replacing the lamp unit could result in personal injury 1 The lamp could rupture if dropped and lamp fragments could cause injury 2 Because the lamp unit is hot immediately after its use touching it may cause burns Please allo...

Page 65: ...n the Lamp Unit Lock Open Knob to the right until it clicks Notes Properly dispose of the old lamp Please see page 64 Secure the Lamp Unit and Lamp Unit housing door If they are not secured a protective circuit will not allow the lamp to turn on At this point confirm that the Lamp Unit will not come out by pulling on the Lamp Unit Lock Open Knob 2 3 4 5 7 After lamp replacement you must reset the ...

Page 66: ...Is the antenna cable connected properly 12 13 A sudden temperature change may have caused condensation in the internal optics which results in blurring or vertical lines Please wait until room temperature is normal and constant before turning power ON These symptoms will clear up as time passes Depending on the connected device a 1080i input signal may cause the picture to flicker If the connected...

Page 67: ...with HDMI connection picture is displayed with unnatural colors as if red and blue are reversed Change Color corr from Off to On 39 Pictures from equipment are unusual when the equipment is connected via HDMI Is the HDMI cable connected properly 19 21 Turn Off the TV unit and device then turn them On again Check the input signal from the equipment 32 No sound is produced Is Sound Mute active 34 Is...

Page 68: ...p p 75 Ω D SUB 15P AUDIO 0 5 Vrms M3 Stereo mini Pin Jack AV INPUT 1 3 VIDEO 1 0 Vp p 75 Ω RCA Pin Jack S VIDEO Y 1 Vp p 75 Ω C 0 286 Vp p 75 Ω Mini DIN 4 pin AUDIO L R 0 5 Vrms RCA Pin Jack 2 COMPONENT VIDEO INPUT 1 2 Y 1 0 Vp p with sync 75 Ω Pin Jack PB PR 0 35 Vp p 75 Ω Pin Jack 2 AUDIO L R 0 5 Vrms RCA Pin Jack 2 HDMI 1 HDMI 1 2 2 HDMI type A Connector AUDIO L R 0 5 Vrms RCA Pin Jack Type 2 S...

Page 69: ...ase be careful to follow the instructions that come with the cloth DO NOT bring into contact with insecticide or other volatile substances DO NOT allow the unit to come into contact for extended periods with rubber or vinyl products Remove dirt and soiling by wiping with a light cloth Even if the unit is heavily soiled do not apply cleaner directly to the unit Soak a cloth in a solution of neutral...

Page 70: ... Panasonic Sales Company Factory Servicenter Ave 65 de Infantería Km 9 5 San Gabriel Industrial Park Carolina Puerto Rico 00985 Phone 787 750 4300 Fax 787 768 2910 For hearing or speech impaired TTY users TTY 1 877 833 8855 Purchase Parts Accessories and Instruction Books online for all Panasonic Products by visiting our Web Site at http www pasc panasonic com or send your request by E mail to npc...

Page 71: ...d by products not supplied by the warrantor or failures which result from accidents misuse abuse neglect bug infestation mishandling misapplication alteration faulty installation set up adjustments misadjustment of consumer controls power line surge lightning damage modification or commercial use such as in a hotel office restaurant or other business rental use of the product service by anyone oth...

Page 72: ... 3 software developed by the third parties and available under certain terms and conditions For the software categorized as 1 and 2 please refer to the terms and conditions of the following GNU GENERAL PUBLIC LICENSE and GNU LESSER GENERAL PUBLIC LICENSE respectively If you wish to get further information as to the software please contact the web site below http www fsf org licenses and http www a...

Page 73: ...s License since you have not signed it However nothing else grants you permission to modify or distribute the Program or its derivative works These actions are prohibited by law if you do not accept this License Therefore by modifying or distributing the Program or any work based on the Program you indicate your acceptance of this License to do so and all its terms and conditions for copying distr...

Page 74: ... attach them to the start of each source file to most effectively convey the exclusion of warranty and each file should have at least the copyright line and a pointer to where the full notice is found one line to give the program s name and an idea of what it does Copyright year name of author This program is free software you can redistribute it and or modify it under the terms of the GNU General...

Page 75: ...roblems that might be introduced by others Finally software patents pose a constant threat to the existence of any free program We wish to make sure that a company cannot effectively restrict the users of a free program by obtaining a restrictive license from a patent holder Therefore we insist that any patent license obtained for a version of the library must be consistent with the full freedom o...

Page 76: ... supplied function or table used by this function must be optional if the application does not supply it the square root function must still compute square roots These requirements apply to the modified work as a whole If identifiable sections of that work are not derived from the Library and can be reasonably considered independent and separate works in themselves then this License and its terms ...

Page 77: ...ry together in an executable that you distribute 7 You may place library facilities that are a work based on the Library side by side in a single library together with other library facilities not covered by this License and distribute such a combined library provided that the separate distribution of the work based on the Library and of the other library facilities is otherwise permitted and prov...

Page 78: ...R CORRECTION 16 IN NO EVENT UNLESS REQUIRED BY APPLICABLE LAW OR AGREED TO IN WRITING WILL ANY COPYRIGHT HOLDER OR ANY OTHER PARTY WHO MAY MODIFY AND OR REDISTRIBUTE THE LIBRARY AS PERMITTED ABOVE BE LIABLE TO YOU FOR DAMAGES INCLUDING ANY GENERAL SPECIAL INCIDENTAL OR CONSEQUENTIAL DAMAGES ARISING OUT OF THE USE OR INABILITY TO USE THE LIBRARY INCLUDING BUT NOT LIMITED TO LOSS OF DATA OR DATA BEI...

Page 79: ...8 47 51 JPEG Thumbnail 48 L LAMP indicator 10 63 66 M MPAA 8 43 44 MSO 8 MUTE button 9 34 N NTSC 8 NUMBER keys 9 33 O OK button 9 P Password 8 43 46 PCM 8 18 21 PC input terminal 11 22 PC position 32 38 POWER button Remote Control 9 24 POWER button POWER indicator Unit 10 24 63 R R TUNE button 9 32 RECALL button 9 33 Remote Control Sensor 10 Reset All Memory Functions 7 RGB cable 22 S SAP button 9...

Page 80: ...product can be found on its back cover You should note this serial number in the space provided below and retain this book plus your purchase receipt as a permanent record of your purchase to aid in identification in the event of theft or loss and for Warranty Service purposes Model Number Serial Number Panasonic Consumer Electronics Company Division of Panasonic Corporation of North America One P...

Reviews: