background image

Basic Operating Instructions

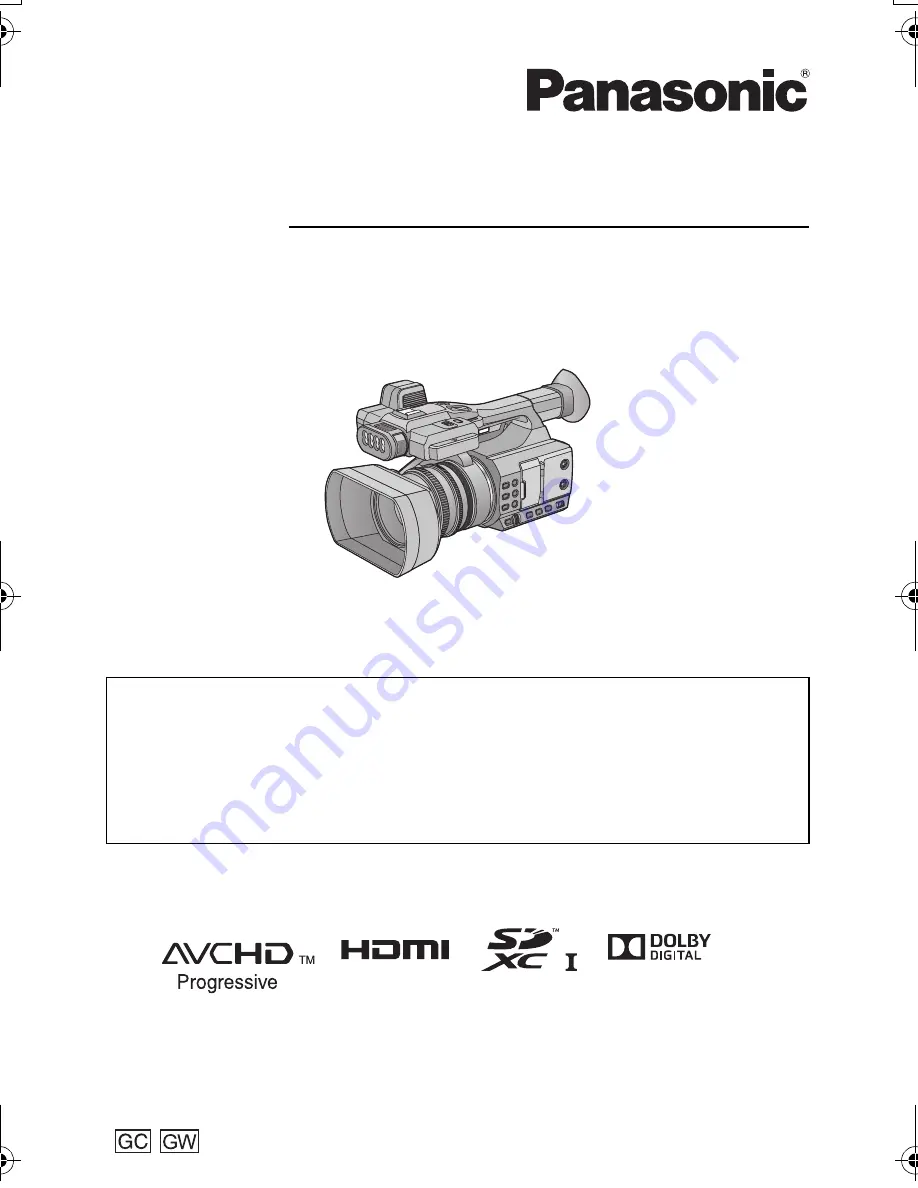
High Definition Video Camera

Model No. 

HC-PV100

SQT1407

F0716NK0

until 
2016/7/13

Please read these instructions carefully before using this 
product, and save this manual for future use.

More detailed operating instructions are available in “Operating Instructions (PDF format)”. To 
read it, download it from the website.

https://eww.pavc.panasonic.co.jp/hdw/oi/HC-PV100/

Click the desired language.

* You will need Adobe Reader to browse or print the Operating Instructions (PDF format).

You can download and install a version of Adobe Reader that you can use with your OS from 
the following website. (As of July 2016)

http://www.adobe.com/products/acrobat/readstep2.html

HC-PV100GCGW-SQT1407_mst.book  1 ページ  2016年7月12日 火曜日 午前11時17分

Summary of Contents for HC-PV100

Page 1: ...ons are available in Operating Instructions PDF format To read it download it from the website https eww pavc panasonic co jp hdw oi HC PV100 Click the desired language You will need Adobe Reader to browse or print the Operating Instructions PDF format You can download and install a version of Adobe Reader that you can use with your OS from the following website As of July 2016 http www adobe com ...

Page 2: ...d space Ensure this unit is well ventilated Do not obstruct this unit s ventilation openings with newspapers tablecloths curtains and similar items Do not place sources of naked flames such as lighted candles on this unit The mains plug is the disconnecting device Install this unit so that the mains plug can be unplugged from the socket outlet immediately This unit is intended for use in moderate ...

Page 3: ...tom Disposal of Old Equipment and Batteries Only for European Union and countries with recycle systems These symbols are only valid in the European Union and countries with recycle systems If you wish to discard this product please contact your local authorities or dealer and ask for the correct method of disposal IS 616 IEC 60065 R 41016268 IS 16046 IEC 62133 R 41022500 ...

Page 4: ...ables If you use optional accessories use the cords and the cables supplied with them Do not extend the cords and the cables Do not spray insecticides or volatile chemicals onto the unit If the unit is sprayed with such chemicals its body may be marred and the surface finish may peel off Do not leave rubber or plastic products in contact with the unit for a long time When you use the unit in a san...

Page 5: ...perature rises or falls In cold areas the full charge indication may not appear or the low battery indication may appear about 5 minutes after starting use At high temperatures the protection function may be triggered making it impossible to use the unit Be sure to detach the battery after use If the battery is left attached a minute amount of current continues to flow even if the unit is off Keep...

Page 6: ...ry is over discharged or the temperature of the battery is too high or low It can be charged but it may take a few hours to complete the charging normally Once normal charging starts the charging lamp lights up green However depending on the conditions of use even when normal charging is taking place the charging lamp may keep flashing in approx 4 second intervals until charging is completed Flash...

Page 7: ...urred please wipe it using a soft cloth such as a lens cloth Do not touch the LCD monitor with your finger nails or rub or press with strong force It may become hard to see or hard to recognize the touch when the LCD protection sheet is affixed When the unit has become very cold for example due to storage in a cold area its LCD monitor will be slightly darker than usual immediately after the unit ...

Page 8: ... work properly Likewise the above also applies in a case where any type of repair is made to the unit About Condensation When the lens the viewfinder or LCD Monitor is fogged up Condensation occurs when there is a change in temperature or humidity such as when the unit is taken from outside or a cold room to a warm room Please be careful as it may cause the lens the viewfinder or LCD monitor to be...

Page 9: ... this unit SDHC Memory Card and SDXC Memory Card 4 GB or more Memory Cards that do not have the SDHC logo or 48 GB or more Memory Cards that do not have the SDXC logo are not based on SD Memory Card Specifications Refer to page 23 for more details on SD cards For the purposes of these operating instructions The battery pack is referred to as the Battery SDHC Memory Card and SDXC Memory Card are re...

Page 10: ...er 26 Using the LCD monitor 26 How to use the touch screen 27 Viewfinder adjustment 27 Setting date and time 28 Recording Selecting a media to record 29 Formatting media 29 Language Selection 29 Recording motion pictures 30 Recording still pictures 30 Intelligent Auto Mode Manual Mode 31 Using the zoom 32 Manual Recording 33 Focus 33 White Balance 33 Iris Gain adjustment 34 Manual shutter speed 34...

Page 11: ...K2CJ2YY00052 C K2CQ2YY00117 In Saudi Arabia always use A HC PV100GW D K2CP2YY00083 AV cable K2KYYYY00048 Eye cup l 18 SYA0019 Lens cap l 17 SYA0073 Lens hood 1 SYK1497 SYA0021 Microphone holder l 18 VYC1146 INPUT terminal cap 2 caps 2 VJF1468 Microphone holder mounting screws l 18 12 mm length 2 screws VYC1144 Diffusion filter white l 19 SYA0071 Color conversion filter amber l 19 SYA0072 1 The len...

Page 12: ...es Transfer data files to perform nonlinear editing on another device PC etc This unit supports USB 2 0 1 SD cards are optional and not supplied with this unit 2 A USB 2 0 cable is not supplied with this unit Use a commercially available double shielded USB 2 0 cable with a ferrite core If possible we recommend using a cable with a length of 1 5 m or less Preparation What you can do with this unit...

Page 13: ...lly available High Speed HDMI cable If possible we recommend using a cable with a length of 3 m or less USB Host Mode Refer to the following support site for information about an external media device http panasonic jp support global cs e_cam This Site is English only Connecting to a TV When connecting with an HDMI cable using an HDMI to DVI converter etc be sure to connect the HDMI cable to the c...

Page 14: ...ck Mode 10 User 5 button REC CHECK l 35 11 Status indicator l 25 12 Power switch l 25 13 Recording start stop button l 30 14 DC input terminal DC IN l 21 15 Charging lamp CHG 16 Camera remote terminal CAM REMOTE FOCUS IRIS terminal 3 5 mm diameter mini jack ZOOM S S terminal 2 5 mm diameter super mini jack 17 Headphone terminal 18 VIDEO OUT terminal 19 AUDIO OUT L CH1 terminal AUDIO OUT L 20 AUDIO...

Page 15: ...is button IRIS l 33 29 User 1 button LCD EVF l 35 30 User 2 button B LIGHT l 35 31 User 3 button O I S l 35 32 Focus ring l 33 33 Zoom ring l 32 34 Iris ring l 33 35 Ring LED 36 Menu button MENU l 39 37 Jog dial SEL PUSH SET l 33 38 Gain button GAIN l 34 39 White Balance button WHITE BAL l 33 40 Shutter button SHUTTER l 34 41 iA MANU switch iA MANU l 31 22 23 21 25 24 32 33 34 35 37 36 38 39 40 41...

Page 16: ...slot cover l 24 48 Access lamp card 1 l 24 49 Card slot 1 l 24 50 Access lamp card 2 l 24 51 Card slot 2 l 24 52 INPUT1 INPUT2 switches 53 CH1 CH2 switches 54 AUDIO LEVEL CH1 AUDIO LEVEL CH2 knobs 55 LCD monitor extract part l 26 56 LCD monitor Touch screen l 27 57 Shoulder strap fixture l 18 58 Eye cup mount l 18 59 Viewfinder l 27 60 Eye cup l 18 61 Battery release button PUSH l 20 62 Battery ho...

Page 17: ... lens cap while the unit is not used Place your fingers in the recesses on the lens cap to hold it when attaching or removing it To attach the lens cap align its projections horizontally and then push them into the slits on the lens hood until a clicking sound is heard Adjust the length of the grip belt so that it fits your hand Adjust the grip belt according to the size of your hand If you find i...

Page 18: ...oing out of doors to record so as to avoid dropping this unit Attaching the front microphone The microphone holder is set up so that a 21 mm external microphone AG MC200G optional can be attached Check in advance whether the microphone you wish to use can be attached 1 Attach the microphone holder to the microphone holder attachment part Attach by using a commercially available screw driver When a...

Page 19: ... Attach the INPUT terminal cap while the AUDIO INPUT1 2 terminals XLR 3 pin are not used Attaching removing the filters for the built in LED light It is possible to attach the supplied diffusion filter or color conversion filter Push in until a clicking sound is heard Hold both the left and right sides of the filter to remove it For information on the effects of the filters refer to the Operating ...

Page 20: ...te safety standards There is a possibility that these battery packs may lead to fire or explosion Please be advised that we are not liable for any accident or failure occurring as a result of use of a counterfeit battery pack To ensure that safe products are used we would recommend that a genuine Panasonic battery pack is used Install the battery by inserting it in the direction shown in the figur...

Page 21: ... charging is completed If the charging lamp flashes refer to page 6 The DC plug of the AC adaptor depending on its angle may block your view of the charging lamp To check the charging lamp status adjust the angle of the DC plug Connecting to the AC outlet It is possible to use this unit with power supplied from the AC outlet by turning on the unit with the AC adaptor connected Even when you use th...

Page 22: ...ely Charging time and recordable time vary depending on the usage conditions such as high low temperature If this unit is turned on charging may take longer than the values in the table above The actual recordable time refers to the recordable time when repeatedly starting stopping recording turning the unit on off moving the zoom lever etc The batteries heat up after use or charging This is not a...

Page 23: ...UHS Speed Class are the speed standards regarding continuous writing To check the class see the labelled side etc of the card Keep the Memory Card out of reach of children to prevent swallowing Preparation Preparation of SD cards This unit an SDXC compatible device is compatible with SDHC Memory Cards and SDXC Memory Cards When using an SDHC Memory Card SDXC Memory Card with other equipment check ...

Page 24: ...o not j Remove the SD card j Turn the unit off j Insert and remove the USB Cable j Expose the unit to vibrations or shock Performing the above while the lamp is on may result in damage to data SD card or this unit Do not expose the terminals of the SD card to water dirt or dust Do not place SD cards in the following areas j In direct sunlight j In very dusty or humid areas j Near a heater j Locati...

Page 25: ...de If you press the recording start stop button or sub recording start stop button in Playback Mode the mode will be switched to Recording Mode and recording will start Preparation Turning the unit on off Preparation Selecting a mode Recording Mode l 30 The recording screen is displayed You can record motion pictures and still pictures Playback Mode l 37 The thumbnail screen for playback is displa...

Page 26: ...D monitor in the direction as indicated in the figure Hold the LCD monitor extract part A and extract the LCD monitor until it clicks into position 2 Rotate to the position that is easy to view Preparation Using the LCD monitor Viewfinder To retract the LCD monitor Retract as shown in the figure with the LCD facing downward Range of rotation of the LCD monitor It can rotate up to 270o towards the ...

Page 27: ...n changing a page or performing settings Do not touch the LCD monitor with hard pointed tips such as ball point pens Viewfinder adjustment This setting will not affect the images actually recorded It adjusts the field of view to show the image on the viewfinder clearly 1 Adjust the viewfinder to suit your vision so that you can see the display images clearly Be careful not to trap your fingers whe...

Page 28: ...ttery connect the AC adaptor or attach a charged battery to this unit Leave the unit as it is for approx 24 hours and the battery will maintain the date and time for approx 6 months The battery is still being recharged even if the unit is off The way that time is displayed can be changed in the menu settings DISP SETUP DATE TIME or DATE FORMAT Time difference from the Greenwich Mean Time can be se...

Page 29: ...ed and cannot be restored Back up important data on a PC etc When using two SD cards format both SD cards Select the menu l 39 When formatting is complete touch EXIT to exit the message screen Do not turn this unit off or remove the SD card while formatting Do not expose the unit to vibrations or shock Language Selection You can select the language on the screen display and the menu screen Select ...

Page 30: ...ge the mode to Recording Mode l 25 Extract the LCD monitor 2 Press the USER button to which CAPTURE is registered or touch the applicable USER button icon to record a still picture For information on the locations of the USER buttons and information on USER button icons refer to page 35 When still pictures are being recorded the remaining recordable number of still pictures and the still picture i...

Page 31: ... 33 j Iris l 34 j GAIN l 34 j Shutter speed l 34 j SCENE MODE Camera controls that are disabled in Intelligent Auto Mode The following camera controls are disabled in Intelligent Auto Mode Iris ring Focus ring FOCUS A M button IRIS button GAIN button SHUTTER button WHITE BAL button USER buttons that are disabled in Intelligent Auto Mode USER buttons 1 to 5 may be disabled in Intelligent Auto Mode ...

Page 32: ... and the value gets smaller when zoomed out If you set i Zoom to ON the magnification level will be displayed as follows j iZ00 to iZ99 optical zoom range j Z99 i Zoom Recording Using the zoom Zoom ring 3 A side Wide angle recording zoom out B side Close up recording zoom in T T W W W W T T W W Zoom lever 1 Sub zoom lever 2 T side Close up recording zoom in W side Wide angle recording zoom out A B...

Page 33: ...ce natural colors depending on the scenes or lighting conditions If so you can adjust the White Balance manually Use the jog dial to change the settings Switch to Manual Mode l 31 1 Press the WHITE BAL button to switch to Manual White Balance Mode The previously used White Balance mode will be selected 2 Rotate the jog dial to switch the White Balance mode Recording Manual Recording IRIS SHUTTER G...

Page 34: ... 31 1 Press the GAIN button to switch to Manual Gain Mode The gain value will be displayed in dB 2 Adjust the gain by rotating the jog dial Manual shutter speed Adjust the shutter speed when recording fast moving subjects Use the jog dial to change the settings Switch to Manual Mode l 31 1 Press the SHUTTER button to switch to Manual Shutter Mode 2 Adjust the shutter speed by rotating the jog dial...

Page 35: ...r to page 36 Touch INHIBIT if not registering Next Previous page can be displayed by touching 3 Touch EXIT to complete the setting Using the USER button To use the function assigned to a USER button or USER button icon press the applicable USER button one of the USER buttons 1 to 5 or touch the applicable USER button icon one of the USER button icons 6 to 9 while operation icons are displayed Reco...

Page 36: ...FD Black Fade WHITE FADE W FD White Fade SLOT SEL SlotSel Slot Selection ATW LOCK ATW L ATW Lock D ZOOM D ZM Digital Zoom HISTOGRAM HIST Histogram REC CHECK REC C Recording Check LAST SCN DEL LstDel Last Scene Delete DRS DRS DRS FRZ FRAME FRZ Freeze Frame SUPER GAIN S Gain Super Gain AREA AREA Area Mode PUSH AF PushAF Push AF CAPTURE Capture Capture EVF LCD DETAIL DETAIL EVF LCD detail LCD EVF OUT...

Page 37: ... recording format j Scenes recorded in FHD 1920k1080 If you touch the recording format option ALL all scenes of the same recording mode in the selected media are displayed The thumbnails of scenes recorded on other devices with different system frequencies are indicated with This unit cannot play back these scenes If you have touched the recording mode option AVCHD After you have touched a recordi...

Page 38: ... icon is being displayed or do not touch the icon for a certain period it will disappear To display again touch the screen Motion picture playback Still picture playback 1 Playback Pause 6 Fast rewind playback 5 Fast forward playback Stops the playback and shows the thumbnails 1 Slide show playback of the still pictures in numerical order start pause 2 Plays back the previous picture 1 Plays back ...

Page 39: ...MENU button 2 Touch the top menu A 3 Touch the submenu B Next Previous page can be displayed by touching 4 Touch the desired item to enter the setting 5 Touch EXIT to exit the menu setting Menu Using the menu screen MENU MENU ...

Page 40: ...RE REC TCG TC PRESET Audio Setup AUDIO LOW CUT CH1 AUDIO LOW CUT CH2 AUDIO LEVEL CH1 AUDIO LEVEL CH2 AUDIO ALC LINK AUDIO ALC CH1 AUDIO ALC CH2 INPUT1 LINE LEVEL INPUT2 LINE LEVEL INPUT1 MIC LEVEL INPUT2 MIC LEVEL Output Setup RESOLUTION DOWN CONV REMOTE REC REMOTE REC LINK HDMI TC OUTPUT H PHONE MODE VOLUME TEST TONE LCD EVF OUTPUT Display setting ZEBRA DETECT 1 ZEBRA DETECT 2 MARKER GUIDE LINES ...

Page 41: ...DIFFERENTIAL COPY 3 SELECT COPY User switch USER1 USER2 USER3 USER4 USER5 Output Setup RESOLUTION DOWN CONV HDMI TC OUTPUT 1 LCD EVF OUTPUT Display setting VIDEO OUT OSD DATE TIME DATE FORMAT AUDIO LEVEL METER 1 CARD BATTERY OTHER DISPLAY POWER LCD LCD SET EVF SET EVF COLOUR Other Functions FORMAT MEDIA MEDIA STATUS REC LAMP CLOCK SET TIME ZONE RING LED BLUE RING LED RED ALERT SOUND ECONOMY BATT E...

Page 42: ... battery again to ensure it is sufficiently charged l 21 In cold places the battery using time becomes shorter The battery has a limited life If the operating time is still too short even after the battery is fully charged the battery has worn out and needs to be replaced This unit cannot be operated though it is turned on This unit does not operate normally Remove the battery or AC adaptor wait a...

Page 43: ...hange or you may see horizontal bars in the image when the object is recorded under fluorescent light mercury light or sodium light etc but this is not a malfunction Change settings as follows j Set this unit to Auto Shutter Mode j Adjust the shutter speed to 1 50 1 60 or 1 100 Playback Problem Check points Scenes still pictures cannot be played back Any scenes still pictures where the thumbnails ...

Page 44: ...lied for any other use Additional information may be obtained from MPEG LA L L C See http www mpegla com Others About copyright This product incorporates the following software 1 the software developed independently by or for Panasonic Corporation 2 the software owned by third party and licensed to Panasonic Corporation 3 the software licensed under the GNU General Public License Version 2 0 GPL V...

Page 45: ...d JPEG corresponding Design rule for Camera File system based on Exif 2 2 standard Refer to Operating Instructions PDF format for picture size of a still picture and number of recordable pictures Recording media SDHC Memory Card 4 GB to 32 GB SDXC Memory Card 48 GB to 128 GB UHS I supported Refer to page 23 for details on SD cards usable in this unit Recording slots 2 slots 2 Slot function Relay s...

Page 46: ... k1 ZOOM S S 3 5 mm mini jack k1 FOCUS IRIS XLR audio input terminals XLR 3 pin k2 INPUT1 INPUT2 LINE 0 dBu 4 dBu switch with the menu MIC j40 dBu j50 dBu j60 dBu switch with the menu USB DEVICE USB terminal Type Micro B Hi Speed USB USB 2 0 used for the mass storage function read only HOST USB terminal Type A Hi Speed USB USB 2 0 for external media device connection bus power supported External m...

Page 47: ... below and use the Service Centre Locator for the name address of the nearest Authorised Service Centre Send or take the product to a Panasonic Authorised Service Centre together with your proof of purchase receipt as a proof of purchase date Please note that freight and insurance to and or from your nearest Authorised Service Centre must be arranged by you Note that home or pick up delivery servi...

Page 48: ...Panasonic Corporation Web site http www panasonic com Panasonic Corporation 2016 SQT1407 F0716NK0 ...

Reviews: