Canon XC10, Instruction Manual
The Canon XC10 is a powerful camcorder designed for professional filmmaking. Capture stunning 4K videos and high-resolution photos with ease. To get started quickly, download the free Quick Manual from manualshive.com which provides step-by-step instructions and valuable tips. Enhance your filming experience with this exceptional Canon product.
Share
Download


Reviews:
No comments
Related manuals for XC10

AG-HVX202AEN
Brand: Panasonic Pages: 136

iQ-SPEED
Brand: ElectrIQ Pages: 19

6008 S
Brand: BEAULIEU Pages: 74

DSB-C300
Brand: D-Link Pages: 19

DSB-C320
Brand: D-Link Pages: 52

MATE 9
Brand: Huawei Pages: 205

AG-CPD10CRUP
Brand: Panasonic Pages: 50

BC-50
Brand: Datavideo Pages: 112

Hi 8 VP-L630
Brand: Samsung Pages: 66

MVX 350 i
Brand: Canon Pages: 162

HC-W850
Brand: Panasonic Pages: 220

LEGRIA FS405
Brand: Canon Pages: 125

HMX-H205BP
Brand: Samsung Pages: 76

XTR
Brand: AAton Pages: 32

DW-100
Brand: Canon Pages: 5

DIM-787
Brand: Canon Pages: 98

DM XM2E
Brand: Canon Pages: 3
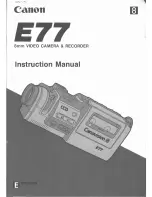
E 77
Brand: Canon Pages: 64


