


Before attempting to connect, operate or adjust this product, please read these
instructions thoroughly.
R
LSQT0228B
Model No.
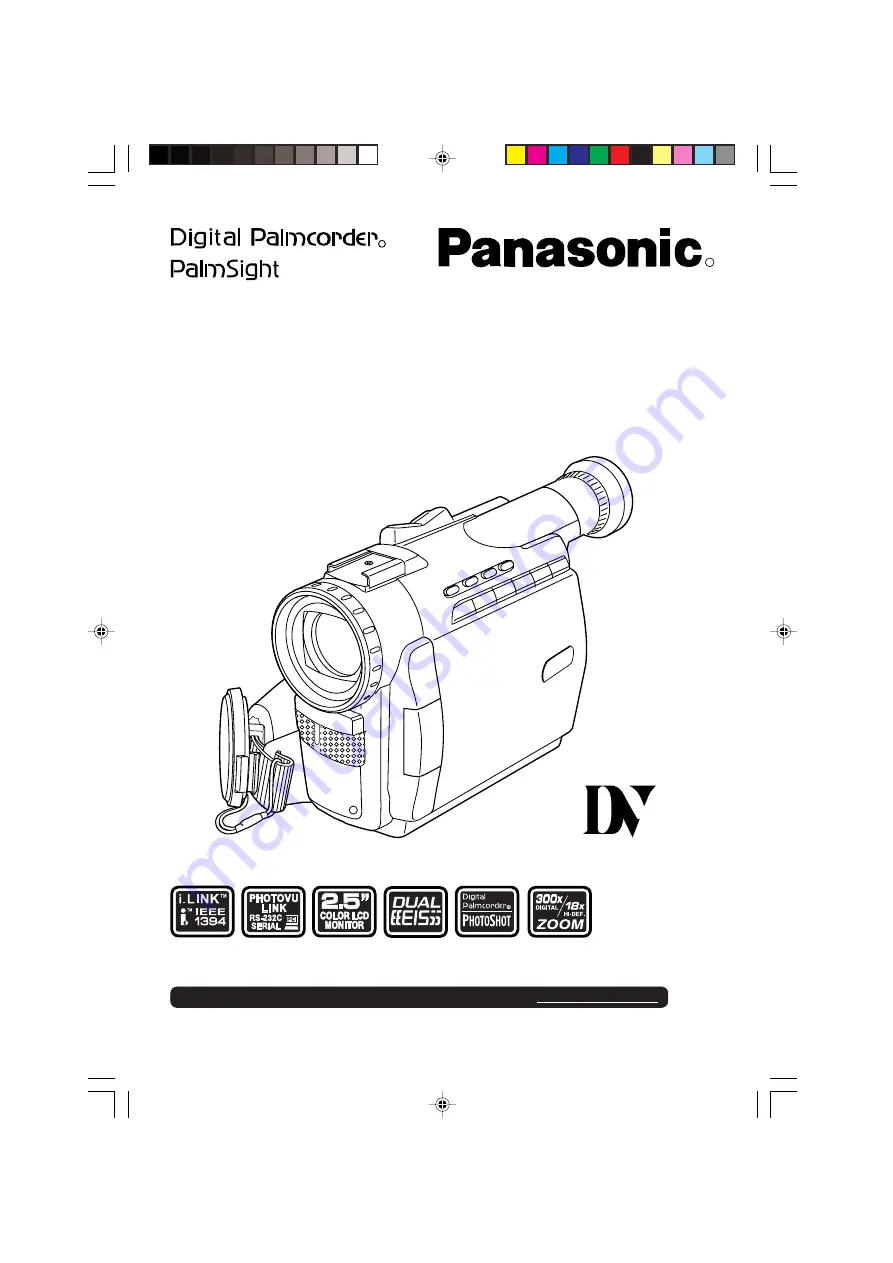
PV-DV100-K
Digital Video Camcorder
Operating Instructions
TM
Mini
R
For assistance, please call 1-800-561-5505 or visit us at www.panasonic.ca
100-K. 1-9.p65
00/06/14, 11:53
1


