background image

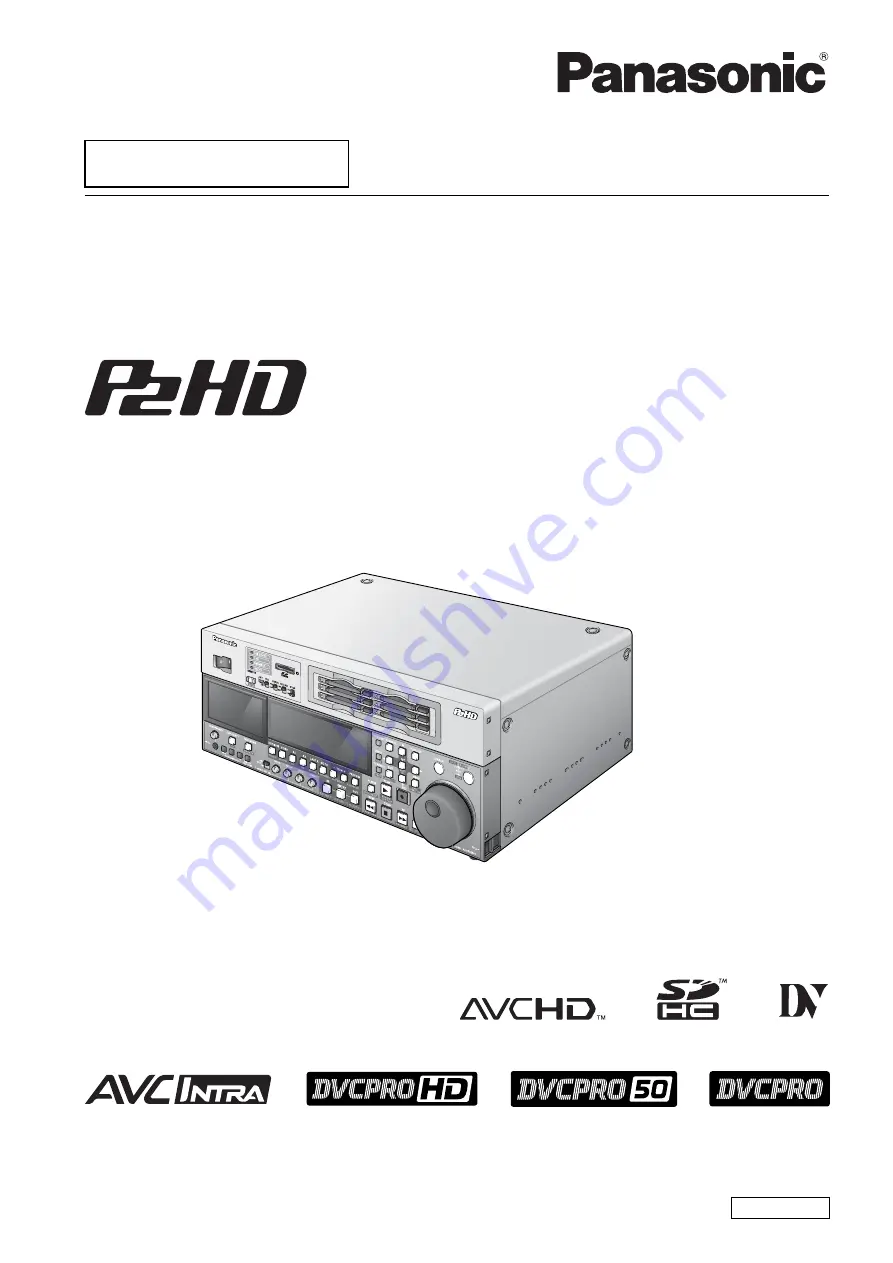
Operating Instructions

Memory Card Recorder

Model No. 

AJ-HPD2500P

Model No. 

AJ-HPD2500E

VQT2P78(E)

ENGLISH

M0310YK0 -PS 

Before operating this product, please read the instructions carefully and save this manual for future use.
• AVCHD capability is available when the optional AVCHD Codec board AJ-YCX250G is installed.

 This product is eligible for the P2HD 5 Year 

Warranty Repair Program. For details, 
see page 15.

Summary of Contents for AJ-HPD2500

Page 1: ...H M0310YK0 PS Before operating this product please read the instructions carefully and save this manual for future use AVCHD capability is available when the optional AVCHD Codec board AJ YCX250G is i...

Page 2: ...ccessible To completely disconnect this equipment from the AC mains disconnect the mains plug from the AC receptacle CAUTION In order to maintain adequate ventilation do not install or place this unit...

Page 3: ...apparatus 11 Only use attachments accessories specified by the manufacturer 12 Use only with the cart stand tripod bracket or table specified by the manufacturer or sold with the apparatus When a cart...

Page 4: ...rgy and if not installed and used in accordance with the instructions may cause harmful interference to radio communications However there is no guarantee that interference will not occur in a particu...

Page 5: ...accessories only CAUTION To reduce the risk of fire or electric shock refer mounting of the optional interface boards to qualified service personnel CAUTION Do not remove panel covers by unscrewing t...

Page 6: ...three pin mains plug for your safety and convenience A 13 amp fuse is fitted in this plug Should the fuse need to be replaced please ensure that the replacement fuse has a rating of 13 amps and that...

Page 7: ...If your apparatus supports AES EBU serial digital audio signals use cables designed for AES EBU Use shielded cables which provide quality performance for high frequency transmission applications for a...

Page 8: ...ing AVC video that was obtained from a video provider licensed to provide AVC video Additional information may be obtained from MPEG LA LLC http www mpegla com Using this product to make recordings on...

Page 9: ...d P2 Card Handling 41 Insert a P2 Card 41 Recording and Playback 41 P2 card and recording times 42 LOOP REC Function 43 Removing P2 Cards 43 Preventing Accidental Deletion 44 Connections 45 Example of...

Page 10: ...P2 Cards 74 Formatting Individual P2 Cards 74 Formatting All P2 Cards 74 Checking Card Status 75 Selecting Information to Display 75 Displaying Card Status Information 76 Editing Playlist Function 78...

Page 11: ...Mode 117 Using This Unit With a Hard Disk 118 Supported Hard Disks 118 Formatting Hard Disks 120 Exporting Data by Card to a Hard Disk 120 Copying Clips to a Hard Disk 121 Displaying Hard Disk Inform...

Page 12: ...160 Recording AVCHD to an SD Memory Card 162 Setup Unit Setup 164 Changing Settings 165 Change Operations 165 Using a Lock to Protect the User Setting File 166 Returning to Factory Defaults Initial S...

Page 13: ...play 213 List of Shortcuts 214 List of Multiple Button Operations 215 Updating the Firmware in This Unit 216 Rack Mounting 217 Mounting the Recorder in the Rack 217 Handling P2 Card Recording 218 Hand...

Page 14: ...oth may damage it Leaving an unchanging image on the screen for a long period of time may create a temporary afterimage burn in LCD response and brightness vary with ambient temperature In a high temp...

Page 15: ...hours the device has been used 1st year 2nd year 3rd year 4th year 5th year 5 P2HD device 2 Basic warranty 3 Extended warranty repair 4 Purchase P2 product Register online within 1 month Registration...

Page 16: ...e of 5 positions When opening the front panel be sure to secure it at one of the 5 positions 1 Pull up the levers at either end of the lower front pan el to release the lock 2 Lower the lower front pa...

Page 17: ...right end of the cover to release the lock 3 As shown below open the cover to 90 1 Disconnect all connected cables and close the con nector cover as shown below Opening the eSATA USB HOST and USB DEVI...

Page 18: ...or It allows you to record and play back audio and video in the compressed DVCPRO HD DVCPRO50 DVCPRO DV and AVC Intra formats on the six P2 cards to edit P2 card and hard disk video data and edit usin...

Page 19: ...stored on a P2 card or external hard disk and transfer it at high speed via an FTP server on the Internet Video stored on an FTP server can be displayed and selected as a thumbnail for downloading to...

Page 20: ...USB keyboard can be connected to enable the following functions Entry and editing of clip metadata Network setup operation on browser NOTE Some USB keyboards may not enable normal input VANC data rec...

Page 21: ...1080i AVC Intra recording as well as 720P DVCPRO HD and AVC Intra recording At 720P this lengthens the recording time 2 to 2 5 times over pull down recording During native recording at a 59 94 Hz or...

Page 22: ...eSATA Connectors page 116 Refer to Connecting This Unit to a Network page 130 Refer to Operating the AVCHD Thumbnail Screens page 152 3 Mode indicators A lamp corresponding to the currently selected...

Page 23: ...d check video Each time you press the dial the SHTL Shuttle SLOW mode and the JOG mode are engaged alternatively The respective indicator lamp lights When the power is turned on the search dial will n...

Page 24: ...ange the setting press the EXIT button or wait for 3 seconds to allow the display of the current setting to vanish 21 AUDIO VOL SEL switch and audio level controls REC UNITY PB switch Audio level cont...

Page 25: ...bnail display or while displaying a still picture by pressing the SEARCH button in the thumbnail display hold down the SHIFT button and press this button to play back only the clip at the cursor posit...

Page 26: ...ack events with the same IN and OUT points as the event at the cursor 4 MENU DIAG OPERATION button MENU button Press this button to open the setup menu thumbnail or playlist menus Press again to retur...

Page 27: ...to use a continuous time code A DUB MODE SHIFT GOTO button Press this button to engage the A DUB mode and record voice overs Refer to Recording Voice Overs page 106 12 IN SLOT CLIP PF1 button IN butto...

Page 28: ...ing Clip Thumbnails on a Hard Disk page 125 Use this button for trimming Refer to Buttons Used in Playlist Operations page 86 16 OUT ALL CLIP PF3 button OUT button Use this button to perform the follo...

Page 29: ...Pressing PLAY or other operation button will remote control an external device and display externally input video audio and time code In playlist mode Switches to player recorder Refer to Preparing fo...

Page 30: ...D or microSD card be sure to use an adaptor dedicated for use with the miniSD or microSD card 1 The SDHC SD High Capacity miniSDHC microSDHC memory card is a new standard established by the SD Card As...

Page 31: ...l the EJECT button pops out After inserting a card flip the EJECT button to the right 6 EJECT button Use this button to remove a P2 card inserted in a P2 card slot Raise the button and press it in fir...

Page 32: ...nks if the input signal does not match the system format VIDEO AUDIO 1 AES EBU blinks when no recordable signal according to the system settings is input LCD Panel VIDEO CMPST SDI SG12 AUDIO ANALOG AE...

Page 33: ...ted recording status of a P2 card 8 Format display Indicates the recording format or the format of video recorded on inserted P2 cards 9 Counter display Indicates the CTL TC and UB counter and time co...

Page 34: ...OUT connectors 4 TIME CODE IN OUT connector This connector inputs and outputs time code signals NOTE When setup menu No 25 SYSTEM FREQ is set to 59 23 60 24 or 60 25 time code signals cannot be input...

Page 35: ...s is a 25 pin parallel remote connector NOTE Use COMMAND at TTL level low active negative logic and of electrical signals with an edge of 100 msec or more STATUS outputs open collector and sync curren...

Page 36: ...nect P2 store and USB 2 0 compliant hard disk drives for use in the USB host mode Refer to Using USB or eSATA Connectors page 116 17 USB 2 0 DEVICE connector Type B Connect personal computers and othe...

Page 37: ...s playlists External control mode In this mode the unit controls an external device connected to the REMOTE connector and monitors audio and video from this device PLAYER SOURCE SELECT THUMBNAIL PLAY...

Page 38: ...ower level menu exists NOTE Use the and buttons to move the cursor up and down Press the a button or the SET button to open submenus Press the b button or the EXIT button to return to a higher level 3...

Page 39: ...the Full Keyboard Key Function Shortcut keys BS Deletes one character SHIFT LAST X Caps Toggles between upper and lower case GO TO OK Saves made entries and closes the on screen keyboard ENTRY EXIT C...

Page 40: ...thumbnail screen 2 Press the MENU button 3 Use the cursor buttons to choose THUMBNAIL SET UP KEYBOARD 4 Press the SET button This opens a menu for keyboard setup 5 Move the cursor to the keyboard layo...

Page 41: ...second P2 card is not recognized The second P2 card is recognized when playback ends While a clip is selected a newly inserted P2 card will not be recognized The recorder will stay in this condition...

Page 42: ...ding or writing is being performed The unit is in USB DEVICE mode and is accessing a P2 card The unit is in LAN mode and a P2 card can be accessed or is being accessed NOTE Do not turn the unit off or...

Page 43: ...5 AUTO REC is set to something other than OFF in remote control status LOOP A is displayed When setup menu No 041 LOOP REC is set to ON P2 card remaining free space indicates the minimum guaranteed re...

Page 44: ...Bad Clips page 65 Removing a P2 card during formatting will in most cases destroy the formatting Reformat the card after restarting the unit Removing or inserting P2 cards that are not being recorded...

Page 45: ...external device to REMOTE Press the REMOTE button on this unit to turn the button off Example of Connections in 23 98 24 29 97 25 Hz Mode CH 1 CH 2 CH 3 CH 4 CH 1 CH 2 CH 3 CH 4 CH 5 CUE L R OUT AC I...

Page 46: ...ously Recording starts NOTE Set setup menu No 155 AUTO REC to TYPE1 and press the REMOTE button to turn the button on The unit will then automatically start and stop recording as the REC and STOP butt...

Page 47: ...SDI IN connector and press the VIDEO IN SHIFT EDIT MODE AUDIO IN SHIFT VIDEO button to select HD SDI 2 Make the following setup menu settings 3 While confirming the camera HD SDI output video press th...

Page 48: ...Press the search dial to release it This engages the shuttle mode When the power has just been turned on turn the search dial to its center position 2 Press the SHTL SLOW button to select the SHTL sh...

Page 49: ...hat spans multiple P2 cards is handled as a single clip The thumbnail screen displays a list of thumbnails of the recorded clips These thumbnails allow you check and also perform the following clip ma...

Page 50: ...umbnail Refer to Thumbnail Editing page 57 8 Clip no Indicates the numbers assigned to P2 card clips which are normally assigned starting in order from the earliest shooting date Numbers of clips that...

Page 51: ...ly displayed thumbnail among displayed thumbnails white The numbers of P2 card slots that contain a P2 card are indicated in white yellow The number of the P2 card slot of the P2 card that contains th...

Page 52: ...he cursor High speed cursor movement and jumping Hold down the SHIFT button and press the up or down cursor button to move the cursor to the first or last clip Hold down the SHIFT button and turn the...

Page 53: ...ED CLIPS TEXT MEMO CLIPS SLOT CLIPS SETUP OPERATION DELETE FORMAT REPAIR CLIP RE CONNECTION COPY EXCH THUMBNAIL PROPERTY CLIP PROPERTY CARD STATUS DEVICES PROPERTY SETUP SYSTEM INFO META DATA LOAD REC...

Page 54: ...ay Switching the type of information that is displayed ALL CLIP Show all clips SAME FORMAT CLIPS Show clips in the same format as the system NOTE When 23 98 24 29 97 59 23 60 24 25 or 60 25 is selecte...

Page 55: ...bnail Screen Names and Functions page 50 TC Time code UB User bit TIME Time of recording DATE Date of recording DATE TIME Date and time of recording CLIP NAME Clip name USER CLIP NAME The first fiftee...

Page 56: ...check mark for a checked item makes it possible to select other items PB POSITION Set the playback start position for playback in the thumbnail screen RESUME From the position where playback was stop...

Page 57: ...rt playback For details refer to Playing Back Clips page 59 4 Hold down the ENTRY button and press the TEXT MEMO button during playback or while displaying a still picture with JOG VAR SHTL This selec...

Page 58: ...r to indicate that it is selected NOTE Repeat steps 1 and 2 to select multiple clips After selecting a clip move the cursor to another clip hold down the SHIFT button and press the SET button to selec...

Page 59: ...ults in fast forward playback Pressing the STOP button during clip playback stops playback and the thumbnail screen appears When playback stops the cursor moves to the clip played prior to stopping Vi...

Page 60: ...hen the STOP button is pressed The cursor then moves to the next clip All buttons other than the STOP button are not available during single clip playback Select PB POSITION from the menu to determine...

Page 61: ...ack may temporarily halt playback This is normal and not a malfunction Text memos are not recorded during LOOP REC or VFR ON recording 1 Press the THUMBNAIL button The thumbnail screen appears on the...

Page 62: ...memo display from the thumbnail screen allows you to delete text memos 1 Open the text memo display from the thumbnail screen 2 Use the cursor buttons to move to the thumbnail for which you want to d...

Page 63: ...s copying NOTE To interrupt copying press the SET button or the CANCEL SHIFT EXIT button to cancel the operation The incomplete copy at the destination is deleted OVER WRITE appears when an attempt is...

Page 64: ...cursor buttons to choose OPERATION DELETE and press the SET button 5 Select YES and press the SET button This deletes all selected clips NOTE Instead of steps 3 and 4 you can also use the DELETE SHIFT...

Page 65: ...original clip NOTE Incomplete clips occur under the following conditions When the individual clip segments on each P2 card that make up the clip are copied separately When the clip segments on each ca...

Page 66: ...emo Indicator Indicates that a voice memo has been attached to a clip This indicator appears only in the clip property mode This unit cannot record and play back voice memos 4 Clip information The fol...

Page 67: ...vised Insert the P2 card with the remainder of the clip MEMO of metadata item to which a 100 character or larger memo has been attached cannot be revised USER CLIP NAME The name a user assigns to a cl...

Page 68: ...d formatted on this unit Refer to Formatting SD Memory Cards page 72 Make the required settings to enable this unit to read the metadata upload file Set the method for recording the USER CLIP NAME 1 O...

Page 69: ...ltiple clips and the counter value is automatically incremented and recorded for each shot When an 8 GB or larger P2 card is used in this unit and each continuous recording exceeds a preset time For d...

Page 70: ...and press the SET button Use this function to check loaded metadata settings 4 While viewing metadata settings use the cursor buttons to move the cursor to the setting you want to change and press th...

Page 71: ...the MENU button to end processing This procedure attaches the loaded metadata to clip that is recorded 1 Open the thumbnail screen 2 Press the MENU button 3 Use the cursor buttons to choose META DATA...

Page 72: ...se the following procedure to display SD memory card status on dialog for checking 1 Open the thumbnail screen 2 Press the MENU button 3 Use the cursor buttons to choose PROPERTY DEVICES SD CARD and p...

Page 73: ...e card is now formatted NOTE To cancel formatting select NO and press the SET button Check that no important data remains on a card before formatting since data erased by formatting cannot be recovere...

Page 74: ...n when the completion message appears NOTE Repeat the procedures in steps 3 to 5 to format P2 cards in other P2 card slots or SD memory cards 6 Press the MENU button to end processing 1 Open the thumb...

Page 75: ...ity should appear in the P2 card information 1 Open the thumbnail screen 2 Press the MENU button 3 Use the cursor buttons to choose PROPERTY PROPERTY SETUP P2 CARD CAP and press the SET button 4 Use t...

Page 76: ...used total memory Indicates P2 card remaining free memory or memory used total memory in time left in minutes Fractions of a minute are rounded off on the display so that the sum total of the remaini...

Page 77: ...g appears when the following P2 cards are inserted RUN DOWN CARD The maximum number of overwrites has been exceeded DIR ENTRY NG CARD The P2 card directory structure is not supported Open Detailed P2...

Page 78: ...essed from the playlist screen Playlists can also be stored on a P2 card Voice overs can also be recorded Since the audio data should be saved to the same P2 card as the playlist first save the playli...

Page 79: ...sts stored in the unit 4 Press the EDIT MODE button to select overwrite editing and select all tracks 5 Press the PLAYER button to switch to player left side operations The PLAYER button goes on durin...

Page 80: ...NOTE The following operations cannot be cancelled or redone Menu operations other than OPERATION menu operations Playlist name changes OPERATION CHANGE PLAYLIST NAME When something other than a P2 car...

Page 81: ...ck for example because they are in a different format in red NOTE In A DUB mode the player screen does not show video but shows only the characters A DUB 1 Player time code indication Indicates the ti...

Page 82: ...me code display When the player is an external device this appears before the left end of the player time code display When the player is a hard disk this appears before the left end of the player tim...

Page 83: ...imultaneously pressed NOTE When either one of the IN and OUT points has not been set this function indicates the duration between the set IN or OUT point and the current location Yellow bar Indicates...

Page 84: ...he mark 14 Seek bar Indicates the current playback position of the recorder Next playback will start from the location indicated on the seek bar 15 Indication of change in audio channels Indicates the...

Page 85: ...st file name indication Names of playlist files are indicated in white NOTE When a card does not contain files white appears Gray file name Indicates read only files Red file name Indicates that the P...

Page 86: ...location Hold down the SET button for 1 second or longer Selects all events with the same IN and OUT points as the event at the cursor location MULTI SEL SHIFT SET button after selecting an event This...

Page 87: ...der operation During player operation the button lights and the player screen is available During recorder operation the button goes out and the recorder screen and timeline become available SOURCE SE...

Page 88: ...istered Events page 99 SLOT SELECT SHIFT TRIM button Select slot of card that will be used for loading video on the timeline from an external device RS 422A or hard disk 15 IN SLOT CLIP button 16 OUT...

Page 89: ...fer to Setting Audio Level page 109 NOTE Events created from external devices or hard disks are indicated in orange as temporarily registered events A LEVEL REC SHIFT PREVIEW button Press this button...

Page 90: ...referenced by the first event is used by all drop frame flags in the playlist During playback or Edit Copy on the recorder the time code of the video track clips is output intact and this may result...

Page 91: ...er the last frame in the edited section 1 Press the MENU button and use the cursor buttons to choose SETTING AUTO ENTRY 2 Press the SET button select ON and press the SET button NOTE When all the foll...

Page 92: ...d is the OUT point Use the steps below to name playlists 1 Press the PLAY LIST button to open the playlist screen 2 Press the MENU button 3 Use the cursor buttons to choose OPERATION CHANGE PLAYLIST N...

Page 93: ...ecorder IN point When an external device is used as the player audio and video up to 24 hours excluding the preview time is inserted at or starts overwriting data at the IN point of the recorder Selec...

Page 94: ...and the screen shows the video of the player 4 Press the PLAYER button to switch to recorder operations The PLAYER button goes off and the right side of the screen appears in a yellow frame NOTE All...

Page 95: ...IFT OUT to switch to ALL CLIP 5 Press the SET button The player screen opens and the player will now only use the selected clips 1 Selecting insert or overwrite editing Use the EDIT MODE button to sel...

Page 96: ...ton is held down NOTE The IN and OUT points for the player and the recorder can be set in any order Setting the fourth point when any three points of player or recorder IN and OUT points have been def...

Page 97: ...iew Start preview by pressing the PREVIEW button to play back the edited section on the recorder starting 3 seconds before the beginning of the edit section PREROLL TIME setting to 1 second beyond the...

Page 98: ...nts of the player and recorder a temporary event of up to 24 hours will be created on the recorder Set an OUT point during the preview or press the STOP button during capture to reset the length of th...

Page 99: ...be revised You can change IN and OUT points for events in frame increments in 4 frame increments at 24PN The result of trimming will depend on whether insert or overwrite editing is selected Example s...

Page 100: ...sly on the recorder and player To trim the IN and OUT points of the player press the PLAYER button to select the player and press the TRIM or TRIM button Hold down the SHIFT button and perform a trimm...

Page 101: ...A4 cursor location with IN points 1 Switch to recorder operation Press the PLAYER button to switch to recorder operation 2 Select the events to move Use the cursor buttons to move the cursor to the ev...

Page 102: ...in the confirmation dialog and press the SET button This operation deletes the selected events You can use the following function to delete all events in a playlist This operation differs from creatin...

Page 103: ...unit to a P2 card 1 Press the PLAY LIST button to open the playlist screen 2 Press the MENU button 3 Use the cursor buttons to choose FILE SAVE AS and press the SET button 4 Use the cursor buttons to...

Page 104: ...names Press the right cursor button a to open a list of file names 6 Select YES in the confirmation dialog and press the SET button The selected playlist is loaded NOTE A playlist file that contains m...

Page 105: ...le names Press the right cursor button a to open a list of file names A selected playlist file is indicated by a check mark These steps can be repeated as necessary to select multiple playlists 6 Pres...

Page 106: ...audio channels page 102 Voice overs cannot be recorded on players other than a P2 card Select a P2 card as the player before start of recording Make the required settings prior to a voice over recordi...

Page 107: ...ENTRY buttons simultaneously to assign an OUT point The OUT button turns on 3 Hold down the REC button and press the PLAY button The P2 card is returned to start of set preroll time and recording sta...

Page 108: ...se the audio volume controls VR as necessary to adjust the playback sound level 4 Press the STOP button to end the voice over NOTE When the 24PN playlist format is set in setup menu No 026 PLY LST FMT...

Page 109: ...Set the AUDIO VOL SEL switch to PB 3 Adjust the audio level using the audio level controls 4 Use the REC button or PREVIEW button to register the event This operation registers the event and an icon i...

Page 110: ...ilable at the start of each preview When a preview is interrupted during the preroll section the level setting is not made and the previous level setting is not cleared Pressing the STOP button to int...

Page 111: ...rom start to end To perform a playback check only of the section where the audio recording level was changed press the SEEK TO IN POINT IN GOTO button and playback will start after locating the IN poi...

Page 112: ...s video that corresponds to the IN and OUT points in the source material for audio event and time code values Duration event length Number of events registered per track 2 Information on clips that ar...

Page 113: ...r buttons to choose PROPERTY and press the SET button NOTE You can also press the PROP SHIFT TC PRESET button instead of performing the operations provided after step 3 1 Clip information Clip name Cl...

Page 114: ...st as a source for editing When an external device is used as a player the playback of temporarily registered edit operations will result in playback without video black and sound Use preview to check...

Page 115: ...or hard disk NOTE When there is not enough space on the installed P2 card to store the created Edit Copy clip LACK OF REC CAPACITY appears and Edit Copy will not start Edit Copy can be made to multip...

Page 116: ...t as mass storage The PC then requires that a USB USB 2 0 driver be installed Use of P2 viewer which can be downloaded from the following site allows you to manipulate clips stored on a P2 card on a W...

Page 117: ...CONNECT appears on the LCD monitor This message is replaced by a USB DEVICE CONNECT message when the connection with the PC is completed 3 Use USB device mode operations 4 Press the MODE SHIFT REMOTE...

Page 118: ...in version Ver2 or later version P2 store hard disk in Ver1 cannot be connected Upgrade a hard disk in Ver1 to the latest version before use Available functions depend on the type of hard disk used Ha...

Page 119: ...il if used in an unsuitable environment Please note that Panasonic accepts no liability whatsoever for data loss or other losses either direct or indirect arising from hard disk damage or other defect...

Page 120: ...and press the SET button 7 When the confirmation message appears again select YES and press the SET button The hard disk will now be formatted NOTE Check that no important data remains on the hard di...

Page 121: ...again Data copied from a P2 card will not be affected if processing should be interrupted during verification When a hard disk is connected to a PC and the network assignment conflicts with drive assi...

Page 122: ...eration ends COPY COMPLETED appears Use the steps below to display hard disk information and select hard disk partitions and folders A selected partition can also easily be used as a player in editing...

Page 123: ...elected partition press the ENTRY button again in the selected partition Use the CANCEL SHIFT EXIT button to cancel all selected areas A warning appears when an attempt is made to select a 7th area NO...

Page 124: ...om a hard disk to a P2 card by partition by P2 card to a P2 card that has the same capacity as the source card 1 Insert the P2 card that will store the imported partition Be sure to insert a formatted...

Page 125: ...sor buttons to choose OPERATION COPY and press the SET button 6 Select the number of the P2 card slot to which the data will be copied and press the SET button 7 Select YES and press the SET button Th...

Page 126: ...Use the TRIM buttons to move to thumbnail displays on previous and subsequent folders without returning to the hard disk explorer screen Press the ENTRY button to select a displayed folder as a targe...

Page 127: ...eturns NOTE To play back a clip it is not necessary to select it so that the thumbnail appears inside a blue frame The thumbnail display settings can be changed to play back only selected clips or pla...

Page 128: ...he unit provides the following indications The LED goes on to indicate external device status Indicates the external device counter The unit is forcibly set to EE to enable reception of audio and vide...

Page 129: ...on the card The PLAYER button flashes during operation The current point is registered as an IN point if an IN point has not been registered Recording stops automatically when the OUT point is reached...

Page 130: ...bnails and metadata on computers and other devices Browser function for accessing web sites Network functions require LAN setup and other settings Make the settings that your needs require NOTE Made n...

Page 131: ...client setup screen appears Current settings appear Use the cursor buttons to select an item and press the SET button to set it FTP CLIENT The set password cannot be displayed on this unit Item Descr...

Page 132: ...ns PROXY server on or off ENABLE Enables PROXY server DISABLE DISABLE Disables PROXY server PROXY SERVER URL Name or address of a PROXY server Enter using the full keyboard No setting PROXY SERVER POR...

Page 133: ...DD NO INPUT appears Changing password and deleting user 1 Move the cursor to the user whose password is to be changed or deleted 2 Select DELETE USER or CHANGE PASSWORD from the menu 3 To change passw...

Page 134: ...ection to determine the cause of a failure Opening the connection log LOG 1 Open the thumbnail screen 2 Press the MENU button to open the menu 3 Use the cursor buttons to choose NETWORK TOOLS LOG and...

Page 135: ...Folder names using multi byte characters are not correctly displayed Each folder can display up to 100 folders The folder 101 and subsequent folders cannot be accessed in the FTP explorer screen Howe...

Page 136: ...the folder appears NOTE Pressing the SET button in the CONTENTS folder will not display thumbnails Be sure to press the SET button in folders above the CONTENTS folder or in the current folder indica...

Page 137: ...perties are left open This will prevent subsequent thumbnail displays Should this happen return to the FTP explorer screen and open the FTP thumbnail display or properties again Use the steps below to...

Page 138: ...ult of a transfer on a PC it may be necessary to use refresh on the PC Use the steps below to write back selected clips from an FTP server on the network to a P2 card or hard disk 1 Open the FTP thumb...

Page 139: ...n the FTP server are deleted if the network connection has not been broken If it has incomplete files may remain on the FTP server When exporting starts communications cut errors will no longer be det...

Page 140: ...Operations including recording and playback are not available in server mode Although P2 cards can be inserted without problem in server mode removing a P2 card will result in an E 30 error message S...

Page 141: ...Check browser settings proxy server etc when the page displays Some settings may prevent correct display of clip metadata Playing back proxy data requires a browser that supports MPEG4 format audio a...

Page 142: ...hen mouse mode is on moves the mouse cursor When mouse mode is off moves link focus SET button When mouse mode is on press for click operation When mouse mode is off press to confirm setting MENU butt...

Page 143: ...Alt right Proceeds to the next page Ctrl Tab Moves to the right tab Ctrl Shift Tab Moves to the left tab Ctrl T Opens a new tab A new tab shows the home page Ctrl D Adds page to book marks Ctrl B Dis...

Page 144: ...itions for receiving commands via an RS 232C interface Hardware Specifications Pin No Signal Description 1 Not used 2 TXD Transmitted data data received from PC 3 RXD Received data data sent to PC 4 D...

Page 145: ...curred in the deck 1 Returns a reception completed message 2 Returns an error code Error code list Return format command A return message data or execution completed message identifier data The data r...

Page 146: ...on setup menu No 102 FF REW MAX setting For details refer to each setup menu 2 16 and 32 speed are restricted by setup menu No 101 SHTL MAX setting Command table Command Operation Send command Argumen...

Page 147: ...completion message data CTL TC DATA REQUEST Counter value QCD CD data data f w gh mm ss ff f F w S gh CTL mode When plus g SP 20h When minus 2Dh h 0 9 hours TC mode gh 00 23 hours mm 00 59 minutes ss...

Page 148: ...lue set in setup menu No 165 CLIPSEL MODE page 179 NOTE The clip select function is available when setup menu No 25 SYSTEM FREQ is set to 50 or 59 94 The CLIP SELECT function cannot be applied to clip...

Page 149: ...ons visit the support desk at the following Web site For English http pro av panasonic net 1 PH mode and HA mode recording requires class 4 or better cards NOTE SDHC memory cards can only be used in S...

Page 150: ...appears To cancel formatting select NO 3 Select YES in the confirmation dialog The SD memory card will now be formatted 4 Press the MENU button to end processing Check that no important data remains o...

Page 151: ...it although it can still be repaired using AVCCAM Restorer 1 a content repair utility An SD memory card that has not generated an error may display the Repair Clip message but a repair will not take p...

Page 152: ...rations and AVCHD optional operations Screen configuration is shown below AVCHD clips are played back from the AVCHD mode thumbnail screen Operating the AVCHD Thumbnail Screens Screen configuration No...

Page 153: ...ess the PLAY button For details of playback refer to Playing Back AVCHD Clips page 160 Opening menus Press the MENU button when thumbnails are displayed 1 Thumbnail display status page 154 Displays th...

Page 154: ...ct THUMBNAIL SETUP and press the SET button 4 Press the up and down 4 5 cursor buttons to select an item and press the SET button THUMBNAIL MODE Select the clip to display XX indicates factory default...

Page 155: ...g to AVCHD mode page 153 2 Press the MENU button 3 Use the cursor buttons to choose SYSTEM INFO and press the SET button Deleting and protecting clips OPERATION ALL CLIPS Deletes all clips Select YES...

Page 156: ...emory card information appears CLIP PROPERTY Displays information regarding the selected clip Use the left and right b a cursor buttons to view information on surrounding clips 1 Clip no 2 Thumbnail 3...

Page 157: ...orded clip The USER CLIP NAME recording method is selectable For details refer to page 158 2 To enter SCENARIO be sure to enter a PROGRAM NAME It is not possible to enter only the SCENE NO and TAKE NO...

Page 158: ...ta items on an SD memory card in order from the most recently created item File names of loaded metadata that use characters other than alphanumeric characters are replaced by RECORD Determines whethe...

Page 159: ...back format and press the SET button Available formats When SYSTEM FREQ is set to 59 94 Hz 1080 60i 30P 1080 24P 720 60P 30P 720 24P When SYSTEM FREQ is set to 50 Hz 1080 50i 25P 720 50P 25P 5 Press t...

Page 160: ...ps every 0 5 sec interval In JOG mode not like during P2 card playback a smooth playback is not possible In SHTL mode 16x playback speed is available maximum 1 Play back or enter pause mode 2 Press th...

Page 161: ...tton to locate the start position and press the STILL button to stop When dubbing is started by a thumbnail dubbing starts from the start of the selected clip NOTE When resume play is activated dubbin...

Page 162: ...mat such SD memory cards in the unit before use Formatting an SD memory card will delete all data recorded on the card and make subsequent recovery impossible Store important data on a PC One recordin...

Page 163: ...It is not possible to record only to an SD memory card Preparing for recording 1 Set up for AVCHD recording Set setup menu No 170 AVCHD REC to ON 2 Select a recording format Set the P2 card and AVCHD...

Page 164: ...content of USER1 can be saved copied to USER2 to USER5 For details refer to Setup menu No A01 SAVE page 192 SETUP menu settings can be saved to and loaded from an SD memory card For details refer to...

Page 165: ...to decrement them To switch to the next item hold down the PLAY button and press the FF button or the button To switch to a previous item hold down the PLAY button and press the REW button or the but...

Page 166: ...For details on releasing the system file lock setting refer to Setup menu No 30 MENU LOCK page 170 For details on releasing the user file lock setting refer to Setup menu No A03 MENU LOCK page 192 NO...

Page 167: ...T REF 032 REC REF 040 VFR REC 041 LOOP REC 100 SEARCH ENA 050 P ON GUI 101 SHTL MAX 051 GUI OUTPUT 102 FF REW MAX 052 GUI HOLD 103 SEEK SEL 069 CLOCK SET 104 REF ALARM OPERATION 108 PLAY DELAY page 17...

Page 168: ...750 A CH1 2 SEL 659 Pb LVL SD 767 METER SELECT 660 Pr LVL SD 774 AVCHD A CH 661 BK LVL SD 775 25M REC CH 662 V LEVEL 776 REF LEVEL 663 C LEVEL 778 AUD OUT DLY 664 HUE C PHASE 782 EMBD CH SEL 665 SETUP...

Page 169: ...saved Thus when adjustments using an external encoder remote controller are completed wait 1 minute or more before turning off the unit 12 SYS H HD 0000 1375 2750 1375 0 1375 Adjusts system phase of...

Page 170: ...s and AJ HPX2700 series camera 7 25 Hz 8 60 25 Hz Receives 60 Hz input Select this frequency to record a variable frame rate set to 25p from VariCam AJ HDC27 series camera 0000 0001 0002 0003 0004 000...

Page 171: ...2 DIS STOP ENA Restricts the number of buttons on the key panel that are available when the REMOTE LOCAL switch is set to REMOTE 0 No buttons are available 1 Only the STOP button is available 2 All bu...

Page 172: ...status 2 Data operating status mode and clip number 3 Data and REC TIME 4 Data and REC DATE year month day 5 Data and REC DATE month day year 6 Data and REC DATE day month year 7 Data and user bit How...

Page 173: ...0 Mbps 1 DVCPRO 25 Mbps 2 DV 25 Mbps 025 REC FMT HD 0000 0001 0002 DVCPRO AVC50 AVC100 Specifies the recording format when 1080i or 720p is selected in setup menu No 020 SYS FORMAT 0 DVCPRO HD 100Mbps...

Page 174: ...50G AVCHD codec board optional is installed In 720P mode recording is always made in PH mode 031 OUT REF 0000 0001 0002 AUTO REF INPUT Select reference for video output 0 Uses the reference signal inp...

Page 175: ...e GUI screen output to ANALOG MONITOR OUT SDI MONITOR OUT may not be clear 052 GUI HOLD 0000 0001 OFF ON Determines whether a switch to full screen mode will be made or the GUI will be retained when t...

Page 176: ...Item Setting Settings and brief function description FR No SUPER DISP FR No SUPER DISP Time difference City Region 00 00 Greenwich 00 30 01 00 Central Europe 01 30 02 00 Eastern Europe 02 30 03 00 Mos...

Page 177: ...s transferred via 9P and RS 232C are performed at 100 normal speed Note that seek operations initiated by the FF and REW commands via 9P behave differently when ORIG is set in setup menu No 202 ID SEL...

Page 178: ...information screen Press the REMOTE button to turn the button on Refer to Panasonic camera recorders recording formats and recording stopping signals Recording Mark on this page before selecting TYPE...

Page 179: ...ing to an SD card either in AVCHD mode or simultaneous with recording to a P2 card 0 No AVCHD recording 1 Makes an AVCHD recording to an SD card either in AVCHD mode or simultaneous with recording to...

Page 180: ...ng playback 0 VITC signals are not output 1 VITC signals are output NOTE This setting is available only during analog composite output and SD SDI output In EE mode the input signal is output with the...

Page 181: ...e generator TCG is in the REGEN mode 0 Regenerates both the time code and the user bit 1 Regenerates only the time code 2 Regenerates only the user bit 507 EXT TC SEL 0000 0001 0002 EXT_L SLTC SVITC S...

Page 182: ...0001 OFF ON Specifies whether or not the internal time code generator value should be recorded in the VAUX area 0 The internal time code generator value is not recorded Record the time code value whe...

Page 183: ...he aspect ratio stays the same 2 Changes the ratio to adjust input size to output size as required by horizontal and vertical axis The aspect ratio may be distorted 621 UPCONV MODE 0000 0001 0002 FIT_...

Page 184: ...otates in a perfect circle in an analog composite style vectorscope NOTE This menu is not displayed when 50 is selected in menu No 25 SYSTEM FREQ 653 Y LVL HD 0000 1000 1413 0 0 100 0 141 3 Adjusts th...

Page 185: ...ing is available when CMPST is set in setup menu No 650 STYLE Setup level adjustment is available only for output 669 SETUP 0000 0001 THRU CUT AD Specifies recording and output method for analog compo...

Page 186: ...MAL DARK Selects the compression method used during video recording 0 Records using normal compression processing 1 Records video suppressing compression video distortion that is generated by dark are...

Page 187: ...of the audio monitor output to the setting of the headphone volume control knob 0 Outputs the sound at a fixed level regardless of volume control knob position 1 Links the volume level to volume cont...

Page 188: ...4 AVCHD A CH 0000 0001 0002 0003 0004 0005 CH1 2 CH3 4 CH5 6 CH7 8 12 34 13 24 Specifies audio channels for AVCHD recording 0 Audio selected as REC CH1 and REC CH2 will be recorded as CH1 and 2 CH1 an...

Page 189: ...ng equipment before setting CH1 8 Invalid signal is output at 24 Hz and 60 24 Hz 785 PB MIX 0000 0001 OFF ON Sets a mix of analog and SDI audio output NOTE Press the STOP or SET button to open a subsc...

Page 190: ...MIX 0000 0001 0002 0003 CH1 CH2 CH3 CH4 Specifies the playback channels that will be mixed and recorded on CH2 03 CH3 MIX 0000 0001 0002 0003 CH1 CH2 CH3 CH4 Specifies the playback channels that will...

Page 191: ...ness of the LCD monitor 910 CONTRAST 0000 0030 0060 30 0 30 Adjusts the contrast of the LCD monitor NOTE This setting multiplied by the R G and B contrast settings setup menus No 911 R CONTRAST No 912...

Page 192: ...ings should be used in startup when the power is turned on 0 Operation is started with the settings of the previously set user file 1 The content of USER 2 is loaded into USER 1 2 The content of USER...

Page 193: ...ENU button select A10 CARD READ from USER1 in the setup menu and press the SET button 2 Select the files to be read in the file menu that appears and press the SET button Files that are not written ar...

Page 194: ...r that indicates the title A completion message appears when the write progress bar closes 1 Press the MENU button select A12 CARD FORMAT from USER1 in the setup menu and press the SET button 2 The fo...

Page 195: ...ld down the SEARCH button and turn the search dial to change the value 3 Press the left or right cursor button b a or turn the search dial to select digit to set The selected digits start flashing The...

Page 196: ...ide long term about one year operation Accuracy when no power is supplied is about 30 s per month NOTE Under the conditions listed below when the time code generator advances regardless of operation m...

Page 197: ...r shows the position relative to the start position NOTE When 23 98 24 59 23 or 60 24 is selected in setup menu No 25 SYSTEM FREQ there is a 1 frame delay between playback video and CTL TCG switch 5 M...

Page 198: ...of characters in the superimposed display Use setup menu No 006 DISPLAY SEL to indicate deck operating mode CTL Relative location from the beginning TCR Recorded time code data TCR Time code data rec...

Page 199: ...4i 59 94 1080 59 94i 720 59 94P 480 59 94i 1080 50i 50 1080 50i 720 50P 576 50i 1080 29 97PsF 29 97 1080 29 97PsF 720 59 94P 1 480 59 94i 1 1080 23 98P over 59 94i 5 59 23 1080 23 98PsF 1080 23 98PsF...

Page 200: ...sF 59 94 1080 29 97PsF 720 59 94P 1 480 59 94i 1 1080 23 98P over 59 94i 5 59 94 1080 23 98PsF 3 1080 59 94i 2 720 59 94P 2 480 59 94i 2 1080 23 98PsF 1080 24PsF 1080 25PsF 720 59 94P 59 94 720 59 94P...

Page 201: ...ple P2 cards or a clip that has been automatically divided and recorded on an 8 GB P2 card A clip created using the Edit Copy function on an AJ SPD850 Settings in setup menu No 731 allow you to play b...

Page 202: ...CH3 CH4 inputs CH2 CH1 input CH2 input CH3 input CH4 input CH1 CH2 inputs CH3 CH4 inputs CH3 CH1 input CH2 input CH3 input CH4 input CH1 CH2 inputs CH3 CH4 inputs CH4 CH1 input CH2 input CH3 input CH...

Page 203: ...d from a cold location to a hot or humid location When moving the unit to locations such as these leave it standing for about 10 minutes rather than switching on the power immediately Before starting...

Page 204: ...itor screen and the message appears on the counter display 2 Press the SET button or the left or right cursor button b a Each press of the button changes the display between WARNING HOURS METER and UM...

Page 205: ...An attempt was made to play a clip when no clips were present An attempt was made to play back a card that cannot be used The card could not be played back or playback stopped for some other reason Pl...

Page 206: ...YCX250G AVCHD codec board optional is installed Operation continues REPAIR R OUT NOT AVAILABLE Displayed when an attempt was made to use a recorder OUT point during insert editing in playlist mode Op...

Page 207: ...playback when frame rate data in user bit cannot be detected or when the playback time code is not continuous The video output is distorted and audio output is muted in sections where the time code is...

Page 208: ...ve to a different name CARD FULL The P2 or SD memory card is full Insert media with sufficient capacity INVALID VALUE Entered data was invalid Enter data in a valid range IP ADDRESS IS USED The set IP...

Page 209: ...D DISCONNECTED The unit is not connected to a hard disk Reconnect the USB cable If the hard disk does not operate normally turn it off and turn it back on again MISMATCH COMPONENT Copying is not possi...

Page 210: ...cannot be used A playlist file with 24 bit audio data cannot be loaded CANNOT OPERATE MULTI FORMAT INCLUDED The files are not in the same format Playlist files in different formats cannot be loaded CA...

Page 211: ...tore up to 999 playlist files Delete files no longer needed or use a new card READ ONLY PLAYLIST VERSION The playlist file is opened as read only because it is in a different version Playlists created...

Page 212: ...tting failed This card must be reformatted CHECK CARD Check the card CONTROL DATA ERROR HAS BEEN DETECTED A control data error was detected NO CARD No card is inserted NO FILE The metadata file cannot...

Page 213: ...PERATION Indicates the number of hours that the unit has been on 0h 99999h H20 LCD ON Indicate the number of hours that the LCD monitor has been turned on 0h 99999h H30 POWER ON Indicates the number o...

Page 214: ...al line of matching IN and OUT points SHIFT EXIT CANCEL Releases the selected item and interrupts copying and other operations CANCEL Releases the selected item and interrupts copying and other operat...

Page 215: ...When an event is selected the OUT point of the event is trimmed When no events are selected the OUT point is moved SHIFT IN TRIM IN TRIM Trims IN points for both player and recorder IN RESET IN POINT...

Page 216: ...omer registration For English http panasonic biz sav pass_e 2 Customers not registered for a P2 HD 5 year warranty program Check firmware version of the unit in the PROPERTY SYSTEM INFO in the thumbna...

Page 217: ...There is no alphabetic legend stamped on the side panels 2 Attach the outer member brackets to the rack Check that the right and left brackets are the same height 3 Remove the four screws on the fron...

Page 218: ...om the Web site listed below For the operating environment of P2Viewer visit also the Web site below For English http pro av panasonic net Follow the steps below to use general IT tools such as Micros...

Page 219: ...n writing back PC data to an SD memory card be sure to use AVCCAM Viewer which you can download from the Web site below For English http pro av panasonic net How this unit handles metadata The metadat...

Page 220: ...e clips to be recorded the recordable time may be shorter than the times given above DIGITAL VIDEO Sampling frequencies AVC Intra100 DVCPRO HD 59 94 Hz Y 74 1758 MHz PB PR 37 0879 MHz 50 Hz Y 74 2500...

Page 221: ...kHz synchronous with video Quantizing 16 bits Frequency response 20 Hz to 20 kHz 1 0 dB at the reference level Dynamic range Better than 85 dB 1 kHz emphasis off A weighted Distortion Less than 0 1 1...

Page 222: ...1 RS 422A D sub 9 pin RS 422A interface 1 Parallel D sub 25 pin 1 Remote encoder D sub 15 pin 1 USB 2 0 Host 1 Device 1 LAN 1000BASE T 100BASE TX 10BASE T 1 eSATA eSATA 3Gbit port 1 Other input output...

Page 223: ...y 115 Error messages 204 eSATA connector 116 Event 78 Deleting 102 Moving 101 Property 112 Registering 99 Revising 99 Export 139 Export copy 137 External control mode 37 F Folder 123 Formatting Hard d...

Page 224: ...ip 112 Event 112 R Rack mounting 217 Recorder 79 82 Recording playback mode 37 Review 114 RS 232C interface 144 S Samba server 140 SD SDHC memory card 149 Formatting 72 150 Protection 150 Recovery 151...

Page 225: ...ARTITION 124 FORMAT HDD 120 IMPORT 124 PROPERTY CLIP PROPERTY 127 FREE CAP OF PARTITION 123 EXPORT SD CARD 139 OPERATION COPY 137 IMPORT 139 PROPERTY CLIP PROPERTY 137 CARD FUNCTIONS 156 CARD FORMAT 1...

Page 226: ...untries outside the European Union These symbols are only valid in the European Union If you wish to discard these items please contact your local authorities or dealer and ask for the correct method...

Reviews: