


The Millennium Pro takes the dependability of the original Millennium charger to new
levels for even better battery performance, new or old. With large backlit display, battery
conditioning, and charge history, you get vital information that is easy to comprehend.
The Millennium Pro is equipped with
Ni-Cd Linear Mode
for all Ni-Cd cells,
Ni-Cd Reverse
Pulse Mode
for Ni-Cd cells, and the new
NOVAK Ni-MH2 Mode
for the ultimate charge of
all sizes of Ni-MH cells. All modes have easy to understand user-adjustable charge parameters.
Case Size ........................................................... 4.00” x 4.38” x 2.33”
(10.16 x 11.13 x 5.92 cm)
Weight ............................................................................................... 14.2 ounces
(402 grams)
Input Voltage
(Power Source) .............................................................................................
12-15 volts DC
Charging Modes ........................ Ni-Cd Linear
(Ni-Cd)
• Ni-Cd Rev.Pulse
(Ni-Cd)
• Ni-MH2
(Ni-Cd/Ni-MH)
Charging Capability ............................................................................... 4-8 cells
(1.2 VDC/cell)
Ni-Cd Charge Rate
(Linear & Reverse Pulse) ..........................................................
0.5-7.0 amps
(adjustable)
Trickle Charge Rate
(Linear/after peak) ...................................................................
0.1-0.4 amp
(adjustable)
Reverse Pulse Duration
(Reverse Pulse) ............................................................................
5-20 milliseconds
Ni-MH Charge Rate ........................................................................... 0.5-7.0 amps
(adjustable)
Circuit Protection ............... Input & Output RVP/Short-Circuits, Shorted Batteries, Thermal Overload
SPECIFICA
TIONS
IMPORTANT PRECAUTIONS
The following precautions will help to prevent possible damage to the Millennium Pro,
the battery pack, or the input power source.
• Charge only nickel-cadmium or nickel-metal hydride
rechargeable battery packs––
Damage will occur from charging other battery types
(lead-acid, lithium-ion, gel cells, etc.)
.
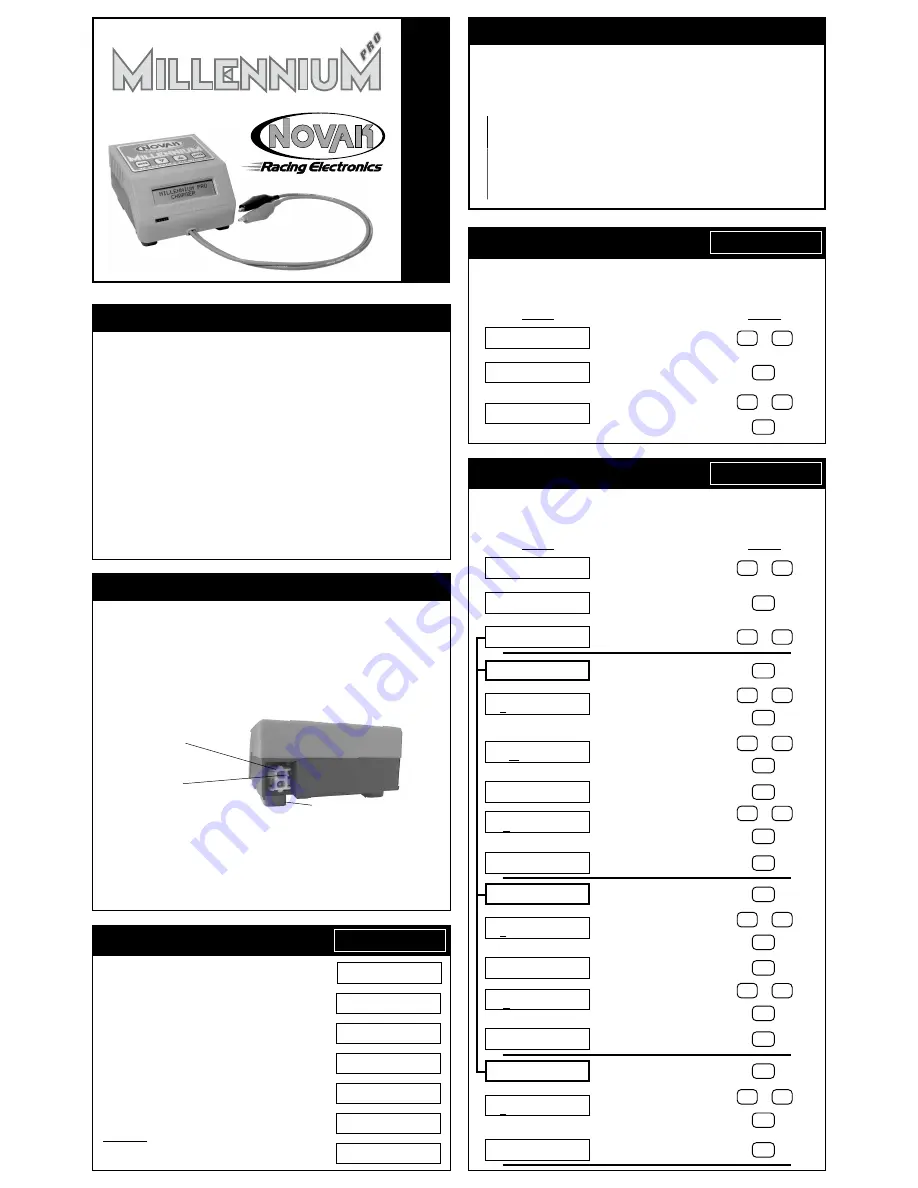
• Never allow water, moisture, or other foreign materials to enter Millennium Pro.
• Do not use automobile battery chargers
to power the Millennium Pro––False peaks
can occur, and excessive voltage spikes can damage the Millennium Pro.
•
Do not obstruct the air intake
on the bottom of the Millennium Pro––This will cause
overheating and thermal shut down. Be careful if putting Millennium Pro on a pit towel.
• Do not charge batteries with fewer than 4 or more than 8 cells
––connected in series.
• Do not charge battery packs connected in parallel
––Batteries will be damaged.
• Enhanced-voltage
(“zapped”)
batteries charge erratically
––Consult the battery matching
company for charging recommendations.
• Excessive charge current can damage batteries
––Follow battery maker recommendations.
• Never exceed 15 volts DC input power source
to power the Millennium Pro.
• Gases from a lead-acid battery may ignite
if sparks occur when connecting or dis-
connecting the Millennium’s alligator clips––Using a lead-acid battery as a power source
may generate hydrogen gas and should only be used in a well ventilated area. Avoid
open flames and sparks which may ignite battery gases.
PLEASE FOLLOW ALL INSTRUCTIONS CAREFULLY
INPUT POWER SOURCE
VOLTAGE & CONNECTION
Input power source voltage
should be 1.5 volts DC above peak-voltage of the battery.
Example 1:
(6 cell Ni-Cd pack peak-voltage
≈
10.5 volts) + (1.5 volts) = 12 volts DC
Example 2:
(8 cell transmitter pack peak-voltage
≈
13.5 volts) + (1.5 volts) = 15 volts DC
Remember that older battery packs peak at higher voltages.
If power supply’s voltage is not high enough to peak battery, charge 8 cell packs as two, 4 cell packs.
Input power source connection
on the Millennium Pro is located on the lower corner of
the back of the case. The supplied power harness has a matching connector attached to it,
and will plug directly to the panel-mounted connector on the back of the Millennium Pro.
When looking at the input power connector,
the pin marked with a raised rib in the
plastic is the positive (+) connection
as shown below.
Panel-mounted
input connector
Positive (+) pin
(Rib in plastic)
Install rubber feet (4)
Acceptable Input Power Sources:
DC power supply* or lead-acid battery**
*Output current of power source should meet/exceed desired charge rate.
**Connect input power harness to lead-acid battery before connecting harness to Millennium Pro.
If using Millennium Pro with power supply,
cut wires of included input power harness to
the desired length and secure them to the output terminal screws of the power supply.
If your power supply has post-style output terminals,
or if using Millennium Pro with a lead-
acid battery, you can solder the included alligator clips to the input power harness. Solder
the red alligator clip to the wire that goes to the Millennium Pro’s positive (+) pin (rib in
plastic of connector). Solder the black alligator clip to other wire.
The MAIN MENU screens are the first level of navigation in
the Millennium Pro. The available screens are shown here
→
→
→
→
→
In each of the MAIN MENU screens the top line of the LCD
displays the available button choices. ENTER and the up (
∆
)
and down (
∇
) arrows to prompt you to use one of these
keys to continue navigation.
The bottom line displays your current software location. To
go the second level of the Millennium’s software, simply
push the
ENTER
button at any of the MAIN MENU screens.
When in the Start menu screen, the display will alternate
between the Start option and Active Profile screen which
shows the active Charge Profile
(bottom line)
and the profile’s
stored settings
(the top line shows charge mode, # of cells, & current)
.
The
Start
option begins the charge process
, while the other
options take you to the next software level where you can
change charge modes and various other parameters.
SHORTCUT: At the Start option screen, pressing the BACK
button takes you directly to the Activate Profile Screen to let
you quickly change the Active Profile.
MAIN SELECTION MENUS
ENTER
∆∇
S t a r t
THE MILLENNIUM PRO
OPERA
TION MANUAL
The Millennium Pro has the ability to store five custom charge profiles in the software’s
memory, and to quickly change the active profile and begin charging. Follow the steps
below to navigate through the sub menus of the Profile Select option and change the
active profile. For each screen displayed, follow the given button inputs as shown.
DISPLAY
BUTTON
Press down (
∇
) or up (
∆
) arrows to
or
scroll to Profile Select menu option.
⇓⇓⇓⇓⇓
Press ENTER to go to
Activate Profile screen.
⇓⇓⇓⇓⇓
Press down (
∇
) or up (
∆
) arrows to
or
change the active charge profile.
(Memory position & profile name displayed)
then:
Then press ENTER to activate profile
and jump back to Start screen.
PROFILE SELECT OPTION
E N T E R
∆∇
P r o f i l e S e l e c t
E N T E R
∆∇
P r o f i l e S e l e c t
E N T E R
∆∇
S t a r t
A c t i v a t e P r o f i l e
1 o f 5 P R O F I L E 1
The Millennium Pro is equipped with three charge modes:
Ni-Cd Rev.Pulse
(larger Ni-Cd
cells)
,
Ni-Cd Linear
(all sizes Ni-Cd)
, &
NOVAK Ni-MH
2
(all sizes Ni-MH cells)
. Each charge
mode has various user-adjustable settings. To customize and activate the desired charge
mode, follow the steps below to navigate through the Edit Charge sub menus.
DISPLAY
BUTTON
Press down (
∇
) or up (
∆
) arrows to
or
scroll to Edit Charge option screen.
⇓⇓⇓⇓⇓
Press ENTER to go to
Charge Mode screen.
⇓⇓⇓⇓⇓
Press down (
∇
) or up (
∆
) arrows to
change the active charge mode.
or
(NiCd Linear/NiCd Rev.Pulse/NOVAK NiMH2)
Press ENTER to activate charge mode
and move to next screen.
⇓⇓⇓⇓⇓
Press down (
∇
) or up (
∆
) arrows to
or
change the underlined parameter.
Press ENTER to move to next parameter.
then:
⇓⇓⇓⇓⇓
Press down (
∇
) or up (
∆
) arrows to
or
change the underlined parameter.
Press ENTER to move to next parameter.
then:
⇓⇓⇓⇓⇓
Press ENTER to move to next screen.
⇓⇓⇓⇓⇓
Press down (
∇
) or up (
∆
) arrows to
or
change the underlined parameter.
Press ENTER to move to next screen.
then:
⇓⇓⇓⇓⇓
Press ENTER to save changes (
∆
or
∇
to
cancel) and jump back to Start screen.
Press ENTER to activate charge mode
and move to next screen.
⇓⇓⇓⇓⇓
Press down (
∇
) or up (
∆
) arrows to
or
change the underlined parameter.
Press ENTER to move to next parameter.
then:
⇓⇓⇓⇓⇓
Press ENTER to move to next screen.
⇓⇓⇓⇓⇓
Press down (
∇
) or up (
∆
) arrows to
or
change the underlined parameter.
Press ENTER to move to next screen.
then:
⇓⇓⇓⇓⇓
Press ENTER to save changes (
∆
or
∇
to
cancel) and jump back to Start screen.
Press ENTER to activate charge mode
and move to next screen.
⇓⇓⇓⇓⇓
Press down (
∇
) or up (
∆
) arrows to
or
change the underlined parameter.
Press ENTER to move to next parameter.
then:
⇓⇓⇓⇓⇓
Press ENTER to save changes (
∆
or
∇
to
cancel) and jump back to Start screen.
EDIT CHARGE OPTION
E N T E R
∆∇
E d i t C h a r g e
E N T E R
∆∇
E d i t C h a r g e
E N T E R
∆∇
S t a r t
CHARGE MODE
∆∇
XXXX XXXXXX
C e l l s C u r r e n t ( A )
6
4 . 5
Trickle Charge
O f f
0 . 2 A
SELECT MENU
Vo l t T h r e s h o l d
ENTER
ENTER
ENTER
∆∆∆∆∆
∆∆∆∆∆
∇
∇
∇
∇
∇
∇
∇
∇
∇
∇
ENTER
∆∆∆∆∆
∇
∇
∇
∇
∇
∆
/ C e l l
∆
/ P a c k
1 4 m V
8 4 m V
E N T E R t o S a v e
∆∇
t o C a n c e l
ENTER
ENTER
∆∆∆∆∆
∇
∇
∇
∇
∇
ENTER
Cells Amps Pulse
6
4.5
1 2 ms
SELECT MENU
Vo l t T h r e s h o l d
∆
/ C e l l
∆
/ P a c k
1 4 m V
8 4 m V
E N T E R t o S a v e
∆∇
t o C a n c e l
ENTER
∆∆∆∆∆
∇
∇
∇
∇
∇
ENTER
ENTER
∆∆∆∆∆
∇
∇
∇
∇
∇
ENTER
C e l l s C u r r e n t ( A )
6
4 . 0
ENTER
∆∆∆∆∆
∇
∇
∇
∇
∇
ENTER
E N T E R t o S a v e
∆∇
t o C a n c e l
ENTER
∆∆∆∆∆
∇
∇
∇
∇
∇
ENTER
CHARGE MODE
∆∇
NiCd Linear
CHARGE MODE
∆∇
NiCd Rev Pulse
CHARGE MODE
∆∇
NOVAK NiMH2
ENTER
ENTER
↔↔↔↔↔
↔↔↔↔↔
↔↔↔↔↔
↔↔↔↔↔
↔↔↔↔↔
↔↔↔↔↔
E N T E R
∆∇
S t a r t
E N T E R
∆∇
E d i t C h a r g e
E N T E R
∆∇
S e t t i n g s
E N T E R
∆∇
P i t Wi z a r d
E N T E R
∆∇
L a s t C h a r g e I n f o
E N T E R
∆∇
D e l a y e d C h a r g e
E N T E R
∆∇
P r o f i l e S e l e c t
∆∆∆∆∆
∇
∇
∇
∇
∇
∆∆∆∆∆
∇
∇
∇
∇
∇


