Garner TS-1 Series, Operation And Installation Manual
The Garner TS-1 Series is a cutting-edge device that you can easily operate with the help of its comprehensive Operation Manual. This manual can be conveniently downloaded for free from our website, ensuring that you make the most of your TS-1 Series experience.
Share
Download


Reviews:
No comments
Related manuals for TS-1 Series

UP
Brand: WallboxOK Pages: 13

BatteryMINDer 12248
Brand: VDC Electronics Pages: 36
Ni-Cd
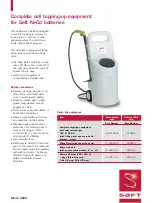
Brand: Saft Pages: 4

B08XGNB359
Brand: PUREGEAR Pages: 17

71393
Brand: SUEX Pages: 40

Certa CTMWR40CHAA
Brand: Kogan Pages: 12

Valena Life
Brand: LEGRAND Pages: 4

OCBC-200
Brand: Ozito Pages: 6

Eve Plus 0131-CC
Brand: Basalte Pages: 2

16621
Brand: APA Pages: 32

18V CHARGE-ALL
Brand: Katana Pages: 4

P-Mega
Brand: Luxa 2 Pages: 11

Genius G1100
Brand: NOCO Genius Pages: 12

845127
Brand: Accusmart Pages: 18

DE9117
Brand: DeWalt Pages: 56

FZ-VCBN11U
Brand: Panasonic Pages: 6

EY0L80-X8
Brand: Panasonic Pages: 6

EY0L80-U1
Brand: Panasonic Pages: 6


