


v. 04.14.16
GW-201 GATEWAY
Operation and Installation Manual
1|Product Review
The NextCentury GW-201 (Gateway) is an easy to use, full-feature
device developed to collect, store, and deliver meter usage and
status data from system components. The Gateway comes
equipped with a 7-inch touch LCD screen that displays network
status, system status, alerts, and more. The Gateway is
programmed with self-healing technologies (power reset, cloud
server reset) and easy to understand LED light indicators. The
Gateway includes an integrated NextCentury radio.
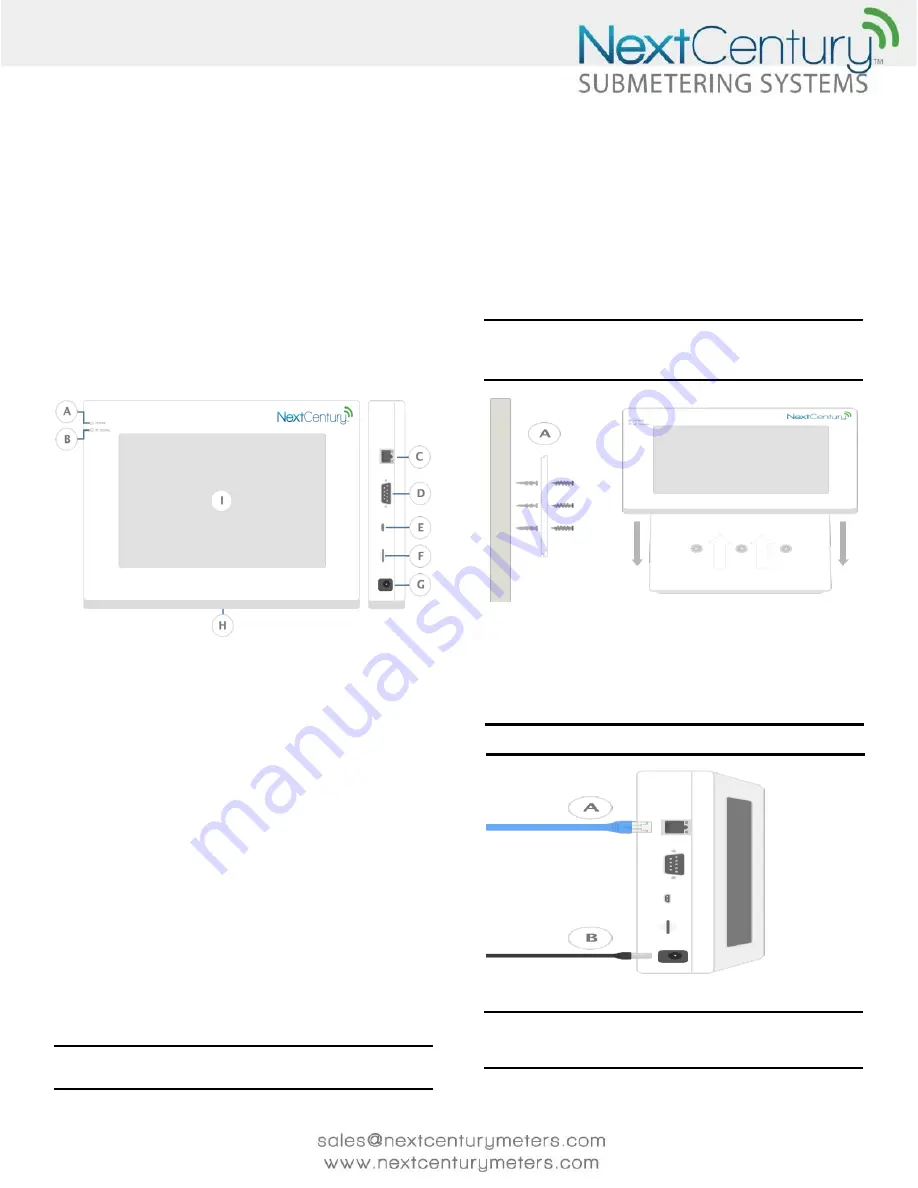
1.1 - GW-201 Hardware
Figure 1 GW-201 Hardware
A Power Indicator B RF Signal Indicator C Ethernet Port
D 3
rd
Party Port E USB Port
F SD Card Port
G 12 Volt Power H Mounting Plate I LCD Screen
1.2
- Packaging Content
1x NextCentury GW-201 Gateway
1x NextCentury 12V 1A power supply
1x NextCentury mounting plate
1x Package of fasteners
1x 5’ Ethernet cable
2|Specifications
2.1 - Dimensions:
223.2mm x 164.4mm x 36.8mm
8.8in x 6.5in x 1.5in
2.2 - Operation Environment:
-28C to 60C
-20F to 140F
Up to 90% relative humidity (non-condensing)
2.3 - Power Requirements:
120/240 VAC wall transformer (included)
Note: If the Gateway is installed outside where it is directly exposed to the
elements, the recommendation is to house it in an appropriate NEMA class
plastic enclosure. (See NextCentury NEMA Enclosures sheet.)
2.4 - Certification:
FCC: Contains 2A B8I-RE-40-214
FCC: Contains MCQ50M1782
IC: Contains 20949-RE40214
IC: Contains 1846A-50M1782
3|Installation and Setup
3.1 - Mount the Gateway
Each Gateway comes with a mounting plate and can be
installed using the mounting screws and anchors to secure the
Mounting Plate (Figure 1-H) to the wall.
Note: To maintain stability, a minimum of two screws and anchors must be
used on the mounting plate (Figure 1-H). Gateway should be secured to the
wall using the provided mounting screws and anchors (Figure 2-A), and
should not be mounted with 3M Tape alone.
Figure 2 Mount the Gateway
A Mounting Screws and Anchor
3.2 - Connect Gateway to NextCentury Cloud
Connecting to the NextCentury Cloud via Ethernet:
1.
Plug Ethernet cable into the Ethernet port (Figure 3-A).
2.
Plug Power Supply into the 12 Volt Power (Figure 3-B).
Note: The Gateway does not require a static IP address. It can be placed on
either a WAN or LAN network and use a DHCP address.
Figure 3 Connect Gateway to NextCentury Cloud
A Ethernet Port B Power Supply Port
Note: On most networks the Gateway will automatically connect to the
NextCentury Cloud. If the Gateway does not connect, please be sure that the
network does not require proxy login information and that TCP traffic is not
blocked.


