background image

I N S T R U C T I O N S

M A N U A L

HIPSTER

TM


PLUS

Summary of Contents for HIPSTER PLUS

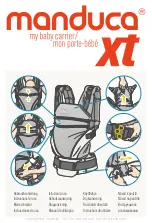
Page 1: ...I N S T R U C T I O N S M A N U A L HIPSTER TM PLUS ...

Page 2: ...ile driving or being a passenger in a motor vehicle This carrier is not suitable for use during sporting activities FALL HAZARD Infants can fall through a wide leg opening or out of carrier Before each use make sure all buckles snaps and straps are secure Take special care when leaning forward Never bend at waist bend at knees Only use this carrier for children between 4 08kg 9 lbs and 20 41kg 45 ...

Page 3: ...ibuting your baby s weight evenly throughout the lower back and shoulders to help minimize any long with a safe but quick release system one simple movement is all that is needed to get your little one in and out in seconds or even with just one hand CONTENTS 1 hip seat base 2 extender belt accessory sold separately 3 single shoulder top carrier accessory sold separately 4 double shoulder top carr...

Page 4: ...ing the buckle together as an extra security measure 4 Fasten your belt with the adjustable security buckle strap Listen for the click sound to make sure the buckle is securely engaged Pull and adjust the security buckle strap until it is snug around your hips 5 Place baby on the HIPSTER PLUS hip seat facing in or facing out or on your side For step by step video instructions please visit www miam...

Page 5: ...ily 5 DOUBLE SHOULDER TOP CARRIER 1 zipper attachment 2 security button for zipper 3 adjustable back strap 4 straps for shoulder strap adjustment 5 removable front pocket layer 1 4 3 2 5 EN HIPSTER TM PLUS ...

Page 6: ...ck strap before you place your baby in 7 Adjust the length of the shoulder straps with the adjustable shoulder straps under your arms Do not strap the baby too tight against your body and always allow room for head movement Keep your baby s face free from any obstructions at all times 8 9 For step by step video instructions please visit www miamily com instructions FACE IN CARRY FACE OUT CARRY BRE...

Page 7: ...m through the shoulder strap 9 Reach both hands in front of your chest to secure the adjustable back strap The back strap should sit in front of your chest If it s too low or too high you can adjust the back strap on the shoulder strap 10 Adjust the length of the shoulder straps with the adjustable shoulder straps under your arms Do not strap the baby too tight against your body and always allow r...

Page 8: ...MiaMily 8 SINGLE SHOULDER TOP CARRIER ACCESSORY SOLD SEPARATELY 1 zipper attachment 2 security button for zipper 3 padded single shoulder strap 4 removable front pocket layer 3 EN HIPSTER TM PLUS 4 2 1 ...

Page 9: ...er Top Carrier and Hip Seat as a second security measure 3 With the Single Shoulder Top Carrier hanging down in front of you place your baby on the hip seat base facing towards your chest for the Face In Carry position or facing outwards for the Face Out Carry position Make sure your baby s legs are properly positioned on each side of the hip seat 4 Using your left hand to support your baby for sa...

Page 10: ...of the HIPSTER waist belt Put on the carrier by wrapping the now extended waist belt around your waist and sliding the male buckle of the extender belt through the elastic safety loop on the HIPSTER waist belt before connecting it to the female buckle of the HIPSTER waist belt Adjust to get a snug fit The tighter the belt the more support it will provide to your back ...

Page 11: ...anufacturing defects in material or workmanship for a period of one 1 years from the original date of purchase If you are in need of warranty or repair for a MiaMily product please contact us at questions miamily com WARRANTY HIPSTER PLUS CARE Overtea Sagl Via Cantonale 40 Porza 6948 Switzerland questions miamily com CONTACT US MiaMily 11 EN HIPSTER PLUS is made with 100 polyester stain resistant ...

Page 12: ...ndheitszustandbefinden Verwenden Sie die Babytrage nicht während Sie kochen putzen oder jegliche andere Tätigkeit ausüben bei der Sie in die NähevonWärmequellenoderchemischenStoffengeratenkönnten BenutzenSiedieBabytrageaufkeinenFallbeimFahreneinesMotorfahrzeugs auchnichtwennSienurMitfahrersind DieBabytrageeignetsichnichtzurVerwendungbeisportlicherBetätigung STURZGEFAHR Kinder können durch die groß...

Page 13: ......

Page 14: ...4 5 1 2 3 ...

Page 15: ...1 4 3 2 5 ...

Page 16: ...ierig sein so regulieren Sie die Höhe des Rückengurts einfach bevor Sie das Kind auf den Hüftsitz setzen 7 Regulieren Sie nun die Länge der Schultergurte indem Sie an den eigens dafür vorgesehenen unter den Armen befindlichen Riemen ziehen Ziehen Sie die Schultergurte nicht zu fest an damit Sie das Kind nicht zu fest an Ihren Körper drücken und lassen Sie ausreichend Freiraum damit das Kind seinen...

Page 17: ......

Page 18: ...3 4 2 1 ...

Page 19: ...inden Sie ein Video mit praktischen Schritt für Schritt Anweisungen TRAGEN AUF EINER SEITE 1 Ziehen Sie den HIPSTER Hüftsitz an sehen Sie diesbzgl die 5 einfachen Schritte zur Benutzung des HIPSTER Hüftsitzes und verbinden Sie dann mit dem Reißverschluss den oberen Rand des Hüftsitzes mit dem unteren Rand der Cross Babytrage mit einzelnem Schultergurt 2 Vergewissern Sie sich als zweite Vorsichtsma...

Page 20: ...en Sie nun die beiden Klettverschlüsse für einen besseren Halt 4 Wickeln Sie den Gürtel um die Taille und regulieren Sie ihn so dass er eng anliegt Je enger der Gürtel anliegt desto mehr Halt gibt er Ihrem Rücken 5 Bringen Sie nun den verstellbaren Gürtel am Originalgürtel an und vergewissern Sie sich dass die Schnalle gut verschlossen ist beim Verschließen müssen Sie ein Klick gehört haben 6 Zieh...

Page 21: ...HIPSTER besteht zu 100 aus fleckabweisendem waschmaschinenfestem Polyester Nehmen Sie ...

Page 22: ...zioni di salute Non utilizzare mai il porta bebè mentre si cucina si fanno le pulizie o in qualsiasi attività che preveda la vicinanza a fonti di calore o l esposizione a sostanze chimiche Non indossare mai il porta bebè durante la guida o come passeggero in un veicolo a motore Il porta bebè non è idoneo all uso durante la pratica di attività sportive PERICOLO DI CADUTA I bambini possono scivolare...

Page 23: ......

Page 24: ...4 5 1 2 3 ...

Page 25: ...1 4 3 2 5 ...

Page 26: ...ne con il bambino posizionato sul seggiolino da anca risulta troppo difficile regolare l altezza della bretella posteriore prima di sistemare il bambino 7 Regolare la lunghezza delle bretelle per le spalle con le apposite bretelle regolabili sotto le braccia Non stringere troppo il bambino con le bretelle contro il proprio corpo e lasciare sempre spazio per il movimento della testa Tenere sempre i...

Page 27: ......

Page 28: ...3 4 2 1 ...

Page 29: ...m instructions troverete un video con istruzioni passo passo TRASPORTO SU UN LATO 1 Una volta indossata la base per il seggiolino da anca HIPSTER vedere 5 semplici step per il seggiolino da anca HIPSTER unire con la cerniera la parte superiore del seggiolino da anca alla parte inferiore del porta bebè monospalla 2 Verificare che i 2 bottoni di sicurezza all inizio e alla fine della cerniera che un...

Page 30: ...ibile 3 Applicare e unire i due nastri di velcro per un ulteriore supporto 4 Avvolgere la cintura intorno alla vita e regolarla in modo che risulti aderente Più è stretta la cintura maggiore sarà il supporto garantito alla schiena 5 Collegare la cintura estensibile alla cintura originale e verificare che la fibbia sia inserita in sicurezza si deve sentire un clic 6 Tirare la bretella con la fibbia...

Page 31: ...HIPSTER è realizzato in materiale composto da 100 di polyester antimacchia e lavabile in lavatrice ...

Page 32: ...utiliserleporte bébéquandoncuisine quandonfaitleménageoupendanttouteactivitéprévoyantlaproximité àdessourcesdechaleuroul expositionàdessubstanceschimiques Nejamaisenfilerleporte bébéquandonconduitouentantquepassagerd unvéhiculeàmoteur Leporte bébén estpasadaptéàuneutilisationpendantlapratiqued activitéssportives DANGER DE CHUTE Les enfants peuvent glisser à travers la grande ouverture pour les jam...

Page 33: ......

Page 34: ...4 5 1 2 3 ...

Page 35: ...1 4 3 2 5 ...

Page 36: ... sur le siège de hanche s avère trop difficile régler la hauteur de la bretelle postérieure avant d installer l enfant 7 Régler la longueur des bretelles pour les épaules avec les bretelles réglables prévues à cet effet sous les bras Ne pas trop serrer l enfant avec les bretelles contre son propre corps et toujours laisser de la place pour le mouvement de la tête Toujours tenir le visage de l enfa...

Page 37: ......

Page 38: ...3 4 2 1 ...

Page 39: ...ions vous trouverez une vidéo contenant des instructions pas à pas TRANSPORT SUR UN CÔTÉ 1 Après avoir enfilé la base pour le siège de hanche HIPSTER voir les 5 étapes simples pour le siège de hanche HIPSTER joindre avec la fermeture à glissière la partie supérieure du siège de hanche à la partie inférieure du porte bébé en bandoulière 2 Vérifier que les 2 boutons de sécurité au début et à la fin ...

Page 40: ...et joindre les deux bandes velcro pour que le soutien soit renforcé 4 Enrouler la ceinture autour de la taille et la régler de manière à ce qu elle adhère bien Plus la ceinture est serrée plus le soutien garanti au dos est important 5 Relier la ceinture extensible à la ceinture d origine et vérifier que la boucle soit insérée en toute sécurité il faut entendre un déclic 6 Tirer la bretelle avec la...

Page 41: ...HIPSTER est réalisé dans une matière composée à 100 de polyester antitache et lavable en machine ...

Page 42: ...ncaelportabebésmientrascocina limpiaorealizacualquierotraactividadquesedesarrollecercadefuentesde caloroqueleexpongaasustanciasquímicas Nollevepuestonuncaelportabebésmientrasconducenimientrasviajaenelasientodelpasajerodeunvehículoamotor Elportabebésnoesaptoparausarsemientraspracticaactividadesdeportivas PELIGRO DE CAÍDA Los niños pueden resbalarse por la amplia abertura para las piernas o caerse d...

Page 43: ......

Page 44: ...4 5 1 2 3 ...

Page 45: ...1 4 3 2 5 ...

Page 46: ...cado regularla con el niño situado sobre el asiento de cadera ajuste la altura de la correa trasera antes de colocar al niño 7 Ajuste la longitud de los tirantes de los hombros con las correas regulables específicas que se encuentran bajo los brazos No apriete demasiado al niño contra el propio cuerpo con las correas y deje siempre espacio para el movimiento de la cabeza Mantenga siempre la cara d...

Page 47: ......

Page 48: ...3 4 2 1 ...

Page 49: ...s encontrará un vídeo con instrucciones paso a paso TRANSPORTE SOBRE UN COSTADO 1 Una vez colocada la base del asiento de cadera HIPSTER vea los 5 pasos sencillos para el asiento de cadera HIPSTER una con la cremallera la parte superior del asiento de cadera a la parte inferior del portabebés en modo bandolera 2 Como segunda medida de precaución compruebe que los 2 botones de seguridad al principi...

Page 50: ...xtensible 3 Coloque y ate las dos cintas de velcro como soporte adicional 4 Póngase el cinturón alrededor de la cintura y regúlelo hasta que quede ajustado Cuanto más apretado esté el cinturón mayor será el soporte para la espalda 5 Conecte el cinturón extensible con el cinturón original y compruebe que la hebilla esté conectada en condiciones de seguridad debe oírse un clic 6 Tire de la correa co...

Page 51: ...HIPSTER ha sido fabricado con material hecho 100 de poliester antimanchas y puede lavarse a ...

Page 52: ...w w w m i a m i l y c o m No 0415 February 2nd 2015 ...

Reviews: