background image

RECHARGEABLE DAB+ RADIO

E66452

User Manual

Summary of Contents for E66452

Page 1: ...RECHARGEABLE DAB RADIO E66452 User Manual ...

Page 2: ...tents 17 Unpacking the device and setting it up 18 Connect mains adapter to radio 18 Battery operation charging device 18 Turning device on off 19 Adjust the antenna 19 Adjusting the volume 20 Connecting ear headphones 20 System settings 21 Operating the radio 26 Bluetooth mode 31 Cleaning 32 Disposal 33 Technical data 34 Contents ...

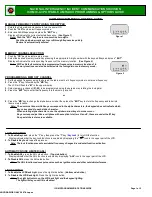
Page 3: ...3 A B 8 3 2 1 5 4 6 7 DC 5V 10 9 11 ...

Page 4: ...the volume 4 Menu Info Accessing the menu displaying information 5 Prev Tuning to previous station Nex t Tuning to next station 6 Preset Storing station tuning to stored station 7 Mode Switching on off selecting DAB FM Bluetooth mode 8 Loudspeaker 9 Antenna 10 Headphone socket 11 Connector socket for mains adapter ...

Page 5: ...s adapter to radio 18 Battery operation charging device 18 Turning device on off 19 Adjust the antenna 19 Adjusting the volume 20 Connecting ear headphones 20 System settings 21 Setting the date and time 22 Setting date format 23 Setting time format 23 Auto update 23 Language 23 Software version 24 Factory settings 24 Setting display lighting 24 Showing information on the display 26 Operating the ...

Page 6: ...Contents 6 DAB mode 26 FM Mode 29 Bluetooth mode 31 Connecting Bluetooth devices 31 Control 31 Disconnecting a Bluetooth connection 32 Cleaning 32 Disposal 33 Technical data 34 ...

Page 7: ...e else make sure you also include this user manual Symbols DANGER This signal word indicates a major hazard which if not avoided will result in death or serious injury WARNING This signal word indicates a moderate hazard which if not avoided could result in death or serious injury CAUTION This signal word indicates a minor hazard which if not avoided could result in a minor or moderate injury NOTI...

Page 8: ...g compliance with all applicable regulations including EMC telecoms radiocoms electromagnetic radiation EMR and electrical safety Energy efficiency level V The energy efficiency level is a standard scale for rating the efficiency of external and internal power supplies The energy efficiency symbol indicates the efficiency level and the ratings are classified up to level VI most efficient level Indoor use...

Page 9: ...ly have double and or reinforced insulation and do not have any connection options for a protective earth The housing of an electrical appliance in protection class II that is enclosed in insulated material can partially or fully act as the additional or reinforced insulation Internal return symbol 1 YEAR WARRANTY Warranty period ...

Page 10: ...he device without our consent and do not use any auxiliary equipment that we have not approved or supplied Use only accessories e g the mains adapter that we have approved or supplied The device is for moderate climates areas use not suitable for use in tropical climates countries Heed all the information in these operating instructions especially the safety information Any other use is deemed imp...

Page 11: ...n responsible for their safety or they have been instructed in its use by that person Children should be supervised to ensure they do not play with this device Keep the device and accessories out of the reach of children Operating safety Do not place any receptacles containing liquid such as vases on the device or in close proximity to it and protect all parts from drips and splashes The receptacl...

Page 12: ...mains adapter Wait a few hours before turning the device on Power supply WARNING Risk of electric shock short circuit There is a risk of electric shock short circuit due to live parts Only use the mains adapter supplied to connect the radio The mains plug or an appliance coupler is used as the disconnect device the disconnect devices shall remain readily operable The local mains voltage must corre...

Page 13: ...e cord If the mains adapter the power supply cord or the device is damaged or if liquids or foreign objects have entered the inside of the device immediately pull the plug out of the power point Do not bend or compress squash the mains power cord Donotturnthedeviceonifthedeviceor thepowersupplycordshowsvisiblewear If you ascertain that the device was damaged in transit please contact the service d...

Page 14: ...ovens Set up location surroundings New devices can emit a typical unavoidable but completely safe odour that fades over time In order to reduce any odours we recommend that you air the room regularly When developing this product we took care to ensure that it falls well within the relevant regulatory limits Place and operate all components on a stable level and vibration free surface in order to s...

Page 15: ...ts on top of the cord as this may damage it Only use the device in residential premises or similar spaces For indoor use only The device shall not be exposed to dripping or splashing Do not use in wet or high humidity areas such as kitchen or bathroom Do not use the device in areas where there is a danger of explosion This includes e g petrol stations fuel storage areas or areas in which solvents ...

Page 16: ...patibility Keep the device at a distance of at least one metre from sources of high frequency or magnetic interference televisions other loudspeakers mobile and cordless telephones etc to avoid malfunctions Safe handling of batteries WARNING Risk of explosion Batteries can contain flammable substances If handled improperly batteries can leak heat up ignite or even explode which can damage your devi...

Page 17: ...ocation as a result of swallowing or inhaling small parts or plastic wrap Keep plastic packaging out of the reach of children Please check the contents to see that all components have been supplied and contact us within 14 days of purchase if any components are missing When unpacking the device make sure that the following parts have been included DAB FM radio Mains adapter User manual and warrant...

Page 18: ...of water Connect mains adapter to radio Connect the plug of the mains adapter cord to the socket on the radio 11 Plug the mains adapter into an easily accessible mains power point If the device is not going to be used for long periods shut it down Do this by pulling the plug out of the power point Battery operation charging device The device can also be operated without external power source via t...

Page 19: ...Mode button pressed down for about 2 seconds to switch the device into the standby mode When the device is connected to the power supply the time and date will be displayed When the device is switched off its display 1 is completely switched off Adjust the antenna Extend the telescopic antenna 9 fully The antenna should be fully extended to ensure good reception and sound quality Adjusting the tel...

Page 20: ...sound levels when using earphones and headphones can cause hearing damage and or loss of hearing Before pressing play set the volume to the lowest setting Start playback and increase the volume to a level that is pleasant for you Using headphones to listen to a device at high volumes for an extended period can damage your hearing The headphone socket is located on the side of the device 10 Connect...

Page 21: ... the time and the date the device must be switched on System settings can only be configured when the device is switched on Settings that have been configured are preserved in standby Configure the settings as follows The radio is switched on Press the Menu Info 7 button for about 2 seconds in order to access menu Select the desired menu by repeatedly pressing the Prev or Next 5 button Press the Sele...

Page 22: ...tes will flash Now set the current time in minutes by repeatedly pressing the Prev or Next button Press the Select button to confirm your input The day is flashing on the display Now set the current day by repeatedly pressing the Prev or Next button Press the Select button to confirm your input Now set the current month by repeatedly pressing the Prev or Next button Press the Select button to confirm y...

Page 23: ... the Prev or Next button to select the 12 hour or 24 hour format for the time Press the Select button to confirm your input Finally press the Menu button to exit the menu Auto update Access the System Time Auto Update function Use the Prev or Next button to select the Update from any Update from DAB Update from FM or no Update settings Press the Select button to confirm your input Finally press the ...

Page 24: ...ory settings are restored all station presets are deleted Use the Prev or Next button to select the Factory Reset Yes or Factory Reset No settings Press the Select button to confirm your input If you selected YES the device will restart Finally press the Menu button to exit the menu Setting display lighting Access the System Backlight function Use the Prev or Next button to select the desired menu ...

Page 25: ...brightness On level allows you to specify the display brightness when the radio is on Use the Prev or Next button to select the On level menu Press the Select button to confirm your input Use the Prev or Next button to select the high middle or low option Press the Select button to confirm your input Setting display brightness DIM levelallowsyoutosetthedisplaybrightnesswhen the radio is in standby m...

Page 26: ...c titles or current traffic bulletins to be shown on the display 1 DAB mode ThefirsttimethedeviceisusedinDABmode itautomatically searchesforalltheDABstationsitcanreceive andstoresthem permanently sothatthestationscanonlyhastobeperformedonce Press the Mode button 7 repeatedly until the display shows 1 DAB The display shows a status bar with the message Scanning and the number of DAB stations found A...

Page 27: ... carry out a manual station search and include the chosen station in the station list This function permits fine tuning of the station Access the Manual tune function in the DAB menu Press the Select button to confirm your input Use the Prev or Next button to tune the station manually Press the Select button to play the station DRC Dynamic Range Control Thesignalusedtoadaptthedynamicrangedependsonth...

Page 28: ...ctive stations Access the Prune function in the DAB menu In order to delete stations that are no longer current from the station list select the Yes response and confirm with the Select button In order to exit from the function choose the No entry Save DAB stations You can save up to 20 preset stations Press the Prev or Next button repeatedly in DAB mode to tune the desired DAB station Hold the Pre...

Page 29: ...tton 7 repeatedly until the display shows FM Scanning for FM stations and storing Use the Prev or Next 5 button to tune to the frequency of the station you would like to play Press and hold one of the Prev or Next buttons in order to start an automatic station scan backwards forwards The station scan will stop at the next strong station signal Storing FM stations You can store up to 20 preset stat...

Page 30: ...be played Configuring FM settings Keep the Menu Info button pressed down for about 2 seconds Use the Prev or Next button to access the desired function in the FM menu Press the Select button to confirm your input Scan setting Access the Scan Setting function in the FM menu Press the Select button to confirm your input Use the Prev or Next button to select the All stations or strong stations settings ...

Page 31: ...em s name is MD44052 The pairing process is now complete and the external device can now be used together with the radio If you want to stop data transfer via Bluetooth either switch off the Bluetooth function on the external device or press MODE to return to radio mode Control You can control how tracks are played the volume and a range of special functions on your external device and on the radi...

Page 32: ...ween your devices Cleaning WARNING Risk of electric shock short circuit There is a risk of electric shock short circuit due to live parts Before cleaning pull the plug out of the power point Do not use chemical solutions or cleaning products as these may damage the surface and or labelling of the device Use a soft dry cloth for cleaning ...

Page 33: ... batteries At the end of its service life do not dispose of the device with normal household waste If you can no longer use your electrical device dispose of it in accordance with the legal provisions applicable in your country This involves separating the materials in the device for the purpose of recycling and minimising the environmental impact Contact your local waste disposal company or your ...

Page 34: ...voltage 100 240 V 50 60Hz 0 2 A max Output voltage DC 5 V 1 A Radio Power supply DC 5 V 1 A Built in Li Ion battery 3 7V 2000mAh 7 4Wh Bluetooth Version 5 0 Frequency 2402 2480MHz Protocol A2DP AVRCP Range 10 meters open area Max transmission power 1 2dbm Power output 1 W RMS Headphone outlet 150 mV max FM bandwidth 87 5 108 MHz ...

Page 35: ...Technical data 35 DAB bandwidth 174 240 MHz Number of preset stations 40 20 DAB 20 FM Dimensions WxHxD approx 16 x 9 6 x 6 cm Weight device only 340 g Subject to technical modifications ...

Page 36: ...ition and Consumer Act 2010 and similar state and territory laws Our goods come with guarantees that cannot be excluded under the Australian Consumer Law You are entitled to a replacement or refund for a major failure and for compensation for any other reasonably foreseeable loss or damage You are also entitled to have the goods repaired or replaced if the goods fail to be of acceptable quality an...

Page 37: ...ble media player games saved on a games console or files stored on a USB memory stick during the process of repair some or all of your stored data may be lost We recommend you save this data elsewhere prior to sending the product for repair Repair and Refurbished Goods or Parts Notice RECHARGEABLE DAB RADIO E66452 AFTER SALES SUPPORT AUS 1300 884 987 www medion com au 1 YEAR WARRANTY REGISTER YOUR ...

Page 38: ...eet ALDI s stringent quality specifications If at any time you feel your repair is being handled unsatisfactorily you may escalate your complaint Please telephone us on 1300 884 987 or write to us at MEDION Australia Pty Ltd Chatswood NSW 2067 Australia Hotline 1300 884 987 Opening hours Mon Fri 08 30AM to 06 00PM EST Internet www medion com au E mail Support australia medion com AFTER SALES SUPPOR...

Page 39: ......

Page 40: ...AFTER SALES SUPPORT MODEL MD 44052 9854 05 2019 1 YEAR WARRANTY www medion com au 1300 884 987 AUS Made in China DISTRIBUTED BY ALDI STORES 1 SARGENTS ROAD MINCHINBURY NSW 2770 www aldi com au AUS ...

Reviews: