background image

MCS Total

Solution

for all your

Control

Needs

Energy Efficient and RoHS Compliant

5580 Enterprise Pkwy.

Fort Myers, FL 33905

Office: 239-694-0089

Fax: 239-694-0031

www.mcscontrols.com

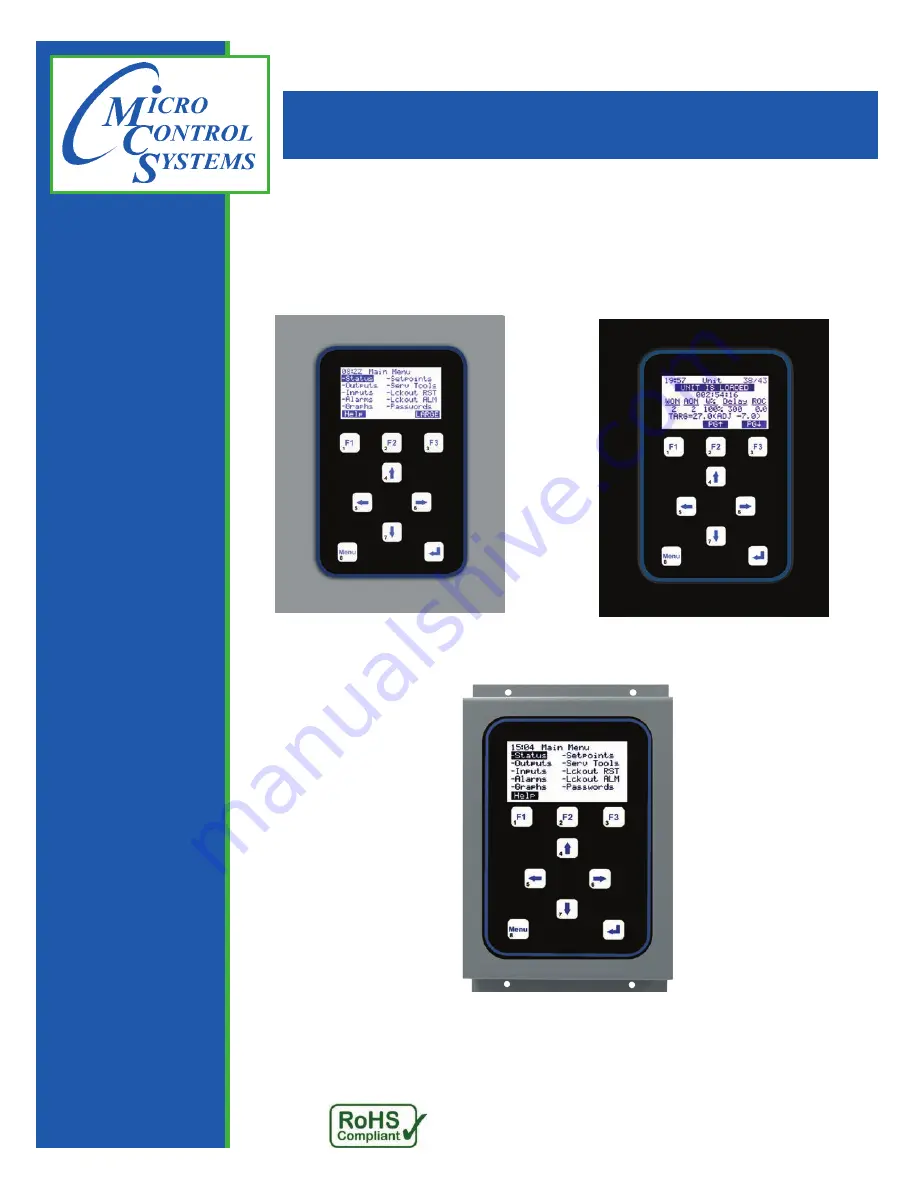
Magnum Keypad / Display

Rev 2.2

 (HVAC 14.00 & Higher)

MCS-DOOR-KEYPAD

MCS-OEM-KEYPAD

MCS-PANEL-KEYPAD

Revision-2017-11-10

Summary of Contents for MCS-DOOR-KEYPAD

Page 1: ...nergy Efficient and RoHS Compliant 5580 Enterprise Pkwy Fort Myers FL 33905 Office 239 694 0089 Fax 239 694 0031 www mcscontrols com Magnum Keypad Display Rev 2 2 HVAC 14 00 Higher MCS DOOR KEYPAD MCS OEM KEYPAD MCS PANEL KEYPAD Revision 2017 11 10 ...

Page 2: ...ocument shall be published used reproduced transmitted or disclosed to others out side your organization without the prior expressed written consent of Micro Control Systems Inc This document and the information contained herein shall be treated as proprietary Reasonable provisions shall be provided to ensure that this information remains proprietary by your employees agents and other personnel th...

Page 3: ...Y OUTPUTS Last Off 13 4 4 RELAY OUTPUTS Run TDY 13 4 5 RELAY OUTPUTS Cycles TDY 13 4 6 RELAY OUTPUTS Run YDY 14 4 7 RELAY OUTPUTS Cycles YDY 14 4 8 RELAY OUTPUTS TTL Run HR 14 4 9 RELAY OUTPUTS TTL Cycles 15 4 10 ANALOG OUTPUTS Status 15 4 11 ANALOG OUTPUTS Max TDY 15 4 12 ANALOG OUTPUTS Min TDY 16 4 13 ANALOG OUTPUTS AVG YDY 16 4 14 ANALOG OUTPUTS Max YDY 16 4 15 ANALOG OUTPUTS MinYDY 17 4 16 ANA...

Page 4: ...Date 32 9 16 SYSTEM INFO Saving Time Date 32 9 17 SYSTEM INFO Display 32 9 18 DISPLAY Contrast Reverse Background 33 9 19 DISPLAY Background Reversed 33 9 20 SERVICE TOOLS Clear Alarm History 33 9 21 CLEAR ALARM HISTORY Yes No 34 9 22 SERVICE TOOLS Clear Point Info 34 9 23 CLEAR POINT INFO Yes No 34 9 24 CHANGES MADE HIGHER AUTH REQUIRED 35 9 25 SERVICE TOOLS Sensor Diagnostics 35 9 26 SENSOR DIAG...

Page 5: ...MAGNUM KEYPAD DISPLAY REVISION 2 2 5 1 1 Cable Connection 6 wire 3 twisted pairs shielded cable 10 length Chapter 1 Keypad Display Specifications ...

Page 6: ... For rainproof enclosures 115 230 field selectable 24 vac option 10 Relay outputs 6 3 amps 12 Analog or Digital inputs 4 Digital inputs RS 485 Ethernet Graphics Display 128 x 64 Dot pixel graphics LCD 2 8 Diagonal viewing area White characters on Dark background reversible Function Keys Direction Movement Keys Enter Key Menu Key ...

Page 7: ...e 115 230 field selectable 24 vac option 10 Relay outputs 6 3 amps 12 Analog or Digital inputs 4 Digital inputs RS 485 RS 232 Ethernet OEM MOUNT PACKAGE Magnum OEM Mount Keypad Display For rainproof enclosures 115 230 field selectable 24 vac option 10 Relay outputs 6 3 amps 12 Analog or Digital inputs 4 Digital inputs RS 485 RS 232 Ethernet ...

Page 8: ...ssing the F3 Large key To get to Large you can only do so from the Menu display Once positioned at the menu key press the function key F3 which says LARGE The display shows the controlling sensor first in large characters The refrigerant type is displayed at the bottom of the display Next Select Menu Chapter 2 Main Screen Layouts Pressing the Menu Key Results in displaying the 10 available Menu it...

Page 9: ...ut chiller in is displayed rounded to a whole number The second line shows system status The third line shows mode time in that mode The next two lines show the following Steps wanted on Steps actually on Wanted capacity Integration delay Rate of change The next line shows the current target Press F3 PGi Unit Status KW TON On the top line right chiller out chiller in is displayed rounded to a whol...

Page 10: ...wn Press F3 PGi Compressor 1 EXV or LLS On the top line right chiller out chiller in is displayed rounded to a whole number The line also shows EXV or LLS status The third line shows time in that mode The display shows information for the EXV or LLS for circuit 1 If EXV the information is as follows Valve open Delay till next chg Curr Suct SH Slope of SH Compressor 1 PSI Temp On the top line right...

Page 11: ...erheats On the top line right chiller out chiller in is displayed rounded to a whole number The second line shows circuit status The third line shows time in that mode The next two lines show the following Sat Suct Tmp Suct Superheat Sat Cond Tmp Disc Superheat The function keys F2 F3 allow paging up or down Press F3 PGi Press Menu Compressor 2 EXV or LLS On the top line right chiller out chiller ...

Page 12: ...dings The third through sixth line shows up to four relays and their status The bottom line shows function keys with current values Pressing F1 moves you to Analog outputs Pressing F2 or F3 pages the current screen up or down for additional outputs To scroll right Press Relay Last On On the top line shows Outputs which allows you to move screen left to right The second line shows column headings T...

Page 13: ...ne shows Outputs which allows you to move screen left to right The second line shows column headings The third through sixth line shows up to four relays run time today The bottom line shows function keys with current values Pressing F1 moves you to Analog outputs Pressing F2 or F3 pages the current screen up or down for additional outputs To scroll right Press Relay Outputs Cycles TDY On the top ...

Page 14: ...n the top line shows Outputs which allows you to move screen left to right The second line shows column headings The third through sixth line shows up to four relays cycles yesterday The bottom line shows function keys with current values Pressing F1 moves you to Analog outputs Pressing F2 or F3 pages the current screen up or down for additional outputs Press F3 PGi Relay Outputs TTL Run HR On the...

Page 15: ...1 for Anlog Analog Outputs Status On the top line shows Outputs The second line shows column headings The third through fifth line shows up to four analog outputs The bottom line shows function keys with current values Pressing F1 moves you to Relay Outputs Pressing F2 or F3 pages the current screen up or down for additional outputs To scroll right Press Analog Outputs Max TDY On the top line show...

Page 16: ...log Outputs AVG TDY On the top line shows Outputs The second line shows column headings The third through sixth line shows up to four analog outputs average value today The bottom line shows function keys with current values Pressing F1 moves you to Relay Outputs Pressing F2 or F3 pages the current screen up or down for additional outputs Press F3 PGi Analog Outputs Max YDY On the top line shows O...

Page 17: ...ues Pressing F1 moves you to Relay Outputs Pressing F2 or F3 pages the current screen up or down for additional outputs To scroll right Press Analog Outputs Avg YDY On the top line shows Outputs The second line shows column headings The third through sixth line shows up to four analog outputs average yesterday The bottom line shows function keys with current values Pressing F1 moves you to Relay O...

Page 18: ...s Inputs The second line shows column headings The third through sixth line shows up to four sensor inputs the sensor type The bottom line shows function keys with current values Pressing F1 moves you to Relay Outputs Pressing F2 or F3 pages the current screen up or down for additional inputs To scroll right Press Chapter 5 Sensor Inputs Pressing the Menu Key Results in displaying the 10 available...

Page 19: ...nputs Last Off On the top line shows Inputs The second line shows column headings The third through sixth line shows up to four sensor inputs Last Off If Digital The bottom line shows function keys with current values Pressing F2 or F3 pages the current screen up or down for additional inputs To scroll right Press Sensor Inputs Max TDY On the top line shows Inputs The second line shows column head...

Page 20: ...r Inputs Run TDY On the top line shows Inputs The second line shows column headings The third through sixth line shows up to four sensor inputs run hours today If Digital The bottom line shows function keys with current values Pressing F2 or F3 pages the current screen up or down for additional inputs To scroll right Press Sensor Inputs Avg TDY On the top line shows Inputs The second line shows co...

Page 21: ...sor Inputs Run YDY On the top line shows Inputs The second line shows column headings The third through sixth line shows up to four sensor inputs run yesterday If digital The bottom line shows function keys with current values Pressing F2 or F3 pages the current screen up or down for additional inputs To scroll right Press Sensor Inputs Max YDY On the top line shows Inputs The second line shows co...

Page 22: ...nsor Inputs Min YDY On the top line shows Inputs The second line shows column headings The third through sixth line shows up to four sensor inputs minimum yesterday If analog The bottom line shows function keys with current values Pressing F2 or F3 pages the current screen up or down for additional inputs To scroll right Press Sensor Inputs TTL Run HR On the top line shows Inputs The second line s...

Page 23: ...If analog The bottom line shows function keys with current values Pressing F2 or F3 pages the current screen up or down for additional inputs Sensor Inputs TTL Cycles On the top line shows Inputs The second line shows column headings The third through sixth line shows up to four sensor inputs total cycles If digital The bottom line shows function keys with current values Pressing F2 or F3 pages th...

Page 24: ...stand the options select F1 for help To display the current Alarm Screens press the Enter Key Select Alarms Press Alarms On the top line shows Alarms The second and third line show the information for the first alarm The third and fourth line show the information for the second alarm The bottom line shows function keys with current values Pressing F2 or F3 pages the current screen up or down the a...

Page 25: ...Function F1 Graphs Relay or Sensor On the top line shows Graph and Sensor being displayed The next lines layout the graph based on the scale required At the bottom of the graph the graph time frame is shown Pressing F1 displays sample time for editing Pressing F2 or F3 selects relays or analog outputs for display Select Menu Press Select Menu Press Graphs Edit The background shows the graph The po...

Page 26: ...tions select F1 for help To display the current Setpoints Screens press the Enter Key Select Menu Press Setpoints Value The top line shows Setpoints which allows you to move screen to left or right The second line shows column headings The third through sixth line shows up to four setpoints their current value Pressing F2 or F3 pages the current screen up or down the current selection Setpoints ar...

Page 27: ...rv Tools Screens press the Enter Key Select Serv Tools Press RS485 Setup The top line shows RS485 Setup The next 3 lines identify the current protocol current address the current baud rate The bottom line shows function keys with current values Pressing F1 takes you back to the previous screen Press F1 Back RS485 Network The top line shows Service Tools The next 5 lines identify the first five opt...

Page 28: ...ection Select Ethernet Network Press Ethernet Setup The top line shows Eth Setup The next 4 lines identify the following Dynamic IP YES or NO IP Address The bottom line shows function keys with current values Pressing F1 backs up to Serv Tools Pressing F2 or F3 pages the current screen up or down Select F3 to Page Down i Ethernet Setup Subnet Mask The top line shows Eth Setup The next 4 lines iden...

Page 29: ... selection Select F1 Back Service Tools System Info The top line shows Service Tools The next 5 lines identify five options available under Service Tools The bottom line shows function keys with current values Pressing F2 or F3 pages the current screen up or down the current selection Select System Press System Info Firmware Cfg The top line shows System Info The next 4 lines identify the Firmware...

Page 30: ... Info Unit serial number Install Date The top line shows System Info The next 2 lines identify the unit serial number The following 2 lines identify the install date The bottom line shows function keys with current values Pressing F1 Back function moves you back to System Info Pressing F2 or F3 pages the current screen up or down the current selection Press F3 PG ä System Info Config Version Date ...

Page 31: ...creen up or down the current selection Press F3 PG ä System Info Physical Mac Address Type I O The top line shows System Info The next 2 lines identify the Physical MAC address the following 2 lines identify the type of I O boards used The bottom line shows function keys with current values Pressing F1 Back function moves you back to System Info Pressing F2 or F3 pages the current screen up or dow...

Page 32: ...o Year or to change Press the to Exit this screen once you have made the changes needed Press to Exit Service Tools Time Date The top line shows Time Date The next section shows Save Changes Pressing the or moves between Yes or No Press function to save your changes moves back to the Service Tools Menu Press to return to main Menu Service Tools Display The top line shows Service Tools The next 5 l...

Page 33: ...t The following line allows reversing the background from light to dark or dark to light Pressing F1 allows you to go back to the Serv Tools menu Press to change contrast Select Menu Key Display Background Reversed The top line shows Display The background is now reversed from light to dark Use F1 Back to return to Service Tools sub menu Service Tools Clear Alarm History The top line shows Serv To...

Page 34: ... line shows Serv Tools Next Line shows Yes No or moves between Yes or No Press function to save changes Press to return to main Menu Service Tools Clear Point Info The top line shows Serv Tools Press to move to CL Point Info Press function Press Service Tools Clear Point Info The top line shows Serv Tools The next section shows Yes No or moves between Yes or No Press function Press ...

Page 35: ...shows Serv Tools The next section shows Higher Auth Required Press function Press to return to main Menu Service Tools Sensor Diagnostics The top line shows Serv Tools Press to move to Sensor Diagnostics Press function Press Service Tools Sensor Diagnostics The top line shows Serv Tools Pressing F3 shows next 5 sensors Press function F1 to return to sub menu Press to return to main Menu ...

Page 36: ...line shows Serv Tools Press to move to Config Checksum Press function Press Service Tools Sensor Diagnostics The top line shows Serv Tools Pressing F3 shows next 5 sensors Press function F1 to return to sub menu Press F1 to return to sub menu Service Tools Operating Schedule The top line shows Serv Tools Press to move to Operating Schedule Press function Press ...

Page 37: ...Dates Service Tools Operating Schedule Sunday Press to move to First Day Press function Press Service Tools Operating Schedule Setup Use the or to set the starting time Press the to move to the next settings Press function when finished Press Service Tools Holiday Dates Use the or to move to Holiday Dates Press function Press ...

Page 38: ...setup Holiday dates in this menu Press function to choose first date Use the to select the first date month day Press function when finished Press to return to sub menu Service Tools BACnet Settings Use the or to move to BACnet Setting Press function to accept Press Service Tools BACnet Settings Use the or to move to BACnet between lines Press function to accept Press ...

Page 39: ... TCP IP Setting Press function to accept Use the keypad to change the TCP IP number Higher auth is needed to make these changes Press F1 to return to sub menu BACnet Settings Device ID Press function to accept Use the keypad to change the Device ID number Higher auth is needed to make these changes Press F1 to return to sub menu ...

Page 40: ...rstand the options select F1 for help To display the current Lckout RST press the Enter Key Press Lockout Reset The top line shows Main Menu The pop up window displays Lockout Reset Yes or NO If there are no current lockouts the response will be No Current Lockouts Using the or arrows select your response then press The system is set for a limited number of resets per day to avoid damage Select Me...

Page 41: ...2 41 Lockout Alarm The top line shows Lckout ALM The next display will show the 1st alarm which caused a lockout If there are no lockout alarms this message will be displayed Select next potion Press Menu Key Chapter 11 Lockout Alarms ...

Page 42: ...ord and press After Entering Password Press Chapter 12 Password Pressing the Menu Key Password Results in displaying the 10 available Menu items The highlight is on the Lckout RST display To select any item use the arrow keys to position the highlight and press To understand the options select F1 for help To display the current Lckout ALM press the Enter Key Select Passwords Press After Entering P...

Page 43: ...MAGNUM KEYPAD DISPLAY REVISION 2 2 43 12 3 PASSWORDS Results Password Results The top line shows Password The next line displays the authorization level Press the Menu key to continue Press Menu Key ...

Page 44: ...Providing HVAC R Control Solutions Worldwide 5580 Enterprise Pkwy Fort Myers FL 33905 Office 239 694 0089 Fax 239 694 0031 www mcscontrols com ...

Reviews: