

Matrox Monarch EDGE Device Setup
Step 1 -- Connecting and Powering up the Monarch EDGE
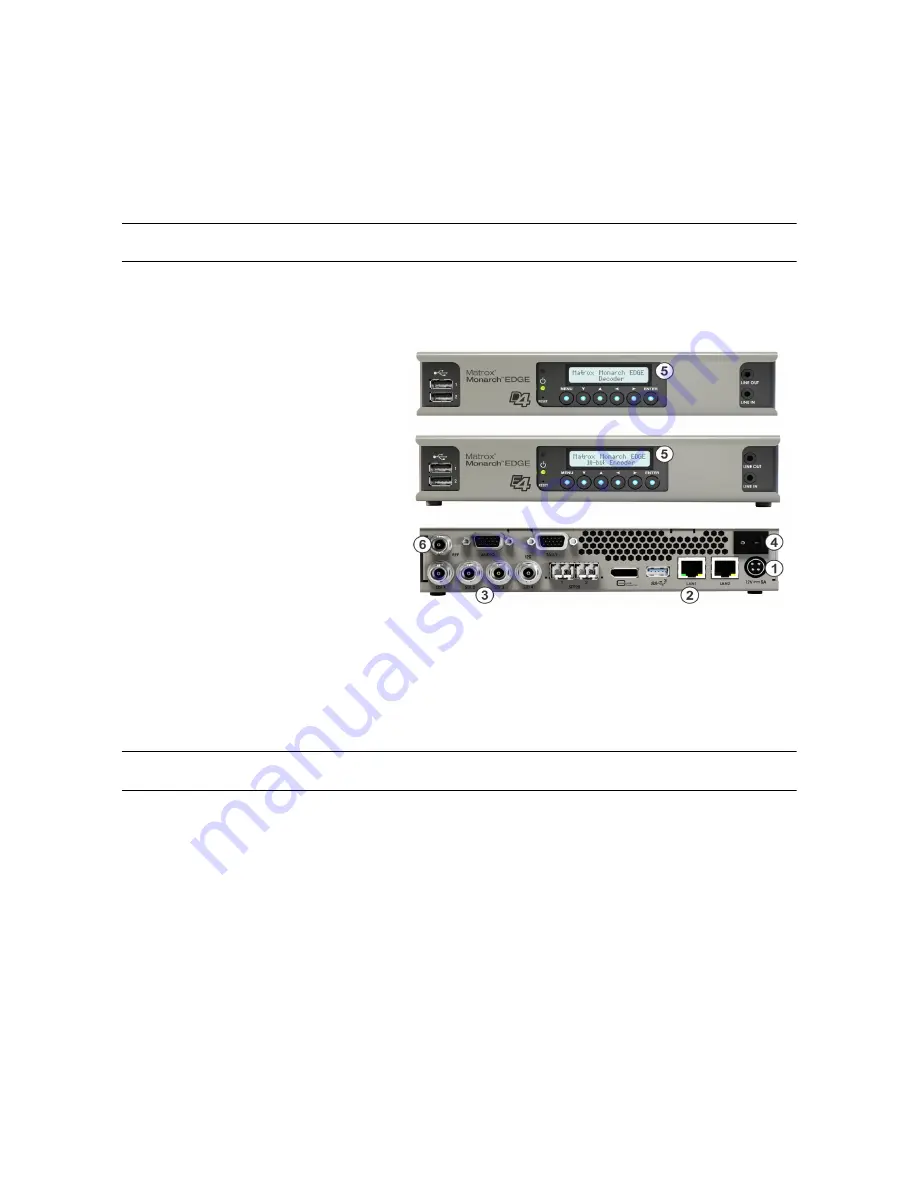
The following illustration and the steps below describe a typical SDI-based connection scenario. The steps apply
to both the Monarch EDGE Encoder and Decoder devices.
Note
SFP28 connectors are shown for illustration purposes only. They are not included with your device.
1
Connect the 12V DC power supply to
the Monarch EDGE.
2
Connect
LAN 1
to a DHCP-enabled
network.
3
Connect SDI cables to the appropriate
connectors. Use
SDI 4
for 12G video.
4
Power on the Monarch EDGE.
5
The LCD screen will display basic
device information, such as the IP
address and device serial number.
6
(Optional) The REF connector is for a
genlock signal to synchronize SDI
sources.
7
(Optional) You can set the Monarch
EDGE to a static IP address from the LCD screen menu:
a
Press
Menu >
Device Config > Network Settings > LAN 1 > Static IP.
b
Use the arrow buttons to enter the static IP address (DNS server must also be entered in IP address format).
c
Press
Enter
to finish.
Matrox Monarch EDGE is connected to the network and ready to be updated.
Step 2 -- Discovering Monarch EDGE and Updating Firmware
After you have connected and powered up your Monarch EDGE, you may need to update the device firmware.
Before you update
• Make sure you have at least 1 GB of free disk space available.
• Use only one instance of the firmware updater on your network at a time.
• Microsoft .NET Framework version 4.5.x is required. Windows 10 systems have version 4.6 pre-installed.
• Make sure you have a DHCP-enabled network, and that your server maintains the IP address of a device
when it reappears on the network after a reboot. If not, assign static IP addresses to your devices.
• Make sure the Monarch EDGE Control Hub version on your computer matches the firmware version of the
Monarch EDGE.


