manualshive.com logo in svg
background image

OWNER'S MANUAL 

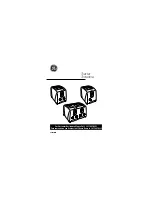
MODEL HST13 - VERTICAL TOASTER 


MANUFACTURER'S INTRODUCTION 

GENERAL SPECIFICATIONS


Height:


23.250"


Width:


19.875"


Depth:


15.250"


208V Single Phase 18.5 Amps


Electrical:


240V Single Phase 18.5 Amps


6 ft. 3 wire including ground,


with NEMA L6 -20P Plug


(Plug furnished by others on


Power Cord:


international units.)


130 lbs.


The Marshall High Speed Vertical Toaster produces a  grilled 
effect on the cut side of sandwich buns. The buns are 
inserted at the top of the unit and are pressed against a 
heated platen surface, which is covered by a replaceable 
toaster platen sheet. The spacing between the heated grill 
and the conveyor is adjustable to accommodate different 
thicknesses of buns. The buns are discharged onto a product 
slide at the bottom of the unit. The system is high speed and 
also variable in speed. Additionally, the heat controls are pre-
set at factory, which eliminates unauthorized tampering with 
heat settings. The flexibility of this toaster is unmatched 
allowing operators to produce the hottest buns in the shortest 
time.


Weight:


135168CH7 RV100599 
Copyright © 1999 Marshall Air Systems, Inc. 
All Rights Reserved.


Supplier Name:


MARSHALL AIR SYSTEMS, INC.


419 Peachtree Drive South


Address:


Charlotte, NC 28217


Serial #:


Date Received:


Date Installed:


Telephone #:


704-525-6230


Toll Free 

#:


800-722-3474 Customer Service


Fax #:


704-525-6229


Service Referral #:


800-722-3474


Local Service Name:


Local Service #:


Conveyor Speed


Setting:


Содержание HST13

Страница 1: ... and the conveyor is adjustable to accommodate different thicknesses of buns The buns are discharged onto a product slide at the bottom of the unit The system is high speed and also variable in speed Additionally the heat controls are pre set at factory which eliminates unauthorized tampering with heat settings The flexibility of this toaster is unmatched allowing operators to produce the hottest ...

Страница 2: ...BELT TENSION PARTS AND ADJUSTMENT MECHANISM FIGURE 5 INTERNAL PARTS AND DRIVE COMPONENTS FIGURE 6 ADJUSTMENT LEVER OPERATION FIGURE 7 BELT REMOVAL INSTRUCTIONS FIGURE 8 TOASTER BELT ORIENTATION FIGURE 9 CONTROL CABINET ACCESS INSTRUCTIONS FIGURE 10 TOASTER TENSION INSTRUCTIONS FIGURE 11 WIRING SCHEMATIC 208V 50 60HZ 1PH 135169 WIRING SCHEMATIC 240V 50 60HZ 1PH 135817 135168CH7 RV100599 Copyright 1...

Страница 3: ...e toaster platen sheet is installed over the contact platen The toaster platen sheet is installed from the top of the unit by lightly creasing it at the center and directly hanging it on the center platen 4 Install the bun guide spacer on the toaster Figure 4 5 Connect the toaster to the power supply 6 Turn on the conveyor switch on the toaster and check for free movement of the two conveyor belts...

Страница 4: ...or use with buttered buns B Life of Toaster Platen Sheet depends on usage and cleaning C Sheet turning white this is black pigment fading out of the sheet and does not mandate sheet replacement D What triggers sheet replacement When buns no longer feed through the machine but instead are damaged or torn the toaster platen sheet should be replaced Replace ONLY with Marshall toaster platen sheet E H...

Страница 5: ...heat resistant gloves on your hands IT IS IMPORTANT TO WEAR HEAT RESISTANT GLOVES TO AVOID BURNING HANDS C Dispense Sizzle Plus agent onto a clean damp No Scratch Pad until the pad is nearly saturated D Using the saturated pad lightly rub the exposed surface of the belt in a widthwise circular motion The belt is not easy to wet so repeated rubbing may be needed to completely contact the soiled sur...

Страница 6: ...ERE TESTING INDICATES WITH POWER OFF BE SURE THAT THE CONVEYOR AND HEAT SWITCHES ARE OFF AND TOASTER IS UNPLUGGED PROBLEM 1 No heat and conveyor belts do not move SOLUTION A Check that toaster is plugged in B Check that conveyor and heat switches are on C Check that power is available at the receptacle Check toaster nameplate for voltage D WITH UNIT UNPLUGGED check connections inside of plug WITH ...

Страница 7: ...p G Check for loose connections or wiring H Check that circuit board 115 230 switch is at the 230V position I Check for DC voltage of at least 25VDC at the motor PROBLEM 4 Product is over or under toasted SOLUTION A Check toasting speed Good toasting will occur in 10 seconds from bun load to drop B Check gap setting There must be compression of the bun as it feeds into the toaster Decreasing the g...

Страница 8: ...nstallation misuse abuse alteration of original design incorrect voltage unauthorized service breakage of fragile items or any other damage caused by an act out of Marshall s control The effect of corrosion fire and normal wear on the equipment or component parts is not covered by this warranty This warranty does not cover cooking performance smoke capture or holding temperatures which is a functi...

Страница 9: ...gency within the service time allowance guidelines and must be submitted along with failed parts if applicable to Marshall Air Systems freight prepaid within 30 days of the work being performed Travel is covered but must not exceed 50 miles or 1 hour whichever is greater Call Marshall s Service Department at 800 722 3474 or 704 525 6230 with any questions Service is to be performed by recognized s...

Страница 10: ...135168FIG 1 RY042899 Copyright 1999 Marshall Air Systems Inc All rights reserved ...

Страница 11: ...ED BELTS TO CLEATED BELTS ON UNITS 0899180 AND BELOW ORDER BELT REPLACEMENT KIT 137638 TOASTERS WITH SERIAL NUMBERS 0899180 AND BELOW HEEL SIDE 5034998LKH CROWN SIDE 503499BLKC NOTE TO BELT INSTALLER IF BOTH BELTS ARE BLACK NOTE THE DIFFERENCE BETWEEN THE TWO THE SEWN SEAM FOR THE HEEL BELT RUNS IN THE OPPOSITE DIRECTION THAN THE CROWN SIDE BELT REFER TO FIGURE 9 FOR BELT SEAM ORIENTATION HANG ON ...

Страница 12: ...135168FIG 4 RY042899 Copyright 1999 Marshall Air Systems Inc All rights reserved ...

Страница 13: ...135168FIG 5 RY093099 Copyright 1999 Marshall Air Systems Inc All rights reserved ...

Страница 14: ...DRIVE SIDE W COVER REMOVED INTERNAL PARTS AND DRIVE COMPONENTS 135168FIG 6 RY093099 Copyright 1999 Marshall Air Systems Inc All rights reserved ...

Страница 15: ...ADJUSTABLE GAP SETTING ADJUSTMENT LEVER OPERATION 135168FIG 7 RY093099 Copyright 1999 Marshall Air Systems Inc All rights reserved ...

Страница 16: ... AWAY FROM ROUND PIN SEE ILLUSTRATION BELOW 6 REMOVE BOLTS ON EACH SIDE PLATEN TOTAL OF 4 THIS WILL ALLOW THE PLATEN BRACKETS AND BEARING RETAINER BRACKETS TO BE REMOVED SEE ILLUSTRATION BELOW DO NOT REMOVE BOLTS THAT ARE IN THE CENTER 7 SLIDE OLD BELTS OFF OF ROLLERS AND THRU CUTOUTS IN SIDE 8 BEFORE SLIDING ON NEW BELTS REFER TO FIGURE 9 IF BELTS HAVE A STITCHED JOINT MAKE SURE TO ORIENT AS SHOW...

Страница 17: ...135168FIG 9 RV050399 Copyright 1999 Marshall Air Systems Inc All rights reserved ...

Страница 18: ... 1 TURN UNIT OFF AND UNPLUG 2 REMOVE BOTH SIDE COVERS 3 LOOSEN SCREW A 4 REMOVE SCREW B 5 LAY UNIT ON LEFT SIDE TO ALLOW BOTTOM PANEL TO SWING OPEN 6 BOTTOM OF CONTROL CABINET SWINGS DOWN GIVING ACCESS TO CONTROLS 7 REAR OF CABINET IS CAULKED ALONG LINE AT C DO NOT BREAK THESE SEALS ...

Страница 19: ...E A ON DRIVE SIDE MEASURE DISTANCE A ON ADJ SIDE DISTANCE A SHOULD BE SAME ON BOTH SIDES ADJUST IF NEEDED MEASURE DISTANCE B ON DRIVE SIDE MEASURE DISTANCE B ON ADJ SIDE DISTANCE B SHOULD BE SAME ON BOTH SIDES ADJUST IF NEEDED TOASTER TENSION INSTRUCTIONS 135168FIG 11 RV093099 Copyright 1999 Marshall Air Systems Inc All rights reserved ...

Страница 20: ...Copyright 1998 Marshall Air Systems Inc All rights reserved ...

Страница 21: ...Copyright 1998 Marshall Air Systems Inc All rights reserved ...

Отзывы: