MAGIMIX LE MINI PLUS, Manual
The MAGIMIX LE MINI PLUS is a compact yet powerful food processor that offers performance and convenience in the kitchen. Easily prepare delicious meals with this versatile appliance. To get the most out of your MAGIMIX LE MINI PLUS, download the free user manual from manualshive.com.
Share
Download


Reviews:
No comments
Related manuals for LE MINI PLUS

FA-5114-5
Brand: TZS First AUSTRIA Pages: 14
2099-1318
Brand: Cross Technologies Pages: 21

70550R - PROCTOR Silex 350W 2 Speed Food...
Brand: Hamilton Beach Pages: 44

943621
Brand: Springlane Pages: 88

840075900
Brand: Hamilton Beach Pages: 32
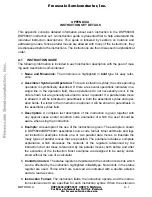
Freescale Semiconductor DSP56000
Brand: Motorola Pages: 126

Cucina HR7730
Brand: Philips Pages: 56

taurus 912100
Brand: creative housewares Pages: 22

SDL 2100
Brand: Wolf Garten Pages: 102

840088000
Brand: Hamilton Beach Pages: 12

KML 4011
Brand: Amica Pages: 32

MAP 100/B
Brand: WAMGROUP Pages: 46

Fresh Express DJ75 Series
Brand: Moulinex Pages: 12

Fresh Express Cube & Stick
Brand: Moulinex Pages: 62

HGK000001NOC
Brand: Kasanova Pages: 32

Stack & Snap
Brand: Hamilton Beach Pages: 44

8606107731698
Brand: VOX electronics Pages: 44

8606019600433
Brand: VOX electronics Pages: 110


