LTE ALM-N245, User Manual
"Get ready to experience seamless connectivity with the LTE ALM-N245. Enhance your mobile experience with this advanced device. Explore its features and maximize its capabilities by downloading the free User Manual from manualshive.com. Access step-by-step instructions and unleash the full potential of your device."
Share
Download


Reviews:
No comments
Related manuals for ALM-N245

DIR-130 - Broadband VPN Router
Brand: D-Link Pages: 13
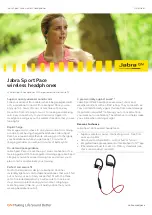
Sport Pace Wireless
Brand: Jabra Pages: 2

Franklin T9
Brand: T-Mobile Pages: 4

Brightbox
Brand: EE Pages: 207

DLB70XX
Brand: Deliberant Pages: 69

GN-A11G
Brand: Gigabyte Pages: 57

ZKS-T23
Brand: Zks Pages: 20

EVlinking Wi-Fi
Brand: Evco Pages: 18

ANC200
Brand: AT&T Pages: 16

Verizon Jetpack AC791L
Brand: NETGEAR Pages: 2

Bright Box
Brand: EE Pages: 2

E7350
Brand: Linksys Pages: 155

BLUESOCKET 3040
Brand: ADTRAN Pages: 6

BLUESOCKET 2135
Brand: ADTRAN Pages: 8

EE400-R
Brand: Gigafast Pages: 54

WAPBR-100
Brand: ViewSonic Pages: 53

CC2541
Brand: Ebyte Pages: 31

SleepPhones
Brand: SleepPhones Pages: 15


