background image

Operator’s Manual

IDEALARC

®

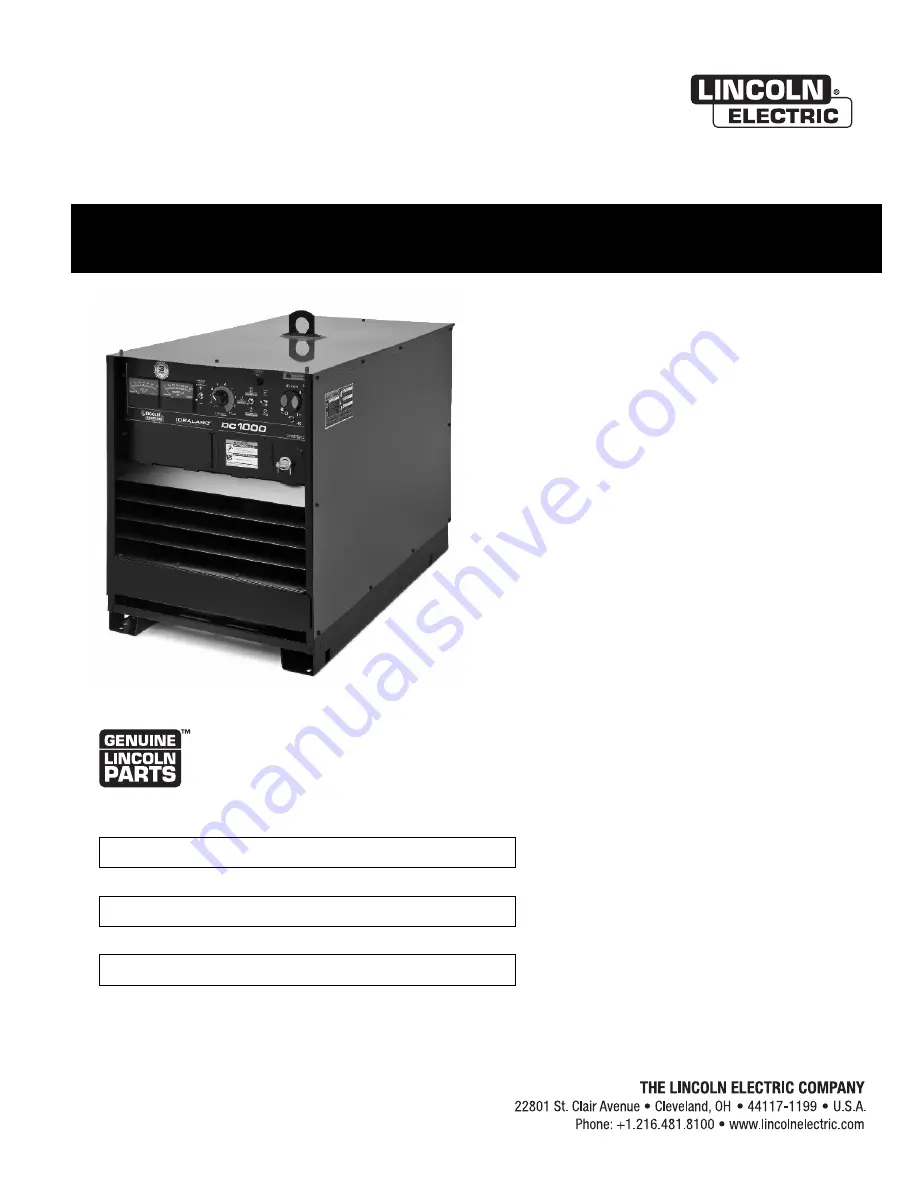
DC-1000

Register your machine:  

www.lincolnelectric.com/register

Authorized Service and Distributor Locator:  

www.lincolnelectric.com/locator

IM10212

|   Issue D ate Sept-15

© Lincoln Global, Inc.  All Rights Reserved.

For use with machines having Code Numbers:

12480

Need Help? Call 1.888.935.3877 

to talk to a Service Representative

Hours of Operation: 

8:00 AM to 6:00 PM (ET) Mon. thru Fri.

After hours? 

Use “Ask the Experts” at lincolnelectric.com
A Lincoln Service Representative will contact you 
no later than the following business day.

For Service outside the USA: 

Email: [email protected]

Save for future reference  

Date Purchased

Code: (ex: 10859)

Serial: (ex: U1060512345)

Summary of Contents for IDEALARC DC-1000

Page 1: ...machines having Code Numbers 12480 Need Help Call 1 888 935 3877 to talk to a Service Representative Hours of Operation 8 00 AM to 6 00 PM ET Mon thru Fri After hours Use Ask the Experts at lincolnelectric com A Lincoln Service Representative will contact you no later than the following business day For Service outside the USA Email globalservice lincolnelectric com Save for future reference Date ...

Page 2: ...N A LARGE ROOM OR OUTDOORS natural ventilation may be adequate if you keep your head out of the fumes See below USE NATURAL DRAFTS or fans to keep the fumes away from your face If you develop unusual symptoms see your supervisor Perhaps the welding atmosphere and ventilation system should be checked WEAR CORRECT EYE EAR BODY PROTECTION PROTECT your eyes and face with welding helmet properly fitted...

Page 3: ... hot engine parts and igniting Do not spill fuel when filling tank If fuel is spilled wipe it up and do not start engine until fumes have been eliminated 1 d Keep all equipment safety guards covers and devices in position and in good repair Keep hands hair clothing and tools away from V belts gears fans and all other moving parts when starting operating or repairing equipment 1 e In some cases it ...

Page 4: ...rm to ANSI Z87 I standards 4 b Use suitable clothing made from durable flame resistant material to protect your skin and that of your helpers from the arc rays 4 c Protect other nearby personnel with suitable non flammable screening and or warn them not to watch the arc nor expose themselves to the arc rays or to hot spatter or metal FUMES AND GASES CAN BE DANGEROUS 5 a Welding may produce fumes a...

Page 5: ...ent passing through lifting chains crane cables or other alternate circuits This can create fire hazards or overheat lifting chains or cables until they fail 6 h Also see item 1 c 6 I Read and follow NFPA 51B Standard for Fire Prevention During Welding Cutting and Other Hot Work available from NFPA 1 Batterymarch Park PO box 9101 Quincy MA 022690 9101 6 j Do not use a welding power source for pipe...

Page 6: ..._ Maintenance Section D Safety Precautions D 1 General Maintenance D 1 Overload Protection D 1 ________________________________________________________________________ Troubleshooting Section E Safety Precautions E 1 How to Use Troubleshooting Guide E 1 Troubleshooting Guide E 2 thru E 7 ________________________________________________________________________ Connection and Wiring Diagrams Section...

Page 7: ...7 NOTES IDEALARC DC 1000 7 ...

Page 8: ... AND FUSE SIZES FOR MAXIMUM RATED OUTPUT IN ADDITION FOLLOW LATEST NATIONAL ELECTRICAL CODE AND LOCAL CODE INPUT AC VOLTAGE U1 FREQUENCY MAXIMUM EFFECTIVE INPUT CURRENT I1EFF TYPE 90 C COPPER WIRE IN CONDUIT AWG mm2 COPPER GROUND WIRE IN CONDUIT AWG mm2 BUSSMANN LIMITRON FUSE SIZE AND CATALOG NUMBER 2 FUSE SIZE CATALOG NUMBER 380VRMS 50 60HZ 116ARMS 2 35 6 16 175A KTS R 175 440VRMS 50 60HZ 100ARMS...

Page 9: ... fuse box before working on this equipment Turn off the input power to any other equipment connected to the welding system at the disconnect switch or fuse box before working on the equipment Do not touch electrically hot parts Always connect the grounding lug located inside the reconnect input access door to a proper safety Earth ground FALLING EQUIPMENT can cause injury Do not lift this machine ...

Page 10: ...HING PANEL NOTE MACHINES ARE SHIPPED FROM FACTORY CONNECTED FOR HIGHEST VOLTAGE RECONNECT PANEL GND CONNECTION FOR 440 VOLTS 50 60 Hz 1 ON RECONNECT PANEL LOOSEN ALL HEX BOLTS OR NUTS PULL BACK MOVABLE LINKS AND ROTATE LINKS TO THEIR NEW POSITIONS POSITION EACH LINK BETWEEN THE WIRE TERMINAL AND HEX BOLT OR NUT PUSH THE LINK COMPLETELY FORWARD SECURELY TIGHTEN ALL HEX BOLTS OR NUTS DO NOT REMOVE H...

Page 11: ...ower from excessive overloads The circuit has a 1000 volt ampere rating Control Cable Connection Terminal strips with screw connections are located behind the hinged door on the front of the power source to make all the control cable connections for operating wire feeding equipment See the appropriate connection diagram for exact instructions covering the wire feeder being used With the DC 1000 tu...

Page 12: ... INSTRUCTIONS ELECTRIC SHOCK can kill Do not touch electrically live parts or electrode with skin or wet clothing Insulate yourself from work and ground Always wear dry insulating gloves FUMES AND GASES can be dangerous Keep your head out of fumes Use ventilation or exhaust to remove fumes from breathing zone WELDING SPARKS can cause fire or explosion Keep flammable material away Do not weld on cl...

Page 13: ...n requirements 60974 1 IEC 60974 1 Three Phase Power Transformer Rectifier Rectified DC Output Line Connection Flux Cored Arc Welding B 2 OPERATION IDEALARC DC 1000 B 2 ELECTRODE POLARITY SWITCH Positive Electrode Negative Electrode EARTH GROUND CONNECTION ON INPUT BOX Signifying the Earth Ground Connection ...

Page 14: ...RC DC 1000 Designates welder complies with low voltage directive and with EMC directive Degree of protection provided by the enclosure IP21S Designates welder complies with China Compulsory Certificate C Tick symbol indicates conformity with Australian EMC regulations CE Designates welder complies with IEC 60974 10 Electromagnetic Capability EMC requirements for equipment used in industrial locati...

Page 15: ...ts of a control box with 28 ft 8 4m of four conductor cable This connects to terminals 75 76 77 on the terminal strip and the case grounding screw so marked with the symbol on the machine These terminals are made available by opening the terminal access cover on the left side of the case front This control will give the same control as the output control on the machine Mode Switch The toggle switc...

Page 16: ... thus provide repeatable starts If the voltmeter swings above the set voltage and then back to the desired welding voltage the OCV setting is too high This usually results in a bad start where the wire tends to blast off If the voltmeter needle hesitates before coming up to the desired voltage the OCV is set too low This will cause the electrode to stub 3 NA 5 Set the DC 1000 mode switch to the pr...

Page 17: ...thermostatically protected with two proximity thermostats against overload or insuf ficient cooling One thermostat is located on the transformer secondary negative output lead and the other thermostat is located on the choke coil The thermostats are connected in series in the machine control circuit so that if an excessive overload is applied to the machine or the machine should receive insufficie...

Page 18: ...IBLE CAUSE lists the obvious external possibilities that may contribute to the machine symptom Step 3 RECOMMENDED COURSE OF ACTION This column provides a course of action for the Possible Cause generally it states to contact your local Lincoln Authorized Field Service Facility If you do not understand or are unable to perform the Recommended Course of Action safely contact your local Lincoln Autho...

Page 19: ...nega tive output terminal 4 Short on output terminals with 2 4 jumpered 5 Defective control board 1 Electrode or work lead loose or bro ken 2 Open main power transformer T1 primary or secondary circuit 3 Output pilot relay 4CR not operating or faulty 4 Firing circuit P C board not connect ed or is faulty 5 If using 500 amp stud choke circuit may be open 1 Repair or replace 2 Check input power 3 Re...

Page 20: ... an internal or external short circuit on the output 2 Faulty control P C board 3 Terminals 73 74 75 76 77 ground ed to negative output terminal 1 Poor work or electrode connection 2 Welding leads too small 3 Welding current or voltage too low 4 Defective main SCR bridge 1 Input contactor contacts frozen 1 Check position of switch 2 Check switch and replace if faulty 3 Check wiring and control and...

Page 21: ...rocedures 2 Defective 3CR reed switch 3 Faulty control board 4 Defective main SCR bridge 1 Defective 3CR reed switch 2 Faulty control board 1 Mode switch in CV Submerged Arc mode 2 Defective main SCR bridge 1 Defective control board 2 Defective firing board 3 Defective main SCR bridge 1 Insufficient output inductance 1 Effective current demand well over 500 amperes 1 Place switch in Output Control...

Page 22: ...t is being activated 5 LED5 indicates a control signal is being supplied to the firing circuit As the output control is varied LED5 should change brilliancy from bright at low output to dim at high output FIRING CIRCUIT P C BOARD All nine light emitting diodes must be lit when the power source is turned on and the wire feed arc start button is pressed or a jumper is connected between 2 and 4 1 Lig...

Page 23: ...placed the following procedure must be followed 1 Visually inspect P C board in question Are any of the components damaged a If there is no damage to the P C board insert a new one and see if this remedies the problem If the problem is remedied replace the old P C board and see if the problem still exists with the old P C board 1 If the problem is no longer present with the old board check the P C...

Page 24: ...K MODE SWITCH FOR PROPER POSITION FOR PROCESS BEING USED CHECK LED S 1 THRU 6 FOR EQUAL BRILLIANCY IF LIGHTS ARE NOT ALL APPROXIMATELY EQUALLY BRIGHT REPLACE FIRING P C BOARD OUTLINE FOR DC 1000 TROUBLESHOOTING GUIDE If troubleshooting guide indicates a possible P C board problem the following guide can be used to locate the problem NO WELDER OUTPUT INPUT CONTACTOR ON 2 AND 4 CLOSED CHECK CONTROL ...

Page 25: ...ead is available for this purpose Connect it directly to the work piece keeping it electrically separate from the welding work lead circuit and connection For convenience this extended 21 lead should be taped to the welding work lead N C Tape up bolted connection N D Alternative 500 amp positive terminal connection provided on DC 1000 models above code 9500 only Above diagram shows electrode conne...

Page 26: ...ectrically separate from the welding work lead circuit and connection For convenience this extended 21 lead should be taped to the welding work lead N C Tape up bolted connection N D Terminals 73 74 not present on earlier DC 1500 N E Alternative 500 amp positive terminal connection provided on DC 1000 models above code 9500 only Above diagram shows electrode connected positive To change polarity t...

Page 27: ...gged under the clamp bar on the left side of the NA 5 control box N J Terminals 73 and 74 were not present on DC 1500 machines below code 8294 These earlier code machines are not suitable for use with the NA 5 N K Alternative 500 amp positive terminal connection provided on DC 1000 models above code 9500 only N L Alternate submerged arc mode available for improved arc stability in high current lar...

Page 28: ...Tape up bolted connection N D Connect the LN 9 control cable ground lead to the frame terminal marked near the power source terminal strip The power source must be properly grounded N E If using an older automatic control cable with leads 75 76 77 Connect lead 75 to 75 on terminal strip connect lead 76 to 74 on terminal strip connect lead 77 to 73 on terminal strip N F The LN 9 voltage control jum...

Page 29: ...2 3 4 5 6 1 J5 J4 J7 P C BOARD 1 2 3 4 204 215 208 231 Y X Z G1 G2 G3 G4 G5 G6 FIRING 2 3 4 5 6 7 8 J6 A A B B C C COVER SW1 INPUT POWER SWITCH SW4 WELDING MODE SWITCH SW2 ELECTRODE POLARITY SWITCH SW3 OUTPUT CONTROL SWITCH F1 8 AMP SLOW BLOW FUSE R1 10K OHM POTENTIOMETER R2 30 OHM 300 W RESISTOR 2CR FAULT PROTECTION RELAY 3CR CURRENT ACTIVATED REED SWITCH 4CR OUTPUT PILOT RELAY T1 MAIN POWER TRAN...

Page 30: ... Case Front Control Box AR 2 P 720 D Case Back Assembly AR 3 P 720 E Base Fan Roof and Case Sides AR 4 P 720 F Output Rectifier Choke Assembly AR 5 P 720 G Lift Bale Transformer Assembly AR 6 P 720 H S78 Contactor AR Index of Sub Assemblies 12480 DC 1000 12480 1 Printed 09 24 2015 at 08 32 31 Produced by Enigma ...

Page 31: ...P 720 A jpg Index of Sub Assemblies 12480 2 DC 1000 12480 Printed 09 24 2015 at 08 32 31 Produced by Enigma ...

Page 32: ...T14798 1 IDENTIFICATION STICKER CR1 1 9SS13504 DECAL CAUTION 1 9ST13470 3 DECAL WARNING 1 9SL8064 1 WARNING DECAL INTERNATIONAL 1 9ST14753 INSTRUCTION DECAL 1 9ST13259 4 GROUNDING DECAL 1 Miscellaneous Items DC 1000 12480 3 Printed 09 24 2015 at 08 32 31 Produced by Enigma ...

Page 33: ...No Image Miscellaneous Items 4 DC 1000 12480 Printed 09 24 2015 at 08 32 31 Produced by Enigma ...

Page 34: ...L ASBLY 5 4B 9SS9225 30 THREAD FORMING SCREW CUTTING 10 4C 9ST3960 FLANGE NUT 5 5A 9SS9225 36 THREAD FORMING SCREW CUTTING 1 5B 9ST9695 1 LOCKWASHER 1 9SS9262 27 PLAIN WASHER 2 9SCF000010 10 24HN 2 6A 9SG8396 1 Control P C Board 1 9SS9225 76 SELF TAPPING SCREW 3 7A 9SG5685 1 FIRING PC BD ASBLY 1 9SS9225 76 SELF TAPPING SCREW 3 8A 9SS14293 8 RELAY 1 15C 9SS8025 62 SELF TAPPING SCREW 2 9ST12286 4 ID...

Page 35: ...TON ASBLY 1 9SCF000104 10 24X2 00RHS 2 9SE106A 1 LOCKWASHER 2 9SCF000154 10 24SQN 2 9SCF000108 6 32X 375PRHS 5 21F 9ST8660 BOTTOM COVER 1 22 9ST10800 39 SWITCH TOGGLE 1 23A 9SS10433 1 FUSE HOLDER15A 1 23B 9ST10728 16 FUSE 1 24 9ST13381 4 SWITCH 1 25 9ST10812 122 POTENTIOMETER 1 26 9ST12792 1 INSULATION 1 27 9ST10491 KNOB 1 28 9ST13562 1 TOGGLE SWTICH 1 9ST13486 PILOT LIGHT 1 30A 9SM20968 3A DC AMM...

Page 36: ...2 9ST13597 1 PLUG BUTTON 1 33 9ST9639 1 CLAMP 1 34A 9SS17293 ACCESS DOOR ASBLY 1 34B 9SS8025 65 SELF TAPPING SCREW 3 9SS27359 METER SPACER 2 35 9ST13486 2 PILOT LIGHT 1 Case Front Control Box DC 1000 12480 7 Printed 09 24 2015 at 08 32 31 Produced by Enigma ...

Page 37: ...P 720 C_2 jpg Case Front Control Box 8 DC 1000 12480 Printed 09 24 2015 at 08 32 31 Produced by Enigma ...

Page 38: ...PUT ACCESS DOOR 1 5B 9SS8025 65 SELF TAPPING SCREW 3 4A 9SS16223 1 REAR PANEL REWORKING 1 5B 9SS8025 65 SELF TAPPING SCREW 3 5A 9SL5951 INPUT BOX GROUND SCREW ASBLY 1 5B 9SS8025 65 SELF TAPPING SCREW 3 6A 9SM13589 CONTACTOR MTG PANEL 1 6B 9SS9225 8 THREAD FORMING SCREW ROLLING 4 7A 9SS10404 83 RESISTOR FIXED WIREWOUND 1 7B 9SCF000045 10 24X5 00RHS 1 7C 9SS10773 7 INSULATING WASHER 2 7D 9SS9262 27 ...

Page 39: ...2390 21 TRANSFORMER ASBLY 1 9B 9SS8025 91 SELF TAPPING SCREW 4 10A 9SS9262 121 PLAIN WASHER 2 10B 9SCF000029 5 16 18HN 1 9SS24579 15 Rating Plate 1 9SM12390 72 TRANSFORMER ASBLY 1 Case Back Assembly 10 DC 1000 12480 Printed 09 24 2015 at 08 32 31 Produced by Enigma ...

Page 40: ...P 720 D jpg Case Back Assembly DC 1000 12480 11 Printed 09 24 2015 at 08 32 31 Produced by Enigma ...

Page 41: ...6A 1 LOCKWASHER 4 4C 9SS9262 27 PLAIN WASHER 4 5 9SM9983 6 FAN MOTOR 1 6A 9SM16525 2 FAN MOTOR MOUNTING BRACKET 2 6B 9SS8025 110 SELF TAPPING SCREW 2 7A 9SM12352 17 ROOF ASBLY 1 8B 9SS8025 65 SELF TAPPING SCREW 12 7C 9SS12934 COVER SEAL 1 8A 9SM14065 8 CASE SIDE 2 8B 9SS8025 65 SELF TAPPING SCREW 12 Base Fan Roof and Case Sides 12 DC 1000 12480 Printed 09 24 2015 at 08 32 31 Produced by Enigma ...

Page 42: ...P 720 E jpg Base Fan Roof and Case Sides DC 1000 12480 13 Printed 09 24 2015 at 08 32 31 Produced by Enigma ...

Page 43: ...9ST7028 205 INSULATING TUBE 4 10B 9SS10773 19 INSULATING WASHER 4 10C 9SS9262 4 PLAIN WASHER 4 10D 9SE106A 16 LOCKWASHER 4 16C 9SCF000067 3 8 16HN 2 11 9ST11357 17 INSULATION 2 12 9SL9007 CHOKE ASBLY 1 13 9SS9225 26 THREAD FORMING SCREW ROLLING 4 14A 9ST13359 8 THERMOSTAT 1 9SS9262 3 PLAIN WASHER 1 14C 9SE106A 13 LOCKWASHER 1 14D 9SCF000005 6 32HN 1 15A 9SS17152 SHUNT ASBLY 1 9SCF000018 3 8 16X 62...

Page 44: ...P 720 F jpg Output Rectifier Choke Assembly DC 1000 12480 15 Printed 09 24 2015 at 08 32 31 Produced by Enigma ...

Page 45: ...IER MTG BRKT 1 9A 9SS20646 OUTPUT STUD JUMPER 1 9B 9SS9262 1 PLAIN WASHER 1 9C 9SE106A 15 LOCKWASHER 1 9D 9SCF000344 HEX HD SCREW 1 10A 9ST13359 2 THERMOSTAT 1 10B 9ST14779 THERMOSTAT INSULATION 1 10C 9SS9262 3 PLAIN WASHER 1 10D 9SE106A 13 LOCKWASHER 1 10E 9SCF000005 6 32HN 1 11 9SM16988 NEGATIVE OUTPUT LEAD 1 12A 9SS12334 53 REED SWITCH ASBLY 1 12B 9SS11797 15 REED SWITCH PLATE 1 12C 9SCF000096 ...

Page 46: ...Y 1 13 9SL9002 4 Complete Transformer Assembly 1 9SS16333 PRI SEC INSULATION 6 22A 9SS17156 1 TRANS SIDE BRACKET 2 22B 9SS17156 2 TRANS SIDE BRACKET 2 23 9SS16090 3 MISC FLAT 2 Lift Bale Transformer Assembly DC 1000 12480 17 Printed 09 24 2015 at 08 32 31 Produced by Enigma ...

Page 47: ...P 720 G jpg Lift Bale Transformer Assembly 18 DC 1000 12480 Printed 09 24 2015 at 08 32 31 Produced by Enigma ...

Page 48: ...62 121 PLAIN WASHER 2 8 9ST9187 LOCKNUT 2 10 9ST9453 INTERLOCK BLOCK ASBLY 1 9SM6893 45 MOVING CONTACT ASBLY 1 12 9SM6892 D CONTACT BASE ASBLY 1 13A 9ST9036 INTERLOCK ASBLY 1 14 9SCF000004 6 32X 50RHS As Req 15 9ST9029 SPRING As Req 16 9ST9865 2R MOVING CONTACT ASBLY As Req 17 9SE106A 13 LOCKWASHER As Req 9SM13866 8 CONTACT BLOCK ASBLY 1 18 9SL6097 MAIN CONTACT BLOCK 1 19 9SS8029 3 CONTACT As Req ...

Page 49: ...P 720 H jpg S78 Contactor 20 DC 1000 12480 Printed 09 24 2015 at 08 32 31 Produced by Enigma ...

Page 50: ...e parts or electrode with skin or wet clothing l Insulate yourself from work and ground l No toque las partes o los electrodos bajo carga con la piel o ropa mojada l Aislese del trabajo y de la tierra l Ne laissez ni la peau ni des vêtements mouillés entrer en contact avec des pièces sous tension l Isolez vous du travail et de la terre l Berühren Sie keine stromführenden Teile oder Elektroden mit ...

Page 51: ...gen Sie für gute Be und Entlüftung des Arbeitsplatzes l Mantenha seu rosto da fumaça l Use ventilação e exhaustão para remover fumo da zona respiratória l Turn power off before servicing l Desconectar el cable de alimentación de poder de la máquina antes de iniciar cualquier servicio l Débranchez le courant avant l entretien l Strom vor Wartungsarbeiten abschalten Netzstrom völlig öffnen Maschine ...

Page 52: ...t to such information or advice As a matter of practical consideration we also cannot assume any responsibility for updating or correcting any such information or advice once it has been given nor does the provision of information or advice create expand or alter any warranty with respect to the sale of our products Lincoln Electric is a responsive manufacturer but the selection and use of specifi...

Reviews: