LG RH2T7-P1L, Owner'S Manual
The LG RH2T7-P1L comes with a comprehensive Owner's Manual for easy understanding and hassle-free operation. This manual is readily available for download, absolutely free of cost, on our website. Explore the features and functions of this remarkable product conveniently by visiting manualshive.com now.
Share
Download


Reviews:
No comments
Related manuals for RH2T7-P1L
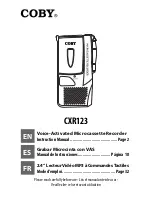
CXR123
Brand: Coby Pages: 48

CLIENT
Brand: Bascom Pages: 15

G4-304SD1a
Brand: Gatekeeper Systems Pages: 151

ZV427FX4
Brand: FUNAI Pages: 96

HD-A2685
Brand: FUNAI Pages: 64

D-20B
Brand: Fostex Pages: 92

Total Recall
Brand: Targus Pages: 31

ZC350MS8
Brand: Magnavox Pages: 102

DR-10L
Brand: Tascam Pages: 24

DVR4MQAEB
Brand: Velleman Pages: 36

DMRES35
Brand: Panasonic Pages: 80

T1000 - Pearlcorder Microcassette...
Brand: Olympus Pages: 6

SOROKA-18E
Brand: Laboratory2 Pages: 18

TCD130040
Brand: AT&T Pages: 4

dm-770
Brand: Olympus Pages: 11

RC-W305
Brand: JVC Pages: 18

943200-11
Brand: Shadin Avionics Pages: 17

14-1168
Brand: Optimus Pages: 32


