Page 1 of 43 – US –
-
Do not store or use gasoline or other flammable vapors and
liquids in the vicinity of this or any other appliance.
-
WHAT TO DO IF YOU SMELL GAS
.
Do not try to light any appliance.
Do not touch any electrical switch.
Do not use any phone in your building.
Immediately call your gas supplier from a neighbor’s phone.
Follow the gas supplier’s instructions.
If you cannot reach your gas supplier, call the fire
department.
-
Installation and service must be performed by a qualified
installer, service agency or the gas supplier.
WARNING
: If the information in this manual is not
followed exactly, a fire or explosion may result causing
property damage, personal injury or death.
WARNING:
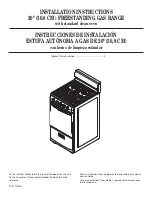
THIS RANGE CAN TIP
INJURY TO PERSONS COULD RESULT
INSTALL ANTI-TIP DEVICE PACKED
WITH RANGE
SEE INSTALLATION INSTRUCTIONS
F
ourneau
«
Sully
»
Lacanche ranges ordered after May 1st, 2015, have the option to be manufactured with a new
minimum chassis height of 36 5/8’’ (930mm) – as well as the default range height of 35 3/8’’
(900mm). Please make note, as this change may impact necessary clearance allowances to
combustible surfaces above the cooktop surface in certain installations requiring permit/occupancy
inspections.
Summary of Contents for Sully
Page 2: ...Page 2 of 43 US...
Page 8: ...Page 8 of 43 US...
Page 22: ...INSTALLER S MANUAL SULLY Page 22 of 43 US D tail A D tail B...
Page 26: ...Page 26 of 43 US...
Page 28: ...Page 28 of 43 US...
Page 30: ...Page 30 of 43 US...