background image

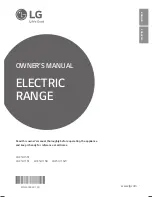
INSTALLATION, USE AND CARE

MANUAL

RANGES

 No. Parte W10111755 Rev. B

THIS MANUAL CONTAINS IMPORTANT INFORMATION,

READ IT BEFORE FIRST USE OF YOUR RANGE

 Cover the following model:

MF12120

Printed in Mexico

STM01401 Rev. A

Summary of Contents for Admiral mf12120

Page 1: ...LATION USE AND CARE MANUAL RANGES No Parte W10111755 Rev B THIS MANUAL CONTAINS IMPORTANT INFORMATION READ IT BEFORE FIRST USE OF YOUR RANGE Cover the following model MF12120 Printed in Mexico STM01401 Rev A ...

Page 2: ...tenance Use the range only in home applications It is not designed for commercial use This range was carefully manufactured with the latest technical expertise By purchasing it you have received quality but remember quality requires maintenance Before you use your range read the instructions in this manual the information is important for best results in the use of your range Oven Thermocontrol Su...

Page 3: ... with the range keep children away while range is in use Keep the range surroundings free of flammable material gasoline and other vapors or flammable liquids Do not get too close to the flame produced by the burners or wear loose clothing your clothes may ignite if contact by open flames Do not use your range to warm rooms because this is dangerous Failure to do so can result in death fire or exp...

Page 4: ... that fix cook top 2 Lift front of cooktop 3 In some models push the support rods away from the range at the same time you are raising 4 Pull cooktop forward and out COOKTOP 4 To connect the range use the material shown in the bottom figure NOTE The material shown for installation is not provided with the range 3 8 shut off valve Gas regulator 3 8 copper pipe with 5 8 flared type nut Necessary len...

Page 5: ...u may need to adjust the main air intake to the burners This will result in a better air gas mixture and thus of better operation Check surface burners and oven burner for proper flame flame must be steady and blue if not follow below instructions for flame adjustment Surface Burners 1 Remove cooktop as shown on page 4 2 Adjust air by loosing air shutter screw move air shutter forward or backwards...

Page 6: ... the rack is towards the back wall of the oven The straight end will be towards the door 2 To change the rack position pull the rack until it stops Insert the rack in the oven place the curved end of the desired rack guides raising the front part of the rack The rack should be positioned so that the food is centered in the oven Always leave a clearance of 4 5 cm 1 1 2 to 2 betwen the pan and the o...

Page 7: ...if not turn knob to off position and repeat the operation 5 Set knb to your desired heat level The oven vent Hot air and moisture are released from oven through an opening located below the backguard of the range DO NOT COVER THIS OPENNING Poor baking can result OVEN EXHAUST VENT 7 ...

Page 8: ...applied IMPORTANT How to remove the oven tray 1 Turn front clips 2 Lift front of tray 3 Lift rear of tray and remove it You can use aluminum foil to wrap the oven tray avoid covering the side grooves For your safety Do not store gasoline orotherflamableliquids near to your range Make sure that the furniture near to your range as well as the wall and the floor must support a temperature of 180o C t...

Page 9: ...9 21 00 in the terms of this policy we warranty to the buyer and the consumer of this range identified in this following policy COVERED CONCEPTS Manufacturing defects that hinder total or partially the correct performance of the appliance Repair change of pieces and components Handwork and transportation expenses derived from the fulfillment of the warranty within our service net The previous poin...

Page 10: ...10 ...

Page 11: ...TIVO DE INSTALACIÓN USO Y MANEJO ESTUFAS No Parte W10111755 Rev B Ampara el siguiente modelo MF12120 LEA CUIDADOSAMENTE ESTE INSTRUCTIVO ANTES DE USAR POR PRIMERA VEZ SU ESTUFA Impreso en México STM01401 Rev A ...

Page 12: ...racterísticas Felicidades por la compra de su nueva estufa 2 Instale su estufa en un lugar protegido de las inclemencias del tiempo y sobre una superficie plana y resistente para soportar su peso No permita que la usen niños o personas que no conozcan su funcionamiento Proporciónele el mantenimiento adecuado Utilice la estufa solo en labores del hogar No es un aparato de uso comercial Termocontrol...

Page 13: ...nténgalos alejados mientras está en uso Mantenga los alrededores del aparato libres de materiales combustibles gasolina y otros vapores o líquidos flamables No se acerque demasiado a las flamas de los quemadores ni use ropa suelta ya que se puede encender y causar quemaduras No use su estufa para calentar habitaciones ya que esto es peligroso No seguir estas instrucciones puede ocasionar incendio ...

Page 14: ...s siguientes operaciones 1 En algunos modelos es necesario quitar los tornillos que sujetan la cubierta 2 Levante la cubierta superior de la parte frontal 3 En los modelos con tirantes presione hacia atras al mismo tiempo que los levanta 4 Retire la cubierta hacia el frente para liberarla CUBIERTA SUPERIOR 4 NOTA El material mostrado para instalacion no viene con la estufa Llave de paso de 9 5 mm ...

Page 15: ...funcionamiento en la estufa Revise que las flamas de los quemadores superiores y el horno sean estables y azuladas de no ser así siga los siguientes pasos para su ajuste AJUSTES DE FLAMAS Quemadores superiores 1 Retire la cubierta como se indica en la página 4 2 Para ajustar el aire afloje el tornillo del regulador de aire y desplácelo hacia delante o hacia atrás si la flama es amarilla desplácelo...

Page 16: ... coloca de la siguiente manera 1 La parrilla presenta un terminado curvo en uno de los extremos Esta parte debe colocarse siempre hacia el interior del horno y dejar como vista frontal el extremo recto 2 El extremo curvo se introduce en la posición deseada levantando la parte frontal donde están los TOPES DE SEGURIDAD LATERALES Después de pasar los topes deslizarla hacia el interior Para retirar e...

Page 17: ...charola del horno si no es asi gire la perilla a la posición de apagado y repita la operación 5 Ajuste la flama en la posición deseada Ventilación del horno El aire caliente y la humedad son liberados del horno a través de una abertura localizada bajo el respaldo de la estufa NO CUBRA ESTA ABERTURA Puede resultar en mal cocimiento VENTILACIÓN DEL HORNO 7 ...

Page 18: ...n las superficies donde se aplique IMPORTANTE Como retirar la charola del horno 1 Gire los dos sujetadores frontales 2 Levante la charola del frente 3 Despues levantela de la parte trasera y retirela Puede usar papel aluminio para forrar la charola del horno teniendo cuidado de NO tapar las ranuras de la misma Para su seguridad Noalmacenegasolinau otrosfluidosflamablesen lacercaníadesuaparato Aseg...

Page 19: ...CONCEPTOS CUBIERTOS POR LA GARANTÍA Defectos de fabricación que impidan total o parcialmente el correcto funcionamiento de la estufa que se presenten dentro del término de vigencia de esta garantía Reparación cambio de piezas y componentes Mano de obra y gastos de transportación derivados del cumplimiento de la garantía dentro de nuestra red de servicio Los puntos anteriores se harán sin costo alg...

Page 20: ...10 ...

Reviews: