background image

To the installer: Please leave this instruction book with the unit.

To the consumer: Please read and keep this book for future 
reference.

Para el instalador: favor de dejar este manual de instrucciones
con la unidad.

Para el consumidor: favor de leer y guardar este manual para
futura referencia.

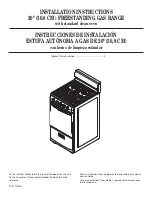
INSTALLATION INSTRUCTIONS

20" (50.8 CM) FREESTANDING GAS RANGE

with standard clean oven

INSTRUCCIONES DE INSTALACIÓN

ESTUFA AUTÓNOMA A GAS DE 20" (50,8 CM)

con horno de limpieza estándar

W10173324B

Table of Contents

/Índice

..................................................2

Summary of Contents for AGP200VDW

Page 1: ...favor de dejar este manual de instrucciones con la unidad Para el consumidor favor de leer y guardar este manual para futura referencia INSTALLATION INSTRUCTIONS 20 50 8 CM FREESTANDING GAS RANGE with standard clean oven INSTRUCCIONES DE INSTALACIÓN ESTUFA AUTÓNOMA A GAS DE 20 50 8 CM con horno de limpieza estándar W10173324B Table of Contents Índice 2 ...

Page 2: ...onversion 17 Complete Conversion 17 SEGURIDAD DE LA ESTUFA 18 REQUISITOS DE INSTALACIÓN 20 Herramientas y piezas 20 Requisitos de ubicación 20 Requisitos del suministro de gas 22 INSTRUCCIONES DE INSTALACIÓN 23 Desempaque la estufa 23 Instalación del soporte anti vuelco 23 Verificación de la ubicación del soporte anti vuelco 24 Nivelación de la estufa 25 Conexión del suministro de gas 25 Verifique...

Page 3: ...icensed by the State of Massachusetts If using a ball valve it shall be a T handle type A flexible gas connector when used must not exceed 3 feet WARNING Gas leaks cannot always be detected by smell Gas suppliers recommend that you use a gas detector approved by UL or CSA For more information contact your gas supplier If a gas leak is detected follow the What to do if you smell gas instructions ...

Page 4: ...es The floor anti tip bracket must be installed To install the anti tip bracket shipped with the range see Install Anti Tip Bracket section Proper gas supply connection must be available See Gas Supply Requirements section Contact a qualified floor covering installer to check that the floor covering can withstand at least 200 F 93 C Use an insulated pad or 1 4 0 64 cm plywood under range if instal...

Page 5: ...op of the cooking platform and the bottom of an uncovered wood or metal cabinet IMPORTANT If installing a range hood or microwave hood combination above the range follow the range hood or microwave hood combination installation instructions for dimensional clearances above the cooktop surface 5 Product Dimensions 19 1 2 49 5 cm 24 1 2 62 2 cm For minimum clearance to top of cooktop see NOTE This s...

Page 6: ... make sure gas pressure does not exceed 14 36 cm water column Examples of a qualified person include licensed heating personnel authorized gas company personnel and authorized service personnel Failure to do so can result in death explosion or fire 6 TEFLON is a registered trademark of E I Du Pont De Nemours and Company Flexible metal appliance connector If local codes permit a new CSA design cert...

Page 7: ... firmly to remove 5 Use an adjustable wrench to loosen the leveling legs Adjust the leveling legs to the correct height Leveling legs can be loosened to add up to a maximum of 1 2 5 cm A maximum of 3 16 5 mm is needed to engage the anti tip bracket NOTE If height adjustment is made when range is standing tilt the range back to adjust the front legs then tilt forward to adjust the rear legs 6 Place...

Page 8: ...until rear leveling leg is removed from the anti tip bracket Use drive ratchet and slip joint pliers to adjust leveling legs up or down until range is level 4 Push range back into position 5 Check that rear leveling leg is engaged in anti tip bracket NOTE Range must be level for satisfactory baking performance A Anti tip braket B Rear range foot A B 5 To mount the anti tip bracket to a wood floor ...

Page 9: ...est all connections by brushing on the approved noncorrosive leak detection solution Bubbles will show a leak Correct any leak found 5 Close the broiler door 6 Place burners burner caps and grates on the cooktop A A Gas pressure regulator Complete Connection 1 Locate gas pressure regulator in the broiler A C B Front View Front View Side View Gas Pressure Regulator A Shutoff valve B Front C ON posi...

Page 10: ...t both burner pilot lights 5 The surface pilot flames should be 0 4 0 6 10 15 mm high A 0 4 0 6 10 15 mm A 6 If the pilot flame needs adjustment use a flat blade screwdriver and turn the adjusting screw until the flame is of the desired height 7 Slowly lower the cooktop until it snaps into position 8 Push in and turn each surface burner control knob to the HI position The flame should light within...

Page 11: ...n the oven back on and check for proper flame If the flame is still not properly adjusted turn the oven off wait for the oven burner to cool down and repeat step 4 until flame is properly adjusted 6 When the flame has been properly adjusted turn the oven off wait for the burner to cool down 7 Tighten the shutter screw 8 Reinstall flame spreader and oven tray Reinstall the oven racks and close oven...

Page 12: ... 36 cm water column Examples of a qualified person include licensed heating personnel authorized gas company personnel and authorized service personnel Failure to do so can result in death explosion or fire WARNING Tip Over Hazard A child or adult can tip the range and be killed Connect anti tip bracket to rear range foot Reconnect the anti tip bracket if the range is moved Failure to follow these...

Page 13: ...set aside 2 Lift oven burner The orifice spud is behind the oven burner air shutter 3 Locate LP gas orifice spud stamped 58 in literature package supplied with range 4 Use a 3 8 combination wrench and remove the natural gas orifice spud 5 Install the number 58 LP gas spud IMPORTANT Do not over tighten 6 Place natural gas oven burner spud in plastic parts bag along with natural gas cooktop burner s...

Page 14: ... fasteners in place 14 Replace the control knobs Slowly lower the cooktop until it snaps into position Close the oven door A A B A Pilot screw B By pass screw Complete Conversion 1 Refer to the Make Gas Connection section for proper connection of the range to the gas supply 2 Turn the manual shutoff valve in the gas supply line to the open position 3 Refer to the Check Operation section for proper...

Page 15: ... can result in death explosion or fire NOTE Gas conversions from natural gas to LP gas or from LP gas to natural gas must be done by a qualified person A Shutoff valve in open position To Convert Gas Pressure Regulator 1 Ensure that the manual shutoff valve is in the closed position 5 Turn the cap over so that N or NAT is visible 6 Reinstall the cap A A Brass cap 2 Open broiler door and remove bro...

Page 16: ...al gas oven orifice spud stamped with 51 A A Air shutter 16 To Convert Surface Burners 1 Remove grates from cooktop 2 Lift the cooktop by both front corners and hold it by the front center edge 3 Remove the screws that attach each dual burner 4 Lift each burner and slip it back to remove it 5 Set them aside 6 Locate the natural gas orifice spuds for top burners in the bag containing literature inc...

Page 17: ...by the front center edge 4 Open oven door 5 Locate the two top fasteners and two bottom fasteners on the front panel and remove them using a Phillips head screwdriver 6 Set the front panel aside and locate the oven thermostat 7 Locate the natural gas by pass screw in the bag containing literature included with the range One natural gas by pass screw is stamped 76 8 Remove the LP gas by pass screw ...

Page 18: ...18 SEGURIDAD DE LA ESTUFA No toque ningún interruptor eléctrico No trate de encender ningún aparato electrodoméstico ...

Page 19: ... recomiendan que usted use un detector de gas aprobado por UL Laboratorio de normalización o CSA Asociación canadiense de seguridad Para obtener más información póngase en contacto con su proveedor de gas Si se detecta una fuga de gas siga las instrucciones de Pasos que usted debe seguir si huele a gas ...

Page 20: ...arse la estufa en un lugar conveniente de la cocina para su uso Las instalaciones empotradas deberán proveer un recinto cerrado de los lados y la parte posterior de la estufa Para eliminar el riesgo de quemaduras o incendio al tocar unidades con la superficie demasiado caliente deberá evitarse el uso de armarios de almacenaje encima de las unidades Si van a proveerse armarios puede reducir el ries...

Page 21: ...superficie de cocción Para el espacio mínimo a la superficie de cocción vea la NOTA Se recomienda esta área sombreada para la instalación de la tubería de gas 18 45 7 cm de espacio mín del lado superior del armario al mostrador 13 33 0 cm máx de profundidad del armario superior ancho de la abertura 20 1 8 51 12 cm ancho mín de la abertura del armario 20 50 8 cm 5 1 2 14 cm 2 5 1 cm 2 1 2 6 4 cm 4 ...

Page 22: ...ción puede ocasionar la muerte explosión o incendio TEFLON es una marca registrada de E I Du Pont De Nemours and Company Línea de suministro de gas Provea una línea de suministro de gas de tubería rígida de 3 4 hacia la ubicación de la estufa Una tubería de tamaño más pequeño en tendidos más largos puede traer como consecuencia un suministro de gas insuficiente Pueden usarse compuestos para unione...

Page 23: ... del horno para levantar o mover la estufa 2 Quite los materiales de envío la cinta adhesiva y la película protectora de la estufa Mantenga la base de cartón debajo de la estufa Saque las rejillas del horno y el paquete de piezas del interior de la estufa 3 Saque los 4 esquinales de cartón de la caja Apile un esquinal de cartón sobre el otro Repita con los otros 2 esquinales Colóquelos a lo largo ...

Page 24: ...manera que el extremo izquierdo esté contra el armario y el extremo superior esté contra la pared posterior moldura o armario 3 Pegue la plantilla con cinta adhesiva en su lugar 4 Si el mostrador no está alineado con el extremo de la abertura del armario alinee la plantilla con la saliente Si la abertura del armario es más ancha que lo especificado en la sección Requisitos de ubicación ajuste la p...

Page 25: ...ñía de gas autorizado y personal de servicio autorizado No seguir esta instrucción puede ocasionar la muerte explosión o incendio Conexión del suministro de gas Conexión típica de la tubería rígida Se debe usar una combinación de tubos de unión para conectar la estufa a la línea de suministro de gas existente Su conexión puede ser distinta de acuerdo con el tipo de línea de suministro tamaño y ubi...

Page 26: ...ento Para encender las luces piloto fijas Antes de usar la estufa deberán estar encendidas las luces piloto Permanecerán encendidas después de que se apaguen los quemadores 1 Asegúrese de que todos los controles estén apagados y que el horno y la superficie de cocción estén fríos 2 Saque las parrillas de superficie de la superficie de cocción 3 Levante la superficie de cocción por ambas esquinas f...

Page 27: ...8 Vuelva a instalar el esparcidor de llama y la bandeja del horno Vuelva a instalar las parrillas del horno y cierre la puerta del mismo 27 B C A A A Bandeja inferior del horno B Sujetadores C Esparcidor de llama A Quemador del horno B Piloto del horno A B A A Tornillo del obturador B Obturador de aire B B C A A A Bandeja inferior del horno B Sujetadores C Esparcidor de llama Complete la instalaci...

Page 28: ...Las conversiones de gas de gas natural a gas LP o de gas LP a gas natural deberán ser hechas por una persona calificada A Regulador de la presión de gas A A Tapa A A Tapa B C A Válvula de cierre en posición cerrada B Línea de suministro de gas C A la estufa A Cómo convertir el regulador de la presión del gas 1 Asegúrese de que la válvula de cierre manual esté en la posición cerrada 2 Abra la puert...

Page 29: ...2 Levante el quemador del horno El tornillo del orificio está detrás del obturador de aire del quemador del horno 3 Ubique el tornillo del orificio de gas LP marcado con 58 en la bolsa con material impreso que se suministró con la estufa 4 Use una llave de combinación de 3 8 para sacar el tornillo del orificio de gas natural 5 Instale el tornillo de gas LP con el número 58 IMPORTANTE No apriete de...

Page 30: ...a de agua de 36 cm 14 y debe ser verificada por una persona calificada Ejemplos de una persona calificada incluyen personal con licencia para calefacción personal de la compañía de gas autorizado y personal de servicio autorizado No seguir esta instrucción puede ocasionar la muerte explosión o incendio NOTA Las conversiones de gas de gas natural a gas LP o de gas LP a gas natural deberán ser hecha...

Page 31: ...del quemador de la superficie de cocción de gas LP para usarlos en el futuro y guárdela en la bolsa con material impreso 7 Vuelva a instalar el quemador del horno 8 Vuelva a instalar las parrillas del horno la bandeja del horno y el esparcidor de llama 31 2 Abra la puerta del asador y saque la charola para asar El regulador de la presión de gas está ubicado en la esquina posterior derecha del comp...

Page 32: ... hoja plana girándolo en el sentido de las manecillas del reloj 13 Vuelva a colocar el panel frontal y atornille los ajustadores superiores e inferiores en su lugar 14 Baje lentamente la superficie de cocción hasta que encaje en su posición Cierre la puerta del horno Complete la conversión 1 Vea la sección Conexión del suministro de gas para conectar la estufa debidamente al suministro de gas 2 Gi...

Reviews: