

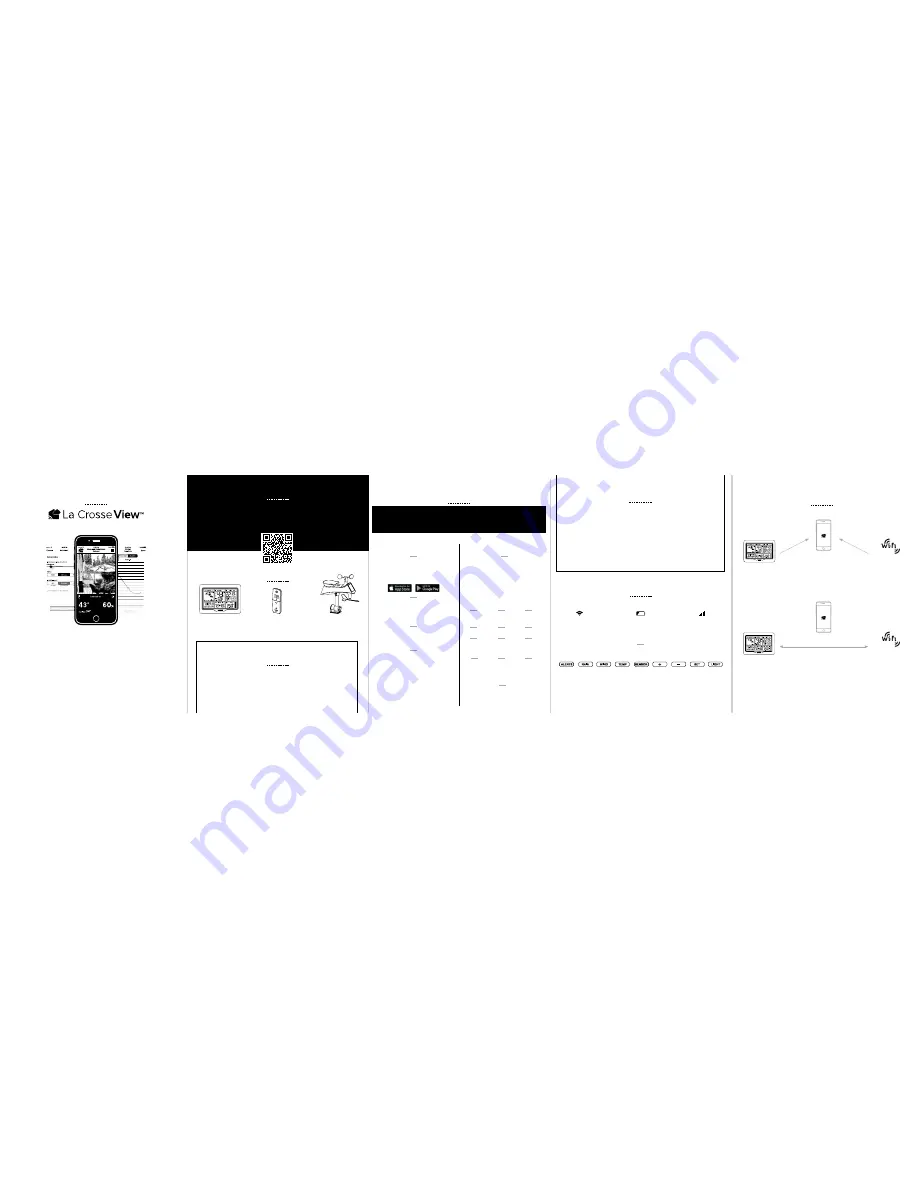
Wind & Rain
Sensor
with
Mounting Bracket
Thermo-Hygro
Sensor
Color LCD
Display
QUICK SETUP GUIDE
AC POWER ADAPTER FOR COLOR DISPLAY
*Only When Connected
STATION OVERVIEW
IMPORTANT ICONS & HELPFUL TIPS
NOTE:
Basic button functions are printed on the back of the station.
This icon measures
your Wi-Fi connection
strength
Press and hold the
+
&
-
buttons
together to look for the Wi-Fi Signal.
Press and hold
ALERTS
&
LIGHT
buttons together to start over
Individual station/sensor
indicators let you know
which batteries to replace
The bars let you know
the station & sensors
are connected
L C D I C O N S
B U T T O N S
( L O C AT E D O N T O P O F S TAT I O N )
W I - F I S E A R C H
F A C T O R Y R E S E T
LOW BATTERY
SENSOR CONNECTION
Wi-Fi INDICATOR*
Congratulations on your new Weather Station and welcome
to the La Crosse Technology® family! This quick setup
guide will walk you through the basics and introduce you to the new
La Crosse View™ app. For our full manual, please visit:
www.lacrossetechnology.com/S84060 or scan the QR code below.
WELCOME!
STEP 1:
POWER UP
Install batteries into your sensors & station in any order.
Plug the included AC Adapter into an outlet and then into the station.
AC power is required at all times.
Note:
For detailed instructions on how to power up your station & sensor,
please review the full manual.
O N - T H E - G O
HOME MONITORING
Check Current Indoor/Outdoor
Readings, View History Charts,
and More
E N H A N C E D
DISPLAY FEATURES
Receive Local National Weather Service
(NWS) such as Forecast & Precipitation
on Your Color Display
B E S T I N C L A S S
APP EXPERIENCE
Use Your Own Photos and Receive Free
Push Notifications on the New,
Easy-to-Navigate App
F R I E N D S & F A M I LY
SHARED ACCOUNTS
No Need to Share Logins or Passwords!
Invite Friends & Family to Download the
App & Monitor Your Home’s Data
L E T ’ S G E T S TA R T E D
INTRODUCING
Connecting You to Your Home
Anytime,
Anywhere.
TA K E Y O U R S TAT I O N T O T H E N E X T L E V E L !
WHAT’S IN THE BOX
STEP 2:
STATION OPTIONS
H O W D O Y O U W A N T T O U S E Y O U R S TAT I O N ?
Not Interested in Connecting to La Crosse View™? No Problem!
These enhanced features are optional & your weather station will
function as a standalone unit without connecting to the app.
Make Sure Your Station is Ready to Connect
When connecting to the app, ensure the Wi-Fi Indicator
icon is blinking. If it is not, perform a Wi-Fi search by
pressing & holding the + & - buttons together.
DOWNLOAD
Visit the App Store or Google Play Store
to download the free La Crosse View™
app on your mobile device.
CHECK YOUR NETWORK
Confirm that your mobile device is
connected to a 2.4GHz Wi-Fi Network
before you connect your station
LAUNCH
Open the app on your iOS or
Android device.
FOLLOW INSTRUCTIONS
The La Crosse View™ app will walk
you through creating an account
and automatically sets your time &
local forecast.
OPTION 1
CONNECT TO LA CROSSE VIEW™
G E T T H E M O S T A C C U R AT E R E A D I N G S P O S S I B L E
STEP 3:
MOUNTING BASICS
At this time, all of your sensor information should be displayed on your station.
Here are a few quick tips for mounting your sensors:
Note:
For detailed mounting instructions, please review the full manual.
C O N N E C T I N G Y O U R S TAT I O N T O Y O U R W I - F I N E T W O R K
THERMO-HYGRO
Keep out of direct sunlight
& ensure the sensor
is well-ventilated.
We recommend mounting
under a deck or eave facing north.
MULTI-SENSOR
Position in an open area that will have
the least amount of interference with
wind speed & wind direction.
For accurate Wind Direction readings please
mount it with the solar panel facing south.
HOW IT WORKS
Your mobile device is used to establish the connection
between your Wi-Fi network and the weather station.
After your weather station is connected, you may choose
a different Wi-Fi frequency or network for your phone.
DURING SETUP
AFTER SETUP
2.4GHz
Home Network
2.4GHz
Home Network
MAKE SURE YOUR STATION IS READY TO CONNECT
When connecting to the app, ensure the Wi-Fi Indicator icon is blinking. If it is
not, perform a Wi-Fi search by pressing & holding the
+
&
-
buttons together.
STATION SETUP
To enter the setup menu, hold the
SET
button.
Press and release the
-
or
+
buttons
to make adjustments.
Push the
SET
button to confirm.
SETUP ORDER
1
4
7
2
5
8
3
6
9
Beep
(ON/OFF)
Minutes
Date
12/24 Hour
Time Format
Year
Temperature
(°F/°C)
Hour
Month
Wind Direction
Degrees or
Letters
OPTION 2
STANDALONE STATION
10
12
11
Wind Speed
MPH | KMH
Rainfall
Inch | MM
Connection
Prompt*
*Note:
This prompt is a reminder that the app is
necessary to connect (optional).
CAN I CONNECT LATER?
Of course! You can always connect
your station to the app. See the full
manual for more details.


