background image


Foreword 

This  service  manual  provides  maintenance 

guidelines  for  KYMCO  AHG1  fuel  injection 

engine. 


Chapter  1  contains  all  the  operational 

precautions  that  you  should  read  carefully 

before you start. 


Chapter 3 gives inspection and fine-tuning tips 

and  maintenance  of  individual  functions 

beginning with regular inspection. 


The  remaining  chapters  outline  assembly/ 

disassembly  and  inspection  steps  for  the 

engine, and electrical system. 


Each  chapter  begins  with  an  overall 

explanation  of  the  exploded  diagram,  system 

diagram,  maintenance  troubleshooting,  and 

diagnosis description. 

ALL 

INFORMATION, 

GRAPHICS 

AND 

SPECIFICATIONS 

CONTAINED 

IN 

THIS 

DOCUMENT  ARE  BASED  ON  THE  LATEST 

PRODUCT  INFORMATION  AVAILABLE  AT  THE 

TIME 

OF  MANUFACTURE. 

KWANG 

YANG 

MOTOR  CO.,  LTD.  RESERVES  THE  RIGHT  TO 

MAKE  CHANGES  AT  ANY  TIME  WITHOUT 

NOTICE 

AND 

WITHOUT 

INCURRING 

ANY 

OBLIGATION WHATEVER. 

ALL  RIGHTS  RESERVED.  ANY  REPRODUCTION 

OR 

UNAUTHORIZED 

USE 

WITHOUT 

THE 

WRITTEN  PERMISSION  OF  KWANG  YANG 

MOTOR CO., LTD.IS STRICTLY PROHIBITED. 


©  KWANG YANG MOTOR CO., LTD. 

By the Technology Training Section 

First Edition 

 Jun. 2021


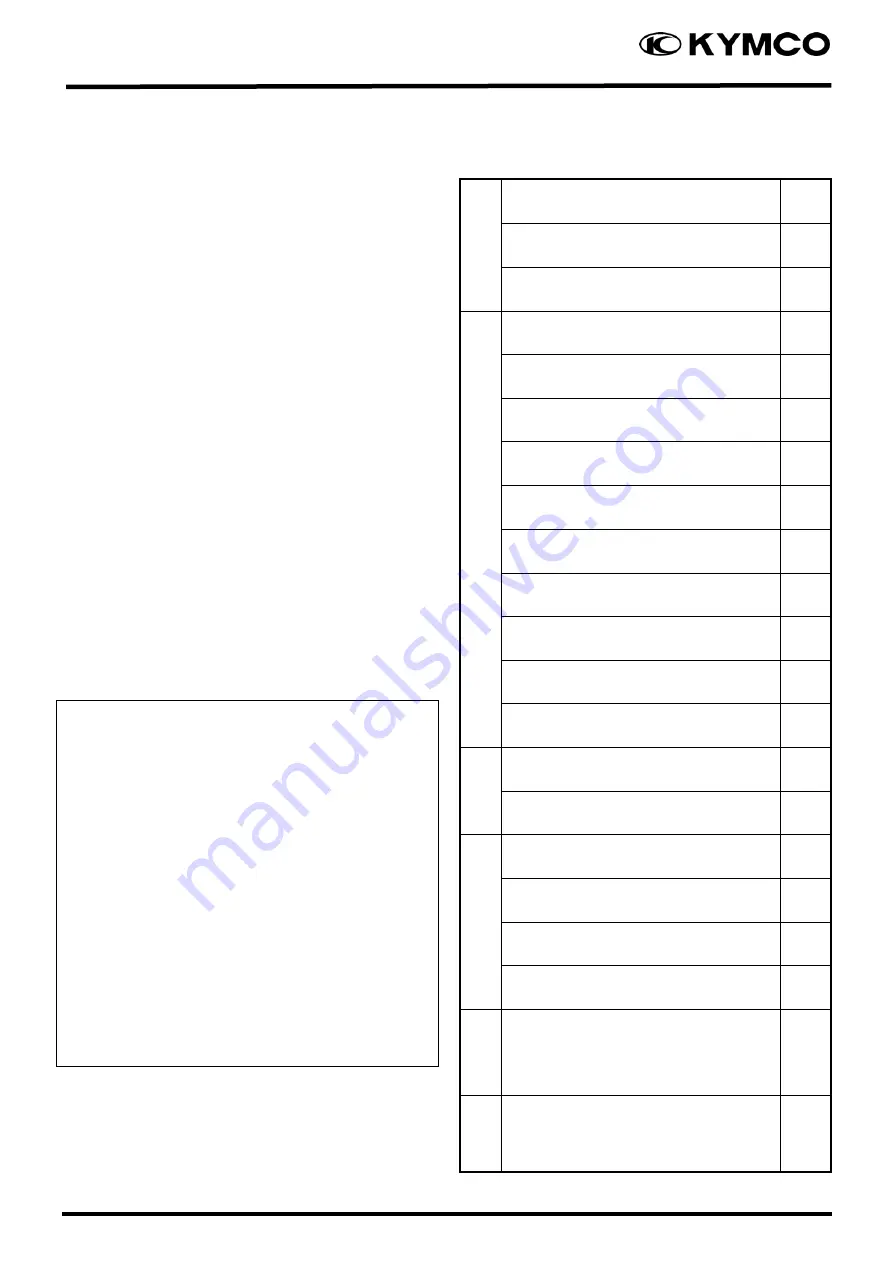
Quick Reference 

External Components 

Periodic Maintenance 

En
g

in

e


Lubrication System 

Engine Removal/ Installation 

Cylinder Head/ Valve 

Cylinder/ Piston 

Drive & Driven Pulley 

Final Reduction 

Alternator / Start Clutch 

10 

Crankcase/ Crankshaft 

11 

Cooling System 

12 

Fi System 

13 

F

rame


Front Assembly 

14 

Rear Assembly 

15 

El
ec
tr

ica

Battery & Charging System 

16 

Ignition System 

17 

Starting System 

18 

Switches/ Lights 

19 

EEC


EEC System 

20 

A

B

S


ABS/TCS 

21 


Summary of Contents for AHG1

Page 1: ...ST PRODUCT INFORMATION AVAILABLE AT THE TIME OF MANUFACTURE KWANG YANG MOTOR CO LTD RESERVES THE RIGHT TO MAKE CHANGES AT ANY TIME WITHOUT NOTICE AND WITHOUT INCURRING ANY OBLIGATION WHATEVER ALL RIGHTS RESERVED ANY REPRODUCTION OR UNAUTHORIZED USE WITHOUT THE WRITTEN PERMISSION OF KWANG YANG MOTOR CO LTD IS STRICTLY PROHIBITED KWANG YANG MOTOR CO LTD By the Technology Training Section First Editi...

Page 2: ... General Torque Value 5 4 2 Engine 6 4 3 Frame 7 5 Special Tool 8 6 LUBRICATION POINTS FRAME 9 7 Components Location 10 8 General Troubleshooting 13 8 1 Engine lacks power 13 8 2 Engine will not stat or is hard to start 15 8 3 Poor handling 16 8 4 Poor performance at high speed 17 8 5 Poor performance at low and idle speed 18 1 ...

Page 3: ...1 Quick Reference 1 2 1 Engine Frame Serial Number Frame Serial Number Engine Serial Number ...

Page 4: ...n type Forced pressure Wet sump Oil Pump Type Inner outer rotor type Oil Filter Type Full flow filtration Engine Oil Disassembly 1 2L Exchange 1 0L Gear Oil Disassembly 0 13L Exchange 0 12L Cooling System Cooling Type Liquid Cooling Coolant capacity Coolant radiator 0 87L Reserve tank 0 49L Fi System Air cleaner type No Paper element wet Fuel capacity 12 5L Throttle Body Type M4C Venturi dia mm 27...

Page 5: ...er diagonally to the specified torque We recommend that you use genuine lubricants and parts Please use dedicated or common tools when working on any assembly and disassembly of the parts during service operation After dismantling the parts to be inspected should be cleaned During assembly apply oil to the frictional surface between parts for lubrication Apply recommended lubricant on the specifie...

Page 6: ... screw Cut 0 05 0 15 6mm Bolt Nut 0 8 1 2 4mm Tapping screw Point 0 2 0 4 8mm Bolt Nut 1 8 2 5 5mm screw Cut 0 1 0 3 10mm Bolt Nut 3 0 4 0 5mm Tapping screw Point 0 35 0 5 12mm Bolt Nut 5 0 6 0 6mm screw SH bolt 0 7 1 1 14mm Bolt Nut 6 0 8 0 6mm Flange bolt Nut 1 0 1 4 8mm Flange bolt Nut 2 4 3 0 10mm Flange bolt Nut 3 5 4 5 ...

Page 7: ...0 1 4 90001 GBHB 6610 13 Tensioner lifter 3 4 4 9 0 35 0 5 90005 KAW1 9010 14 Oil pump 6 9 10 8 0 7 1 1 96001 06028 08 15 Reed valve 9 8 13 7 1 0 1 4 95701 06040 00 95701 06025 00 16 A I pipe 9 8 13 7 1 0 1 4 90304 4H38 0010 17 Mission cover 9 8 13 7 1 0 1 4 96001 06025 08 96001 06032 08 18 L case gear oil drain bolt 7 8 11 8 0 8 1 2 95701 08012 08 19 L case engine oil drain bolt 19 6 29 4 2 0 3 0...

Page 8: ... bolt ABS M 29 4 39 2 3 0 4 0 90145 LFH1 E000 M C holder 9 8 13 7 1 0 1 4 Flange bolt 95701 06028 06 M C cap screw 1 2 2 0 0 12 0 2 93600 04012 IG C P bleeder 3 9 6 9 0 4 0 7 43352 LBA2 C000 43352 KKD6 C000 Disk bolt 31 4 37 3 3 2 3 8 90105 KCR3 C200 90105 LEA7 C100 Modulator ABS bolt 7 6 8 1 0 77 0 83 90113 LGE5 C100 90114 LGE5 C100 5 ENG Hanger Frame side 58 8 68 6 6 0 7 0 U nut 90305 MAA1 C100 ...

Page 9: ...sembly Thread Protector A120E00029 Protecting the crankshaft s thread Valve Cotter Installer A120E00051 Valve cotter installation Clutch Spring Compressor A120E00053 Clutch disassembly assembly Shaft Collar Puller A120E00088 Bearing crankcase removal Shaft Collar Driver A120E00091 Bearing crankcase removal Shaft Collar Installer A120E00092 Bearing crankcase installation Bearing Puller A120E00093 B...

Page 10: ...ame Use grease for parts not listed Apply engine oil or grease to cables and movable parts not specified It will avoid abnormal noise and damage the durability of the motorcycle Grease Engine Oil Throttle Cable Brake Lever Pivot Front Wheel Axle Center Stand Shaft Side Stand Seat Lock Rear Wheel Axle ...

Page 11: ...nents Location Front brake fluid reservoir Rear brake fluid hose Rear brake fluid reservoir USB charger wires Right handlebar switch Front brake fluid hose Left handlebar switch Start relay Fuse box OBD connector Coolant filling cap ...

Page 12: ...1 Fuel pump Throttle body ISC Idle air bypass valve Fuel injector PPTS Intake air temp MAP TPS Fuel hose Spark plug cap Thermostat Throttle cables Inductive ignition coil Rectifier Regulator Canister Hazard light controller ...

Page 13: ...USB charger controller Long distance antenna Tilt switch KEYLESS controller Ignition switch Engine oil indicator controller ECU Headlight controller Coolant reserve tank Battery box Start relay ABS controller Coolant radiator ...

Page 14: ...1 Quick Reference 1 13 8 General Troubleshooting Engine lacks power 8 1 ...

Page 15: ...1 Quick Reference 1 14 ...

Page 16: ...1 Quick Reference 1 15 Engine will not stat or is hard to start 8 2 ...

Page 17: ...1 Quick Reference 1 16 Poor handling 8 3 ...

Page 18: ...1 Quick Reference 1 17 Poor performance at high speed 8 4 ...

Page 19: ...1 Quick Reference 1 18 Poor performance at low and idle speed 8 5 ...

Page 20: ...2 External components Exhaust pipe 2 0 2 ...

Page 21: ...2 External components Exhaust pipe 2 1 ...

Page 22: ... 4 2 1 Front cover 4 2 2 Headlight assy 4 2 3 Side covers 5 Seat 6 2 4 Luggage box 6 2 5 Rear carriers 6 2 6 Center cover 6 2 7 Tail light assy 7 2 8 Floor panel assy 7 2 9 Meter cover 8 2 10 Leg shield 10 2 11 Handlebar covers 10 2 12 Front fender 11 2 13 Rear fenders 11 2 14 Undercover 12 2 15 Muffler cover 12 2 16 3 Exhaust assembly 13 Muffler 13 3 1 Exhaust pipe 13 3 2 ...

Page 23: ...cables and harnesses according to the Cable Harness Routing Torque value 1 2 Item Torque kgf m Remarks Exhaust pipe fixing bolts tighten on the rear fork 4 0 5 0 Exhaust pipe front end nuts 1 8 2 2 Other bolts on the exhaust pipe 1 8 2 2 O2 sensor 2 0 3 0 Troubleshooting 1 3 Excessive exhaust noise Broken exhaust system Exhaust gas leaks Poor performance Deformed exhaust system Clogged muffler Exh...

Page 24: ... bolts and Allen bolts Remove the wind screen and brackets Install in the reverse order of work Front cover 2 2 Remove the plastic screws Remove the screws Remove the front cover Install in the reverse order of work Headlight assy 2 3 Remove the wind screen Remove the front cover Remove the nuts ...

Page 25: ...o each side of cover Remove the screws Side covers Remove the plastic screws on each side of the under cowl Remove the plastic screw on rear part of the side cover Repeat the process on the other side cover Remove the side covers Remove the screws on each side Remove the headlight assy Install in the reverse order of work ...

Page 26: ...e luggage box light connector Remove the luggage box Install in the reverse order of work Rear carriers 2 6 Remove the Allen bolts on the each rear carrier Remove the rear carriers Install in the reverse order of work Center cover 2 7 Remove the plastic screws Pull the center cover back and up to remove it Install in the reverse order of work Do not damage the joint claws when removal ...

Page 27: ...ubber cover Remove the bolt Remove the plastic screws on the upper and down side of each side cover Disconnect all connectors of tail light assy Remove the tail light assy Install in the reverse order of work Floor panel assy 2 9 Remove the upper and lower bolts on the each side ...

Page 28: ... Remove the plastic screw on each side of the leg shield Remove the floor panel assy Install in the reverse order of work Meter cover 2 10 Remove the wind screen Remove the front cover Remove the headlight assy Remove the plastic screws Remove the screw on each side of the meter cover ...

Page 29: ...ise Pull out the cover but do not over pull it Disconnect the connector Remove the ignition switch cover Use a proper tool to pry out the lid Remove the key cover Lid Key cover Remove the bolts Remove the plastic screw on each side of the meter cover Disconnect the connector of the meter Remove the meter cover ...

Page 30: ...ield Install in the reverse of work Handlebar covers 2 12 Remove the bolts on each side of lower handlebar cover Disconnect the USB connector Remove the upper handlebar cover Remove the throttle cables Remove the screws on the lower handlebar cover Remove the lower handlebar cover Install in the reverse order of work Do not damage the joint claws during removal ...

Page 31: ... fender Remove the front fender Install in the reverse order of work Rear fenders 2 14 Remove the bolts on the lower rear fender Remove the lower rear fender Remove the bolts on the upper rear fender Remove the bolt on each side of the upper rear fender Remove the upper rear fender Install in the reverse order of work ...

Page 32: ... pipe 2 12 Undercover 2 15 Remove the bolts on each side of the undercover Remove the undercover Install in the reverse order of work Muffler cover 2 16 Remove the bolts Remove the muffler cover Install in the reverse order of work ...

Page 33: ...tor Remove the nuts on the front end of the exhaust pipe Remove the gasket Install in the reverse order of work Replace a new gasket after remove the exhaust pipe Nuts Gasket Torque value Item Torque value Front end nuts 1 8 2 2 kgf m Bolts 4 0 5 0 kgf m Allen bolt 1 8 2 2 kgf m O2 sensor 2 0 3 0 kgf m Do not damage the O2 sensor and twist the cable Tighten the O2 sensor to the specific value to p...

Page 34: ...rance 8 7 1 Inspection 8 7 2 Adjustment 9 8 Cylinder Compression 9 9 Engine Oil 10 9 1 Engine oil recommendation 10 9 2 Engine oil level check 10 9 3 Engine oil replacement 11 9 4 Oil strainer screen clean 12 9 5 Oil filter replacement 13 10 Transmission Oil 15 10 1 Oil change 15 11 Idle Speed 16 12 Drive Belt 16 13 Clutch Shoe Wear 16 14 Headlight Aim 17 15 Coolant 17 15 1 Inspection 17 15 2 Add ...

Page 35: ...fluid 19 16 2 Brake pad wear 19 16 3 Brake levers 20 17 Nuts Bolts Fasteners 20 18 Wheels Tires 21 18 1 Tire pressure 21 19 Steering Handlebar 21 20 Suspension 22 20 1 Rear suspension adjustment 22 21 Side Stand 23 21 1 Functional check 23 ...

Page 36: ...area 1 2 Specifications Throttle Grip Free Play 2 6 mm Spark Plug NGK CPR7EA Spark Plug Gap 0 7 0 8 mm Valve Clearance IN 0 1 mm EX 0 1 mm Idle Speed 1700 100 rpm Cylinder Compression 15 2 kgf cm Engine Oil Type 15 40W Capacity At disassembly 1 2 L At change 1 0 L Gear Oil Capacity Type 90 Capacity At disassembly 0 13 L At change 0 12 L Coolant Capacity Total 1360 cc Radiator and hoses 870 cc Rese...

Page 37: ... R PCV Evaporative Emission Control Valve I I I O2 Sensor I I I Catalytic Converter I I I Drivetrain Cam Chain I I I CVT Driving Belt Roller Clutch Outer Sleeve I I M I Rear Wheel Driving Belt Note 2 I I I I I I I I I I I I I Valve Clearance Note 4 I I I Ignition System Spark Plug I R Ignition Circuit I I Engine Management System Throttle Body Note 4 M I M I Fuel Injector Note 1 4 D M D M D M C D ...

Page 38: ... if driving in dusty and rainy areas 6 ABS Wheel Speed Sensor Reading Disc Perform maintenance and inspection every 5000 km Replace the sensor when necessary 2 2 Notes 1 We recommend that you add a bottle of KYMCO fuel injector cleaner every 1000 km to the fuel tank 2 An air blow gun must be used to clean the dust and foreign objects inside the belt wheel for models with rear wheel driving belt Ch...

Page 39: ...ee play is made with the adjusting nut at the throttle valve Adjust by loosening the lock nut and turning the adjusting nut When the free play has been moved into specification hold the adjuster in place and tighten the locknut securely Adjust the closing cable as needed for a proper throttle action Minor adjustment is made with the adjusting nut at the throttle grip side Slide the rubber cover 1 ...

Page 40: ...ement which is not of equivalent quality may cause premature engine wear or performance problems The air cleaner should be serviced at regular intervals Service more frequently when riding in unusually wet or dusty areas 6 Spark Plug Remove the spark plug cap and spark plug Check the spark plug for wear and fouling deposits Clean any fouling deposits with a spark plug cleaner or a wire brush Speci...

Page 41: ... the T mark on the flywheel aligns with the index mark on the left crankcase cover The punch mark on the camshaft should face upward as shown If the punch mark on the camshaft is facing downward turn the crankshaft clockwise one full turn 360 and the punch mark are facing upward Measure the valve clearance with a thickness feeler gauge Insert the feeler gauge between the tappet adjusting screw and...

Page 42: ... removed parts in the reverse order of removal Make sure the O rings on the crankshaft and timing plugs are in good condition Replace them as needed Install the timing inspection and crankshaft caps to the right side of the engine Tighten the caps securely but not overly with a large flat blade screwdriver Torque 0 7 1 1 kgf m Special tool Valve adjuster A120E00012 8 Cylinder Compression Warm up t...

Page 43: ...riding the scooter The level must be maintained between the upper and lower level marks on the oil filler cap dipstick 1 Start the engine and let it idle for a few minutes 2 Stop the engine and put the scooter on its center stand on level ground 3 After a few minutes remove the oil filler cap dipstick wipe it clean and reinsert the oil filler cap dipstick without screwing it in Remove the oil fill...

Page 44: ...basis it is still advisable to thoroughly wash your hands with soap and water as soon as possible after handling used oil Change the engine oil with the engine at normal operating temperature and the scooter on its center stand to assure complete and rapid draining 1 Remove the oil filler cap dipstick 1 from the right crankcase cover 2 Place a container under the left crankcase 3 Remove the oil dr...

Page 45: ...l come out when the drain plug is removed 4 Let the engine oil drain out 5 Clean the oil strainer screen 6 Check that the oil strainer screen sealing rubber and drain plug O ring are in good condition 7 Install the oil strainer screen spring and oil strainer screen cap Oil strainer screen cap torque 1 5 kgf m 8 Fill the crankcase with the recommended grade oil and install the oil filler cap Oil ca...

Page 46: ... working in those areas 1 Remove the oil filler cap dipstick 1 from the right crankcase cover 2 Place a drain pan under the crankcase Remove three bolts and then remove the oil filter cap 2 and O ring 3 The spring 4 will come out when the filter cap is removed Let the engine oil drain out 3 Remove and discard the oil filter 5 Do not remain the rubber seal on the oil filter in the oil filter housin...

Page 47: ... torque 1 2 kgf m 7 Fill the crankcase with the recommended grade oil and install the oil filler cap Oil capacity after draining 1 0 liter 8 Start the engine and let it idle for 2 3 minutes 9 Stop the engine and check that the oil level is at the upper level mark on the oil filler cap dipstick with the scooter upright on firm level ground Make sure there are no oil leaks ...

Page 48: ...ission oil filler bolt 2 slowly turn the rear wheel and drain the oil After draining the oil completely install the oil drain bolt with a new sealing washer and tighten it Torque 1 0kgf m 5 Fill the transmission case with recommended oil Recommended transmission oil SAE 90 Oil capacity at draining 0 2 liter 6 Install the transmission oil filler bolt with a new sealing washer and tighten it Torque ...

Page 49: ...tachometer Turn the throttle stop screw to obtain the specified idle speed When the engine misses or run erratic adjust the pilot screw Idle Speed 1700 100 rpm 12 Drive Belt Remove the left crankcase cover Inspect the drive belt for cracks or excessive wear Replace the drive belt with a new one if necessary and in accordance with the Maintenance Schedule 13 Clutch Shoe Wear Start the engine and ch...

Page 50: ...e of main switch with the scooter in an upright position on a level ground If the coolant level is below the LOWER level mark remove the reserve tank cap to add coolant mixture until it reaches the F level mark Always add coolant to the reserve tank Do not attempt to add coolant by removing the radiator cap If the reserve tank is empty or if coolant loss is excessive check for leaks and see your K...

Page 51: ...er label Use only low mineral drinking water or distilled water as a part of the antifreeze solution Water that is high in mineral content or salt may be harmful to the aluminum engine Using coolant with silicate inhibitors may cause premature wear of water pump seals or blockage of radiator passages Using tap water may cause engine damage The factory provides a 50 50 solution of antifreeze and di...

Page 52: ...rom a sealed container or an equivalent Other checks Make sure there are no fluid leaks Check for deterioration or cracks in the hoses and fittings Warning Brake fluid is very caustic and can damage paint chrome and plastic Wipe up any spills immediately 16 2 Brake pad wear Brake pad wear depends upon the severity of usage the type of riding and road conditions Generally the pads will wear faster ...

Page 53: ... the brake lever forward and then turn the adjuster knob to align the number with the round punch mark on the lever 3 After adjustment release the Brake Lever and check if the lever position is suitable for driver The distance from the grip to the released lever is at its closest at number 1 an d the furthest away at number 4 17 Nuts Bolts Fasteners Check all important chassis nuts and bolts for l...

Page 54: ...ound which can lead to skids and loss of control Be sure that the tire pressure is within the specified limits at all times Tire pressure should only be adjusted when the tires are cold Cold inflation tire pressure 1 Rider 60 kg 2 Riders 120 kg Front 2 0 kgf cm2 2 25 kgf cm2 Rear 2 0 kgf cm2 2 25 kgf cm2 19 Steering Handlebar Raise the front wheel off the ground and check that the steering handleb...

Page 55: ...f there is any looseness 20 1 Rear suspension adjustment Each shock absorb has 5 adjustment positions for different load or riding conditions Use a fitting wrench to turn the adjuster s boss Position 1 is for light loads and smooth road conditions Position 3 to 5 increase spring preload for a more stiff rear suspension and can be used under heavy loading NOTE Always adjust the shock absorber pre l...

Page 56: ...ension and the side stand assembly for freedom of movement Check the side stand ignition cut off system 1 Place the scooter on its center stand 2 Put the side stand up and start the engine 3 Lower the side stand The engine should stop as you put the side stand down If the side stand system does not operate as described see your KYMCO dealer for service Side Stand Up Side Stand Down ...

Page 57: ...4 LUBRICATION SYSTEM 4 1 Lubrication System ...

Page 58: ... Lubrication Diagram 3 2 SERVICE INFORMATION 4 2 1 GENERAL INSTRUCTIONS 4 2 2 SPECIFICATIONS 4 2 3 TROUBLESHOOTING 5 3 Engine oil 6 4 Oil Pump 6 4 1 Removal 6 4 2 Disassembly 7 4 3 Inspection 7 4 4 Assembly 8 4 5 Installation 9 ...

Page 59: ...4 LUBRICATION SYSTEM 4 3 1 Lubrication Diagram Rocker Arm Shaft Crankshaft Oil Strainer Screen Oil Filter Screen Oil Pump ...

Page 60: ...re when removing and installing the oil pump not to allow dust and foreign matters to enter the engine and oil line Do not attempt to disassemble the oil pump The oil pump must be replaced as a set when it reaches its service limit After the oil pump is installed check each part for oil leaks 2 2 SPECIFICATIONS ENGINE OIL Engine Oil Capacity At disassembly 1 2 liter At change 1 0 liter Recommended...

Page 61: ...l consumption Oil leaks Worn piston rings Worn valve guide Worn valve guide seal Poor lubrication pressure Oil level too low Clogged oil filter or oil passage Faulty oil pump Oil contamination Oil not changed often enough Faulty cylinder head gasket Loose cylinder head bolts ...

Page 62: ...e the oil pump drive chain Inspect the oil pump drive chain and sprocket for signs of wear and damage Replace the parts as needed Remove the two oil pump bolts to remove the oil pump When removing and installing the oil pump use care not to allow dust or dirt to enter the engine Turn the oil pump shaft by hand and make sure it turns smoothly If the oil pump shaft will not rotate smoothly the oil p...

Page 63: ...d disassemble the oil pump as shown 4 3 Inspection Measure the pump body to outer rotor clearance Measure the inner rotor to outer rotor clearance Screw Dowel Pin Pump Shaft Pump Cover Outer Rotor Pump Body Inner Rotor Outer Rotor Pump Body Inner Rotor Pump Body ...

Page 64: ...tor and pump shaft into the pump body Insert the pump shaft by aligning the flat on the shaft with the flat in the inner rotor Install the dowel pin There is one punch mark on the surface of the inner rotor and outer rotor The mark is upside Rotor End Pump Body Dowel Pin Outer Rotor Inner Rotor Pump Shaft Pump Body ...

Page 65: ... and arrow mark which is on the oil pump is upside Install the pump drive chain and driven sprocket then set the snap ring securely on the pump shaft Install the oil pump cover properly Tighten the bolts Fit the tab of the pump cover into the slit in the pump Oil Pump Bolts Oil Pump Driven Gear Oil Snap Ring Drive Chain Bolts Oil Pump Cover ...

Page 66: ...5 ENGINE 5 1 Engine 1 ENGINE REMOVAL INSTALLATION 4 1 1 Removal 4 1 2 Installation 6 ...

Page 67: ...brake fluid tube Place the scooter on the center stand Remove the following external components Seat Center Cover Front Cover Front Lower Cover Foot Skirt Rear Carrier Body Cover Under Cover Disconnect the cables from the battery terminals See the Battery topic for more information Remove the spark plug cap See the Spark Plug topic for more information Drain the coolant See the Coolant topic for m...

Page 68: ...iator capacity hoses 0 87 L Reserve tank capacity 0 49 L TORQUE VALUES Engine hanger bolts Engine side 5 0 kgf m Engine hanger bolts Frame side 6 5 kgf m Engine rear suspension mounting bolts 3 5 kgf m Rear axle nut 12 0 kgf m Rear shock absorber bolts 4 0 kgf m Rear brake caliper mounting bolts 3 2 kgf m ...

Page 69: ...starter motor lead Remove the starter motor lead nut Free the cable lead from the starter motor Thread the nut back on to keep track of it Disconnect the ground wire Loosen the water pump hose clamp with a 2 Phillips screwdriver Slide up the clamp and free the coolant hose from the water pump Allow any remaining coolant to drain into a suitable container Squeeze the air bleed hose clamp with needl...

Page 70: ...oter securely on its main stand Remove the bolts and then remove the rear brake caliper Disconnect the alternator cord including the crank position sensor cord Remove the spark plug cap Remove the bolts Remove the shock absorbers Rear brake caliper bolts ...

Page 71: ...ghten the rear suspension bolts Torque 3 5kgf m Tighten the right and left rear shock absorber lower mount bolts Torque 4 0kgf m Tighten the rear axle nut Torque 12 0kgf m Install the rear brake caliper and tighten the mount bolts Torque 3 2 kgf m Installation is in the reverse order of removal Install the cables and wires with the wire routine pics After installation inspect and adjust the follow...

Page 72: ...ools 4 2 5 Troubleshooting 5 3 CYLINDER HEAD COVER 6 3 1 Removal 6 3 2 Installation 6 4 CAMSHAFT HOLDER 7 4 1 Removal 7 4 2 Installation 7 4 3 Disassembly 8 4 4 Inspection 8 4 5 Assembly 9 5 CAMSHAFT 10 5 1 Removal 10 5 2 Inspection 11 Camshaft 11 5 3 Installation 11 5 4 Disassembly 12 5 5 Inspection 13 Valve Valve Guide 13 Valve Spring 13 Cylinder Head 14 5 6 Assembly 14 ...

Page 73: ...6 CYLINDER HEAD VALVE 6 2 1 SCHEMATIC DRAWING ...

Page 74: ...es before assembling the cylinder head After disassembly clean the removed parts and dry them with compressed air before inspection After removal mark and arrange the removed parts in order When assembling install them in the reverse order of removal 2 2 Specifications Unit mm Item Standard Valve clearance cold IN 0 1 EX 0 1 Cylinder head compression pressure 15 2kgf cm2 Cylinder head warpage Cams...

Page 75: ...9 kgf m Tensioner mounting bolt 1 0 1 4 kgf m Tensioner sealing bolt 0 5 0 5 kgf m Cylinder head nut 1 8 2 2 kgf m Cylinder head bolt 0 7 1 1 kgf m Valve clearance fixing nut 0 7 1 1 kgf m Apply engine oil to threads 2 4 Special Tools Valve spring compressor A120E00051 Valve adjuster A120E00012 ...

Page 76: ...timing Broken valve spring Poor valve and seat contact Leaking cylinder head gasket Warped or cracked cylinder head Poorly installed spark plug Abnormal noise Incorrect valve clearance adjustment Sticking valve or broken valve spring Damaged or worn camshaft Worn cam chain tensioner Worn camshaft and rocker arm Compression too high Excessive carbon build up in combustion chamber or on piston head ...

Page 77: ...ve the cylinder head cover 3 2 Installation Install a new cylinder head cover O ring and install the cylinder head cover Be sure to install the O ring into the groove properly Install and tighten the cylinder head cover bolts to the specified torque in a crisscross pattern Torque 0 8 0 9kgf m ...

Page 78: ...r 2 bolts washers from camshaft holder and cylinder 2 bolts then remove the cam shaft Bolt Remove the camshaft gear and holder Bolt 4 2 Installation Install the camshaft gear Holder bolt and holder washers and nuts Tighten the four cylinder head nuts to the specified torque Torque 1 8 2 2 kgf m Cylinder head nuts 1 0 1 4 kgf m Cam shaft set plate bolt 0 8 1 2 kgf m Cylinder head outer bolts Instal...

Page 79: ...e If the valve rocker arm contact surface is worn check each cam lobe for wear or damage Inspect the rocker arm bore cam lobe contact surface and adjuster surface for wear pitting scratches blue discoloration If any defects are found replace the rocker arm shaft with a new one and then inspect lubrication system Rocker Arm Shaft Camshaft Holder Rocker Arm Shaft Rocker Arm Bore Adjust Surface Conta...

Page 80: ... limits 0 1 mm 4 5 Assembly Apply engine oil to the rocker arms and rocker arm shafts Install the rocker arms and shafts into the camshaft holder Install the exhaust valve rocker arm shaft on the EX side of the camshaft holder and the exhaust rocker arm shaft is shorter Clean the intake valve rocker arm shaft off any grease before installation Align the cutout on the exhaust valve rocker arm shaft...

Page 81: ...ase Hold the round hole on the camshaft gear facing up and the location is the top dead center on the compression stroke Remove the tensioner sealing bolt and spring Remove the two bolts from cam chain tensioner and then remove the tensioner and gasket Remove the camshaft holder Remove the camshaft gear and holder Bolt Remove the camshaft from the cam chain ...

Page 82: ...ing for play or damage Replace the camshaft assembly with a new one if the bearings are noisy or have excessive play 5 3 Installation Turn the A C generator flywheel so that the T mark on the flywheel aligns with the index mark on the crankcase Keep the round hole on the camshaft gear facing up and align the punch marks on the camshaft gear with the cylinder head surface Position the intake and ex...

Page 83: ...otters retainers springs spring seats oil seals and valves using a valve spring compressor Be sure to compress the valve springs with a valve spring compressor Mark all disassembled parts to ensure correct reassembly Special tool Valve Spring Compressor A120E00040 Valve Spring Compression Valve ...

Page 84: ... found replace the valve with a new one Check valve movement in the guide Measure each valve stem O D Measure each valve guide I D Subtract each valve stem O D from the corresponding guide I D to obtain the stem to guide clearance Service limits IN 0 08 mm EX 0 1 mm If the stem to guide clearance exceeds the service limits replace the cylinder head is necessary Valve Spring Measure the free length...

Page 85: ...lves into the valve guides Install the valve springs and retainers Compress the valve springs using the valve spring compressor then install the valve cotters When assembling a valve spring compressor must be used Install the cotters with the pointed ends facing down from the upper side of the cylinder head Special tool Valve Spring Compressor A120E00040 Tap the valve stems gently with a plastic h...

Page 86: ...RAWING 2 2 SERVICE INFORMATION 3 2 1 General Instructions 3 2 2 Specifications 3 2 3 Troubleshooting 4 3 Cylinder and Piston 5 3 1 Removal 5 3 2 Inspection 6 Piston ring 6 Piston Piston pin 7 Cylinder 7 3 3 Installation 9 Piston ring 9 Cylinder Piston 9 ...

Page 87: ...7 CYLINDER PISTON 7 2 1 SCHEMATIC DRAWING ...

Page 88: ...ir before inspection 2 2 Specifications Unit mm Item Standard Cylinder I D 52 4 52 41 Warpage Cylindricity True roundness Piston piston ring Ring to groove clearance Top 0 015 0 055 Second 0 015 0 055 Ring end gap Top 0 10 0 25 Second 0 10 0 25 Oil side rail 0 2 0 7 Piston O D 52 37 52 39 Piston O D measuring position 9 mm from bottom of skirt Piston to cylinder clearance 0 01 0 04 Piston pin hole...

Page 89: ...mpression too low or uneven compression Worn or damaged cylinder and piston rings Worn stuck or broken piston rings Compression too high Excessive carbon build up in combustion chamber or on piston head Excessive smoke from exhaust muffler Worn or damaged piston rings Worn or damaged cylinder and piston Abnormal noisy piston Worn cylinder piston and piston rings Worn piston pin hole and piston pin...

Page 90: ... cylinder Remove the cylinder Remove the cylinder gasket and dowel pins Clean any gasket material from the cylinder surface Remove the piston pin clip Place a clean shop towel in the crankcase to keep the piston pin clip from falling into the crankcase Press the piston pin out of the piston and remove the piston ...

Page 91: ... Piston ring Inspect the piston rings for movement by rotating the rings The rings should be able to move in their grooves without catching Push the ring until the outer surface of the piston ring is nearly flush with the piston and measure the ring to groove clearance Insert each piston ring into the bottom of the cylinder squarely Use the piston head to push each piston ring into the cylinder Me...

Page 92: ...n O D at piston and connecting rod sliding areas Service Limit 14 96 mm 0 5984 in Measure the piston to piston pin clearance Service Limit 0 02 mm 0 0008 in Cylinder Check the cylinder for warpage with a straight edge and feeler gauge in the directions shown Check the cylinder wall for wear or damage Measure and record the cylinder I D at three levels in an X and Y axis Take the maximum reading to...

Page 93: ... out of round at three levels in an X and Y axis Take the maximum reading to determine them Measure the connecting rod small end I D Calculate the connecting rod to piston pin clearance Inspect the exhaust side and intake side chain guides Wear Damage Replace Exhaust Side Guide Intake Side Guide ...

Page 94: ...l ring install the oil ring and then install the side rails Stagger the piston ring end gaps 120 degrees apart from each other Stagger the side rail end gaps as shown Cylinder Piston Clean any gasket material from the cylinder mating surfaces of the crankcase and oil passage Apply engine oil to the piston pin Apply engine oil to the connecting rod small end and piston pin hole Install the piston w...

Page 95: ...Do not align the piston pin clip end gap with the piston cut out Install the dowel pins and gasket Apply engine oil to the cylinder wall piston and piston ring outer surfaces Pass the cam chain through the cylinder and install the cylinder over the piston Be careful not to damage the piston rings and cylinder walls Install the cylinder head and camshaft holder has installed Connect the water hose ...

Page 96: ...ools 3 2 5 Troubleshooting 4 3 Left Crankcase Cover 5 3 1 Removal 5 3 2 Installation 5 4 Drive Pulley Drive Belt and Driven Pulley 6 4 1 Removal 6 4 2 Installation 8 5 Drive Pulley 9 5 1 Disassembly 9 5 2 Inspection 10 Weight rollers 10 Movable drive face Slide pieces Drive pulley face 10 5 3 Assembly 11 6 Driven Pulley 12 6 1 Disassembly 12 6 2 Inspection 13 6 3 Assembly 14 ...

Page 97: ...8 DRIVE DRIVEN PULLEYS 8 2 1 SCHEMATIC DRAWING ...

Page 98: ...e pulley 2 2 Specifications Unit mm Item Standard Movable drive face bushing I D 24 011 24 052 Drive face collar O D 23 960 23 974 Clutch outer I D 130 130 2 Driven face O D 33 965 33 985 Movable driven face I D 34 34 025 Weight roller O D 17 920 18 080 2 3 Torque Values Left crankcase cover 1 2 kgf m Drive face nut 5 5 6 5 kgf m Clutch outer nut 5 0 6 0 kgf m Clutch plate comp 5 0 6 0 kgf m 2 4 S...

Page 99: ...motorcycle won t move Worn drive belt Broken ramp plate Worn or damaged clutch lining Broken driven face spring Engine stalls or motorcycle creeps Broken clutch weight spring Lack of power Worn drive belt Weak driven face spring Worn weight roller Faulty driven face ...

Page 100: ...the left crankcase cover Remove the gasket and dowel pins 3 2 Installation Install the dowel pins and gasket Install the left crankcase cover Install and tighten the 10 bolts diagonally to specified torque Do not pull out the kick starter spindle Press in the kick starter spindle when installing the left crankcase cover ...

Page 101: ...is chapter Use the special tool to hold the drive pulley and then remove the nut and ratchet Special tool Universal holder A120E00017 Remove the drive pulley face and washer Hold the clutch outer with the universal holder and remove the clutch outer nut Special tool Universal HolderA120E00017 Remove the clutch outer driven pulley assembly and drive belt together ...

Page 102: ...inspection Check the drive belt for cracks separation or abnormal or excessive wear Measure the drive belt width Use specified genuine parts for replacement Clutch out inspection Inspect the clutch outer for wear or damage Measure the clutch outer I D Standard Value 130 130 2mm ...

Page 103: ...riven pulley assembly The drive belt should be installed so that the arrows on the drive belt periphery point in the normal turning direction if the drive belt has arrow mark The drive belt contact surface of the driven face should be thoroughly cleaned Install the driven pulley assembly clutch outer and drive belt together Use the special tool to hold clutch outer then tighten the nut to the spec...

Page 104: ...and ratchet Use the special tool to hold drive pulley face and then tighten the nut to the specified torque Torque 5 5 6 5 kgf m 55 65 N m Special tool Universal holder A120E00017 5 Drive Pulley 5 1 Disassembly Remove the drive face boss Remove the ramp plate ...

Page 105: ...ller for wear or damage Measure outside diameter Service limit 19 8 mm 0 792 in Movable drive face Slide pieces Drive pulley face Check the movable drive face splines for wear cracks or damage Check the ramp plate for cracks or damage Check the movable drive face and drive pulley face cracks or damage ...

Page 106: ... pulley face weight rollers slide pieces ramp plate and drive face boss Remove any excess grease Install the weight rollers The direction of all weight rollers is the same The thin side is towards to clockwise Install the slide pieces and ramp plate Install the drive face boss ...

Page 107: ...ing damage Special tool Clutch Spring Compressor A120E00034 Set the tool in a vise and remove the clutch drive plate nut Remove the clutch Remove the spring Remove the spring collar on the movable driven face Remove the three guide pins rollers and then remove the movable driven face Remove the needle bearing from driven face Remove the snap ring then remove the bearing from driven face ...

Page 108: ...Check the torque cam grooves for wear or damage Check guide pins and rollers for wear or damage If any scratches or damage is found then replace as a set Check the spring for damage Measure the spring free length Spring Spring Collar Dust Seal O ring Guide Pins Rollers Movable Driven Face Dust Seal Bearing Needle Bearing Driven Face Snap Bearing ...

Page 109: ...ble driven face Coat new O rings with grease and install them into the movable driven face grooves Install the movable driven face onto the driven face Install the guide rollers and guide roller pins Filling 5 g of grease to each guide groove Install the guide pins rollers Install spring collar Use the special tool to install spring and clutch then install and tighten the nut to the specified torq...

Page 110: ...al Instructions 3 2 2 Specifications 3 2 3 Torque Values 3 2 4 Special Tools 3 2 5 Troubleshooting 3 3 GEAR OIL 4 3 1 Draining 4 3 2 Filling 6 4 FINAL REDUCTION 8 4 1 Removal 8 4 2 Inspection 9 4 3 Installation 10 5 BEARING REPLACEMENT 11 5 1 Transmission Case Cover 11 5 2 Transmission Case 11 ...

Page 111: ...9 FINAL REDUCTION 9 2 1 SCHEMATIC DRAWING ...

Page 112: ... SAE 90 Oil Capacity At disassembly 0 23 L At change 0 20 L 2 3 Torque Values ITEM TORQUE kgf m Transmission case cover bolt 1 0 1 4 L case gear oil filler drain bolt 0 8 1 2 2 4 Special Tools Oil seal and bearing installer A120E00014 Bearing puller A120E00037 2 5 Troubleshooting Engine starts but motorcycle won t move Damaged transmission Seized or burnt transmission Abnormal noise Worn seized or...

Page 113: ...drain pan under the transmission oil drain plug Remove the transmission oil level filler bolt with a 12 mm socket Place a suitable container under the drain plug to capture the final drive oil Loosen the oil drain plug with a 12 mm socket Remove the drain plug and slowly rotate the rear wheel to drain the transmission oil ...

Page 114: ...ION 9 5 Inspect the drain plug and washer Install the oil drain plug and washer with a 12 mm socket Tighten to specification Item Qty Thread size mm Torque kgf m lb ft Final drive oil drain bolt 1 8 0 8 1 2 5 79 8 68 ...

Page 115: ...9 6 3 2 Filling Fill the final drive with the specified quantity of oil with a syringe Gear oil type SAE 90 Gear oil capacity At disassembly 0 13 Liter At change 0 12 Liter Thread in the final drive oil level filler bolt ...

Page 116: ...9 FINAL REDUCTION 9 7 Install the oil filler plug and torque it to specification with a 12 mm socket Item Qty Thread size mm Torque kgf m lb ft Final drive oil filler bolt 1 8 0 8 1 2 5 79 8 68 ...

Page 117: ... a clean container Remove the driven pulley Remove the nine bolts from the transmission case cover and then remove the transmission case cover Remove the dowel pins and gasket Remove the final gear and shaft then remove the countershaft Counter Shaft Dowel Pin Gasket Final Gear Drive Shaft ...

Page 118: ...r and final gear shaft for wear damage or seizure Check the driveshaft for wear or damage Check the left crankcase bearings for excessive play and inspect the oil seal for wear or damage Check the transmission case cover bearings for excessive play and inspect the final shaft bearing oil seal for wear or damage ...

Page 119: ...Install the two dowel pins Install the transmission case cover Install and tighten the nine bolts to the specified torque in a crisscross pattern in 2 or 3 steps Torque 1 0 1 4kgf m Fill the transmission case with the specified oil Final Gear Shaft Bearing Counter Shaft Bearing Drive Shaft Bearing Counter Shaft Dowel Pin Gasket Final Gear Drive Shaft ...

Page 120: ...gs or new oil seal into the transmission case cover by using the special tool Special tool Oil seal and bearing installer A120E00014 5 2 Transmission Case Remove the all transmission gears Remove the transmission case bearings by using the special tool Special tool Bearing puller A120E00037 Install the new bearings or new oil seal into the transmission case by using the special tool Special tool O...

Page 121: ...NERATOR STARTER CLUTCH Downtown 125i 10 1 A C Generator Starter Clutch 1 Alternator Stator 4 1 1 Removal 4 1 2 Inspection 5 1 3 Installation 5 2 Starter Clutch 6 2 1 Removal 6 2 2 Inspection 7 2 3 Installation 8 ...

Page 122: ...10 A C GENERATOR STARTER CLUTCH Downtown 125i 10 2 SCHEMATIC DRAWING ...

Page 123: ...removing the right crankcase cover When the right crankcase cover is installed fill with the recommended engine oil and coolant Then bleed air from the water jacket Refer to chapter 17 for A C generator inspection SPECIFICATIONS Engine Oil SAE 15W 40 API SJ Above Oil Capacity At Change 1 2 L Coolant Distilled Water Coolant Concentrate Coolant Capacity 0 87 L SPECIAL TOOLS Flywheel Puller A120E0000...

Page 124: ...ngine oil Disconnect the alternator stator connectors Remove the 10 bolts from the right crankcase cover and then remove the cover Remove the two dowel pins and gasket Remove the two pulse coil mount screws Remove the three stator mount bolts grommet and the stator from the right crankcase cover ...

Page 125: ...lts to the specified torque Torque 1 kgf m Apply sealant to the grommet seating surface and install it to the cover groove properly Install the pulse coil and tighten mount screws securely Clean the mating surfaces of the right crankcase and cover Install the dowel pins and gasket Install the right crankcase cover and tighten the bolts in a crisscross pattern in 2 or 3 steps ...

Page 126: ...ove the right crankcase cover Hold the flywheel with a special tool and remove the flywheel nut Special tool Flywheel holder A120E00021 Remove the flywheel driven gear by using the special tool Special tool Flywheel puller A120E00003 Remove the reduction gear shaft and reduction gear ...

Page 127: ...e able to turn the driven gear clockwise smoothly but the gear should not turn counterclockwise Remove the starter driven gear by turning the driven gear Check the starter driven gear teeth for wear or damage Measure the starter driven gear boss O D Service limit 41 mm 1 64 in Measure the starter driven gear bushing I D Service limit 20 15 mm 0 806 in Check the starter reduction gear teeth and sha...

Page 128: ...lywheel onto the crankshaft by aligning the key on the crankshaft with the groove in the flywheel Before installation check and make sure that the inside of the flywheel is not contaminated Hold the flywheel with the special tool and tighten the flywheel nut Torque 5 0 6 0 kgf m Special tool Flywheel holder A120E00021 Install the dowel pins and gasket Install the right crankcase cover and tighten ...

Page 129: ...ank Case Crank Shaft 1 Schematic Drawing 2 2 Service Information 3 2 1 General Instructions 3 2 2 Specifications 3 2 3 Torque Values 3 2 4 Troubleshooting 3 3 Crankcase 4 3 1 Splitting 4 4 Crankshaft Inspection 7 5 Crankcase Assembly 8 ...

Page 130: ...11 Crank Case Crank Shaft 11 2 1 Schematic Drawing ...

Page 131: ...following parts must be removed before separating the crankcase Cylinder head Cylinder piston Drive and driven pulley A C generator starter clutch Rear wheel rear shock absorber Starter motor Oil pump 2 2 Specifications Unit mm Item Standard Service Limit Crankshaft Connecting rod big end side clearance 0 15 0 35 0 6 Connecting rod big end radial clearance 0 0 008 0 05 Run out 0 1 2 3 Torque Value...

Page 132: ...See the Camshaft topic for more information Remove the cylinder head See the Cylinder Head topic for more information Remove the cylinder and piston See the Cylinder and Piston topic for more information Remove the generator cover flywheel starter idle gear and starter driven gear See the A C Generator and Starter clutch topic Remove the starter motor See the Starter Motor topic for more informati...

Page 133: ...in Remove the two right crankcase attaching bolts Remove the left crankcase bolts Place the crankcase with the left crankcase down and remove the right crankcase from the left crankcase Never use a driver to pry the crankcase mating surfaces apart Remove the gasket and dowel pins Remove the crankshaft from the left crankcase ...

Page 134: ...11 Crank Case Crank Shaft 11 6 Remove the oil seal from the left crankcase ...

Page 135: ...ure the connecting rod big end side clearance Service Limit 0 6 mm Measure the connecting rod small end I D Service Limit 14 06 mm Measure the crankshaft run out Service Limit 0 1 mm Measure the crankshaft bearing play Service Limits Axial 0 2 mm Radial 0 05 mm ...

Page 136: ...seal into the left crankcase Place the left crankcase down and install the crankshaft into the left crankcase Avoid damaging the oil seal Apply grease to the lip of the oil seal Install the two dowel pins and a new gasket Place the right crankcase over the crankshaft and onto the left crankcase Install the right crankcase squarely and do not tap it with an iron or plastic hammer ...

Page 137: ...ft 11 9 Install and tighten the right and left crankcase attaching bolts Torque 1 0 kgf m Install the cam chain Install the cam chain tensioner slipper Install and tighten the cam chain tensioner slipper bolt Torque 1 0kgf m ...

Page 138: ...ION 5 4 COOLANT REPLACEMENT 6 4 1 Preparation 6 4 2 Replacement 6 4 3 Air Bleeding 7 5 RADIATOR 8 5 1 Removal 8 5 2 Inspection 9 5 3 Installation 9 6 WATER PUMP 10 6 1 Mechanical Seal Water Seal Inspection 10 6 2 Water Pump Impeller Removal 10 6 3 Water Pump Shaft Removal 12 6 4 Water Pump Impeller Installation 13 7 WATER TEMPERATURE SENSOR 14 7 1 Removal 14 7 2 Inspection 14 7 3 Installation 15 8...

Page 139: ...olant temperature is over 100 never remove the radiator cap to release the pressure because the boiling coolant may cause danger Avoid spilling coolant on painted surfaces because the coolant will corrode the painted surfaces Wash off any spilled coolant with fresh water as soon as possible After servicing the system check for leaks with a cooling system tester 2 2 Special Tool Mechanical seal dri...

Page 140: ... coolant temperature Faulty temperature gauge or thermo sensor Faulty thermostat Coolant leaks Faulty pump mechanical water seal Deteriorated O rings Damaged or deteriorated water hoses 2 5 Specifications Radiator cap relief pressure 90 14 7 kPa 0 92 0 15 kgf cm2 13 05 2 13 psi Thermostat temperature Begins to open 82 C 180 F Full open 95 C 203 F Valve lift 3 5 4 5 mm 0 14 0 18 in minimum Coolant ...

Page 141: ... 1 068 1 066 1 064 1 062 1 059 1 056 1 053 1 050 1 047 45 1 080 1 078 1 076 1 074 1 072 1 069 1 056 1 063 1 062 1 057 1 054 50 1 086 1 084 1 082 1 080 1 077 1 074 1 071 1 068 1 065 1 062 1 059 55 1 095 1 093 1 091 1 088 1 085 1 082 1 079 1 076 1 073 1 070 1 067 60 1 100 1 098 1 095 1 092 1 089 1 086 1 083 1 080 1 077 1 074 1 071 2 7 Coolant Mixture With Anti Rust And Anti Freezing Effects Freezing...

Page 142: ...move it After remove the radiator cap wet the tester seal and install the end of the pressure tester onto the filler neck Pump the tester up until the gauge reads 0 84 kg cm2 or 12 psi The cooling system should hold this pressure for at least 6 seconds Replace the radiator cap if it does not hold pressure or if relief pressure is too high or too low It must hold the specified pressure for at least...

Page 143: ...e Therefore for best performance change the coolant regularly as specified in the maintenance schedule Mix only distilled low mineral water with the antifreeze Recommended mixture 1 1 Distilled water and antifreeze 4 2 Replacement Remove the front cover When filling the system or reserve tank with coolant checking the coolant level place the scooter in a vertical position on a flat level surface R...

Page 144: ...o the upper level line Fill the system with the recommended coolant through the filler opening up to the filler neck Gently rock the vehicle side to side to release any air bubbles trapped in the cooling system 4 3 Air Bleeding Bleed air from the system as follow 1 Start the engine and let it idle for 2 3 minutes 2 Snap the throttle three to four times to bleed air from the system 3 Stop the engin...

Page 145: ... air bleed hose 2 Remove the nut 3 Loosen the hose bands and then disconnect the output hose 4 to the water pump coolant filling hose 5 and input hose 6 from the engine from the radiator Disconnect the fan motor switch connector Remove the bolts and then remove the radiator from frame 3 2 1 4 6 5 ...

Page 146: ...r and water Check the radiator for any bent or damaged fins Use a small flat blade screwdriver to straighten them out but be careful not to puncture the radiator Always wear safety glasses when using compressed air and never point it directly at yourself or anyone else Check the fan motor to operate using an available battery 5 3 Installation Installation is in the reverse order of removal Refill ...

Page 147: ...hole for signs of mechanical seal coolant leakage If the mechanical seal is leaking remove the right crankcase cover and replace the mechanical seal 6 2 Water Pump Impeller Removal Drain the coolant Remove the coolant inlet hose and outlet hose Outlet Hose Right Crankcase Cover Water Pump Outlet Hose ...

Page 148: ...s Remove the water pump impeller The impeller has left hand threads Inspect the mechanical water seal and seal washer for wear or damage The mechanical seal and seal washer must be replaced as a set Bolts Water Pump Cover Impeller Left Hand Treads Seal Washer Porcelain Mechanical Seal Impeller ...

Page 149: ...ter pump shaft Install the water pump shaft and shaft inner bearing into the waster pump assembly Install the snap ring to secure the inner bearing properly Install the dowel pins and a new gasket and then install the water pump assembly to the right crankcase cover Tighten the 5 bolts to secure the water pump assembly When installing the water pump assembly aligning the groove on the water pump s...

Page 150: ...peller Install the impeller onto the water pump shaft Torque 1 2 kgf m 12 N m 9 lbf ft The impeller has left hand threads Install the two dowel pins and a new gasket Install the water pump cover and tighten the 4 bolts Torque 1 kgf m 10 N m 7 lbf ft Seal Washer Porcelain Mechanical Seal Impeller Impeller Left Hand Treads Bolts Water Pump Cover ...

Page 151: ... a pan which is placed on an electric heater Gradually raise oil temperature while reading the thermometer in the pan and the ohmmeter connected If the resistance measured is out of specification replace the temperature gauge with a new one Temperature Standard resistance 50ºC 123 9 478 9 100ºC 26 29 3 Handle the water temperature sensor carefully as it is vulnerable to impact Do not allow the wat...

Page 152: ...n With thread lock applied to the threaded part tighten the water temperature sensor Torque 0 8 kgf m 8 N m 5 8 lbf ft Connect the sensor connectors After the water temperature sensor has been installed fill coolant and perform air bleeding ...

Page 153: ...unting bolts 2 and the thermostat housing from the cylinder head 8 2 Installation The installation sequence is the reverse of removal After the water thermostat has been installed fill coolant and perform air bleeding 8 3 Disassembly Remove the two bolts and separate the thermostat housing halves Remove the thermostat from the thermostat housing 2 Thermostat ...

Page 154: ...82 C 176 180 F Full open 90 C 198 F Valve lift 3 5 mm 0 14 in minimum Do not let the thermostat touch the pan as it will give a false reading Replace the thermostat if the valve stays open at room temperature Test the thermostat after it is opened for about 5 minutes and holds the temperature at 70 8 5 Assembly Thermostat assembly is in the reverse order of disassembly Thermostat Thermometer ...

Page 155: ...bly 7 3 4 Assembly 8 4 Front Brake Fluid 9 4 1 Check 9 4 2 Fluid Replacement Air Bleeding 9 4 3 Brake Fluid Draining 9 4 4 Brake Fluid Filling Air Bleeding 10 5 Front Brake Pad 11 5 1 Brake Pad Replacement 11 6 Brake Disc 12 6 1 Inspection 12 6 2 Removal 12 7 Handlebar 13 7 1 Removal 13 7 2 Installation 13 7 3 Disassembly 14 7 4 Assembly 15 8 Front Shock Absorber 16 8 1 Removal 16 8 2 Inspection 1...

Page 156: ...14 FRONT ASSEMBLY 14 2 1 SCHEMATIC DRAWING ...

Page 157: ...14 FRONT ASSEMBLY 14 3 ...

Page 158: ...0 Brake Disk Runout 0 3 Brake Master Cylinder I D 12 7 12 74 Brake Master Cylinder Piston O D 12 65 12 68 Brake Caliper Piston O D 25 33 25 36 Brake Caliper Cylinder I D 25 4 25 45 TORQUE VALUES 2 3 Handlebar Lock Nut 45 N m 4 5 kgf m Steering Stem Lock Nut 70 N m 7 0kgf m Steering Stem Pinch Bolt 27 N m 2 7 kgf m Front Axle 20 N m 2 0 kgf m Master cylinder reservoir cover screw 1 6N m 0 16 kgf m ...

Page 159: ...r does not track straight Uneven front shock absorbers Bent front fork Bent front axle or uneven tire Poor brake performance Worn brake pads Contaminated brake pad surface Deformed brake disk Air in brake system Deteriorated brake fluid Worn brake master cylinder piston oil seal Clogged brake fluid line Unevenly worn brake caliper Front wheel wobbling Bent rim Loose front axle Bent spoke plate Fau...

Page 160: ... in the reverse order of work Inspection 3 2 Remove the collars from each side of the wheel Inspect the bearing seals and the O rings seals on the collars Replace the seals if they are in poor condition Turn the inner race of each bearing with your finger to see if they turn smoothly and quietly Also check if the outer race fits tightly in the hub Replace the bearings if the races do not turn smoo...

Page 161: ...o the collar and then install the collar onto the wheel Disassembly 3 3 Replace bearings as a set and do not reuse old bearings Place the new bearings in the freezer about an hour before you plan to install them Do not let the wheel rest on its brake disc Remove the side collar and dust seal The seal should be replaced with a new item Turn the inner race of each bearing with your finger to see if ...

Page 162: ...bearing installer tool or a socket with the same outside diameter as the bearing Make sure the bearing is fully seated and the marked side is facing out Special tool Bearing installer A120E00014 Insert the distance collar into the hub Drive in the other bearing The bearing should fit against the distance collar Do not continue to force the bearing in or the distance collar will begin to push the r...

Page 163: ... instructions A contaminated brake disc or pad reduces stopping power Discard contaminated pads and clean a contaminated disc with a high quality brake degreasing agent Do not allow foreign material to enter the system when filling the reservoir Avoid spilling brake fluid on painted plastic or rubber parts Place a rag over these parts whenever the system is serviced Brake Fluid Draining 4 3 Make s...

Page 164: ...ed valve and operate the front brake lever If it still spongy bleed the system again If the brake bleeder is not available perform the following procedure Pump up the system pressure with the brake lever until these are not air bubbles in the fluid flowing out of the reservoir small hole and lever resistance is felt 1 Pump the brake lever several times then squeeze the brake lever all the way and ...

Page 165: ...to ensure even disc pressure Apply a light coat of waterproof grease to the brake pad pin Push the pads against the pad spring and insert the brake pad pin It may be necessary to spread the pads and force the pistons back into the caliper in order to allow room for the brake disc to fit between the new pads Install the front caliper onto the fork leg and then install and tighten the new two calipe...

Page 166: ...e limits 4 mm Replace the brake disc if the smallest measurement is less than the service limit Measure the brake disc warpage Service limits 0 3 mm Removal 6 2 Remove the front wheel Remove the five brake disc mounting bolts with an Allen wrench Remove the front brake disc and front wheel speed sensor rotor Install in the reverse order of work ...

Page 167: ...om the handlebar cable guide Remove the handlebar lock nut and take out the bolt Remove the handlebar and collar Installation 7 2 Install the handlebar onto the steering stem and install the handlebar collar lock nut and bolt Tighten the bolt to the specified torque Torque 4 5 kgf m 45 N m 32 lbf ft Install the front and rear master cylinders and connect the brake light switch wires Adjust the thr...

Page 168: ... right switch housing from the handlebar Remove the two screws and then remove the left handlebar switch Disconnect the switch Separate the left switch housing from the handlebar Bar ends Remove the bar ends with a 6 mm Allen Grips Remove the right handlebar switch Disconnect the throttle cable from the throttle grip Remove the throttle grip ...

Page 169: ...ea with a brake or parts cleaner that will dry without leaving a residue When you are sure the area is dry apply grip cement to the bar or tube Install the left grip at an angle of your preference Install the throttle grip onto the tube with the same angle as the original grip Always wear safety glasses when using compressed air and never point it directly at yourself or anyone else Assembly 7 4 I...

Page 170: ...p Loosen the fork clamp pinch bolts with a 12 mm socket The top bolts must be removed Slide the forks legs down and out of the fork clamp using a twisting motion Installation is in the reverse order of removal Tighten the shock absorber mounting bolt to the specified torque Torque 3 2 kgf m 32 N m 23 lbf ft Inspection 8 2 Inspect the following items and replace if necessary Front shock absorber tu...

Page 171: ...justing nut may need to be adjusted Always replace the races at the same time as the bearings Remove the handlebar covers Remove the front cover Remove the handlebar Remove the front fender Remove the front wheel Remove the front fork Hold the steering stem top cone race and remove the steering stem lock nut by using the special tool Special tool Lock nut wrench A120F00002 Remove the top cone race...

Page 172: ...the special tools or a drift and hammer to drive out the bearing races in the steering head Have the drift set against the lip of the race and work around the race evenly to drive it out Repeat the process with the remaining bearing race Use a chisel to remove the bottom bearing inner race and dust seal Be careful not to damage the steering stem Bottom Cone Race ...

Page 173: ...l the steering stem Apply grease to the top cone race and install it Tighten the top cone race and then turn the steering stem right and left several times to make steel balls contact each other closely Check that the steering stem rotates freely without vertical play Special tool Lock nut wrench A120F00023 Install the steering stem lock nut and tighten it to the specified torque by using the spec...

Page 174: ...14 FRONT ASSEMBLY 14 20 Bottom Ball Race Remove Special Tool Bottom Ball Race Install special tool Top Ball Cone Race Install special tool ...

Page 175: ...Torque Values 3 2 3 Troubleshooting 4 2 4 3 Rear Brake 5 Rear Brake Caliper Removal 5 3 1 Inspection 5 3 2 Disassembly 6 3 3 Assembly 7 3 4 Installation 8 3 5 4 Rear Fork 9 Removal 9 4 1 Inspection 9 4 2 5 Rear Wheel 10 Removal 10 5 1 Inspection 10 5 2 Installation 10 5 3 6 Rear Shock Absorber 11 Removal 11 6 1 Installation 11 6 2 ...

Page 176: ...15 REAR ASSEMBLY 15 2 1 SCHEMATIC DRAWING ...

Page 177: ...m Service Limit mm Rear wheel rim runout 2 0 Rear brake disk thickness 5 0 4 0 Rear brake disk runout 0 3 Rear brake master cylinder I D 27 00 Rear brake master cylinder piston O D 26 95 Torque Values 2 3 Item Value N m kgf m Exhaust muffler lock bolt 45 N m 4 5 kgf m Exhaust muffler pipe nut 20 N m 2 kgf m Rear axle nut 120 N m 12 kgf m Rear shock absorber lower mount bolt 40N m 4 kgf m Rear shoc...

Page 178: ...tly mounted suspension components Incorrect damper adjustment Bent swing arm pivot Bent damper rod Damaged swing arm pivot bearing s Faulty suspension linkage Damaged linkage pivot bearings Rear wheel noise Worn rear wheel axle bearings Worn rear fork bearings Deformed rear fork Poor brake performance Air in brake system Deteriorated brake fluid Contaminated brake pad surface Worn brake pads Clogg...

Page 179: ... hose banjo bolt sealing washers with new items on assembly Remove the exhaust muffler Remove the rear brake fluid tube bolt and disconnect the brake fluid tube Remove two bolts attaching the rear brake caliper Remove the rear brake caliper When removing the brake fluid tube use shop towels to cover plastic parts and coated surfaces to avoid damage Inspection 3 2 Inspect the brake pads and brake d...

Page 180: ...nd place a towel under the caliper to avoid contamination caused by the removed piston Check the piston cylinder for scratches or wear and replace if necessary Push the piston oil seal outward to remove it Clean the oil seal groove with brake fluid Be careful not to damage the piston surface Check the piston for scratches or wear Measure the piston O D with a micrometer gauge Check the caliper cyl...

Page 181: ...side wall with brake fluid Install the brake caliper piston with grooved side facing out Install the piston with its outer end protruding 3 5mm beyond the brake caliper Install the two spring plates onto the groove of the caliper Make sure the spring plate next to the brake pad dowel pin orientation Install two brake pads and brake pad dowel pin ...

Page 182: ...ue 35 N m Connect the brake fluid tube to the brake caliper and install fluid tube bolt copper washers and tighten the fluid tube bolt Fill the brake reservoir with the specified brake fluid and bleed air from the brake system When installing the brake fluid tube be sure to install the two copper sealing washers ...

Page 183: ...protect the rear fork and covers from being scratched Install in the reverse order of work Inspection 4 2 Remove the clip Turn the inner race of each bearing with your finger to see if they turn smoothly and quietly Also check if the outer race fits tightly in the hub Replace the bearings if the races do not turn smoothly quietly or if they fit loosely in the hub Inspect the dust seal for damage o...

Page 184: ... rear fork Remove the rear axle collar Remove the rear wheel Inspection 5 2 Measure the rear wheel rim runout Installation 5 3 Apply a proper amount of grease on the rear axle before installation Install in the reverse order of work Torque Rear shock absorber lower mount bolt 35 45N m Rear axle nut 120 N m Rear axle ...

Page 185: ... body cover center cover and rear fender together Remove the right left rear shock absorber upper and lower mount bolts Remove the right and left rear shock absorbers Installation 6 2 Install the rear shock absorbers in the reverse order of removal Torque Upper Mount Bolt 40 N m Lower Mount Bolt 40 N m ...

Page 186: ...FORMATION 3 2 1 GENERAL INSTRUCTIONS 3 2 2 SPECIFICATIONS 4 2 3 TROUBLESHOOTING 4 3 Battery 5 3 1 Removal 5 3 2 Installation 5 3 3 Voltage Inspection 5 3 4 Battery Charging 6 4 Charging System Inspection 7 4 1 Charging Voltage 7 5 Regulator Rectifier 8 5 1 Inspection 8 5 2 Removal Installation 9 ...

Page 187: ...16 BATTERY CHARGING SYSTEM 16 2 1 CHARGING SYSTEM LAYOUT Positive cord Negative cord OBD connector ACG REGULATOR RECTIFIER ...

Page 188: ...h electrolyte will generate voltage within a certain time and it should be recharged when the capacity is insufficient Recharging a new battery will prolong its service life Inspect the charging system according to the sequence specified in the Troubleshooting Do not disconnect and soon reconnect the power of any electrical equipment because the electronic parts in the regulator rectifier will be ...

Page 189: ...ormance 18A 5000rpm Regulator Rectifier Regulated voltage 14 5 0 5V 2 3 TROUBLESHOOTING No power Dead battery Disconnected battery cable Fuse burned out Faulty ignition switch Low power Weak battery Loose battery connection Charging system failure Faulty regulator rectifier Intermittent power Loose battery cable connection Loose charging system connection Loose connection or short circuit in ignit...

Page 190: ...isconnect the positive cable 5 Remove the battery from the battery box 3 2 Installation Install in the reverse order of the removal When install the battery first connect the positive cable and then negative cable to avoid short circuit 3 3 Voltage Inspection Measure the battery voltage using a commercially available digital multimeter Voltage Fully charged 13 13 2 V Under charged below 12 3 V Neg...

Page 191: ...eads will permit Always keep flammable material or spark from battery Turn off the charger after charging Charging the battery under 45 Quick charging should only be done in an emergency slow charging is preferred For battery charging do not exceed the charging current and time specified on the battery Using excessive current or extending the charging time may damage the battery Measure the batter...

Page 192: ...ch are the positive and negative terminals or cable With the headlight on and turned to the high beam position restart the engine Measure the voltage on the multimeter when the engine runs at 5000 min rpm Standard 14 15V Under 0 5A Under 5000rpm Inspect the rectifier regulator if the voltage is not in the standard Do not disconnect the battery or any cable in the charging system without first swit...

Page 193: ...ound There should be continuity at all times and the value should be very small The inspection value should be minus the resistance value between the probes Check the continuity between the each yellow wire and ground wire There should not be continuity all times If there is continuity the coil is short Charging coil line Measure the resistance between each Yellow wire terminals Standard 0 4 0 6 2...

Page 194: ...G SYSTEM 16 9 5 2 Removal Installation Remove the side body cover Disconnect the regulator rectifier connectors Remove the two bolts regulator rectifier Installation is in the reverse order of removal Regulator rectifier ...

Page 195: ...ting System Layout 2 2 Service Information 3 2 1 General Instructions 3 2 2 Torque Values 3 2 3 Troubleshooting 3 3 Start Motor 4 3 1 Inspection 4 3 2 Removal 4 3 3 Installation 4 4 Starter Relay 5 4 1 Removal 5 4 2 Installation 5 4 3 Inspection 5 ...

Page 196: ...18 STARTING SYSTEM 18 2 1 Starting System Layout Battery Start Relay Start Motor ...

Page 197: ...em Unit kgf m N m Starter motor mounting bolt 0 7 1 1 7 11 ACG flywheel mounting bolt 5 0 6 0 50 60 2 3 Troubleshooting Starter motor won t turn Fuse burned out Weak battery Faulty ignition switch Faulty starter clutch Faulty front or rear stop switch Faulty starter relay Poorly connected broken or shorted wire Faulty starter motor Lack of power Weak battery Loose wire or connection Foreign matter...

Page 198: ...he rubber cap and remove the terminal screw to disconnect the cable from the start motor Remove the two mounting bolts then remove the start motor Rubber cap Cable 3 3 Installation Coat a new O ring with engine oil and install it into the start motor groove Install the starter motor into the crankcase Install the two mounting bolts securely TORQUE 0 7 1 1 kgf m Connect the cable to motor terminal ...

Page 199: ...lay may be damaged and fail starting 4 3 Inspection Continuity Test Disconnect the starter relay wire connector Check for continuity between the yellow red wire and green yellow wire There should be continuity when the starter button is depressed If there is no continuity check the starter button for continuity and inspect the wire Connector Operation Test On Board Turn on the ignition switch Sque...

Page 200: ...d the frame There should be continuity always Operation Test Removed Connect the electric meter to the starter relay terminals that connect to the battery positive cable and the starter motor cable Connect a fully charged battery across the starter relay yellow red and green yellow wire terminals Check for continuity between the starter relay large terminals The relay is normal if there is continu...

Page 201: ... Light 6 4 Speed Sensors 6 4 1 Front Speed Sensor 6 4 2 Inspection 7 5 Switches 8 5 1 Brake Light Switch 8 5 2 Ignition Switch 8 5 3 Right handlebar switch 9 5 4 Left Handlebar Switch 10 6 Luggage Box Light Sensor 11 6 1 INSPECTION 11 7 Oil pressure sensor 12 7 1 Inspection 12 7 2 Removal 13 7 3 Installation 13 8 Fuel Pump 14 8 1 Removal 14 8 2 Inspection 15 8 3 Installation 16 9 Side Stand Switch...

Page 202: ...19 ELECTRICAL SYSTEM 19 2 10 1 Inspection 18 10 2 Removal Installation 18 11 Rollover sensor 19 11 1 Inspection 19 11 2 Removal Installation 19 ...

Page 203: ...prevent its early failure Be sure to install the dust cover after replacing the bulb Check the battery condition before performing any inspection that requires proper battery voltage A continuity test can be made with the switches installed on the scooter Route the wires and cables properly after servicing each component 1 2 Specification Head light LED Turn signal light LED Plate light 12V 5W Tai...

Page 204: ...emoval to prevent scratches Remove the headlight assy Remove screws Remove the headlight Install in the reverse order of work 2 2 Front turn signal lights Remove the headlight assy Remove the screws Remove the front turn signal lights Repeat the process on the other side Install in the reverse order of work ...

Page 205: ...ts assy 3 1 Tail light assy Remove the rear light assy Remove screws on the each side of cover Remove the side covers Remove the rear center cover Remove the screws Remove the tail light assy Installation is in the reverse order of removal ...

Page 206: ...crews Push and turn the bulb counterclockwise to remove it and then replace with a new one Specification 12V 5W Installation is in the reverse order of removal 4 Speed Sensors 4 1 Front Speed Sensor Remove the front cover Disconnect the speed sensor connector Remove the bolt Remove the speed sensor Install in the reverse order of removal ...

Page 207: ...ove the rear speed sensor Install in the reverse order of removal 4 2 Inspection After remove the speed sensor rotate the wheel to check the speed sensor ring If the speed sensor ring is deformed or damaged it should be replaced Check the gap between the speed sensor and the ring Standard 0 4 1 2mm Speed sensor Speed sensor ring ...

Page 208: ... check for continuity between the switch terminals 1 There should be continuity with the front or rear brake lever squeezed and there should be no continuity when the front or rear brake lever 2 is released 5 2 Ignition Switch INSPECTION Remove the front cover Remove the leg shield Continuity should exist between the color code wires as follows ...

Page 209: ...ar switch Disconnect the right handlebar switch connector and check for continuity at switch side connector terminals Continuity should exist between the color code wires as follows Engine Stop SW IG BAT3 OFF RUN COLOR B W B G Engine stop switch ...

Page 210: ...r Switch Disconnect the left handlebar switch connector and check for continuity at switch side connector terminals Continuity should exist between the color code wires as follows Turn Signal Light Switch Horn Switch Passing Switch Dimmer switch ...

Page 211: ...x light sensor being covered up and there should be continuity with the luggage box light sensor being not covered up To inspect the lamp and sensor of luggage box Sensor Voltage supply range 8 16V It will light off 2 minutes later while opening the rider seat It will light off 3 seconds later while masking the sensor below 4cm height Lamp Disconnect the light coupler Connect 8 16V power supply to...

Page 212: ...s not come up perform the following inspection process 1 Remove the protective cap to disconnect the wire 2 Connect the wire to ground directly to check if the indicator comes up automatically 3 If the indicator does not light up still check any of following situation blown fuse poor connecition of short circuit The engine oil pressure indicator should go off automatically after run the engine If ...

Page 213: ... and disconnect the wire Remove the engine oil pressure sensor 7 3 Installation Apply suitable sealant as shown and do not seize the sensor Tighten the oil pressure sensor to specified torque TORQUE 2 1 3 0kgf m 3 4mm Install the protective cap and connect the wire ...

Page 214: ...e center cover Remove the fuel pump connector Be sure to relieve the fuel pressure before removing fuel pump or fuel hose Remove the 6 nuts 1 and fuel unit connectors 2 then remove the fuel hose 3 Remove the fuel pump Check the fuel pump O ring If it was damage replace new one ...

Page 215: ...mal Use a good condition and fully charged battery to perform the inspection Check the fuel meter for correct indication by moving the fuel unit float up and down Float Position Display Upper Much Full Lower Less Empty Wire Terminals Display Free From Much to Less Apply From Less to Much The fuel meter is normal if it operates as above indicated If not check for poorly connected terminals or short...

Page 216: ...s of the fuel unit connector Standard at 20 C 68 F Float at full position About1100 Ω Float at empty position About100 Ω 8 3 Installation Installation is in the reverse order of removal Check the fuel hose routing is correct Check the fuel pump and the fuel gauge operate normally after installation ...

Page 217: ...ould be continuity between the Yellow Black and Green with the side stand applied 9 2 Removal Disconnect the side stand switch connector Remove the bolt and side stand switch from the side stand 9 3 Installation Installs the side stand switch aligning the groove on the switch with the pin on the side stand stay Install and tighten the side stand switch bolt securely Connect the side stand switch c...

Page 218: ...s 1 from the horn Connect a 12 V battery to the horn terminals The horn is normal if it sounds when the 12 V battery is connected across the horn terminals 10 2 Removal Installation Disconnect the horn connectors from the horn Remove the bolt 2 and horn Installation is in the reverse order of removal 2 1 ...

Page 219: ...tage of the rollover sensor Termials Standard V R G P 5V ECU voltage B L G P 0 4 1 4V If the vehicle tipping angle exceeds 65 the engine will stop 11 2 Removal Installation Disconnect the connector Remove the nut Remove the rollover sensor Remove the nuts Remove the bracket Install in the reverse order of removal The arrow mark which above the UP mark should point to upward Nuts Rollover sensor Nu...

Page 220: ...val 7 1 5 Installation 7 2 Diagnostic Tool 8 2 1 PC version 8 3 Diagnostic Tool Operation 9 3 1 Operation Instructions 9 3 2 Connection 10 3 3 DTC Inspect 11 3 4 DTC Displayed 11 3 5 DTC Cleared 12 3 6 Data Analyze 12 3 7 Air Bleeding 12 4 DTC List 13 4 1 Bosch ABS91 DTC List 13 4 2 TCS DTC List 錯誤 尚未定義書籤 5 Introduction to KYMCO TCS System 錯誤 尚未定義書籤 ...

Page 221: ...automatically regulates brake force Intermittently gaining gripping force and braking force helps prevent wheel lock up and allows stable steering control while stopping Brake control function is identical to that of conventional vehicle The brake lever is used for the front brake and rear brake Although the ABS provides stability while stopping by preventing wheel lock up remember the following c...

Page 222: ...le speed with wheel speed Since non recommended tires can affect wheel speed they may confuse which can extend distance Use of non recommended tires may cause malfunctioning of ABS and lead to extended braking distance The rider could have an accident as a result Always use standard for this recommended vehicle NOTICE When the ABS is functioning you may feel a pulsing in the brake lever This is no...

Page 223: ...ire different in size from the standard size is being used Replace with standard size When the wheel is deformed Replace the wheel Much of the ABS troubleshooting work consists of confirming continuity of the wiring The ABS parts are assembled and adjusted by the manufacturer so there is no need to disassemble or repair them Replace the ABS hydraulic unit if needed The basic troubleshooting proced...

Page 224: ...20 ANTI LOCK BRAKE SYSTEM ABS 20 5 Pre diagnosis Inspection Chart 1 ...

Page 225: ...20 ANTI LOCK BRAKE SYSTEM ABS 20 6 Pre diagnosis Inspection Chart 2 ...

Page 226: ...age the joint claw Remove the bolts Remove the ABS module Installation 1 5 Install in the reverse order of removal TORQUE 3 4 kgf m Install the brake fluuid hoses in the correct positions Wipe off any remaining brake fluid Rear brake fluid input Front brake fluid input Rear brake fluid output Front brake fluid output Bolts Joint claw Rear brake fluid input Front brake fluid input Rear brake fluid ...

Page 227: ...tic tool software Remove the front cover Connect the integrated linker to the OBD connector Turn on the ignition switch Chose the ABS brake system Check the ECU version If any of components which are related to brake fluid is replaced the air bleed procedure must be done OBD connector ...

Page 228: ...Button Adjust TPI and ABV reset function DTC indicator Failure codes DATA Analyze Enter or Exit DTC Inspect Power indicator ECU Version Note For EURO models Use the Sub cord OBD diagnostics connecter part number 36205 LFA7 E00 to connect between vehicle and diagnostic tool To Vehicle To Diagnostic tool AHG1 ECU Version DTC Inspect DATAAnalyze Adjust ...

Page 229: ...iagnostic tool Power comes from vehicle s Battery 2 Put the side stand upward and ENG stop switch is at RUN position 3 Choose Fi ECU Version and press the enter button 4 Press the down button 2 times to open the First diagnostic page 5 Choose the ABS 6 Open the previous page and press the enter button again to back to the Main page OBD Connector ABS91 ...

Page 230: ... ANTI LOCK BRAKE SYSTEM ABS 20 11 DTC Inspect 3 3 1 Choose DTC Inspect 2 Load DTC Active Occurred History DTC Displayed 3 4 1 Rear wheel speed sensor disconnect 2 Front wheel speed sensor disconnect ABS91 ...

Page 231: ...lamp is off Data Analyze 3 6 1 Choose DATA Analyze and then push Enter button 2 Front wheel speed Rear wheel speed Battery volt Battery volt Standard 9 6 16 7 V You can turn the front or rear wheel to check if the wheel speed is figured Air Bleeding 3 7 1 Choose the Adjust 2 Choose the front or rear brake to perform air bleeding ABS91 ABS91 ...

Page 232: ...nction Failsafe relay 06 5025 Deviation between Wheel speeds WSS_GENERIC 07 5035 Pump Motor Malfunction 08 5042 Front wheel speed sensor malfunction Plausibility 09 5043 Front wheel speed sensor Disconnection gnd Short Battery Voltage Short 10 5044 Rear wheel speed sensor malfunction Plausibility 11 5045 Rear wheel speed sensor Disconnection gnd Short Battery Voltage Short 12 5052 Power Supply Mal...

Page 233: ... Emission Control System 3 2 3 Exhaust Emission Control System 3 2 4 Noise Exhaust Emission Control System 3 3 Function 4 3 1 Trouble Shooting 4 4 Maintenance Schedule 5 4 1 Maintenance schedule legend 錯誤 尚未定義書籤 5 Maintenance Information 7 6 Canister 8 6 1 Removal 8 6 2 Inspection 8 6 3 Installation of canister 9 7 P C V 10 7 1 Inspection 10 7 2 Air filter 10 7 3 Inspection of emission system 11 8...

Page 234: ...ission System Diagram Fuel tank Fuel pump Fuel Fuel injector Canister Air cleaner Negative pressure Negative pressure Fuel Fuel vapors Water bleed hole Fuel vapors To atmosphere Crankcase blow by Intake manifold Fuel vapors capture Cylinder head cover Hose Air cleaner Throttle body Fuel vapors ...

Page 235: ... Crankcase Emission Control System The scooter is equipped with a closed crankcase system Blow by gas is recycled into the combustion chamber via the intake system This arrangement is to prevent blow by gas from spreading to the atmosphere 2 3 Exhaust Emission Control System The exhaust emission from the scooter is controlled by combustion management fuel delivery ignition setting and exhaust syst...

Page 236: ...dition Sending the mixture condition info to ECU by voltage signal ECU controls the fuel injection to meet the emission regulation Catalyst To reduce the emission of HC CO and NOx produced from the exhaust gas Using the catalyst converts the HC and CO to CO2 and H2O also reduce the NOx pollution ECU To control the injector ignition and bypass air of fuel injection system to reach the best driving ...

Page 237: ...CV Evaporative Emission Control Valve I I I O2 Sensor I I I Catalytic Converter I I I Drivetrain Cam Chain I I I CVT Driving Belt Roller Clutch Outer Sleeve I I M I Rear Wheel Driving Belt Note 2 I I I I I I I I I I I I I Valve Clearance Note 4 I I I Ignition System Spark Plug I R Ignition Circuit I I Engine Management System Throttle Body Note 4 M I M I Fuel Injector Note 1 4 D M D M D M C D M Id...

Page 238: ...driving in dusty and rainy areas 6 ABS Wheel Speed Sensor Reading Disc Perform maintenance and inspection every 5000 km Replace the sensor when necessary 4 2 Notes 1 We recommend that you add a bottle of KYMCO fuel injector cleaner every 1000 km to the fuel tank 2 An air blow gun must be used to clean the dust and foreign objects inside the belt wheel for models with rear wheel driving belt Check ...

Page 239: ...laced with a new one The tubes should be installed tightly The leakage hole should be installed downward Tool Vacuum pump Pressure pump Maintenance standard Emission Vacuum Standard 45m mHg Capacity Of Canister 90cc Install Angle incline 60 Evaporative Emission Control System The location of tube connection diagram Leakage checking 1 Connection between canister and fuel tank 2 Tubes of canister ...

Page 240: ...control valve If the pressure will be kept without change obviously in one minute that means the valve are with good condition otherwise the valve malfunction a new canister should be replaced Connect a vacuum pump to the tube of canister Follow the illustration below Applying 45m mHg vacuum pressure to the canister evaporative control valve If the pressure will be kept without change obviously in...

Page 241: ...w rate above 9 4 liters per minute that means the valve is in good condition otherwise the canister should be replaced Always using the pump by manual do not apply high pressure for testing to prevent the valve from malfunction 6 3 Installation of canister 1 Installation is the reverse order to the dismantling 2 Connect the tubes and circlips firmly The tube should not be wrenched or crashed and n...

Page 242: ...er element The new air cleaner element installation is in the reverse order of removal Use the KYMCO genuine air cleaner element or an equivalent air cleaner element specified for your model Using the wrong KYMCO air cleaner element or a non KYMCO air cleaner element which is not of equivalent quality may cause premature engine wear or performance problems The air cleaner element has a viscous typ...

Page 243: ...ce the pollution emission Inspect Catalyst Converter Inspect catalyst converter efficiency at idle speed Warm up the engine 8 10 minutes connect to emission machine To check the CO value before catalyst and after Normally measuring after catalyst converting the CO figure will be lower than the CO figure before catalyst converting If the number is abnormal the catalyst converter could be deteriorat...

Page 244: ...n Sensor to work normally In normal hours the impedance of heater is 7 7 1 2 ohm and can be told with multimeter Output of sensor after the engine is warmed up is A F 14 7 mixing ratio too thick 0 7V A F 14 7 Mixing ratio too thin 0 18V Inspection and adjustment of emission 1 Start the engine and warm up for several minutes engine temperature 80 90 connect the diagnostic tool to check the informat...

Reviews: