JVC NX-F30, Instructions Manual
The JVC NX-F30 is a versatile audio system designed to deliver exceptional sound quality. In order to get the most out of your device, make sure to download the Instructions Manual from our website for free. This comprehensive manual provides step-by-step guidance to ensure a seamless user experience.
Share
Download


Reviews:
No comments
Related manuals for NX-F30

CL-3645
Brand: SCS Sentinel Pages: 170

DBS 576 Section 300
Brand: Panasonic Pages: 362

Smart Sounddeck 100
Brand: Canton Pages: 58

DIGITAL MOVIE DM 90
Brand: Canton Pages: 68

PASSPORT
Brand: Fender Pages: 3

T 200
Brand: Gardena Pages: 4
GPSMAP 720
Brand: Garmin Pages: 2
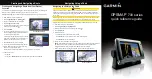
GPSMAP 740
Brand: Garmin Pages: 2
Astro 220
Brand: Garmin Pages: 92

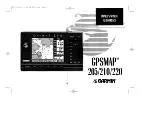
GPSMAP 3205 - Marine GPS Receiver
Brand: Garmin Pages: 2

Quadnet
Brand: Rafiki Protection Pages: 32

Subwoofer KHT2005.2
Brand: KEF Pages: 2

LS50
Brand: KEF Pages: 7

C80
Brand: KEF Pages: 4

RX-DT610
Brand: Panasonic Pages: 45

VISTA-32FB
Brand: ADEMCO Pages: 56

EB8MS
Brand: proavio Pages: 6

SkyFunk 3
Brand: TechniSat Pages: 8


