background image

2

 EN

Dear Customer,

Thank you for purchasing the JVC VHS video cassette recorder. Before use, please read the safety information and precautions
contained on this page to ensure safe use of your new VCR.

CAUTIONS

WARNING:

DANGEROUS VOLTAGE INSIDE

WARNING:

TO PREVENT FIRE OR SHOCK HAZARD, DO
NOT EXPOSE THIS UNIT TO RAIN OR
MOISTURE.

The POWER 

 button does not completely shut off mains

power from the unit, but switches operating current on and off.
" " shows electrical power standby and " " shows ON.

n

Cassettes marked "VHS" (or "S-VHS") can be used with this
video cassette recorder. However, only "VHS" recordings can
be played back in this model.

n

This model is equipped with SQPB (S-VHS QUASI PLAY-
BACK) that makes it possible to play back S-VHS recordings
with regular VHS resolution.

n

HQ VHS is compatible with existing VHS equipment.

Warning on lithium battery

The battery used in this device may present a fire or
chemical burn hazard if mistreated. Do not recharge,
disassemble, heat above 100°C or incinerate.
Replace battery with Panasonic (Matsushita Electric),
Sanyo, Sony or Maxell CR2025; use of another battery may
present a risk of fire or explosion.

n

Dispose of used battery promptly.

n

Keep away from children.

n

Do not disassemble and do not dispose of in fire.

HOW TO USE THIS INSTRUCTION

MANUAL

All major sections and subsections are listed in the Table
Of Contents on page 3. Use this when searching for
information on a specific procedure or feature.

The Index on pages 34 – 36 lists frequently-used terms,
and the number of the first page on which they are used
or explained in the manual. This section also illustrates
the controls and connections on the front and rear panel,
the front display panel and the remote control.

The 

Z

 mark signals a reference to another page for

instructions or related information.

Operation buttons necessary for the various procedures
are clearly indicated through the use of illustrations at
the beginning of each major section.

BEFORE YOU INSTALL YOUR NEW

VCR . . .

. . . please read thoroughly the cautions on this page.

This unit is produced to comply with Standard IEC Publ. 65.

POWER SYSTEM:

This set operates on voltage of AC 110 – 220V

`

, 50/60 Hz

with automatic switching.

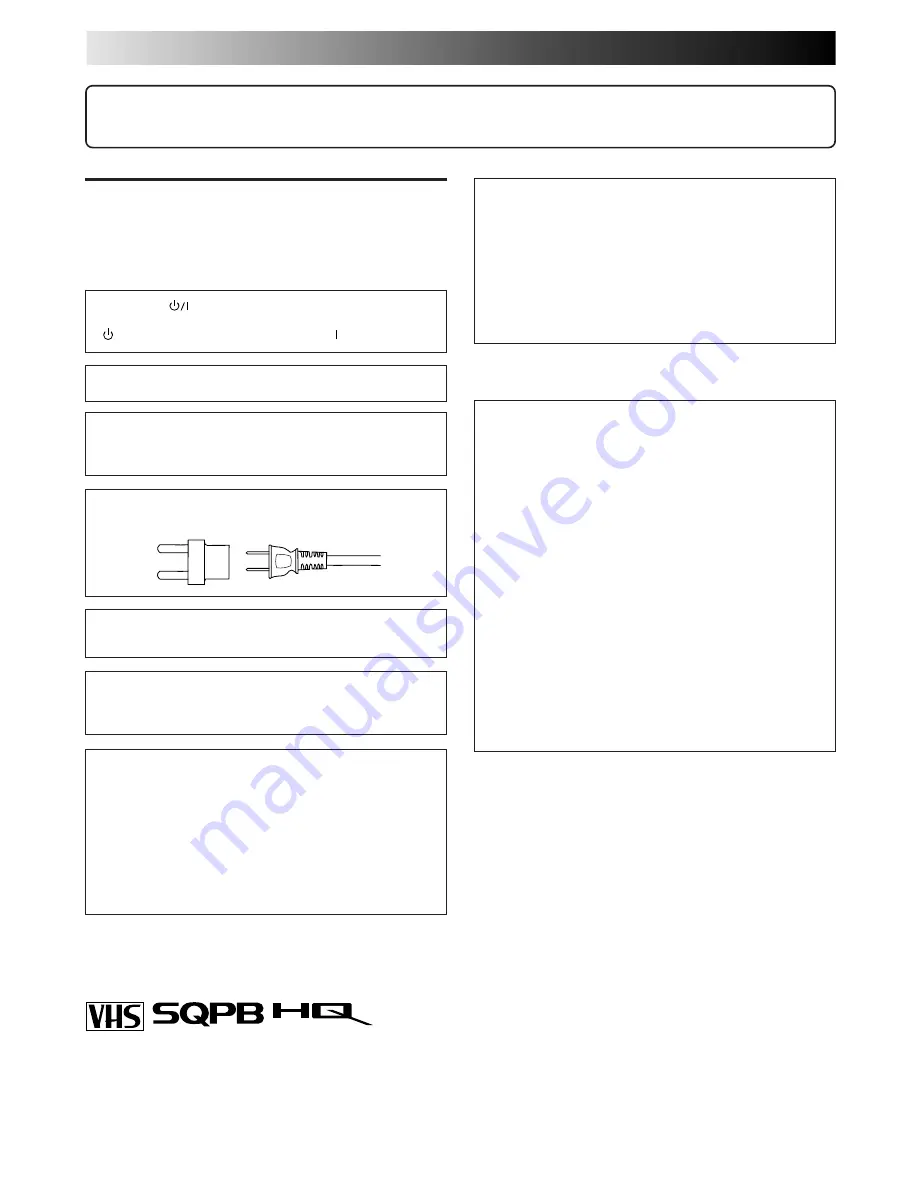
Use the conversion plug (provided) depending on the type
of your AC WALL outlet.

The rating plate and safety caution are on the rear of the
unit.

IMPORTANT:

It may be unlawful to record or play back copyrighted
material without the consent of the copyright owner.

CAUTION

n

When you are not using the VCR for a long period of
time, it is recommended that you disconnect the power
cord from the AC outlet.

n

Dangerous voltage inside. Refer internal servicing to
qualified service personnel. To prevent electric shock or fire
hazard, remove the power cord from the AC outlet prior to
connecting or disconnecting any signal lead or aerial.

n

Changes or modifications not approved by JVC could
void user's authority to operate the equipment.

Summary of Contents for HR-J4005UM

Page 1: ...s on page 3 Use this when searching for information on a specific procedure or feature The Index on pages 34 36 lists frequently used terms and the number of the first page on which they are used or explained in the manual This section also illustrates the controls and connections on the front and rear panel the front display panel and the remote control The Z mark signals a reference to another p...

Page 2: ...yback 14 Slow Motion Reverse Slow Motion 14 Variable Speed Search Reverse Motion Playback 14 High Speed Search 15 Index Search 15 Manual Tracking 15 Video Stabilizer 16 Repeat Playback 17 Counter Reset 17 Tape Position Indicator 17 Next Function Memory 17 Superimpose 18 Select The Soundtrack HR J6005UM only 19 B E S T Picture System 20 Preparation 20 Recording 21 Playback 21 Recording Features 22 ...

Page 3: ...d turn off the VCR power 2 Open the battery cover while pressing the release tab as illustrated 3 Insert a lithium battery with the plus side up and push it in To remove the lithium battery press the latch A down ward using a pointed non metallic object then pull out the lithium battery 4 Close the battery cover until it clicks in place Be sure to connect the power plug to an AC outlet first befor...

Page 4: ... For HR J4005UM Owners If your TV has AUDIO IN L and R connectors connect the VCR to the L connector CONNECT VCR TO POWER SOURCE 4 Connect the power plug to an AC outlet FINAL PREPARATION FOR USE 5 Select the VCR channel 3 or 4 by setting the switch on the rear of the VCR as shown in the illustration Perform Plug Play Z pg 6 and 7 NOTES The VCR channel is the channel on the TV which will display t...

Page 5: ...JOG Press and hold either button to delay or advance the time by 30 minutes SET DATE 4 Press CH5 or PUSH JOG fi to set the date then press OK or PUSH JOG Press and hold either button to change the date by 15 days SET YEAR 5 Press CH5 or PUSH JOG fi to set the year IMPORTANT Don t press any buttons on the VCR or remote that are not directly related to the step you are performing while Plug Play is ...

Page 6: ...le channels are skipped If the tuner channels have been set properly SCAN COMPLETED will be displayed on the screen If NO SIGNAL is displayed on the screen make sure that the antenna cable is connected to the VCR properly and press OK or PUSH JOG The VCR will try Auto Channel Set again RETURN TO NORMAL SCREEN 7 Press MENU 1 2 3 4 5 0 6 7 8 9 1 2 4 3 MENU MENU OK PUSH JOG OK C H CH ...

Page 7: ...row to AJUSTE INICIAL by pressing CH5 or PUSH JOG fi then press OK or PUSH JOG SELECT LANGUAGE 4 Move the highlight bar arrow to IDIOMA by pressing CH5 or PUSH JOG fi then press OK or PUSH JOG to select the desired language RETURN TO NORMAL SCREEN 5 Press MENU Turn on the TV and select the VCR channel 3 or 4 or AV mode 1 2 3 4 5 0 6 7 8 9 1 2 4 3 POWER MENU POWER MENU OK PUSH JOG OK CH C H MENU PR...

Page 8: ...nd hold CH5 or PUSH JOG fi to change the time by 30 minutes SET DATE 6 Press CH5 or PUSH JOG fi until the desired date appears then press OK or PUSH JOG Press and hold CH5 or PUSH JOG fi to change the date by 15 days SET YEAR 7 Press CH5 or PUSH JOG fi until the desired year appears START CLOCK 8 Press MENU and normal screen appears To Make Corrections Press OK or PUSH JOG until the item you want ...

Page 9: ...pears on screen If the scan was unsuccessful SCAN COMPLETED NO SIGNAL appears on screen Check the connections and start again RETURN TO NORMAL SCREEN 5 Press MENU INITIAL SETTINGS cont INFORMATION The VCR detects the band TV or CATV and selects the correct band automatically during Auto Channel Set The selected band will be displayed on the right side of BAND on the Tuner Set screen Turn on the TV...

Page 10: ...s OK or PUSH JOG ADD OR SKIP DESIRED CHANNEL 4 Input the channel number using the NUMBER keys or by pressing CH5 or PUSH JOG fi then press OK or PUSH JOG to set to ADD or SKIP as required Repeat for each channel you want to add or skip RETURN TO NORMAL SCREEN 5 Press MENU 1 2 3 4 5 0 6 7 8 9 1 2 4 3 MENU MENU OK PUSH JOG OK CH C H NUMBER TUNER SET BAND CATV AUTO CHANNEL SET MANUAL CHANNEL SET SELE...

Page 11: ...EJECT to remove the cassette Turn on the TV and select the VCR channel 3 or 4 or AV mode INFORMATION This video recorder is equipped with SQPB S VHS QUASI PLAYBACK that lets you watch tapes recorded in the S VHS format with regular VHS resolution SQPB does not deliver Super VHS resolution S VHS recording is not possible with this video recorder Usable cassettes Full Size VHS T 30 ST 30 T 60 ST 60 ...

Page 12: ...n B E S T is set to ON Z pg 20 PAUSE RESUME RECORDING 5 Press PAUSE Press PLAY to resume recording During record pause you can change the recording channel by using the CH5 buttons or NUMBER keys B E S T will not take place if the tape speed is changed while in record pause mode STOP RECORDING 6 Press STOP or STOP EJECT Then press STOP EJECT to remove the cassette Turn on the TV and select the VCR...

Page 13: ...ring playback to decrease speed in the forward direction Continue to press and release PUSH JOG to select the reverse slow motion reverse play and reverse search modes OR During still picture press and hold PUSH JOG for forward slow motion or press and hold PUSH JOG for reverse slow motion Release to return to still picture OR For forward slow motion during still picture press and hold PAUSE for m...

Page 14: ...de is not placed on the tape when recording is paused and then resumed fi FF P L A Y R E W FF REW P L A Y fi Manual Tracking Once playback begins the VCR s automatic tracking function is engaged If tracking noise appears in the picture you can override this and make the adjustment manually ENGAGE MANUAL TRACKING MODE 1 During playback press the CH5 and buttons on the VCR s front panel simultaneous...

Page 15: ...VIDEO STABILIZER by pressing CH5 or PUSH JOG fi then press OK or PUSH JOG to set to ON RETURN TO NORMAL SCREEN 4 Press MENU MENU HR J4005UM HR J6005UM C H MENU NOTES Regardless of the setting this function has no effect during recording and during special effects playback When you finish viewing the tape be sure to set it back to OFF The Superimpose mode indications may jitter vertically when VIDE...

Page 16: ...e a few seconds for the Tape Position Indicator to be displayed COUNT 0 33 27 B E Next Function Memory The Next Function Memory tells the VCR what to do after rewinding Before continuing ensure that the VCR is in stop mode a For Automatic Start Of Playback After Tape Rewind press REW then press PLAY within 2 seconds b For Automatic Power Off After Tape Rewind press REW then press POWER within 2 se...

Page 17: ...ading ACCESS MAIN MENU SCREEN 1 Press MENU ACCESS FUNCTION SET SCREEN 2 Move the highlight bar arrow to FUNCTION SET by pressing CH5 or PUSH JOG fi then press OK or PUSH JOG SELECT SUPERIMPOSE SET MODE 3 Move the highlight bar arrow to SUPERIMPOSE by pressing CH5 or PUSH JOG fi then press OK or PUSH JOG to select the desired mode a Select ON if you want the superimposed opera tional indications on...

Page 18: ...ET MODE 3 Move the highlight bar arrow to AUDIO MONITOR by pressing CH5 or PUSH JOG fi then press OK or PUSH JOG to select the desired mode a Hi Fi b Hi Fi L c Hi Fi R d Normal e Mix RETURN TO NORMAL SCREEN 4 Press MENU NOTES If the tape being played back has no Hi Fi soundtrack the Normal soundtrack will be heard no matter what choice you make in step 3 If RF connection is used for TV even if Hi ...

Page 19: ...G SELECT B E S T MODE 4 HR J4005UM HR J6005UM Press CH5 or PUSH JOG fi to move the highlight bar arrow to B E S T then press OK or PUSH JOG to set to ON or OFF NOTE When recording or when playing back tapes recorded on this VCR set the B E S T to ON RETURN TO NORMAL SCREEN 5 Press MENU C H MENU POWER B E S T Picture System OK OK CH PUSH JOG MAIN MENU FUNCTION SET TUNER SET INITIAL SET PRESS 5 THEN...

Page 20: ...n is operative To display the B E S T Picture System screen SUPERIMPOSE must be set to ON or the B E S T Picture System screen will not appear Z pg 18 START RECORDING 1 Press and hold REC and press PLAY on the remote control or press REC on the VCR s front panel The VCR takes about 7 seconds to assess the quality of the tape in use then recording begins with the picture level optimized NOTES B E S...

Page 21: ...CHANNEL FOR VIEWING 2 Use the TV s channel selector to set the channel you want to watch RESET COUNTER TO ZERO 1 Before recording starts press C RESET The counter resets to zero and displays the exact elapsed time as the tape runs DISPLAY ELAPSED TIME ON SCREEN 2 During recording press OSD at any time to see the elapsed time All indications corresponding to the current status of the VCR are displa...

Page 22: ... ACCESS MAIN MENU SCREEN 1 Press MENU ACCESS FUNCTION SET SCREEN 2 Move the highlight bar arrow to FUNCTION SET by pressing CH5 or PUSH JOG fi then press OK or PUSH JOG SELECT 2ND AUDIO RECORD SET MODE 3 Move the highlight bar arrow to 2ND AUDIO RECORD by pressing CH5 or PUSH JOG fi then press OK or PUSH JOG to set to ON RETURN TO NORMAL SCREEN 4 Press MENU NOTES If a SAP program is received and 2...

Page 23: ...Press STOP to enter the time you want recording to stop Press and hold STOP to move in 30 minute increments or press and release repeatedly to move 1 minute at a time SET PROGRAM DATE 5 Press DATE The current date is displayed on screen The date you enter appears in its place SET CHANNEL NUMBER 6 Press CH5 Holding down CH5 rapidly scans through the channels If you are using a cable box enter the c...

Page 24: ...rograms that start after midnight must have the next day s date After timer recording is completed the VCR s power goes off automatically You can program the timer while a regular recording is in progress the on screen menu will not be recorded If the end of tape is reached during timer recording the cassette is automatically ejected When timer recording cable or satellite channels through an exte...

Page 25: ...rogram s information appears PR START STOP CH DATE 1 8 00P 10 00 12 12 24 2 10 00A 10 45 40 12 25 3 11 30P 01 00 125 12 25 4 5 6 7 8 PRESS CHECK TO NEXT To Cancel Or Revise A Program CANCEL OR REVISE A PROGRAM 4 To cancel a program press CANCEL To revise a program press the appropriate button START STOP DATE CH5 SP EP RETURN TO NORMAL SCREEN 5 Press PROG CHECK as many times as necessary If there a...

Page 26: ...EP TIMER by pressing CH5 or PUSH JOG fi then press OK or PUSH JOG to set to ON RETURN TO NORMAL SCREEN 4 Press MENU HR J4005UM HR J6005UM HR J4005UM HR J6005UM NOTE For safety when AUTO TIMER is set to OFF all other VCR functions are disabled while the Timer mode is engaged To disengage the timer press TIMER NOTES If you have programmed the VCR to timer record 2 or more programs the second program...

Page 27: ...ord for more than 30 minutes press REC to extend the time Each press extends recording time by 30 minutes NOTES You can only perform ITR using the REC button on the VCR s front panel After you set the ITR time the previous display reappears To check the remaining time press REC once during record ing and the remaining time will be displayed for about 5 seconds Be careful not to press REC again wit...

Page 28: ...o a Hi Fi VCR connect your VCR s AUDIO OUT connector to the AUDIO IN L connector on the Hi Fi VCR LOAD CASSETTES 2 Insert the playback cassette into your VCR and the cassette to be recorded on into the other VCR SET RECORDER S INPUT MODE 3 Set the other VCR s auxiliary AV input mode START PLAYER 4 Press PLAY on your VCR NOTE If you don t want to record the superimposed indication on the edited tap...

Page 29: ...R connect its AUDIO OUT L connector to the AUDIO IN connector on your VCR LOAD A CASSETTE 2 Insert the cassette to be recorded on into your VCR and the playback cassette into the camcorder or the playback VCR SET RECORDER S INPUT MODE 3 Press NUMBER key 0 to set your VCR to F 1 START PLAYER 4 Set the camcorder or the playback VCR to its play mode NOTE If the camcorder or another VCR is equipped wi...

Page 30: ... OUT connec tion Z pg 4 the channel selector on the TV is set incorrectly If you re using the AV connection Z pg 4 the TV receiver is set to the wrong mode This is normal Automatic tracking is engaged The video heads may be dirty The AUDIO MONITOR option was set incorrectly CORRECTIVE ACTION Set the channel selector to channel 3 or 4 Set the TV receiver to its AV mode Disengage Auto Tracking and a...

Page 31: ...OSSIBLE CAUSE The clock and or the timer have been set incorrectly The timer is not engaged The VCR has not been set up properly Timer recording is in progress The timer is engaged but there s no cassette loaded The loaded cassette has had its record safety tab removed TIMER has been pressed when there are no programs in memory or the timer record program information has not been programmed correc...

Page 32: ... effect does removing the safety tab have A It disables marking of index codes Q Sometimes during Index Search the VCR can t find the program I want to see Why not A There may be index codes too close together Q During playback on screen operational indicators sometimes jitter Why does this happen A If the condition of the tape being played back is not good jittering of the video including on scre...

Page 33: ...splay Panel Z pg 35 Remote Control Sensor Channel CH 5 Button Z pg 13 Record REC Button Z pg 13 STOP EJECT Button Z pg 12 PAUSE Button Z pg 14 INDEX FRONT VIEW J4005UM CH MENU VIDEO AUDIO STOP EJECT PAUSE REC REW FF PLAY POWER OK SP VCR 1 8 7 2 3 4 5 6 9 0 1 POWER Button Z pg 6 2 Cassette Loading Slot 3 Rewind REW Button Z pg 12 4 PLAY Button Z pg 12 5 Fast Forward FF Button Z pg 12 6 VIDEO AUDIO ...

Page 34: ...r AUX mode Counter Display Z pg 12 Clock Display Z pg 6 1 Symbolic Mode Indicators STILL SLOW RECORD RECORD PAUSE PLAY FF REW VARIABLE SEARCH 1 Power Cord Z pg 4 2 ANT IN Connector Z pg 4 3 Lithium Battery Compartment Z pg 4 4 Channel 3 4 Switch Z pg 4 5 VIDEO AUDIO Output Connectors Z pg 29 The HR J4005UM has only one AUDIO output connector 6 RF OUT Connector Z pg 4 SP VCR 8 4 0 6 15dB NORM 7 1 3...

Page 35: ...teries provided in the direction indicated under the battery cover 3 Replace the cover How To Use The remote control can operate most of your VCR s func tions 1 Point the remote control toward the sensor window 2 Press the appropriate operation button 3 The maximum operating distance of the remote control is about 8 m Operating JVC TVs To operate your TV while holding down TV press the correspondi...

Page 36: ...sh battery actual performance may differ ACCESSORIES Provided accessories RF cable Infrared remote control unit Lithium battery CR2025 Conversion plug AA battery x 2 Specifications shown are for SP mode unless otherwise specified E O E Design and specifications subject to change without notice Failure to heed the following precautions may result in damage to the VCR remote control or video cassett...

Page 37: ...MEMO ...

Page 38: ...MEMO ...

Reviews: