background image

2

 EN

Dear Customer,

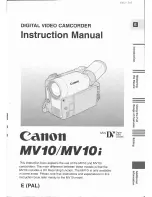
Thank you for purchasing the JVC Compact VHS camcorder. Before use, please read the safety informa-
tion and precautions contained in the following pages to ensure safe use of your new camcorder.

Warning on lithium battery

The battery used in this device may present a
fire or chemical burn hazard if mistreated. Do
not recharge, disassemble, heat above 100°C or
incinerate.
Replace the battery with Maxell, Panasonic
(Matsushita Electric), Sanyo or Sony CR2025;
use of another battery may present a risk of fire
or explosion.

n

Dispose of used battery promptly.

n

Keep away from children.

n

Do not disassemble and do not dispose of in
fire.

PAL

n

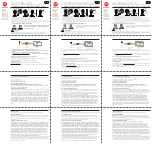
Camcorder is designed exclusively for the VHS-C video cassette. Only cassettes marked VHS-C can be
used with this unit.

n

HQ VHS is compatible with existing VHS equipment.

SAFETY PRECAUTIONS

Using This Instruction Manual

• All major sections and subsections are listed in the Table Of Contents (

Z

 pg. 3).

• Notes appear after most subsections. Be sure to read these as well.
• Basic and advanced features/operation are separated for easier reference.

It is recommended that you . . .

.... refer to the Index (

Z

 pg. 42 – 43) and familiarize yourself with button locations, etc. before use.

.... read thoroughly the Safety Precautions that follow and cautions (

Z

 pg. 45, 46). They contain extremely

important information regarding the safe use of your new camcorder.

CAUTIONS:

n

To prevent shock, do not open the cabinet.
No user serviceable parts inside. Refer
servicing to qualified personnel.

n

When you are not using the AC Power
Adapter/Battery charger for a long period of
time, it is recommended that you disconnect
the power cord from AC outlet.

WARNING:
TO PREVENT FIRE OR SHOCK

HAZARD, DO NOT EXPOSE

THIS UNIT TO RAIN OR

MOISTURE.

This camcorder is designed to be used with
PAL-type colour television signals. It cannot be
used for playback with a television of a different
standard. However, live recording and LCD
monitor/viewfinder playback are possible
anywhere. Use the BN-V12U/V22U/V25U
battery packs and, to recharge them, the
provided multi-voltage AC Power Adapter/
Charger. (An appropriate conversion adapter
may be necessary to accommodate different
designs of AC outlets in different countries.)

NOTES:

The rating plate (serial number plate) and
safety caution are on the bottom and/or the
back of the main unit.

The rating plate (serial number plate) of the
AC Power Adapter/Charger is on its bottom.

This unit is produced to comply with Standard
IEC Publ. 65.

Summary of Contents for GR-AXM368EG

Page 1: ...dex Z pg 42 43 and familiarize yourself with button locations etc before use read thoroughly the Safety Precautions that follow and cautions Z pg 45 46 They contain extremely important information regarding the safe use of your new camcorder CAUTIONS n To prevent shock do not open the cabinet No user serviceable parts inside Refer servicing to qualified personnel n When you are not using the AC Po...

Page 2: ...ent 10 Viewfinder Adjustment 10 Shoulder Strap Attachment 11 Tripod Mounting 11 RECORDING 12 Basic Recording 12 Basic Features 16 Advanced Features 20 PLAYBACK 34 Basic Playback 34 Features 35 Using The Cassette Adapter 37 Basic Connections 38 TAPE DUBBING 39 TROUBLESHOOTING 40 INDEX 42 Controls 42 Connectors 42 Indicators 42 Other Parts 42 LCD Monitor Viewfinder Indications 44 CAUTIONS 45 SPECIFI...

Page 3: ...SH function that allows you to fully discharge the battery pack before recharging Perform the REFRESH function after no less than 5 chargings To discharge the battery attach the battery pack to the adapter as shown in the above illustration Then push REFRESH The REFRESH indicator lights when discharging starts and goes out when discharging is complete BATT PACK CHARGE DISCHARGE BN V12U approx 1 hr...

Page 4: ...isharging is complete detach the battery from the AC Power Adapter Charger to store it High temperatures can damage the battery pack so use only where good ventilation is available Don t allow it to discharge in container such as a bag If you stop recharging or discharging part way through make sure to remove the battery pack before unplugging the adapter s AC cord Remove the battery pack from the...

Page 5: ...ock battery compartment cover while pressing the release tab REMOVE BATTERY when replacing 3 Insert a pointed non metallic object between the battery and the compartment A and pull the battery out INSERT BATTERY 4 Ensure that the plus side is up and insert a CR2025 lithium battery and push it in CLOSE COVER 5 Close the compartment cover until it clicks in place NOTE See SAFETY PRECAUTIONS Z pg 2 f...

Page 6: ...nging the date go to step 4 SET DATE 3 Rotate the MENU Jog Dial to move the highlight bar to the item you want to set and then press it When the setting begins blinking rotate the MENU Jog Dial until the correct setting appears and then press it The setting stops blinking Repeat this procedure until you re satisfied with the Date settings YEAR MONTH and DAY SET TIME 4 Rotate the MENU Jog Dial to m...

Page 7: ... time Z pg 13 is correct only if the correct tape length has been selected Once you have set the tape length it remains un changed even if the Select Dial is returned to AUTO LOCK Recording Mode Setting Set depending on your preference SET RECORDING MODE 1 First set the Power Switch to CAMERA Press SP LP Button for more than 1 second SP Standard Play provides higher picture and sound quality and i...

Page 8: ...ng the LCD monitor while the cassette holder is still open may cause damage to the LCD monitor A cassette holder can t be opened unless a power supply is attached Make sure that the tape is not slack when loading the cassette If there is any slack turn the gear on the cassette in the direction of the arrow to take up the slack Make sure the Erase Protection tab is in the position that allows recor...

Page 9: ...UST STRAP LENGTH 3 Adjust so your thumb and fingers can easily operate the Recording Start Stop Button and Power Zoom Button Refasten the Velcro strip Viewfinder Adjustment POSITION VIEWFINDER 1 Adjust the viewfinder manually for best viewability see illustration to the left SELECT MODE 2 Set the Power Switch to CAMERA ADJUST DIOPTRE 3 Turn the Dioptre Adjustment Control until the indications in t...

Page 10: ... mounting socket and stud hole Then tighten the screw Shoulder Strap Attachment ATTACH STRAP 1 Following the illustration at left thread the strap through the top of the eyelet 1 then fold it back and thread it through the keeper 2 and then through the buckle 3 Repeat the procedure to attach the other end of the strap to the other eyelet 4 making sure the strap isn t twisted ADJUST LENGTH 2 Adjust...

Page 11: ...ed and locked Shooting while watching the viewfinder ENTER RECORD STANDBY MODE 2 Make sure the LCD monitor is closed and locked Slide the LENS COVER Open Close Switch to open the lens cover then set the Power Switch to CAMERA The power indicator lights and the camcorder enters the Record Standby mode The scene you re aimed at appears on the viewfinder screen with the word PAUSE superimposed upon i...

Page 12: ...when the tape reaches its end and the power goes off automatically if left in this condition for 5 minutes TAPE END also appears when a cassette whose tape is already at its end is loaded If the Record Standby mode continues for 5 minutes without performing Zoom or any other operations the camcorder s power shuts off automatically Set the Power Switch to POWER OFF and then back to CAMERA to turn t...

Page 13: ... viewability Z pg 15 and press the Recording Start Stop button REC appears in the LCD monitor while recording is in progress STOP RECORDING 4 Press the Recording Start Stop Button again to stop recording The camcorder re enters the Record Standby mode NOTES When you use the LCD monitor outdoors in direct sunlight the LCD monitor may be difficult to see If this happens we recommend that you use the...

Page 14: ...erson you shoot can view himself herself in the LCD monitor and you can even shoot yourself while viewing your own image in the LCD monitor TILT LCD MONITOR UPWARD 1 Open the LCD monitor and tilt it upward to 180 degrees so that it faces forward When the LCD monitor is tilted upward to an angle of over approx 105 degrees the monitor image is inverted vertically and the viewfinder also switches on ...

Page 15: ... while 2 speed levels FAST SLOW can be selected in the ZOOM SPEED Menu depending on the overall speed you prefer The combinations of zoom speeds are shown in the chart below Changing the ZOOM SPEED in the Menu 1 Set the Select Dial to any position except AUTO LOCK and press the MENU Jog Dial The Menu Screen appears 2 Rotate the MENU Jog Dial to move the highlight bar to ZOOM SPEED then press it Th...

Page 16: ...e for the next shot NOTE Distortion may occur at start of playback This is normal FEATURE Retake PURPOSE To re record certain segments OPERATION 1 Make sure the camcorder is in the Record Standby mode 2 Press either RETAKE button to reach the start point for new recording Pressing F forwards the tape and pressing R reverses it 3 Press Recording Start Stop Button to start recording NOTE Noise may a...

Page 17: ...tandby press 5SEC REC 5S appears and 5Sec Rec is reserved 2 Press Recording Start Stop Button Recording starts and after 5 second recording is finished the camcorder reenters the Record Standby mode automatically n To cancel the 5Sec Rec function press 5SEC REC again so that 5S disappears NOTE The Fader Z pg 22 cannot be activated by pressing 5SEC REC 5SEC REC LCD monitor or viewfinder 5Sec Rec mo...

Page 18: ... as shown in the illustration to the left n You should have already performed the Date Time Setting procedure Z pg 7 If you haven t do so first NOTES DISPLAY The selected display can be recorded If you don t want to record the display select the Date off mode before shooting If you want to delete the display during shooting press DATE TIME To recall the display engage the Record Standby mode and p...

Page 19: ...Mode Lock or Auto Mode Release mode is selected only the mode s name is displayed Then the name disappears and the mode is activated NOTES Only one effect can be engaged at a time The screen becomes slightly reddish when the Fader Z pg 22 is used in the Sepia mode The screen becomes slightly dark in the High Speed Shutter mode Use in well lit situations In the High Speed Shutter or Sports modes pi...

Page 20: ...are on the subject Sepia SEPIA Sepia The scene being shot is recorded in sepia tinted reddish brown monochrome giving the effect of an older movie Use together with Wide Z pg 22 for the authentic look of a classic Hollywood movie Dial LCD monitor Mode symbol Viewfinder indication Twilight TWILIGHT Twilight Dusk twilight scenery fireworks etc look more natural and dramatic The following happens whe...

Page 21: ...der is used with Sepia Z pg 21 With the Electronic fog filter mode Z pg 21 engaged the image fades in out to a white screen LCD monitor or viewfinder After 2 sec EFFECT WIDE Wide mode LCD monitor or viewfinder Wide This feature allows you to record black bars at the top and bottom of the screen to produce a cinema like wide screen effect ENGAGE WIDE MODE 1 Press WIDE To restore normal screen press...

Page 22: ...subject in a dimly lit environ ment When it is more convenient to shoot with a less coarse picture although the subject becomes slightly dark OFF Allows you to shoot dark scenes with no picture brightness adjustment After 2 sec SUPER LOLUX TITLE Instant Titles The camcorder has eight preset titles in memory You can superimpose one of them above a previously stored title as shown in the illustratio...

Page 23: ...he screen Repeat for additional characters max 18 To select the location of the next character rotate the MENU Jog Dial to make BACK or NEXT at the bottom of the screen blink then press it repeatedly to move the blinking cursor underneath the desired location Rotate the MENU Jog Dial when you are done and the blinking cursor returns to the character grid END CHARACTER SETTING 4 Rotate the MENU jog...

Page 24: ...HARACTER Z pg 24 If you select JLIP ID NO press the MENU Jog Dial so that the number blinks then rotate it until the desired number appears and press it Then rotate the MENU Jog Dial to move the highlight bar to EXIT If you select any other functions rotate the MENU Jog Dial to move the highlight bar to the desired setting If you decide you want to return to the previous setting rotate the MENU Jo...

Page 25: ...the zoom position the lens may go out of focus Allows you to set the tape length depending on the tape used Z pg 8 This camcorder s Automatic Colour Temperature system senses the colour temperature of the ambient lighting for automatic white balance adjustment However precise colour adjustment is not possible under the following conditions When an object is in various shades of the same colour Whe...

Page 26: ...actory setting is 07 Automatic demonstration will not take place Demonstrates certain functions such as the Fader Instant Titles etc When DEMO MODE is set to ON and the Menu Screen is closed demonstration starts NOTES When a tape whose Erase Protection tab is in the position that allows recording is loaded in the camcorder demonstration is not available By turning off the camcorder or inserting a ...

Page 27: ...tical patterns that are regularly repeated When the scene is affected by sunbeams or light reflecting off the surface of a body of water When shooting a scene with a high contrast background The low contrast warning appears NOTES If the lens is smeared or blurred accurate focusing is not possible Keep the lens clean wiping with a piece of soft cloth if it gets dirty When condensation occurs wipe w...

Page 28: ...To nearer subject Rotate the MENU Jog Dial downward appears and blinks Go to step 5 END ADJUSTMENT OF FOCUS 5 Press the MENU Jog Dial The Menu Screen reappears and the highlight bar is placed on MENU END CLOSE MENU 6 Press the MENU Jog Dial The Menu Screen disppears and reappears to indicate the focus is locked NOTES To return to Auto Focus select AUTO in step 3 To re adjust Manual Focus repeat th...

Page 29: ...To darken the image Rotate the MENU Jog Dial downward The exposure control level counter decreases maximum 06 Go to step 5 END ADJUSTMENT OF EXPOSURE 5 Press the MENU Jog Dial The Menu Screen reappears and the highlight bar is placed on MENU END CLOSE MENU 6 Press the MENU Jog Dial The Menu Screen disappears and the exposure control level counter reappers to indicate the exposure is adjusted NOTES...

Page 30: ...ent colour temperatures PREPARE WHITE OBJECT 1 Point the camcorder at a white flat object such as a sheet of white paper SELECT MWB 2 Follow step 1 through 3 of the above select MWB MEMORIZE WHITE BALANCE 3 Press the MENU Jog Dial until MWB begins blinking MWB blinks while the white balance is being stored in memory then the Menu Screen reappears when memorization is complete CLOSE MENU 4 Press th...

Page 31: ...Dial The Menu Screen reappears and the highlight bar is placed on MENU END CLOSE MENU 4 Press the MENU Jog Dial START DELAYED RECORDING 5 Press the Recording Start Stop Button When the selected time has elapsed recording begins automatically To Cancel Self Timer Before the recording begins press the Recording Start Stop Button to display PAUSE then set INT TIME in the Menu Screen to OFF MENU MENU ...

Page 32: ... Time Lapse mode is deactivated Self Timer Animation and Time Lapse are cancelled when the power is shut off or when the cassette is ejected Time Lapse You can record sequentially at preset time spans Leaving the camcorder aimed at a specific subject you can record subtle changes over an extended period of time NOTE Make sure the camcorder is in the Record Standby mode and the recording mode is se...

Page 33: ...onitor switches on and the viewfinder switches off automatically to save power The playback picture can also be viewed in the viewfinder with the LCD monitor shut or on a connected TV Z pg 38 Camcorder operation is the same as described in this section You can also view the playback picture on the LCD monitor with it flipped over and retracted LCD monitor viewfinder indications The indication mark...

Page 34: ... from the speaker Tracking This function can be used to eliminate noise bars that appear on screen during playback Initial setting is Auto Tracking Manual Tracking is also available ACTIVATE MANUAL TRACKING 1 Press the MENU Jog Dial during playback mode Keep rotating it until noise bars disappear To return to Auto Tracking press the MENU Jog Dial AT blinks When Auto Tracking finishes the indicatio...

Page 35: ... appear and pictures may become monochrome or darken in Shuttle Search This is normal FEATURE Counter Memory Function PURPOSE To make it easier to locate a specific tape segment OPERATION 1 Press COUNTER R M and hold for more than 1 second The counter resets to 0 00 00 2 Press COUNTER R M for less than 1 second M appears 3 After recording or playback press STOP then REW The tape automatically stop...

Page 36: ...ad the cassette adapter into the VCR and play the tape back as you would any other REMOVE CASSETTE FROM ADAPTER 4 Slide the latch and the compartment door opens automatically This may take around 10 seconds Do not attempt to force the adapter open Then insert your finger in the hole on the underside of the adapter as shown in the illustration to the left push up and remove the cassette NOTES Durin...

Page 37: ... connectors on the camcorder and those on the TV SELECT MODE 2 Set the TV to its VIDEO or AV mode as specified in its instructions Connection To A TV With NO A V Input Connectors Playback ONLY NOTE Use the optional RF V5E RF unit Refer to the RF V5E instruction manual for connection procedure NOTES It is recommended to use the AC Power Adapter Charger as the power supply instead of the battery pac...

Page 38: ...r s Play mode to find a spot just before the edit in point Once it s reached press PAUSE on the camcorder START EDITING 5 Press PLAY on the camcorder and engage the VCR s Record mode STOP EDITING TEMPORARILY 6 Engage the VCR s Record Pause mode and press PAUSE on the camcorder EDIT MORE SEGMENTS 7 Repeat steps 4 through 6 for additional editing then stop the VCR and camcorder when finished VCR Rec...

Page 39: ...completely discharged Remove the cassette and disconnect the power source then after a few minutes try turning the power back on If it still doesn t come on consult your nearest JVC dealer Make sure the Erase Protection tab is in the position that allows recording If not slide the tab Some cassettes have removable tabs If the tab has been removed cover the hole with adhesive tape The camcorder Pow...

Page 40: ...s This is not a defect of the camcorder The light used to illuminate the LCD monitor causes it to be hot Close the LCD monitor to turn it off or set the Power Switch to OFF and let the unit cool down The LCD monitor is made with high precision technology However black spots or bright spots of light red green or blue may appear constantly on the LCD monitor These spots are not recorded on the tape ...

Page 41: ...42EN INDEX 3 2 p Q i T Y o 1 q W w e r t R u y E U 0 8 9 7 4 5 6 ...

Page 42: ...ial Z pg 35 VOLUME Dial Z pg 35 Connectors q DC IN Jack Z pg 5 The jacks w to t are located beneath the jack cover w J terminal JLIP Joint Level Interface Protocol Connector It is used to connect the camcorder to a device such as a personal computer For further detail consult your nearest JVC dealer JLIP controlled editing from camcorder to VCR is not possible if the VCR is not equipped with a J t...

Page 43: ...t on again the indication should disappear 1 Cassette Warning Tape Remaining Time Z pg 13 When no cassette is inserted the cassette warning blinks When Erase Protection tab is not in the position that allows recording the cassette warning lights Otherwise the tape remaining time is displayed and the tape remaining time warning blinks when the tape is about to reach its end When the Power Switch is...

Page 44: ... to 30 C Recharging time is based on room temperature of 20 C The lower the temperature the longer recharging takes CAUTIONS Terminals Cassettes To properly use and store your cassettes be sure to read the following cautions 1 During use make sure the cassette bears the VHS C mark be aware that recording onto prerecorded tapes automatically erases the previously recorded video and audio signals ma...

Page 45: ...ng a cold room under extremely humid conditions or in a place directly subjected to the cool air from an air conditioner Moisture on the head drum can cause severe damage to the video tape and can lead to internal damage to the camcorder itself Serious malfunctioning If malfunctioning occurs stop using the unit immediately and consult your local JVC dealer For Your Maintenance 1 After Use 1 Set th...

Page 46: ... Manual adjustment LCD MONITOR Size 3 diagonally measured LCD system LCD TFT active matrix system VIDEO Output 1 Vp p 75 ohms unbalanced via VIDEO OUT connector AUDIO Output 8 dBs 1 k ohm via AUDIO OUT connector AC POWER ADAPTER BATTERY CHARGER AA V15EG Power requirement AC 110 V to 240 V 50 60 Hz Power consumption 23 W Output Charge DC 8 5 V 1 3 A VTR DC 6 3 V 1 8 A Charging system Constant curre...

Reviews: