


- 1 -
XC4697
Manual
Introduction
:
XC4697 is a USB 3.0 enabled dual-SATA hard drive
enclosure. It supports simultaneous use of two 2.5” or 3.5”
SATA hard disk for both data read and data write. It also
backward compatible with USB 2.0 and USB 1.1. The
maximum transfer speed of USB 3.0 can reach 5Gbps. The
actual transfer speed of XC4697 is 400M/s.It supports Offline
Clone, which is able to copy data and system files from Source
HDD to Target HDD completely via finger touch. XC4697
provides high storage capacity, high data transfer rate, and best
data protection.
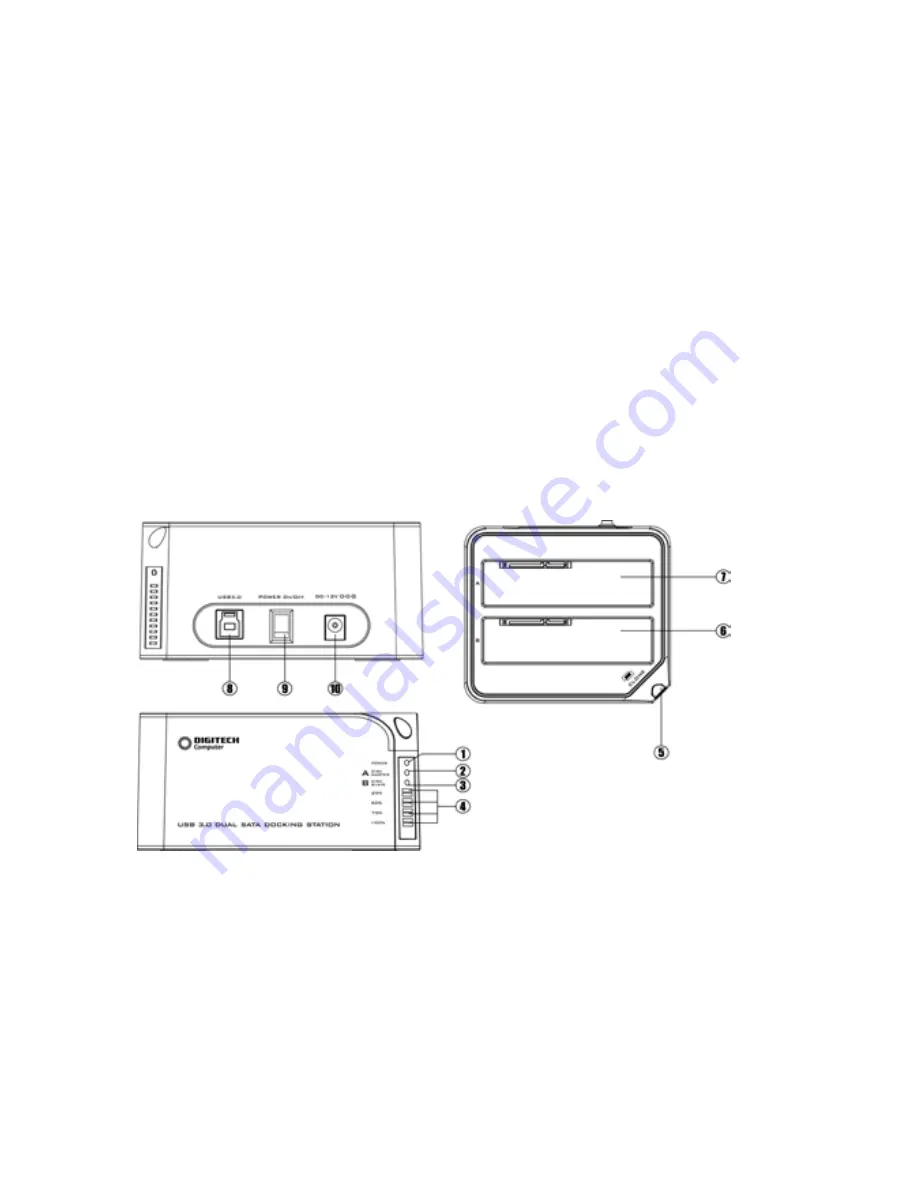
Function Chart
:
1
、
Power indicator 2
、
Bay ‘A’ indicator 3
、
Bay ‘B’ indicator
4
、
Clone processing indicator 5
、
Clone button 6
、
Bay ‘B’
7
、
Bay ‘A’ 8
、
USB3.0 input 9
、
Power switch (ON/OFF)
10
、
DC input
Summary of Contents for XC4697
Page 7: ...7 c Click Install for installation d Installation progress is showed...
Page 9: ...9 b Clone drive activated please click Start c Press start to proceed with Clone...
Page 10: ...10 d Clone progress is showed e Click OK once clone is finished...
Page 13: ...13 c Next d Base on your need and click Next...
Page 15: ...15 g Select quick format to format the new partition h Click finish...
Page 16: ...16 i Partition completed the new partition can be found...


