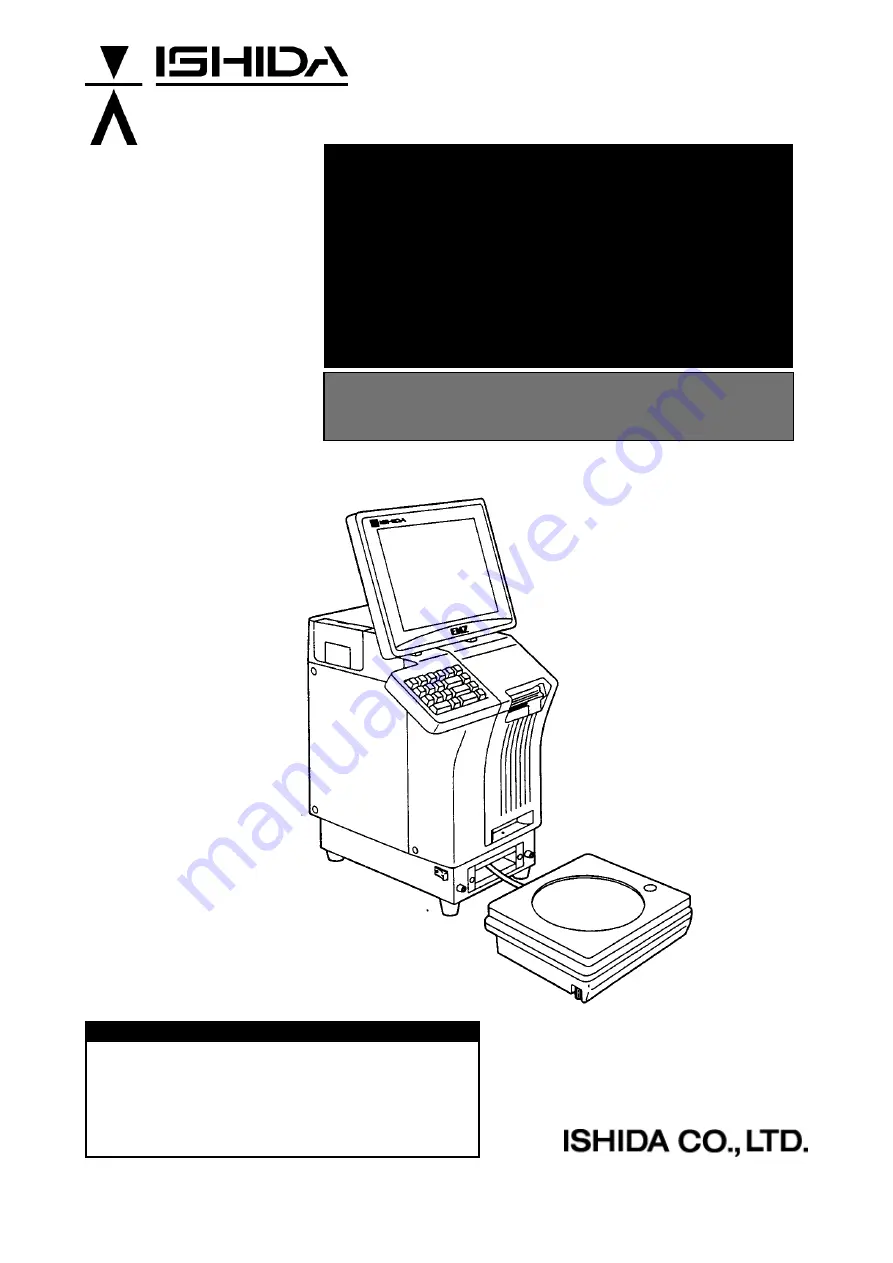
background image


IP-EMZ 

Operation Manual 

COUNTRY: CAN. USA. EU.    2008.09.10 


IMPORTANT 

  Read this manual thoroughly, and do not perform 

installation, operation, maintenance, or inspection 
unless you fully understand all of the contents. 

  Keep this manual in a safe place where you can refer 

to it easily while installing, operating, and carrying out 
maintenance or inspections. 

 
                                                                                         109167

Summary of Contents for IP-EMZ

Page 1: ...anual thoroughly and do not perform installation operation maintenance or inspection unless you fully understand all of the contents Keep this manual in a safe place where you can refer to it easily while installing operating and carrying out maintenance or inspections 109167 ...

Page 2: ...on may be reproduced stored in a retrieval system or transmitted in any form or by any means mechanical electronic photocopying recording or otherwise without prior written permission of ISHIDA The information contained in this manual is subject to change without notice ...

Page 3: ... Manual 1 1 Contents 1 1 SPECIFICATIONS 2 1 2 NAME OF EACH PART 4 1 3 OUTER DIMENSIONS 5 1 4 PREPARATION FOR INSATALLATION 6 1 5 PRECAUTIONS FOR INSTALLATION 7 1 6 HARDWARE INSTALLATION 8 1 7 FINALIZING INSTALLATION 10 BEFORE USING MACHINE 1 ...

Page 4: ... sec 11 Effective print size 78mm 12 Label size 12 1 Label width 30 80mm 12 2 Label length 30 150mm 12 3 Backing paper width 32 82mm 13 Label diameter 13 1 Core inner diameter φ 76mm 13 2 Max outer diameter φ 2240mm 14 Keys 14 1 Touch panel 212mm 159mm 14 2 Stroke key 24 keys 15 I O Ethernet 1ch RS 232C 2ch PCMCIA 2ch I2NET 2ch ISHIDA Original Protocol 16 Program storage medium 16 1 Flash ROM 1MB ...

Page 5: ...s 28 items x 2 pages 17 22 Classification preset keys 36 types 5 ranges type 18 Barcode print 19 POS code system NON PLU 13 digits NON PLU 8 digits PLU 13 digits PLU 8 digits 20 POS types 5 digit standard code 6 digit code including check price 6 digit code including flag 5 digit code including check price 6 digit code 5 digit price 21 Durability 21 1 Number of label issues 16 2 million labels lab...

Page 6: ...anual 1 2 NAME OF EACH PART 1 2 1 FRONT VIEW Touch panel Stroke keys Level gauge Scale unit Power switch Level adjuster Label outlet Label cassette Brightness adjustment dial Lighter Darker 1 2 2 REAR VIEW Rear Connectors Located in the rear cover ...

Page 7: ...Chapter 1 INSTALLATION IP EMZ Operation Manual 1 5 1 3 OUTER DIMENSIONS Unit mm ...

Page 8: ...dy Scale unit Grounding cable Tool Screw driver User s manual Weight 500g Cleaning pen NOTE Parts are fixed with adhesive tapes so as not to move when transported Remove these tapes when unpacking 1 4 2 THINGS TO BE PREPARED Weight 6kg 15kg 30lb IF 21FD 3 5 inch 2DD floppy disk in which the user s data is recorded I2NET cable D sub 9 pin modular Labels ...

Page 9: ... not leave screws or other foreign objects in the machine after performing routine maintenance since this can cause major damage to the machine when the electrical switch is turned on Always remove wires by holding the connector and pulling to disconnect Do not disconnect by pulling on the wires themselves since this may cause a wire to snap or damage the connection Before disassembling or adjusti...

Page 10: ... on state may cause damage 3 Turn the level adjuster so that the unit is horizontally installed To install the scale unit horizontally turn the level adjuster until the bubble locates at the center of circle of the level gauge If this adjustment is not performed accurately a weighing error may occur Scale unit Bubble Circle Level adjuster Level gauge 4 Make sure that the machine is grounded at the...

Page 11: ...l printer I2NET OPTION1 Modular jack IF 21FD I2NET INLINE Dsub 9 pin Journal printer RS 232C 8 Fix the harnesses NOTE Nylon clamps to fix harnesses are not attached Prepare the nylon clamps beforehand with their sizes according to the number of the connected harnesses Fig 1 Rear Connectors Located in the rear cover 9 Load labels to be used by the user Refer to Label Replacement in the User s Manua...

Page 12: ... that the difference between the center and four corners is within 1d 1g 15kg Place weighs Approximately 6kg but not heavier on the center and four corners of the weighing platter and confirms that the difference between the center and four corners is within 1d 2g 30lb Place weighs Approximately 15lb but not heavier on the center and four corners of the weighing platter and confirms that the diffe...

Page 13: ... UP 2 4 2 3 TENTATIVE UNIT PRICE CHANGE 2 8 2 4 TENTATIVE CHANGE TO FIXED PRICE 2 9 2 5 MARKDOWN PRICE 2 10 2 6 MANUAL LABELING 2 12 2 7 DATE AND TIME CHANGE 2 13 2 8 CHECKING PRINT ITEMS FOR LABELING 2 16 2 9 MEMO PRESET BUTTON 2 17 2 10 FUNCTION KEYS 2 21 IP EMZ Operation Manual page 2 1 ...

Page 14: ...et Keys Main function keys Changes the data when pressed after numeric entry Also displays the print selection screen when touched without numeric entry Displays the markdown price print selection screen Changes the data when pressed after numeric entry Also displays the pack date setting screen when touched without numeric entry Performs the scale zero calibration Numeric function keys Changes th...

Page 15: ...Chapter 2 NORMAL MODE 2 1 2 EXAMPLE OF WEIGHING PLU SCREEN 2 1 3 EXAMPLE OF FIXED PRICE PLU SCREEN Displays the upper lower weight limit setting screen when pressed IP EMZ Operation Manual page 2 3 ...

Page 16: ...ess the touch panel with your finger Pressing the panel using pointed objects such as fingernails or mechanical pencils may damage the touch panel 2 Enter a PLU number and press the PLU stroke key or PLU No field on the screen EXAMPLE Call up PLU No 131 3 The designated PLU screen is displayed page 2 4 IP EMZ Operation Manual ...

Page 17: ...cts such as fingernails or mechanical pencils may damage the touch panel 2 Press the desired category button to make a selection EXAMPLE Call the PLU No 131 Select Beef BNLS Shoulder Steak under the category BEEF 3 The Category Preset List screen is displayed Press the Select Beef BNLS Shoulder Steak field to make a selection 4 The designated PLU screen is displayed IP EMZ Operation Manual page 2 ...

Page 18: ...using pointed objects such as fingernails or mechanical pencils may damage the touch panel 2 Press the PLU No field on the screen 3 The Category Preset List screen is displayed Use the V and U buttons to turn over the screen until you find the desired PLU and press the desired field to make a selection EXAMPLE Call the Select Beef BNLS Shoulder Steak page 2 6 IP EMZ Operation Manual ...

Page 19: ...ted objects such as fingernails or mechanical pencils may damage the touch panel 2 Press the PRESET button 3 The Memo Preset screen is displayed 4 Press the desired Memo Preset button to make a selection EXAMPLE Call the SLICED BEEF using Memo Preset button 000004 OREGON GROUND BEEF 000005 CALIFORNIA GROUND BEEF 000006 UTAH GROUND BEEF 000007 SLICED BEEF IP EMZ Operation Manual page 2 7 ...

Page 20: ... the selected PLU tentatively EXAMPLE Change the unit price from 6 50 to 4 80 tentatively 1 Make sure that the desired PLU screen is displayed 2 Enter a new unit price using numeric keys and press the U P stroke key Î The unit price has been changed to the new unit price tentatively page 2 8 IP EMZ Operation Manual ...

Page 21: ... the fixed price PLU tentatively EXAMPLE Change the unit price 6 50 to the fixed price 7 00 tentatively 1 Make sure that the desired PLU screen is displayed 2 Enter the fixed price using numeric keys and press the FIX stroke key Î The unit price has been changed to the new fixed price tentatively IP EMZ Operation Manual page 2 9 ...

Page 22: ...to PLU131 tentatively 1 Make sure that the desired PLU screen is displayed Lightly press the touch panel with your finger Pressing the panel using pointed objects such as fingernails or mechanical pencils may damage the touch panel 2 Press the M D PRICE field on the screen 3 The Markdown Price Mode Setting screen is displayed page 2 10 IP EMZ Operation Manual ...

Page 23: ...this button after numeric entry will register the discount rate in the markdown price field Special Unit Price Pressing this button after numeric entry will register the special unit price in the unit price field Unit Price Amount Discount Pressing this button after numeric entry will register the discount unit price in the unit price field Unit Price Percent Discount Pressing this button after nu...

Page 24: ...finger Pressing the panel using pointed objects such as fingernails or mechanical pencils may damage the touch panel 2 Press the U button to display the function key screen AUTO LABELING is usually displayed 3 Press the AUTO button to change the button display to MANUAL The button display will change between AUTO and MANUAL each time the button is pressed 5 Press the FEED stroke key to issue the l...

Page 25: ...e to Tray No 5 tentatively 1 Make sure that the desired PLU screen is displayed Lightly press the touch panel with your finger Pressing the panel using pointed objects such as fingernails or mechanical pencils may damage the touch panel 2 Press the PACK DATE or SHELF LIFE field on the screen 3 The Pack Date Setting screen is displayed IP EMZ Operation Manual page 2 13 ...

Page 26: ...not print the Pack Date 2 Pack Time Enter the Pack Time HHMM when you want to print a certain Pack Time X Press one of the following buttons Print the Pack Time Do not print the Pack Time 3 Pack Time Select Press one of the following buttons Select for printing the current time Select for printing a certain time page 2 14 IP EMZ Operation Manual ...

Page 27: ...1 9999 hours for Sell By Date X Press one of the following buttons Do not print the Sell By Time Print the Sell By Time 6 Shelf Life Enter the number of days 1 9999 days for Sell By Date X 7 Use By Enter the number of days 1 9999 hours for Sell By Date Press one of the following buttons Print the Pack Date Do not print the Pack Date IP EMZ Operation Manual page 2 15 ...

Page 28: ...ch panel 2 Press the PLU name display field 3 The PLU Information screen is displayed Check whether there are any missing items or mistakes for the selected PLU and make the necessary additions and corrections if any Item fields below the comment field can be registered by pressing the field after numeric entry When the field is pressed without numeric entry displays the list for each item 4 Press...

Page 29: ...screen Operation will become more efficient by registering the frequently called PLUs in these buttons Turns over the screen Aborts respective operation mode and returns to the normal display Changes the mode Truncates the PLU name Executes each mode operation and returns to the normal display IP EMZ Operation Manual page 2 17 ...

Page 30: ...mo Preset screen is displayed 3 Press the REGISTER button UND EF GROUND BEEF GROUND BEEF GROUND BEEF BEEF 010 CED GON EF The data will be overwritten when the registered Memo Preset button is pressed Registration can also be performed by pressing the Memo Preset button after entering the PLU number 4 The display changes to the Memo Preset Programming mode Press the Memo Preset button at the desire...

Page 31: ... 1 Press the PRESET button on the initial screen 2 The Memo Preset screen is displayed 3 Press the DELETE button BEEF BEEF BEEF 4 The display changes to the Memo Preset Delete mode Press the desired memo preset to be deleted EXAMPLE Delete the UTAH GROUND BEEF Memo Preset button 000004 OREGON GROUND BEEF 000005 CALIFORNIA GROUND BEEF 000006 UTAH GROUND BEEF 000007 SLICED BEEF IP EMZ Operation Manu...

Page 32: ...Chapter 2 NORMAL MODE 5 Press the CONFIRM button The deletion has been executed and the display returns to the normal screen page 2 20 IP EMZ Operation Manual ...

Page 33: ...s many convenient function keys Main function keys are located at the bottom of the screen and sub function keys on the Function Key screen Æ Numeric function keys Function keys Function keys Displays the Function Key screen IP EMZ Operation Manual page 2 21 ...

Page 34: ...Chapter 2 NORMAL MODE FUNCTION KEYS page 2 22 IP EMZ Operation Manual ...

Page 35: ...Chapter 2 NORMAL MODE IP EMZ Operation Manual page 2 23 ...

Page 36: ...after entering 0 POP number can be set when pressed after numeric entry To delete the setting press the button after entering 0 Coupon message number can be set when pressed after numeric entry To delete the setting press the button after entering 0 Front format number can be set when pressed after numeric entry To delete the setting press the button after entering 0 Image number can be set when p...

Page 37: ...Chapter 3 TOTAL MODE TOTAL MODE 3 CONTENTS 3 1 TOTAL MENU 3 2 3 2 DAILY ACCUMULATED TOTAL 3 3 3 3 HOURLY TRAY TOTALS 3 9 3 4 TOTAL CLEAR 3 15 Omni 4000ST User s Manual page 3 1 ...

Page 38: ...encils may damage the touch panel 1 Make sure that the initial screen is displayed Press the MENU button If a password has been set for entering Total Mode press the TOTALS button after password entry 6 digits 2 Main Menu screen is displayed Press the TOTALS button 3 Total Menu screen is displayed Returns to Main Menu screen page 3 2 Omni 4000ST User s Manual ...

Page 39: ...el with your finger Pressing the panel using pointed objects such as fingernails or mechanical pencils may damage the touch panel 1 Press the DAILY TOTAL or ACCUMULATED TOTAL button on the Total Menu screen 2 Daily Total Menu screen is displayed Press the Daily Grand Total button to select the desired report type The Daily Grand Total screen is displayed Omni 4000ST User s Manual page 3 3 ...

Page 40: ... such as fingernails or mechanical pencils may damage the touch panel 1 Press the DAILY TOTAL or ACCUMULATED TOTAL button on the Total Menu screen 2 Daily Total Menu screen is displayed Press the Sales per Department button to select the desired report type The Sales per Department Total screen is displayed page 3 4 Omni 4000ST User s Manual ...

Page 41: ...s such as fingernails or mechanical pencils may damage the touch panel 1 Press the DAILY TOTAL or ACCUMULATED TOTAL button on the Total Menu screen 2 Daily Total Menu screen is displayed Press the Sales by PLU button to select the desired report type The Sales by PLU Total screen is displayed Omni 4000ST User s Manual page 3 5 ...

Page 42: ...s the DAILY TOTAL or ACCUMULATED TOTAL button on the Total Menu screen 2 Daily Total Menu screen is displayed Press the Analysis by PLU button to select the desired report type 3 Analysis By PLU screen is displayed Set the number of items to be displayed by pressing SET in the Enter Report Size field after numeric entry Note Enter 0 to display all items and totalize them page 3 6 Omni 4000ST User ...

Page 43: ... a selection Displays and totalizes data in PLU number order Displays and totalizes data in price descending order Displays and totalizes data in weight descending order Displays and totalizes data in quantity descending order Displays and totalizes data in price ascending order Displays and totalizes data in weight ascending order Displays and totalizes data in quantity ascending order 6 Press th...

Page 44: ...0 35 10 5 UTAH GROUND BEEF 4 0 600 25 20 6 SLICE BEEF 28 5 740 200 90 7 SLICE BEEF SPECIAL 7 2 800 67 20 8 SLICE TEXAS BEEF 20 6 110 183 30 9 SLICE OREGON BEEF 12 3 604 108 12 10 Changes the screen for each classification type set on the Analysis BY PLU screen This is not usable when the classification type is set as No Analysis Returns to the previous screen Moves the cursor up and down Turns ove...

Page 45: ...Chapter 3 TOTAL MODE 3 3 HOURLY TRAY TOTALS This section explains about how to obtain hourly and tray totals in this machine Omni 4000ST User s Manual page 3 9 ...

Page 46: ...mechanical pencils may damage the touch panel 1 Press the HOURLY TRAY TOTALS button on the Total Menu screen 2 The Hourly Tray Totals screen is displayed Press the HOURLY TOTALS button on the screen Totals for each time zone screen Select the type of data to be 3 are displayed analyzed 64 8 6 78 10 4 123 16 5 131 17 5 92 12 3 88 11 7 Displays the hourly totals in rela on to the PLU quantities or p...

Page 47: ... the touch panel with your finger Pressing the panel using pointed objects such as fingernails or mechanical pencils may damage the touch panel 1 Press the HOURLY TRAY TOTALS button on the Total Menu screen 2 Press the HOURLY PLU TOTALS on the screen 3 The Hourly PLU Totals screen is displayed Call the desired PLU by pressing the PLU stroke key after numeric entry 0 0 0 0 0 0 0 0 0 0 0 0 0 0 0 0 0...

Page 48: ...ach time zone screen are displayed Select the type of data to be analyzed GROUND BEEF 0 0 0 0 0 0 8 4 8 12 7 3 6 3 6 11 6 6 23 13 9 31 18 7 48 29 0 26 15 7 165 55 120 397 29 H O U R LY P L U T O TA L S page 3 12 Omni 4000ST User s Manual ...

Page 49: ... 1 Press the HOURLY TRAY TOTALS button on the Total Menu screen 2 The Hourly Tray Totals screen is displayed Press the HOURLY WRAP TOTALS button to make a selection Totals for each time zone screen are displayed Omni 4000ST User s Manual page 3 13 ...

Page 50: ...Y TRAY 1 Press the HOURLY TRAY TOTALS button on the Total Menu screen 2 The Hourly Tray Totals screen is displayed Press the WRAP TOTALS BY TRAY button to make a selection Wrap Totals by Tray are displayed page 3 14 Omni 4000ST User s Manual ...

Page 51: ...The Total Clear screen is displayed Select the item from the accumulated totals Press the desired button to make a selection of the items to be deleted among DAILY TOTAL TIME ZONE TRAY TOTAL and PERIOD 3 Press the EXECUTE button to clear the selected total Delete confirmation screen is displayed Press EXECUTE to clear the selected items Omni 4000ST User s Manual page 3 15 ...

Page 52: ...Chapter 3 TOTAL MODE page 3 16 Omni 4000ST User s Manual ...

Page 53: ...3 PLU NAME REGISTRATION 4 15 4 4 EXTRA MESSAGE REGISTRATION 4 17 4 5 POP MESSAGE REGISTRATION 4 19 4 6 COUPON MESSAGE REGISTRATION 4 21 4 7 STORE NAME ADDRESS REGISTRATION 4 23 4 8 DEPARTMENT NAME REGISTRATION 4 26 4 9 CATEGORY PRESET REGISTRATION 4 28 4 10 PLU PRESET REGISTRATION 4 30 4 11 TEXT EDITING 4 31 PROGRAMMING MODE 4 ...

Page 54: ... COUPON MSG The coupon message can be registered EXTRA MESSAGE 2 The extra message 2 can be registered EXTRA MESSAGE 3 The extra message 3 can be registered STORE NAME The store name and address can be registered TRAY MESSAGE The tray data such as name size and weight can be registered DEPARTMENT The department name can be registered GROUP The group name can be registered PRESET KEYS The PLU data ...

Page 55: ... price fixed price tare weight register code POP number etc can be registered Register the PLU data after selecting the PLU field listed on the screen Moves the cursor up and down Displays PLU Data Registration screen Deletes the selected data Returns to Registration Menu screen Turns back the screen Turns over the screen ...

Page 56: ...tration screen is displayed Press the desired PLU filed to make a selection Or enter the desired PLU number 1 999999 using the numeric keys and press the PLU stroke key 3 Press the DETAIL button on the screen 4 PLU Data Registration 1 3 screen is displayed page 4 4 IP EMZ Operation Manual ...

Page 57: ...the screen Deletes the called PLU data The text edit screen is displayed Displays the called PLU name Also changes to the next registered PLU name when directly pressed REGISTRATION METHOD The table below is the summarized registration examples Select necessary items and make necessary registrations IP EMZ Operation Manual page 4 5 ...

Page 58: ...Chapter 4 PROGRAMMING MODE page 4 6 IP EMZ Operation Manual ...

Page 59: ...Chapter 4 PROGRAMMING MODE IP EMZ Operation Manual page 4 7 ...

Page 60: ...Chapter 4 PROGRAMMING MODE page 4 8 IP EMZ Operation Manual ...

Page 61: ...ON 2 3 SCREEN Saves the PLU data and returns to the previous screen Turns over the screen REGISTRATION METHOD The table below is the summarized registration examples Select necessary items and make necessary registrations IP EMZ Operation Manual page 4 9 ...

Page 62: ...Chapter 4 PROGRAMMING MODE page 4 10 IP EMZ Operation Manual ...

Page 63: ...Chapter 4 PROGRAMMING MODE IP EMZ Operation Manual page 4 11 ...

Page 64: ...N 3 3 SCREEN Saves the PLU data and returns to the previous screen Turns over the screen REGISTRATION METHOD The table below is the summarized registration examples Select necessary items and make necessary registrations page 4 12 IP EMZ Operation Manual ...

Page 65: ...Chapter 4 PROGRAMMING MODE IP EMZ Operation Manual page 4 13 ...

Page 66: ...Chapter 4 PROGRAMMING MODE page 4 14 IP EMZ Operation Manual ...

Page 67: ...tered simply by pressing the PLU NAME button on the Registration Menu screen Register the PLU name after calling the desired PLU 1 Press PLU NAME on the Registration Menu screen 2 Text edit screen is displayed Specify the desired PLU EXAMPLE PLU No 1 IP EMZ Operation Manual page 4 15 ...

Page 68: ... is displayed Enter the desired text using the keyboard on the screen GROUND BEEF 000 001 2046 4 Press the FIX button to confirm the text image 5 Press the RETURN button on the screen Save confirmation screen is displayed Press the EXECUTE button to save the data D BEEF page 4 16 IP EMZ Operation Manual ...

Page 69: ... the EXTRA MESSAGE button on the Registration Menu screen 2 Extra Message Registration screen is displayed Press the desired message field on the screen to make a selection Or enter the message number 1 999999 and press the PLU stroke key EXAMPLE Message No 1 3 Press the EDIT button 94 For character entry refer to section 4 12 ext Editing T 4 ext edit screen is displayed T Enter the desired text u...

Page 70: ...RAMMING MODE 5 Press the FIX button to confirm the text image 6 Press the RETURN button on the screen Save confirmation screen is displayed Press the EXECUTE button to save the data page 4 18 IP EMZ Operation Manual ...

Page 71: ...s the POP MESSAGE button on the Registration Menu screen 2 POP Registration screen is displayed Press the desired message field the screen to make a selection on r Or enter the message numbe 1 999 and press the PLU stroke key EXAMPLE Message No 1 3 Press the EDIT button 94 For character entry refer to section 4 12 ext Editing T 4 ext edit screen is displayed T Enter the desired text using the keyb...

Page 72: ...RAMMING MODE 5 Press the FIX button to confirm the text image 6 Press the RETURN button on the screen Save confirmation screen is displayed Press the EXECUTE button to save the data page 4 20 IP EMZ Operation Manual ...

Page 73: ...COUPON MESSAGE button on the Registration Menu screen 2 Coupon Message Registration screen is displayed Press the desired message field on the screen to make a selection Or enter the message number 1 999999 and press the PLU e key strok EXAMPLE Message No 1 3 ress the EDIT button P 94 For character entry refer to section 4 12 ext Editing T 4 ext edit screen is displayed T Enter the desired text us...

Page 74: ...RAMMING MODE 5 Press the FIX button to confirm the text image 6 Press the RETURN button on the screen Save confirmation screen is displayed Press the EXECUTE button to save the data page 4 22 IP EMZ Operation Manual ...

Page 75: ...Press the STORE NAME button on the Registration Menu screen For character entry refer to section 4 12 Text Editing 2 Store Name Address Registration screen for Store No 9999 is displayed The NAME field is automatically selected first When selecting a store number other than 9999 press to find the desired number or enter the store number 1 9999 and press the PLU stroke key EXAMPLE Store No 1 NAME S...

Page 76: ...ng the keyboard on the screen 000 001 096 0001 4 Press the FIX button to confirm the text image 5 Press the RETURN button on the screen Save confirmation screen is displayed Press the EXECUTE button to save the data 6 Press the ADDRESS field to make a selection and press the EDIT button on the screen NAME HYPER ISHIDA ADDRESS 1 2 94 9999 1 2 ...

Page 77: ... desired text using the keyboard on the screen 000 001 096 0001 8 Press the FIX button to confirm the text image 9 Press the RETURN button on the screen Save confirmation screen is displayed Press the EXECUTE button to save the data 10 Registered name and address appear on the screen NAME HYPER ISHIDA ADDRESS SHIGA 1 2 94 9999 ...

Page 78: ...MENT button on the Registration Menu screen 2 The Department Name registration screen is displayed 3 Press the desired department filed to make a selection when changing the text Or enter the desired department number 1 9999 and press the PLU stroke key Example Department No 2 4 Press the EDIT button on the screen when changing or creating the selected department name data page 4 26 IP EMZ Operati...

Page 79: ...try refer to section 4 12 Text Editing 5 Text edit screen is displayed Enter the department name using the keyboard on the screen 6 Press the RETURN button on the screen Press the EXECUTE button to save the data IP EMZ Operation Manual page 4 27 ...

Page 80: ... list to be registered to the index is displayed Refer to section 4 10 2 Registering Category Preset Keys from PLU List Deletes all the data in the selected index number 1 Press the CATEGORY PRESET button on the Registration Menu screen 2 Category Preset Registration screen is displayed Select the index to register page 4 28 IP EMZ Operation Manual ...

Page 81: ...an also be performed by pressing the preset key after numeric entry 4 The PLU Preset Registration screen is displayed Select the PLU to allocate from the list Specify the PLU to allocate with the cursor and press the allocation position key of the preset keyboard IP EMZ Operation Manual page 4 29 ...

Page 82: ...ursor down Turns over the next screen 1 Press the PRESET KEYS button on the Registration Menu screen PLU preset registration can also be performed by pressing the preset key after numeric entry 2 The Memo Preset Registration screen is displayed Select the PLU to allocate from the list Specify the PLU to allocate with the cursor and press the allocation position key of the preset keyboard page 4 30...

Page 83: ...e only when two color print specification is used Used to emphasize the characters Touching this key changes the key display in the following order Used to emphasize the characters This key is effective only when the two thermal heads are used Touching this key changes the key display in the following order Used to delete a character at the position where the cursor is positioned Used to delete a ...

Page 84: ...re text on the text display field Used to perform carriage return Used to select either lower case or upper case characters SHIFT ON Lower case characters SHIFT OFF Upper case characters Touching this key changes the key display in the following order 4 11 2 SHIFT ON OFF The SHIFT ON or SHIFT OFF button is used to select either lower case or upper case character Shift OFF Upper case character Shif...

Page 85: ...at the text edit screen is displayed Then enter the desired PLU number and press the PLU key on the operating console Example PLU No 5 2 Text edit screen for the PLU number 5 is called Enter the desired characters Example Roast Fillet Steak Edit the text as necessary 3 When the text editing is completed touch FIX to confirm the edited text image on the text display field Then touch RETURN to finis...

Page 86: ...Chapter 4 PROGRAMMING MODE 4 The confirmation screen appears on the display for saving Then touch EXECUTE to save the text page 4 34 IP EMZ Operation Manual ...

Page 87: ...he following procedure explains how to emphasize characters EMPHASIZING CHARACTERS FIRST Style 2 function is available only when two color thermal heads are used or 1 Touch to select one of the Style 1 functions or or or Example Reverse Touch STYLE 1 repeatedly until REVERSE appears on the key display 2 Enter the desired characters Example Roast Fillet Steak Touch FIX to confirm the edited text im...

Page 88: ...herwise enter the desired characters Example Roast Fillet Steak 2 Confirm that SELECT is selected on the screen If not selected touch INSERT to change the key display to SELECT 3 Select REVERSE by touching STYLE 1 repeatedly Example Reverse 4 Use and keys to select the characters to be emphasized page 4 36 IP EMZ Operation Manual ...

Page 89: ...played on the text display field Example Roast Fillet Steak 2 Touch ERASE on the screen to delete the entire text 4 11 6 BACK SPACING The following procedure is used to move the cursor back and delete a character if any 1 If you have misspelled press BACK SPACE on the screen to delete the character that has been lastly entered Example Roast Fillet Steal IP EMZ Operation Manual page 4 37 ...

Page 90: ...re is used to delete a character at the position where the cursor is placed 1 The displayed text is misspelled Example Roast Fillet Steak 2 Place the cursor at the character to be deleted Then touch DELETE on the screen to delete the character page 4 38 IP EMZ Operation Manual ...

Page 91: ...ere the cursor is placed 1 The displayed text is misspelled Example Roast Filet Steak 2 Confirm that INSERT is selected on the screen When not selected touch SELECT to change the key display to INSERT 3 Move the cursor to the position where the character to be inserted Then enter the character L IP EMZ Operation Manual page 4 39 ...

Page 92: ...d yellow If not touch the INPUT field first to declare that the numeric entry will be made Then enter the desired PLU number and press the PLU key on the operating console to designate the PLU file to which the original text is copied 2 Enter the original PLU number using the numeric keys and touch COPY on the screen 3 The copy confirmation screen appears on the display Then touch EXECUTE to copy ...

Page 93: ...Chapter 4 PROGRAMMING MODE 4 The text Roast Fillet Steak of the PLU No 5 is copied to the text display field of the PLU No 25 IP EMZ Operation Manual page 4 41 ...

Page 94: ......

Page 95: ...4 SANNO CHO SHOGOIN SAKYO KU KYOTO 606 8392 JAPAN PHONE 81 75 771 4141 FACSIMILE 81 75 751 1634 URL http www ishidajapan com Design and specifications are subject to change without notice Manual No 0000A ...

Reviews: