


Inclarity Communications Ltd, Swallow Place, Oxford Circus, London, W1B 2AF
United Kingdom
Aastra handset M560 expansion module
This guide provides information on the installation, configuration and use of the Aastra M560 expansion module, for use
with the Aastra 6755i and 6757i.
Model 560M
The M560 provides 10 softkeys in each column (totalling 20 keys) on the keypad. It also provides 3 keys at the bottom
left of the unit. These keys represent "Page 1", "Page 2", and "Page 3" of the LCD display. The M560 has 20 keys
available on each page (totalling 60 softkeys), but please note that system support is available for the first page of 20
buttons per module only, for Line Monitor usage.
The Expansion Module keys support the
Line Monitor
feature and are configured through SMT. Each key provides an
LED for indicating call status and uses the LCD for displaying key labels.
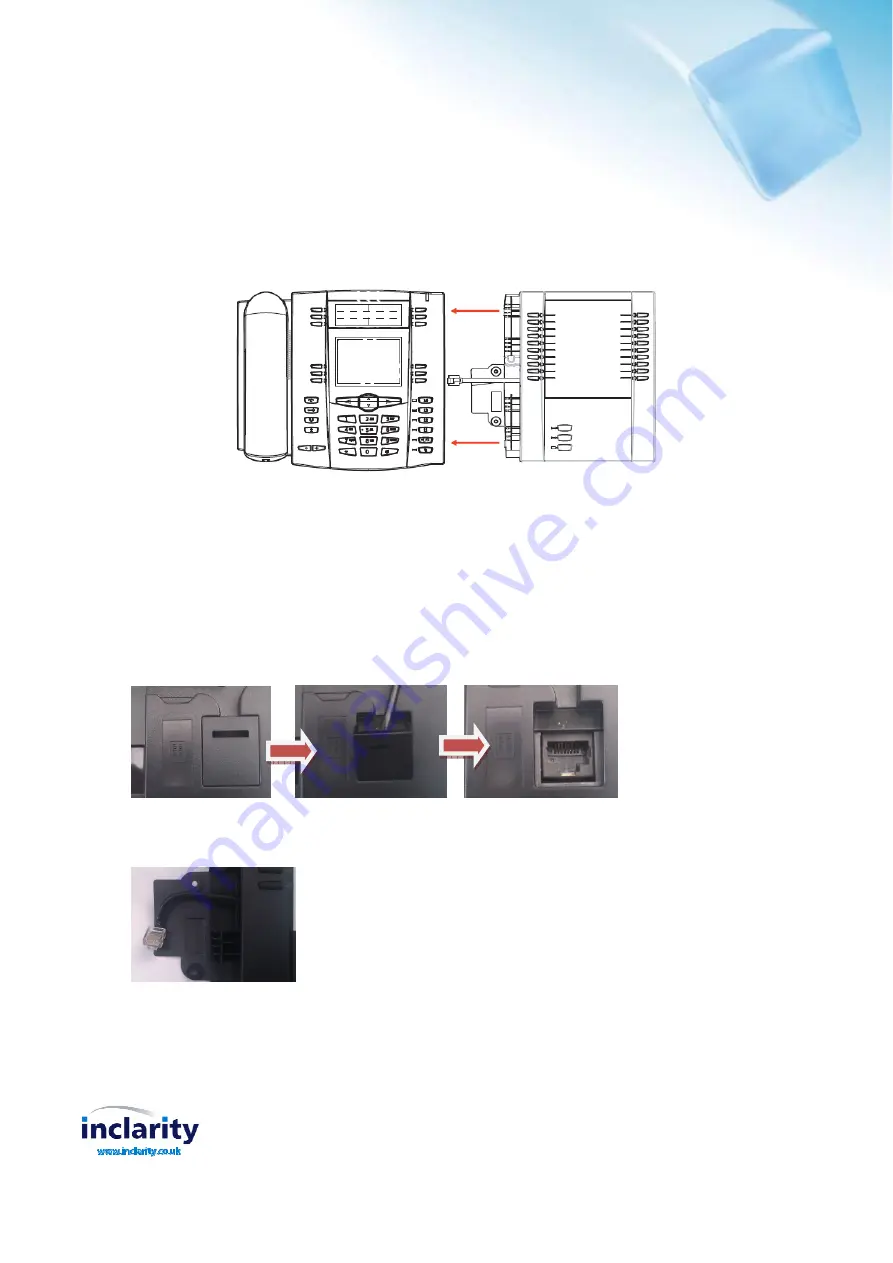
Installing the Modules
Use the following procedure to connect the M560 to your IP phone:
1. Disconnect the phone from the LAN and (if applicable) the mains power. Turn your phone over to show the bottom of
the phone. Remove the cable port cover plate as illustrated below.
2. Turn the expansion module over to show the bottom of the module.
3. Connect the RJ-45 cable that is connected to the module, to the RJ-45 port on the back of your phone as indicated in
the illustration below.
4. Secure the module to the phone using the screws provided and ensure that the appropriate foot stand is applied.
5. Turn over both units to sit face up on the desk with the expansion module sitting flush against the right side of the
phone. Once configured in SMT, power up the handset (the expansion module receives its power from the IP Phone).
Note
: Install additional modules as applicable using the same process. You must attach any additional module to the
right side of an existing module (piggy-backed).


