background image


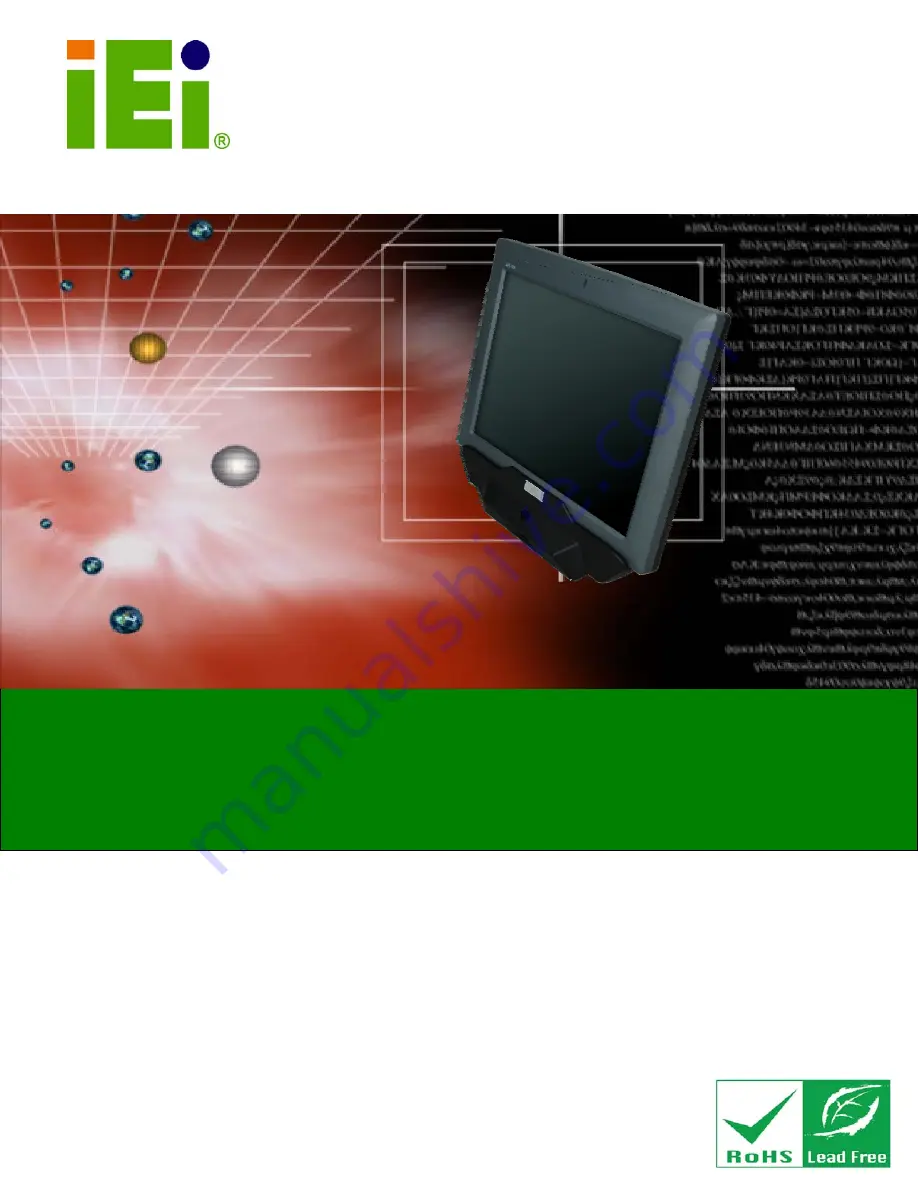
AFL2D-12A-N270-ECIL Panel PC 

Page I 

IEI Technology Corp. 

User Manual 

AFL2D-12A-N270-ECIL 

MODEL: 

AFL2D-12A-N270-ECIL Flat Panel PC 

Fanless All-in-one Panel PC with 1.6 GHz Intel® Atom™ Processor

TFT LCD, Capacitive Touch Screen,   

RS-232/422/485 and IP 64 Protection 

Rev. 1.00 - 24 February, 2010 

User Manual 

Summary of Contents for AFL2D-12A-N270-ECIL

Page 1: ...gy Corp User Manual AFL2D 12A N270 ECIL MODEL AFL2D 12A N270 ECIL Flat Panel PC Fanless All in one Panel PC with 1 6 GHz Intel Atom Processor TFT LCD Capacitive Touch Screen RS 232 422 485 and IP 64 P...

Page 2: ...AFL2D 12A N270 ECIL Panel PC Page II Revision Date Version Changes 24 February 2010 1 00 Initial release...

Page 3: ...ages arising out of the use or inability to use the product or documentation even if advised of the possibility of such damages This document contains proprietary information protected by copyright Al...

Page 4: ...FICATIONS 19 2 DETAILED SPECIFICATIONS 21 2 1 DIMENSIONS 22 2 2 INTEL ATOM PROCESSOR 23 2 3 MOTHERBOARD COMPONENTS 23 2 3 1 Memory Support 23 2 3 1 1 Installed Memory 23 2 3 2 Storage Capacity 23 2 4...

Page 5: ...CTION 39 4 6 1 AT Power Mode 40 4 6 2 ATX Power Mode 40 4 7 JUMPER SETTINGS 41 4 7 1 Access the Jumpers 41 4 7 2 Preconfigured Jumpers 42 4 7 3 Clear CMOS Jumper 42 4 7 4 COM Port Pin 9 Select 43 4 7...

Page 6: ...Replacement 64 5 6 REINSTALLING THE COVERS 65 6 AMI BIOS SETUP 66 6 1 INTRODUCTION 67 6 1 1 Starting Setup 67 6 1 2 Using Setup 67 6 1 3 Getting Help 68 6 1 4 Unable to Reboot After Configuration Chan...

Page 7: ...120 7 7 TOUCH SCREEN DRIVER 123 A SYSTEM SPECIFICATIONS 128 A 1 MOTHERBOARD SPECIFICATIONS 129 A 2 PROCESSOR SPECIFICATIONS 129 A 3 SCREEN SPECIFICATIONS 130 A 4 BARCODE SCANNER SPECIFICATIONS 131 B...

Page 8: ...AFL2D 12A N270 ECIL Panel PC Page VIII ROHS COMPLIANT UNDER 2002 95 EC WITHOUT MERCURY 145...

Page 9: ...Connector 29 Figure 4 1 Disconnect the Power Cable and USB Cable 37 Figure 4 2 Barcode Scanner Retention Screws 37 Figure 4 3 Back Cover Retention Screws 37 Figure 4 4 AFL2D 12A N270 ECIL Plastic Back...

Page 10: ...perations 112 Figure 7 7 Chipset Driver Installation Finish Screen 113 Figure 7 8 VGA Driver Read Me File 114 Figure 7 9 VGA Driver Setup Files Extracted 114 Figure 7 10 VGA Driver Welcome Screen 115...

Page 11: ...e 7 26 Setup Type RS 232 125 Figure 7 27 Setup Type 4 point calibration 125 Figure 7 28 Enable Multi Monitor Function 126 Figure 7 29 Destination Location 126 Figure 7 30 Installing PenMount DMC9000 1...

Page 12: ...Settings 43 Table 4 4 COM1 Pin 9 Setting Jumper Settings 44 Table 4 5 COM3 Pin 9 Setting Jumper Settings 44 Table 4 6 RS 422 Pinouts 45 Table 4 7 RS 485 Pinouts 45 Table 4 8 COM3 RX Function Select Ju...

Page 13: ...AFL2D 12A N270 ECIL Panel PC Page 13 1 Introduction Chapter 1...

Page 14: ...an Intel ICH7 M input output controller hub ensures optimal memory graphics and peripheral I O support The system comes with 2 0 GB of preinstalled DDR2 SDRAM ensuring smooth data throughputs with red...

Page 15: ...ant front panel AT or ATX power mode Capacitive type touch screen RoHS compliance 1 1 2 Applications The AFL2D 12A N270 ECIL panel PC is elegant yet sophisticated systems that are easily implemented i...

Page 16: ...nel PC Page 16 Figure 1 2 AFL2D 12A N270 ECIL Front View 1 2 2 Rear Panel The rear panel provides access to retention screw holes that support the wall mounting Refer to Figure 1 3 Figure 1 3 AFL2D 12...

Page 17: ...nnector 1 x 12 V DC In connector connects to barcode scanner 1 x External SATA connector 1 x RS 232 connector 1 x RS 232 422 485 connector 2 x LAN connectors 2 x USB 2 0 connectors barcode scanner con...

Page 18: ...nels of AFL2D 12A N270 ECIL provides access to slots that support panel mount and rack mount Figure 1 5 Figure 1 5 Top View Figure 1 6 Side View 1 3 Internal Overview The AFL2D 12A N270 ECIL has the f...

Page 19: ...ry One 2 0 GB 533 MHz DDR2 SDRAM SO DIMM pre installed SSD One 2 0 GB CF Type II card preinstalled Watchdog Timer Software Programmable supports 1 sec 255 sec system reset Audio AMP 1 5 W AMP 1 5 W bu...

Page 20: ...h controller is on board 50 W Input 90 VAC 264 VAC 47 Hz 63 Hz Power Adapter Output 12 V DC Power Consumption 32 W 1 x 12 V DC input jack 1 x Audio connector 1 x RS 232 COM port connectors 1 x RS 232...

Page 21: ...AFL2D 12A N270 ECIL Panel PC Page 21 2 Detailed Specifications Chapter 2...

Page 22: ...AFL2D 12A N270 ECIL Panel PC Page 22 2 1 Dimensions The AFL2D 12A N270 ECIL dimensions are shown below Width 304 0 mm Height 246 0 mm Depth 49 5 mm Figure 2 1 AFL2D 12A N270 ECIL Dimensions mm...

Page 23: ...describe some of the features on the motherboard 2 3 1 Memory Support 2 3 1 1 Installed Memory One 200 pin 2 0 GB 533 MHz DDR2 SDRAM SO DIMM is installed in the AFL2D 12A N270 ECIL and controlled by t...

Page 24: ...ports COM1 is RS 232 only port The other serial port COM3 can be configured as a RS 232 RS 422 or an RS 485 serial port Pin 9 on both ports can be set as the normal ring RI signal or can be designate...

Page 25: ...s There are two USB 2 0 connectors on the bottom panel of the AFL2D 12A N270 ECIL Both USB 2 0 connectors are interfaced directly to the USB controllers on the ICH7 M southbridge These USB connectors...

Page 26: ...2 6 Audio 2 6 1 AC 97 Audio Codec Controller The integrated AC 97 Audio compliant audio controller on the Intel ICH7 Southbridge is integrated to a RealTek ALC655 audio codec The RealTek ALC655 is con...

Page 27: ...or the ATX power mode Both these power modes are described below 2 7 1 1 ATX Power Mode Default With the ATX mode selected the AFL2D 12A N270 ECIL panel PC goes in a standby mode when it is turned off...

Page 28: ...ow 2 7 2 Power Adapter The system is shipped with a 90 V to 264 V AC power adapter that has a maximum power output of 50 W The power adapter has a 12 V DC output connector 2 7 3 Power Connector There...

Page 29: ...AFL2D 12A N270 ECIL Panel PC Page 29 Figure 2 9 Power Connector...

Page 30: ...AFL2D 12A N270 ECIL Panel PC Page 30 3 Unpacking Chapter 3...

Page 31: ...g the installation process Step 1 Use box cutters a knife or a sharp pair of scissors that seals the top side of the external second box Step 2 Open the external second box Step 3 Use box cutters a kn...

Page 32: ...12A N270 ECIL flat panel PC is shipped with the following components Quantity Item Image Standard 1 AFL2D 12A N270 ECIL panel PC 1 Power adapter 1 Power cord 1 SATA and power cable 1 Screw kit 1 User...

Page 33: ...Wall mounting kit P N AFLWK 12 Stand P N STAND A12 Stand P N STAND B19 Stand P N STAND 210 RS Arm P N ARM 11 RS Arm P N ARM 31 RS If any of these items are missing or damaged contact the distributor...

Page 34: ...AFL2D 12A N270 ECIL Panel PC Page 34 4 Installation Chapter 4...

Page 35: ...nd can help to prevent ESD from damaging the board Self grounding Before handling the board touch any grounded conducting material During the time the board is handled frequently touch any conducting...

Page 36: ...al devices to the bottom panel of the flat panel PC Step 5 Mount the flat panel PC Step 0 4 4 Removing the Back Cover WARNING Over tightening back cover screws will crack the plastic frame Maximum tor...

Page 37: ...Page 37 Figure 4 1 Disconnect the Power Cable and USB Cable Figure 4 2 Barcode Scanner Retention Screws Step 2 Remove the retention screws Figure 4 3 and lift the cover off the flat panel PC Figure 4...

Page 38: ...all the HDD into the AFL2D 12A N270 ECIL please follow the steps below Step 1 Remove the plastic back cover See Section 4 4 above Step 2 Remove the aluminum cover See Section 5 4 2 Step 3 Remove the f...

Page 39: ...ce the plastic back cover Step 0 WARNING Over tightening back cover screws will crack the plastic frame Maximum torque for cover screws is 5 kg cm 0 36 lb ft 0 49 Nm 4 6 AT ATX Mode Selection AT and A...

Page 40: ...pplications including ATM Self service kiosk Plant environment monitoring system Factory automation platform Manufacturing shop flow 4 6 2 ATX Power Mode With the ATX mode selected the AFL2D 12A N270...

Page 41: ...e motherboard installed in the AFL2D 12A N270 ECIL Before the AFL2D 12A N270 ECIL is installed the jumpers must be set in accordance with the desired configuration The jumpers on the AFL2D 12A N270 EC...

Page 42: ...1 10 pin header Table 4 2 Preconfigured Jumpers 4 7 3 Clear CMOS Jumper Jumper Label J_CMOS1 Jumper Type 2 pin header Jumper Settings See Table 4 3 Jumper Location See Figure 4 7 If the AFL2D 12A N270...

Page 43: ...tup Table 4 3 Clear CMOS Jumper Settings The location of the clear CMOS jumper is shown in Figure 4 7 below Figure 4 7 Clear CMOS Jumper 4 7 4 COM Port Pin 9 Select Jumper Label JP8 and JP10 Jumper Se...

Page 44: ...n Short 1 2 COM3 RI Pin use 12 V Short 3 4 COM3 RI Pin use RI Default Short 5 6 COM3 RI Pin use 5 V Table 4 5 COM3 Pin 9 Setting Jumper Settings The COM1 and COM3 Pin 9 Setting jumper locations are sh...

Page 45: ...Settings See Table 4 8 Jumper Location See Figure 4 9 The COM3 RX Function Select jumper sets the communication protocol used by the RX serial communications port COM3 as RS 232 RS 422 or RS 485 The C...

Page 46: ...The COM3 TX Function Select jumper configures the TX pin on COM3 serial port connector as RS 422 as an RS 485 The COM3 TX Function Select jumper selection options are shown in Table 4 9 COM3 TX Functi...

Page 47: ...2 485 Serial Port Select jumper sets the communication protocol used by the second serial communications port COM3 as RS 232 RS 422 or RS 485 The COM3 RS 232 422 485 Serial Port Select settings are sh...

Page 48: ...the System WARNING When mounting the flat panel PC onto an arm onto the wall or onto a panel it is better to have more than one person to help with the installation to make sure the panel PC does not...

Page 49: ...mark the locations of the four screw holes in the bracket on the wall Step 3 Drill four pilot holes at the marked locations on the wall for the bracket retention screws Step 4 Align the wall mounting...

Page 50: ...the rear panel If the screw is missing the thread depth of the replacement screw should be not more than 4 mm Step 7 Align the mounting screws on the monitor rear panel with the mounting holes on the...

Page 51: ...12A N270 ECIL Panel PC Page 51 Figure 4 13 Chassis Support Screws Step 9 Secure the panel PC by fastening the retention screw of the wall mounting bracket Figure 4 14 Step 0 Figure 4 14 Secure the Pan...

Page 52: ...er than the overall size of the frame that surrounds the flat panel PC but just large enough for the rear panel of the flat panel PC to fit through Step 3 Slide the flat panel PC through the hole unti...

Page 53: ...es as a base To do this refer to the installation documentation that came with the mounting arm NOTE When purchasing the arm please ensure that it is VESA compliant and that the arm has a 75 mm or 100...

Page 54: ...be installed into a cabinet or rack The installation procedures are similar to the panel mounting installation To do this please follow the steps below NOTE When purchasing the cabinet rack installati...

Page 55: ...holes along the edges of the flat panel PC behind the ABS PC plastic frame There are a total of 6 rack mounting clamps Step 3 Tighten the screws that pass through the rack mounting clamps until the p...

Page 56: ...operly inserted into the rack or cabinet secure the front of the rack cabinet bracket to the front of the rack or cabinet Figure 4 19 Step 0 4 9 Bottom Panel Connectors 4 9 1 LAN Connection There are...

Page 57: ...le RJ 45 connector into the onboard RJ 45 connector Step 0 4 9 2 Serial Device Connection The AFL2D 12A N270 ECIL has two male DB 9 connectors on the bottom panel for serial devices to be connected Fo...

Page 58: ...Panel PC Page 58 Figure 4 21 Serial Device Connector Step 3 Secure the connector Secure the serial device connector to the external interface by tightening the two retention screws on either side of t...

Page 59: ...please follow the instructions below Step 1 Located the USB connectors The locations of the USB connectors are shown in Chapter 2 Step 2 Align the connectors Align the USB device connector with one of...

Page 60: ...AFL2D 12A N270 ECIL Panel PC Page 60 5 System Maintenance Chapter 5...

Page 61: ...components including the AFL2D 12A N270 ECIL Dry climates are especially susceptible to ESD It is therefore critical that whenever the AFL2D 12A N270 ECIL is accessed internally or any other electric...

Page 62: ...tic frame Maximum torque for cover screws is 5 kg cm 0 36 lb ft 0 49 Nm To access the AFL2D 12A N270 ECIL internally the back cover must be removed To remove the back cover please follow the steps bel...

Page 63: ...k cover See Section 5 4 2 above Step 3 Locate the DDR2 SO DIMM on the motherboard Figure 5 1 Figure 5 1 SO DIMM Socket Location Step 4 Remove the DDR memory module by pulling both the spring retainer...

Page 64: ...SO DIMM Module Installation 5 5 2 CF Card Replacement The AFL2D 12A N270 ECIL has one CF Type II slot To replace the CF card follow the instructions below Step 1 Follow all anti static procedures See...

Page 65: ...aced reinsert the nine previously removed retention screws Step 0 5 6 Reinstalling the Covers WARNING Failing to reinstall the covers may result in permanent damage to the system Please make sure all...

Page 66: ...AFL2D 12A N270 ECIL Panel PC Page 66 6 AMI BIOS Setup Chapter 6...

Page 67: ...message appears on the screen 0 If the message disappears before the DELETE key is pressed restart the computer and try again 6 1 2 Using Setup Use the arrow keys to highlight items press ENTER to sel...

Page 68: ...oot After Configuration Changes If the computer cannot boot after changes to the system configuration is made CMOS defaults Use the jumper described in Chapter 5 6 1 5 BIOS Menu Bar The menu bar on to...

Page 69: ...ields in System Overview cannot be changed The items shown in the system overview include AMI BIOS Displays auto detected BIOS information o Version Current BIOS version o Build Date Date the current...

Page 70: ...he Advanced menu 5BIOS Menu 2 to configure the CPU and peripheral devices through the following sub menus WARNING Setting the wrong values in the sections below may cause the system to malfunction Mak...

Page 71: ...2A N270 ECIL Panel PC Page 71 BIOS Menu 2 Advanced 6 3 1 CPU Configuration Use the CPU Configuration menu 5BIOS Menu 3 to view detailed CPU specifications and configure the CPU BIOS Menu 3 CPU Configu...

Page 72: ...d Cache L1 Lists the CPU L1 cache size Cache L2 Lists the CPU L2 cache size 6 3 2 IDE Configuration Use the IDE Configuration menu 5BIOS Menu 4 to change and or set the configuration of the IDE device...

Page 73: ...drives are enabled on the Secondary IDE channel PATA Only The IDE drives are enabled on the primary and secondary IDE channels SATA drives are disabled IDE Master and IDE Slave When entering setup BIO...

Page 74: ...ter and IDE Slave Configuration Auto Detected Drive Parameters The grayed out items in the left frame are IDE disk drive parameters automatically detected from the firmware of the selected IDE disk dr...

Page 75: ...f Monitoring Analysis and Reporting Technology protocol is supported 32Bit Data Transfer Enables 32 bit data transfer Type Auto Use the Type BIOS option select the type of device the AMIBIOS attempts...

Page 76: ...sing Multi Sector Transfer on the specified channel The data to and from the device occurs one sector at a time Auto DEFAULT BIOS auto detects Multi Sector Transfer support on the drive on the specifi...

Page 77: ...ith a maximum data transfer rate of 2 1MBps SWDMA1 Single Word DMA mode 1 selected with a maximum data transfer rate of 4 2MBps SWDMA2 Single Word DMA mode 2 selected with a maximum data transfer rate...

Page 78: ...nology SMART on the drive on the specified channel S M A R T predicts impending drive failures The S M A R T BIOS option enables or disables this function Auto DEFAULT BIOS auto detects HDD SMART supp...

Page 79: ...LT Serial Port 1 I O port address is 3F8 and the interrupt address is IRQ4 2F8 IRQ3 Serial Port 1 I O port address is 2F8 and the interrupt address is IRQ3 3E8 IRQ4 Serial Port 1 I O port address is 3...

Page 80: ...Port 3 I O port address is 2F0 2E0 Serial Port 3 I O port address is 2E0 Serial Port3 IRQ 11 Use the Serial Port3 IRQ option to select the interrupt address for serial port 3 10 Serial port 3 IRQ addr...

Page 81: ...iguration CPU FAN Mode Setting Full On Mode Use the CPU FAN Mode Setting option to configure the second fan Full On Mode DEFAULT Fan is on all the time Automatic mode Fan is off when the temperature i...

Page 82: ...Temp Limit of OFF option can only be set if the CPU FAN Mode Setting option is set to Automatic Mode Use the CPU Temp Limit of OFF option to select the CPU temperature at which the cooling fan should...

Page 83: ...t PWM option can only be set if the CPU FAN Mode Setting option is set to Automatic Mode Use the Fan 3 Start PWM option to select the PWM mode the fan starts to rotate with after the temperature speci...

Page 84: ...nitored o CPU Temperature o System Temperature Fan Speeds The CPU cooling fan speed is monitored o CPU Fan Speed Voltages The following system voltages are monitored o CPU Core o 1 05V o 3 30V o 5 00V...

Page 85: ...ECIL Panel PC Page 85 BIOS Menu 8 Power Configuration 6 3 5 1 ACPI configuration The ACPI Configuration menu 5BIOS Menu 9 configures the Advanced Configuration and Power Interface ACPI BIOS Menu 9 ACP...

Page 86: ...de S3 STR System appears off The CPU has no power RAM is in slow refresh the power supply is in a reduced power mode 6 3 6 APM Configuration The APM Configuration menu BIOS Menu 10 allows the advanced...

Page 87: ...e on Keyboard Mouse BIOS option to enable activity on either the keyboard or mouse to rouse the system from a suspend or standby state That is the system is roused when the mouse is moved or a button...

Page 88: ...ume On RTC Alarm Disabled Use the Resume On RTC Alarm option to specify the time the system should be roused from a suspended state Disabled DEFAULT The real time clock RTC cannot generate a wake even...

Page 89: ...ote Access option to enable or disable access to the remote functionalities of the system Disabled DEFAULT Remote access is disabled Enabled Remote access configuration options shown below appear Seri...

Page 90: ...e Base Address IRQ option cannot be configured and only shows the interrupt address of the serial port listed above Serial Port Mode 115200 8 n 1 Use the Serial Port Mode option to select baud rate th...

Page 91: ...not work if set to Always Terminal Type ANSI Use the Terminal Type BIOS option to specify the remote terminal type ANSI DEFAULT The target terminal type is ANSI VT100 The target terminal type is VT100...

Page 92: ...keyboard support Normally if this option is not enabled any attached USB mouse or USB keyboard does not become available until a USB compatible operating system is fully booted with all USB drivers lo...

Page 93: ...figure advanced PCI and PnP settings WARNING Setting wrong values for the BIOS selections in the PCIPnP BIOS menu may cause the system to malfunction BIOS Menu 13 PCI PnP Configuration IRQ Available U...

Page 94: ...14 IRQ 15 DMA Channel Available Use the DMA Channel option to assign a specific DMA channel to a particular PCI PnP device Available DEFAULT The specified DMA is available to be used by PCI PnP device...

Page 95: ...AULT No memory block reserved for legacy ISA devices 16K 16KB reserved for legacy ISA devices 32K 32KB reserved for legacy ISA devices 64K 54KB reserved for legacy ISA devices 6 5 Boot Use the Boot me...

Page 96: ...speed up the boot process Disabled No POST procedures are skipped Enabled DEFAULT Some POST procedures are skipped to decrease the system boot time Quiet Boot Disabled Use the Quiet Boot BIOS option t...

Page 97: ...ly To use the 10 keys on the keyboard press the Number Lock key located on the upper left hand corner of the 10 key pad The Number Lock LED on the keyboard lights up when the Number Lock is engaged On...

Page 98: ...is Not Installed If a supervisor password must be installed select this field and enter the password After the password has been added Install appears next to Change Supervisor Password Change User Pa...

Page 99: ...ridge configuration menus WARNING Setting the wrong values for the Chipset BIOS selections in the Chipset BIOS menu may cause the system to malfunction BIOS Menu 17 Chipset 6 7 1 North Bridge Chipset...

Page 100: ...the documentation that came with the card to see if it is necessary to reserve the space Disabled DEFAULT Memory is not reserved for ISA expansion cards Enabled Memory is reserved for ISA expansion c...

Page 101: ...ed graphics memory is dynamically allocated according to the system and graphics needs DVMT FIXED Memory Use the DVMT FIXED Memory option to specify the maximum amount of memory that can be allocated...

Page 102: ...RT DEFAULT LFP Panel Type by H W Use the LFP Panel Type option to select the type of flat panel connected to the system Configuration options are listed below 640x480 18b 800x480 18b 800x600 18b 1024x...

Page 103: ...e Audio Controller option enables or disables the audio controller AC 97 Audio Only The on board AC 97 audio controller is enabled All Disabled DEFAULT The on board audio controller is disabled 6 8 Ex...

Page 104: ...t Use the Discard Changes and Exit option to exit the BIOS configuration setup program without saving the changes made to the system Discard Changes Use the Discard Changes option to discard the chang...

Page 105: ...2A N270 ECIL Panel PC Page 105 Load Failsafe Defaults Use the Load Failsafe Defaults option to load failsafe default values for each of the parameters on the Setup menus F8 key can be used for this op...

Page 106: ...AFL2D 12A N270 ECIL Panel PC Page 106 7 Software Drivers Chapter 7...

Page 107: ...t updates The following drivers can be installed on the system Chipset VGA Audio LAN Touch screen Installation instructions are given below 7 2 Starting the Driver Program To access the driver install...

Page 108: ...3 Chipset Driver Installation To install the chipset driver please do the following Step 1 Access the driver list shown in Figure 7 1 See Section 7 2 Step 2 Click Chipset and double click Setup exe S...

Page 109: ...L Panel PC Page 109 Figure 7 2 Chipset Driver Screen Step 4 When the setup files are completely extracted the Welcome Screen in Figure 7 3 appears Figure 7 3 Chipset Driver Welcome Screen Step 5 Click...

Page 110: ...p 6 The license agreement in Figure 7 4 appears Step 7 Read the License Agreement Step 8 Click the Yes icon to continue Figure 7 4 Chipset Driver License Agreement Step 9 The Read Me file in Figure 7...

Page 111: ...AFL2D 12A N270 ECIL Panel PC Page 111 Figure 7 5 Chipset Driver Read Me File Step 11 Setup Operations are performed as shown in Figure 7 6...

Page 112: ...Chipset Driver Setup Operations Step 12 Once the Setup Operations are complete click the Next icon to continue Step 13 The Finish screen appears Step 14 Select Yes I want to restart the computer now...

Page 113: ...en 7 4 VGA Driver Installation To install the VGA driver please do the following Step 1 Access the driver list shown in Figure 7 1 See Section 7 2 Step 2 Click VGA and double click the win2k_xp14324 e...

Page 114: ...70 ECIL Panel PC Page 114 Figure 7 8 VGA Driver Read Me File Step 5 The installation files are extracted See Figure 7 9 Figure 7 9 VGA Driver Setup Files Extracted Step 6 The Welcome Screen in Figure...

Page 115: ...ECIL Panel PC Page 115 Figure 7 10 VGA Driver Welcome Screen Step 7 Click Next to continue Step 8 The license agreement in Figure 7 11 appears Step 9 Read the License Agreement Step 10 Click the Yes i...

Page 116: ...Page 116 Figure 7 11 VGA Driver License Agreement Step 11 The Read Me file in Figure 7 12 appears Step 12 Click Next to continue Figure 7 12 VGA Driver Read Me File Step 13 Setup Operations are perfo...

Page 117: ...tions Step 14 Once the Setup Operations are complete click the Next icon to continue Step 15 The Finish screen appears Step 16 Select Yes I want to restart the computer now and click the Finish icon S...

Page 118: ...Step 1 Access the driver list shown in Figure 7 1 See Section 7 2 Step 2 Click Audio Step 3 The screen in Figure 7 15 appears Double click the WDM_A404 folder Figure 7 15 Audio Driver Options Step 4 C...

Page 119: ...ure 7 16 AC 97 Driver Installation Welcome Screen Step 7 The Verification window in Figure 7 17 may appear Step 8 Click Continue Anyway Figure 7 17 AC 97 Driver Installation Verification Step 9 The dr...

Page 120: ...on finish screen in Figure 7 19 appears Step 11 Select Yes I wish to restart my computer now And click Finish Figure 7 19 AC 97 Driver Installation Complete Step 12 The system reboots Step 0 7 6 LAN D...

Page 121: ...click the setup exe file to start installing the LAN driver Step 3 The Welcome screen in Figure 7 20 appears Figure 7 20 LAN Driver Welcome Screen Step 4 Click Next to continue Step 5 The Ready to In...

Page 122: ...Panel PC Page 122 Figure 7 21 LAN Driver Welcome Screen Step 7 The program begins to install Step 8 The installation progress can be monitored in the progress bar shown in Figure 7 22 Figure 7 22 LAN...

Page 123: ...ch panel software driver please follow the steps below Step 1 Access the driver list shown in Figure 7 1 See Section 7 2 Step 2 Click Touch Screen Open the x Touch Screen All_In_One_2k_XP_Vista_5 6 0...

Page 124: ...ome Screen Step 4 The PS 2 Setup Type screen in Figure 7 25 appears Check the box if it is for PS 2 touch controller Figure 7 25 Setup Type PS 2 Step 5 The RS 232 Setup Type screen in Figure 7 26 appe...

Page 125: ...e 4 point Calibration Setup screen in Figure 7 27 appears Select an option on how you would like system to do after reboot Figure 7 27 Setup Type 4 point calibration Step 7 The Multi Monitor Setup scr...

Page 126: ...lti Monitor Function Step 8 The Choose Destination Location screen in Figure 7 29 appears next Confirm the destination folder by clicking Next Figure 7 29 Destination Location Step 9 Select an existin...

Page 127: ...270 ECIL Panel PC Page 127 Figure 7 30 Installing PenMount DMC9000 Step 10 Start to install the eGalaxTouch Figure 7 31 Close the installation window when it is finished Step 0 Figure 7 31 Installing...

Page 128: ...AFL2D 12A N270 ECIL Panel PC Page 128 A System Specifications Appendix A...

Page 129: ...MM system max 2 0 GB System BIOS AMI BIOS Hard disk drives Two SATA drives VGA Integrated in the Intel 945GSE LAN Realtek RTL8111CP PCIe GbE Controllers Expansion Options One PCIe Mini Super I O ITE I...

Page 130: ...e flat panel PC Specifications for the screens are shown below SPECIFICATION AFL2D 12A N270 ECIL Model Toshiba PI LTA121C250F Size 12 1 Resolution 1024 x 768 XGA Active Area mm 245 76 x 184 32 Pixel P...

Page 131: ...e POSTNET PLANET UPU Intelligent Mail Canada Post Australia Post Japanese Post Royal Mail RM4SCC KIX Code OCR OCR A OCR B E 13B MICR Note Enable by purchasing decoding license Depth of Field 25 mm 310...

Page 132: ...AFL2D 12A N270 ECIL Panel PC Page 132 B Safety Precautions Appendix B...

Page 133: ...L2D 12A N270 ECIL is being installed moved or modified Do not apply voltage levels that exceed the specified voltage range Doing so may cause fire and or an electrical shock Electric shocks can occur...

Page 134: ...atic wristband can help to prevent ESD from damaging any electrical component Self grounding Before handling any electrical component touch any grounded conducting material During the time the electri...

Page 135: ...Tools Some components in the AFL2D 12A N270 ECIL may only be cleaned using a product specifically designed for the purpose In such case the product will be explicitly mentioned in the cleaning tips Be...

Page 136: ...AFL2D 12A N270 ECIL Panel PC Page 136 Foam swabs Whenever possible it is best to use lint free swabs such as foam swabs for cleaning...

Page 137: ...AFL2D 12A N270 ECIL Panel PC Page 137 C BIOS Configuration Options Appendix C...

Page 138: ...LBA Large Mode Auto 76 Block Multi Sector Transfer Auto 76 PIO Mode Auto 76 DMA Mode Auto 77 S M A R T Auto 78 32Bit Data Transfer Enabled 78 Serial Port1 Address 3F8 IRQ4 79 Serial Port1 Mode Normal...

Page 139: ...OST Always 90 Terminal Type ANSI 91 USB Functions Enabled 92 USB 2 0 Controller Enabled 92 Legacy USB Support Enabled 92 USB2 0 Controller Mode HiSpeed 92 IRQ Available 93 DMA Channel Available 94 Res...

Page 140: ...ECIL Panel PC Page 140 LFP Panel Type by H W 102 Audio Controller AC 97 Audio Only 103 Save Changes and Exit 104 Discard Changes and Exit 104 Discard Changes 104 Load Optimal Defaults 104 Load Failsaf...

Page 141: ...AFL2D 12A N270 ECIL Panel PC Page 141 D Watchdog Timer Appendix D...

Page 142: ...A BIOS function call INT 15H is used to control the Watchdog Timer INT 15H AH 6FH Sub function AL 2 Sets the Watchdog Timer s period BL Time out value Its unit second is dependent on the item Watchdog...

Page 143: ...the system resets Example program INITIAL TIMER PERIOD COUNTER W_LOOP MOV AX 6F02H setting the time out value MOV BX 05 time out value is 5 seconds INT 15H ADD THE APPLICATION PROGRAM HERE CMP EXIT_AP...

Page 144: ...AFL2D 12A N270 ECIL Panel PC Page 144 E Hazardous Materials Disclosure Appendix E...

Page 145: ...he presences of small quantities of certain materials in the product and is applicable to China RoHS only A label will be placed on each product to indicate the estimated Environmentally Friendly Use...

Page 146: ...cuit Board X O O O O X Metal Fasteners X O O O O O Cable Assembly X O O O O X Fan Assembly X O O O O X Power Supply Assemblies X O O O O X Battery O O O O O O O This toxic or hazardous substance is co...

Page 147: ...FL2D 12A N270 ECIL Panel PC Page 147 RoHS RoHS Pb Hg Cd CR VI PBB PBDE X O O O O X X O O O O X X O O O O X X O O O O O X O O O O X X O O O O X X O O O O X O O O O O O O SJ T11363 2006 X SJ T11363 2006...

Reviews: