IBM
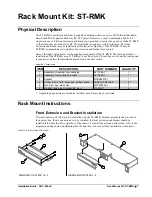
Netfinity Rack Monitor Compartment Installation Instructions
For more information about this option, refer to the
IBM Netfinity Rack Configurator program and the IBM
Netfinity Rack Planning and Installation Guide.
Before you begin, read through these instructions to familiarize yourself with the installation procedure.
This option consists of:
One monitor compartment
One rear monitor-compartment bracket
Twelve cage nuts
Twelve screws
IBM Netfinity Rack Monitor Compartment Installation Instructions (this booklet)
You need a screwdriver to install the monitor compartment.
Be sure to perform the installation steps in the following order.
1. Decide at what U level you want to install the monitor compartment. Make sure you leave room to
install your monitor.
Note: All vertical rack measurements are given in rack units (U). One U is equal to 4.45 cm (1.75
in.). The U levels are marked on labels on one front mounting rail and one rear mounting rail.
2. Install the monitor-compartment rear bracket.
a. Temporarily insert the rear bracket against the rear mounting rails at the U-level you selected.
The bottom of the rear bracket must be even with a U-level mark on the label.
The rear bracket must be level.
b. With a pencil, mark the location of the six holes in the rear bracket on the rear mounting rails.
c. Remove the rear bracket.
IBM is a trademark of the International Business Machines Corporation.
1