Hydro Mobile F200, Owner'S Manual
The Honeywell F200 user manual is available for download, free of charge, from manualshive.com. This comprehensive manual provides detailed instructions on operating and maintaining your Honeywell F200 product. Maximize your device's performance and get the most out of its features with this essential manual.
Share
Download


Reviews:
No comments
Related manuals for F200

5078
Brand: Laser Pages: 2

AeGIS 4000
Brand: PACH & COMPANY Pages: 4

Eva400
Brand: Handicare Pages: 20

Gator Grip Drum EGG-1
Brand: Wesco Pages: 2

MIG210S
Brand: Welding Industries Malaysia Pages: 20
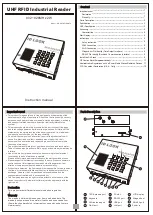
WS-UHFRFIDANT4
Brand: Wenshing Pages: 4

DH-S Series
Brand: Dhollandia Pages: 82

LSC1576
Brand: LSP inc. Pages: 6

HYD-2100
Brand: Purelogic Pages: 60

TX600
Brand: Mackworth Pages: 7

POSITIP 880
Brand: HEIDENHAIN Pages: 64

SR/ABITIGL ABITIG GRIP
Brand: Abicor Binzel Pages: 36

V ARMIG 1905c Profimig
Brand: Daihen varstroj Pages: 34

Transcmig 250se
Brand: CIGWELD Pages: 41
ET1523L
Brand: Elo Touch Solutions Pages: 3

750MPa
Brand: Miller Electric Pages: 2

HVS-GPIO128
Brand: FOR-A Pages: 18

RAV4300 A3
Brand: Ravaglioli Pages: 28


