background image

CTU 1x3x / CTU 1x4x

ContaminationTest Unit

Operating and Maintenance Instructions

English (translation of original instructions)

Document No. : 4093420f

Follow these instructions for proper and safe use.

Keep for future reference.

Valid from series no. up 0002S01495K000000192

Summary of Contents for CTU 1 3 Series

Page 1: ...est Unit Operating and Maintenance Instructions English translation of original instructions Document No 4093420f Follow these instructions for proper and safe use Keep for future reference Valid from series no up 0002S01495K000000192 ...

Page 2: ...9 9046 E mail filtersystems hydac com Homepage www hydac com Court of Registration Saarbrücken HRB 17216 Executive directors Mathias Dieter Dipl Kfm Wolfgang Haering Documentation Representative The contact data of the Documentation Representative is Günter Harge c o HYDAC International GmbH Industriegebiet 66280 Sulzbach Saar Germany Telephone 49 6897 509 1511 Fax 49 6897 509 1394 E mail guenter ...

Page 3: ...rmation 11 1 2 7 Signal words and their meaning in the general safety information 12 1 3 Exclusion of liability warranty 13 1 4 Notes on copyright 13 2 Safety 14 2 1 Target group Required personnel qualification 14 2 2 Hazard symbols pictograms 17 2 3 Danger notifications 20 2 4 Safety marking 24 2 5 Observing regulatory information 25 2 6 Observing environmental precautions 25 2 7 Wear personal p...

Page 4: ... Connecting the components 45 5 3 Suctioning the machine room 47 5 3 1 Connecting an air extractor 48 5 3 1 1 Suctioning the machine room of the CTU 1x3x 48 5 3 1 2 Suctioning the machine room and analysis chamber of the CTU1x4x 49 5 4 Connecting the compressed air connection 51 5 5 Connecting the foot switch 51 5 6 Commissioning 52 6 Operation 53 6 1 Switching the extraction unit on off 54 6 2 Op...

Page 5: ...pan is full 84 7 Carrying out the maintenance inspection 85 7 1 Maintenance table 86 7 2 Cleaning the analysis chamber 87 7 2 1 Cleaning the analysis chamber in the case of test liquid Water with surfactants 88 7 2 2 Cleaning the analysis chamber in the case of test liquid G60 Spezial Fero clean L261 88 7 3 Cleaning the door 88 7 3 1 Maintaining an electrostatically charged door 89 7 4 Dismounting...

Page 6: ... 1 Permeation time according to EN 374 3 99 7 14 Installing Removing the protective gloves 100 7 15 Preparing for changing the filter element 102 7 15 1 Changing the filter element MRF1 E 102 8 Eliminating errors 106 9 Decommissioning Disposal 109 9 1 Temporary shutdown 109 9 2 Permanent shutdown 109 9 3 Disposal Recycling 109 A Appendix 110 A 1 Finding spare parts accessories 110 A 1 1 Finding ac...

Page 7: ... this manual are meant for gen eral illustration purposes Therefore representations and func tional options can deviate from the delivered product We reserve the right to modifications to the contents of this man ual without prior notice 1 1 Target group of the manual This manual was created for the following target group Target group Tasks Owner Keep this manual and the applicable docu ments at t...

Page 8: ...t Product name Operating and Maintenance Instructions Document no 12345678 English translation of original instructions Valid from from s no 1 5 2 4 3 Fig 1 Overview labeling of the title page 1 Short name of the product product name 2 Type of document 3 Language 4 Document no Index 5 Supplementary instructions regarding the validity of the man ual optional Please note that you can directly access...

Page 9: ...s assembled and connected ü The product is switched off 1 Switch the product on 1 2 3 Representation of procedural instructions In the case of procedural instructions there are the two following representations Procedural instructions with a fixed sequence Procedural instructions whose sequence must be complied with without fail are listed with sequential numbering 1 2 3 etc An example for procedu...

Page 10: ... intermediate results and end results Intermediate results are the consequence of activities they are marked with an indented arrow End results represent the end of an activity and are represented with a flag An example for a procedural instruction with intermediate result and final result 1 Switch the product on ð The display lights up 2 Press the button O The product is now ready for use 1 2 3 4...

Page 11: ...end of the manual Tip for handling the product Required tool 1 2 6 Representation of warning general safety information All the warning general safety information in this manual are highlighted with pictograms and signal words The pictogram and the signal word give you information of the risk level of the danger Warning General Safety Information which is placed ahead of each activity are represen...

Page 12: ...es a hazardous situation with a medium level of risk which if not avoided can result lethal or serious injury CAUTION CAUTION The signal word indicates a hazardous situation with a low level of risk which if not avoided can result in minor or mod erate injury NOTICE NOTICE The signal word indicates a hazardous situation with a high level of risk which if not avoided will result in damage to proper...

Page 13: ...ion in these instructions In particular we shall not be liable for lost profit or other financial loss This exclusion of liability does not apply in cases of intent and gross negligence Moreover it does not apply to defects which have been deceitfully concealed or whose absence has been guaranteed nor in cases of culpable harm to life physical injury and damage to health If we negligently breach a...

Page 14: ...f the installation commissioning op eration maintenance work and also troubleshooting on the prod uct An owner is the person who operates the product himself herself for commercial or economic purposes or provides it to a third party for use application and bears the legal product responsibility to protect the user the personnel or the third party The obligations of the owner are To know and apply...

Page 15: ...hanical Specialist personnel Electrical Safe handling use of tools Product specific knowledge is re quired Commissioning Specialist personnel Mechanical Specialist personnel Electrical Safe handling use of tools Product specific knowledge is re quired Handling operation operation monitoring Operating personnel General Product specific knowledge is re quired Knowledge about handling the test liq ui...

Page 16: ...on of con taminants is required Knowledge of recy cling is required transport Commis sioning Operation Troubleshooting Maintenance Dis posal Specialist personnel Service Administra tor Service personnel Administrator HY DAC Service Extensive experience of the product Tab 2 Target group Required personnel qualification 1 2 3 4 5 6 7 8 9 A ...

Page 17: ...safety and warning instructions in this manual which indicate particular dangers to persons prop erty or the environment Fires naked lights and smoking are prohibited Warning signs used These marks can be found for all safety and warning instructions in this manual which indicate particular dangers to persons prop erty or the environment Danger point warning Dangerous electrical voltage warning Si...

Page 18: ...und for all safety and warning instructions in this manual which indicate particular dangers to persons prop erty or the environment Hazardous to the environment Others symbols used These marks can be found for all safety and warning instructions in this manual which indicate a particular danger to persons prop erty or the environment Exposed electrical components Danger due to operating pressure ...

Page 19: ... to recognize potential dangers Specialist personnel Electrician Such persons have specific specialist training and sev eral years work experience They are able to assess and perform the work assigned to them they are also able to recognize potential dangers Specialist personnel Mechanic Such persons have specific specialist training and sev eral years work experience They are able to assess and p...

Page 20: ...module only by the housing not by the at tachments or components Life phase Commissioning Operation The following risks could arise during the commissioning opera tion life phase WARNING Test liquid G60 Spezial or Feroclean L261 Flammable gas air mixture in the analysis chamber Danger of bodily injury uOpen fires or smoking are prohibited in the vicinity WARNING Danger due to unintended use test l...

Page 21: ... this can be found in the safety data sheet of the test liquid uWear your personal protective equipment Details on this can be found in the safety data sheet of the test liquid uMake sure that there is adequate air flow in the room Details on this can be found in the safety data sheet of the test liquid CAUTION Test liquid G60 Spezial or Feroclean L261 Danger to health by spraying the test liquid ...

Page 22: ...on in the analysis chamber due to air extraction with G60 L261 as the test liquid Risk of explosion uDo not perform air extraction on test items that have previously been flushed with test liquid G60 Special Feroclean L261 uDo not aim the air jet at liquid pockets Life phase Maintenance Troubleshooting The following dangers could arise during the life phase of mainte nance troubleshooting WARNING ...

Page 23: ... CAUTION Test liquid G60 Spezial or Feroclean L261 Health hazard uFollow all the instructions when handling the test liquid Details on this can be found in the safety data sheet of the test liquid uWear your personal protective equipment Details on this can be found in the safety data sheet of the test liquid uMake sure that there is adequate air flow in the room Details on this can be found in th...

Page 24: ...action unit Replace the damaged or no more recognizable legible safety symbols pictograms imme diately Pull the safety symbol pictogram off the extraction unit re move possible present adhesive residues with a cleaner suitable for that purpose Then affix the new stick on safety symbol pic togram at the same place on the extraction unit Fig 2 Placement of safety symbols pictograms 1 2 3 4 5 6 7 8 9...

Page 25: ...tal precautions Take all measures to protect the environment Ensure that no op erating medium is released into the environment soil or water Environmentally tip Operating medium is released into the soil or water Environmental hazard uRemove any leaked operating medium immediately and dis pose of it in an environmentally sound manner 2 7 Wear personal protection equipment When handling the extract...

Page 26: ...the extraction unit with the main switch The extraction unit is deenergized downstream of the main switch 2 9 Fire fighting measures Observe the measures relating to fire fighting given in the safety data sheet of the test liquid used Maintain a minimum safe distance from electrical components For a mains voltage of up to 1000 V the minimum safe distance is 1 m Fig 3 Minimum distance for fire figh...

Page 27: ...t Unit is delivered packed and pre assem bled At the time of delivery before the commissioning please check the scope of delivery to ensure that it is complete and un damaged The following items are included in the scope of delivery Qty Designation 1 Contamination Test Unit 1 PC pre installed 1 Monitor including holder or foot 1 Keyboard with touchpad 1 Keyboard tray only for CTU12xx 1 Foot switch...

Page 28: ...s for defects or liability regardless of the legal foundation do not apply with incorrect or improper installation commissioning usage handling storage maintenance repair use of unsuitable components or other circumstances for which the manufacturer is not responsible The manufacturer assumes no responsibility for determining the interfaces for installation in a system or the installation use or f...

Page 29: ...e following Follow all the instructions contained in the operating instruction Operation only with mounted cover panels Not operating unless the analysis chamber is closed Complying with the requirements for repair and maintenance work Operation under supervision Operation only in closed rooms environmental cleanliness and air similar to that under laboratory conditions Horizontal installation sur...

Page 30: ... deviating from intended use are for example Operation with an impermissible test liquid Operation under non permissible ambient and operational con ditions Operation with faulty safety devices Modifications to the power unit made by the user or purchaser Inadequate monitoring of parts that are subject to wear and tear Improperly performed repair work Unsupervised operation Non observance of the O...

Page 31: ...pacity payload 47 5 kg for evenly distributed surface load no point load Nominal voltage See Model Code 34 Nominal power 600 W 800 W with ultrasonic Emission sound pressure level LPA 70 db A Permissible test liquids for CTU1xx0 Test fluids that are compati ble with the materials and the sealing materials they come in contact with G60 Spezial or Feroclean L261 Permissible test liquids for CTU1xx1 W...

Page 32: ...pressed air supply 6 5 10 bar Required compressed air vol ume 60 l min Condition of the compressed air dry and clean Required compressed air supply 5 µm Pressure adjustment range 0 7 6 bar Intended service life of the ma chine The intended service life of the machine is not limited if the ser vice and maintenance intervals are complied with Service life of the components of the machine with safety...

Page 33: ...ame plate Fig 4 Decoding the name plate Item Description 1 Name plate of the extraction unit 2 Model code for details see Decoding the name plate 33 3 Details of nominal voltage frequency phases and power consumption The following information can be found on the name plate of the extraction unit Item Description Model Model code P N Part no S N Serial number Date Year week of production 1 2 3 4 5 ...

Page 34: ... V AC 60 Hz 1 Ph 230 V AC 50 Hz 1 Ph 240 V AC 50 Hz 1 Ph 240 V AC 50 Hz 1 Ph 100 V AC 50 Hz 1 Ph USA Canada Europe UK Australia Japan 2011 version 2014 version 2020 version Solvent cleaner G60 Spezial flash point 60 C lower explosion limit 0 6 vol Water with surfactants permissible ph values 6 10 No fully demineralized water or Solvent cleaner G60 Spezial flash point 60 C lower explosion limit 0 6...

Page 35: ...g on the model the ContaminationTest Unit has different outer dimensions and different dimensions of the analysis cham ber The ContaminationTest Unit has the following outer dimensions Fig 6 Dimensions CTU B T H1 H2 H3 H4 CTU10xx 985 850 1170 1290 1500 1700 CTU12xx 910 1140 1160 1280 1750 2070 All dimensions in mm 1 2 3 4 5 6 7 8 9 A ...

Page 36: ...U1x4x 4093420f en us web The ContaminationTest Unit has the following dimensions for the analysis chamber Fig 7 Dimensions of the analysis chamber of the CTU B1 T1 H5 H6 H7 D CTU10xx 765 365 260 335 380 2x Ø180 CTU12xx 765 650 300 445 560 2x Ø180 All dimensions in mm 1 2 3 4 5 6 7 8 9 A ...

Page 37: ...perating elements compo nents Fig 8 Components operating elements example CTU1200 1 Analysis chamber with door 2 Connection for the spray extraction Flushing of inner cham ber 3 Interventions with protective gloves 4 Switch cabinet with PC 5 Monitor 6 Cable hole 7 USB A port for the keyboard 8 Keyboard with touchpad console only CTU 12xx 9 Side paneling 10 Handle 1 2 3 4 5 6 7 8 9 A ...

Page 38: ...ift lugs for transport only CTU 12xx 3 7 1 Control panel The control panel has the following operating elements Fig 9 Control panel 61 Quick fastener terminal 62 Ball valve for filter membrane holder 64 Compressed air supply 65 Main switch E STOP 67 Filter membrane holder for details see Cascading the filter membranes changing the filter membranes 66 68 Setting the filter regulator compressed air ...

Page 39: ...traction unit NOTICE Lifting the extraction module by the components The extraction unit will be damaged uUse suitable lifting accessories to lift the extraction module uLift the extraction module only by the housing not by the at tachments or components ü In order to transport store the extraction unit proceed as fol lows 1 Completely empty the extraction unit all the containers flushing and retu...

Page 40: ...tion unit in clean and dry rooms in an upright posi tion under the storage conditions see Technical data 31 4 1 Transporting with a fork lift truck The extraction unit is shipped from the factory in a wooden box with the appropriate securing devices Pack the assembly for fur ther transportation in this wooden box Alternatively place the as sembly on a pallet of sufficient size using a fork lift tr...

Page 41: ...4 NOTICE Incorrect positioning of the slings The extraction unit will be damaged uSecure the extraction unit with suitable slings uWhen doing this ensure that the slings are routed and stretched only over the body and not over the analysis cham ber drip tray Fig 12 Packaging the extraction unit 1 2 3 4 5 6 7 8 9 A ...

Page 42: ...d position with the installed rollers The extraction unit must be set up on an even level surface When you have positioned and aligned the extraction unit press the brakes on all the guide rolls Make sure that the cleanliness of the surrounding area the am bient air and the temperature at the installation location are similar to laboratory conditions for details see Technical data 31 Make sure tha...

Page 43: ...HYDAC FILTER SYSTEMS GMBH Setting up assembling commissioning 5 BeWa CTU1x3x CTU1x4x 4093420f en us web 43 124 Fig 13 Moving using the handle 1 2 3 4 5 6 7 8 9 A ...

Page 44: ...traction unit is electrically connected to the supply net work 5 2 1 Checking the terminal strip in the switch box While transporting the extraction unit it is possible that the resis tors come loose in the X2 terminal strip DANGER Danger Due to dangerous electrical voltage Danger of fatal injury uWork on the electric supply may only be carried out by a prop erly trained certified electrician uPul...

Page 45: ...ation on the installation and connec tion of all the associated components to the extraction unit 1 Place the monitor at the top of the housing of the extraction unit 2 Check Connect the supply voltage and the signal data ca ble according to the following figure Fig 15 Supply voltage of the PC monitor ultrasonic 3 Hooking up the power supply and signal transfer 1 2 3 4 5 6 7 8 9 A ...

Page 46: ...commissioning HYDAC FILTER SYSTEMS GMBH 46 124 BeWa CTU1x3x CTU1x4x 4093420f en us web Fig 16 Signal cable of the PC monitor keyboard etc 4 The installation and connection of all the components is complete 1 2 3 4 5 6 7 8 9 A ...

Page 47: ... is used Details on this can be found in the safety data sheet of the test liq uid During the suctioning operation note the required flow rate and check the wiring of the entire ventilation system of the room Note the safety data sheet of the test liquid being used CAUTION Test liquid G60 Spezial or Feroclean L261 Health hazard uFollow all the instructions when handling the test liquid Details on ...

Page 48: ...ease note the following descriptions for the respec tive model 5 3 1 1 Suctioning the machine room of the CTU 1x3x If there is an air extraction system at the installation location this can be attached to the connection on the rear side of the CTU On delivery a cover is fitted to the CTU 1x3x extraction connection Only in the unit is the air extracted using this connection Fig 17 Suctioning the CT...

Page 49: ...this can be attached to the connection on the CTU At the time of delivery of the CTU 1x4x the air exhaust port of Ø 100 mm is pre mounted The air is extracted from the machine room using the connection E1 Fig 18 Suctioning the machine room of the CTU1x4x A partial current of the extraction at the connection E1 is used for extraction in the analysis chamber The extraction in the analysis chamber is...

Page 50: ...5 Setting up assembling commissioning HYDAC FILTER SYSTEMS GMBH 50 124 BeWa CTU1x3x CTU1x4x 4093420f en us web Fig 19 Suctioning of the analysis chamber of the CTU1x4x 1 2 3 4 5 6 7 8 9 A ...

Page 51: ...ction nipple of the low pressure series DN 7 2 on the extraction unit 2 Open the shut off valves that may be present in the supply line 3 Check the state and the setting of the maintenance unit in the supply line O The pressure port is connected 5 5 Connecting the foot switch The foot switch is used to control the spray extraction depending on the setting The socket for the foot switch is located ...

Page 52: ...only a moist cloth of the appropriate language included in the scope of delivery and affix it to the lower right part of the border film of the door 3 Take the supporting sieve supplied and put it in the filter membrane holder 4 Fill the test liquid in the extraction unit for details see Filling the test liquid Filling the extraction unit 92 5 Clean the analysis chamber thoroughly using the Flushi...

Page 53: ...usly by a level sensor When the lower fill level is reached in one container the system automatically switches over between the containers During the container switchover the message Containers being switched is displayed in the status line of the user interface Additionally the status light will blink red The sup ply of test liquid is locked until the container switchover is com plete The contain...

Page 54: ...pressurized air supply is open 1 Switch on the extraction unit with the main switch On the monitor the self test of the PC runs after 5 8 seconds 2 After the loading of the Operating System the user interface of the extraction unit starts O Select the required operating mode or start an extraction Refer to the ConTeS software manual for details on the user in terface Switching the extraction modul...

Page 55: ...liquid from leaking The design of the door with door locks varies depending on the model To open close the door use the handles provided for this pur pose Open the door with both hands on the door locks CAUTION Door is not correctly held Danger of crushing uHold the door with both hands and close it slowly Fig 21 Opening Closing the door 1 Door lock open 2 Door lock closed 1 2 3 4 5 6 7 8 9 A ...

Page 56: ...uOnly use hoses with suitable conductivity uGround the test item if it is on a support that has an insulating effect uOnly use original spare parts CAUTION Test liquid G60 Spezial or Feroclean L261 Danger to health by spraying the test liquid aerosols uKeep the door to the analysis chamber closed during the analy sis 6 3 1 Performing the spray extraction On the user interface select the spray extr...

Page 57: ...HYDAC FILTER SYSTEMS GMBH Operation 6 BeWa CTU1x3x CTU1x4x 4093420f en us web 57 124 A B Fig 22 Spray gun A with nozzle B A Spray gun B Nozzle Fig 23 Analysis chamber with grating 1 2 3 4 5 6 7 8 9 A ...

Page 58: ...he auxiliary equipment such as the hook in basket grating mounts for the test item etc 1 Place the test item to be sampled in the analysis chamber 2 Close the door and lock it 3 Select the required analysis parameters on the user interface and start the spray extraction 4 Spray the component surfaces to be analyzed evenly The test liquid now referred to as the analysis fluid loaded with the partia...

Page 59: ...MS GMBH Operation 6 BeWa CTU1x3x CTU1x4x 4093420f en us web 59 124 5 Then remove the filter membrane for analysis evaluation 6 Open the door and remove the test item O The spray extraction is complete 1 2 3 4 5 6 7 8 9 A ...

Page 60: ...recedes a sampling to determine the negative control value Enter the desired settings parameters flushing vol ume and pressure in the user interface and start the process Please refer to the ConTeS manual for this The analysis chamber of the extraction unit is cleaned in a defined manner using Flushing of inner chamber The nozzle for this is lo cated in the center of the analysis chamber Fig 25 Fl...

Page 61: ...the test liquid cause microscopic cav ities to be formed constantly which then always implode This ef fect referred to as cavitation causes contamination to be removed and accelerates the physical process NOTICE Protective gloves in the ultrasonic bath The protective gloves will be damaged destroyed uRemove the protective gloves from the test liquid during ultra sonic operation Pull the protective...

Page 62: ...nly with the corre sponding jig uUse the hook in basket Note the permissible weight of the test item of 0 5 kg For the ultrasonic test replace the grating in the analysis chamber with a proper device such as a freely hanging basket Hang the basket retaining frame a with the basket b in the cor responding thrust bolts in the analysis chamber b a Fig 27 Analysis chamber with mounts a Thrust bolts wi...

Page 63: ...illing quantity on the user interface Shut the ball valve on the filter membrane holder before beginning the ultrasonic extraction The temperature of the ultrasonic bath is continuously monitored If a temperature of 34 C is reached during ultrasonic extraction the monitor will switch off the ultrasonic vibrator The testing that is running will be interrupted while the unit cools down 1 2 3 4 5 6 7...

Page 64: ...anliness During the analysis it must therefore be ensured that the negative control value does not have a significant influence on the test result For this purpose the negative control value must first be recorded in a suitable manner In addition this value may only be in a special maximum ratio to the required technical cleanliness which is not exceeded The achievable negative control value depen...

Page 65: ...Wa CTU1x3x CTU1x4x 4093420f en us web 65 124 Requisite effort Particle size Cleaning time h after shut down 24 h Cleaning time h after shut down 24 h High 100 µm 1 5 4 3 5 Tab 7 Effort to achieve the negative control value 1 2 3 4 5 6 7 8 9 A ...

Page 66: ...r cas cading or changing the filter membranes varies The handling of different filter membrane holders is described below CAUTION Test liquid G60 Spezial or Feroclean L261 Health hazard uWear protective equipment 6 5 1 Creating cascades Cascade the filter membranes in the filter membrane holder ac cording to the following illustration example filter membrane holder with quick fastener 1 2 3 4 5 6 ...

Page 67: ...r mem brane 4 Upper part of the filter membrane holder 5 1 Filter membrane 100 µm 5 2 Filter membrane 20 µm 5 3 Filter membrane 5 µm 6 Supporting sieve 7 Intermediate ring 8 The lower part of the filter membrane holder with a hose connection A Cascade coarse B Cascade medium C Cascade fine Tab 8 Cascading the filter membrane holder Due to the design the filter membrane in the lower part 8 of the f...

Page 68: ...gage the lower part from the upper when the guide of the lower part is parallel to the lock guide 3 Pull down the lower part slightly Then pull it fully through the opening created 1 2 3 4 Place a single filter membrane or for cascading multiple fil ter membranes with different filtration ratings 1 coarse 2 medium 3 fine on the corresponding support sieve of the filter membrane holder 5 Place the ...

Page 69: ...uired adjust the lower part for the suitable grid When assembling two cascades select the middle grid 8 When assembling three cascades select the upper grid 9 Seal the filter membrane holder by turning it clockwise by 90 NOTICE Do not use any tools O The insertion of the filter membrane is complete 1 2 3 4 5 6 7 8 9 A ...

Page 70: ... Pull down the lower part slightly Then pull it fully through the opening created 13 Remove the filter membranes from the cascade and mark them as given in Chapter Labeling the filter membrane 76 ð Pass these filter membranes on for analysis 14 Install the filter membrane holder 15 Place the lower part horizontally in the upper part together with the filter membrane 16 Lift the lower part vertical...

Page 71: ...MBH Operation 6 BeWa CTU1x3x CTU1x4x 4093420f en us web 71 124 19 Seal the filter membrane holder by turning it clockwise by 90 NOTICE Do not use any tools O The removal of the filter membrane is complete 1 2 3 4 5 6 7 8 9 A ...

Page 72: ...acted ü End the extraction via the user interface ü Shut the ball valve upstream of the filter membrane holder 1 Hold the holder by the lower part with one hand Loosen the union nut counterclockwise with the other hand 2 Put down the lower part together with the filter membrane in its holder 3 Remove the filter membrane for further evaluation and mark it as shown in the chapter Labeling the filter...

Page 73: ...er membrane onto the supporting sieve 5 Lift the union nut Position the lower part together with the filter membrane flush underneath the upper part 6 Turn the union nut tightly in the clockwise direction NOTICE Do not use any tools O The changing of the filter membrane is complete 1 2 3 4 5 6 7 8 9 A ...

Page 74: ...ueeze the handles 1 of the clip together 6 Slide the clamp over the filter membrane holder 2 Carefully release the handles of the clamp due to the spring force of the clamp 3 the two halves are pressed together with the intermediate ring of the filter membrane holder O The insertion of the filter membrane is complete Removing the filter membrane ü Wait until the analysis fluid has been fully extra...

Page 75: ...ut an intermediate ring supporting sieve in the fil ter membrane holder Leak in the filter membrane holder uThe filter membrane holder is sealed effectively only when vacuum is applied a supporting sieve with a filter membrane is inserted uIt is not possible to use two intermediate rings 1 2 3 4 5 6 7 8 9 A ...

Page 76: ...example xyz 1 A 005 Tab 9 Example Marking of filter membranes Marking Description XYZ Running test item series running test item lot 1 Number of the filter membranes provided A When several flushing procedures are car ried out on a test item A B C Z for the establishment of the negative con trol value for the filter membrane 005 Rating of the filter membrane 005 5 µm 010 10 µm 100 100 µm 1 2 3 4 5...

Page 77: ...his variant is only possible in connection with the modules of the CTM EB 1xxx or CTM EF 1xxx For this purpose connect the coding plug 1 1 from the scope of delivery of the modules into the bushing 1 2 Only when the coding or module plug 1 1 is connected are the external connections enabled Select the return port connection R using the changeover switch 2 Alternatively you can return the test liqu...

Page 78: ...6 Operation HYDAC FILTER SYSTEMS GMBH 78 124 BeWa CTU1x3x CTU1x4x 4093420f en us web Fig 29 Variant A Add flushing 1 2 3 4 5 6 7 8 9 A ...

Page 79: ...o window of the operating software to check CTM E must be selected to do so This variant is only possible in connection with the modules of the CTM EB 1xxx or CTM EF 1xxx For this purpose connect the coding plug 1 1 from the scope of delivery of the modules into the bushing 1 2 Only when the coding or module plug 1 1 is connected are the external connections enabled Fig 30 Variant F 1 2 3 4 5 6 7 ...

Page 80: ...ction is per formed by means of this port in the analysis room Air extraction has been described in volume VDA19 1 since 2015 DANGER Aerosol formation in the analysis chamber due to air extraction with G60 L261 as the test liquid Risk of explosion uDo not perform air extraction on test items that have previously been flushed with test liquid G60 Special Feroclean L261 uDo not aim the air jet at li...

Page 81: ...HYDAC FILTER SYSTEMS GMBH Operation 6 BeWa CTU1x3x CTU1x4x 4093420f en us web 81 124 Fig 31 Variant EA 1 2 3 4 5 6 7 8 9 A ...

Page 82: ...n us web 6 7 4 Variant S2 Changing over the vacuum Switch the vacuum either to the filter membrane holder standard 1 or to the additional connection in the analysis chamber 2 to empty the test item Fig 32 Changing over vacuum 1 Fig 33 Changing over vacuum 2 1 2 3 4 5 6 7 8 9 A ...

Page 83: ...re Injury to the eyes uAlways wear eye protection Using the connecting hose 1 in the analysis chamber establish a connection between the flushing port and the upper connector at the front of the analysis chamber Install the pipe bend 2 with the outlet pointing down onto the lower connector Fig 34 External flushing connections 1 Connecting hose 2 Pipe bend Close the ports to the front of the analys...

Page 84: ...collect in the collecting pan and the float switch will trigger the warning contact for the visual acoustic sensor Reset the warning signal as described below 1 Switch off the extraction unit at the main switch 2 Rectify the leak in the extraction unit 3 Empty the collecting pan O The warning signal is reset Switch on the extraction unit with the main switch Fig 35 Option Sensor to signal that the...

Page 85: ...er being switched off WARNING Test liquid G60 Spezial or Feroclean L261 Flammable gas air mixture in the analysis chamber Danger of bodily injury uOpen fires or smoking are prohibited in the vicinity CAUTION Test liquid G60 Spezial or Feroclean L261 Health hazard uFollow all the instructions when handling the test liquid Details on this can be found in the safety data sheet of the test liquid uWea...

Page 86: ...Directive 2006 42 EC on machinery there is no obliga tion to perform periodic inspections in accordance with 15 and 16 of the Industrial Safety Regulation The other owner s obligations for normal work equipment accord ing to Industrial Safety Regulation and Labor Protection Law or the relevant local national ordinances remain unaffected 7 1 Maintenance tableDaily Weekly Every three months Annually...

Page 87: ...l with ultra sonic 5 7 9 Replacing hoses plastic pipe 3 7 9 Replacing hoses plastic pipe 3 1 Operating personnel 2 Service personnel 3 Specialist per sonnel Mechanical 4 Specialist personnel Electrical 5 Spe cialist personnel Service Administrator 7 2 Cleaning the analysis chamber The total surface area in the analysis chamber the opening cy cles opening duration and the environment all influence ...

Page 88: ...of inner chamber 7 2 1 Cleaning the analysis chamber in the case of test liquid Water with surfactants Clean the analysis chamber when using a water based test liquid due to self contamination daily 7 2 2 Cleaning the analysis chamber in the case of test liquid G60 Spezial Feroclean L261 Clean the analysis chamber if using test liquid G60 Spezial Feroclean L261 weekly 7 3 Cleaning the door Clean t...

Page 89: ...ellulose cotton are rubbed against one another Static charges of the materials arise thereby A discharge may be accel erated by the ambient conditions such as dry air and low external temperatures One visual feature which comes about when using the G 60 Spezial or Feroclean L261 as test liquid is that a film that looks like a pasty mass forms on the inside of the door The static charge counteracts...

Page 90: ...er is complete 7 5 Changing the test fluid Fixed change intervals of the test liquid are difficult to define due to different parameters such as sampling interval type and surface of the test items etc Define the change interval individually for each application The following characteristics of the test liquid change with increas ing use Check the test liquid cyclically for Appearance Greases oils...

Page 91: ... by hand 4 Start the Empty system process in the user interface To control the process see ConTeS 5 This process leaves a small amount of test liquid in the rinse return line filters and in the lines Max capacity is approx 20 liters Level 1 liter 6 Put the drain ball valve into the Operation position Wind up the hose and place it back in the extraction unit NOTICE Owing to the design of the unit t...

Page 92: ...ume calculation Filling the CTU1x3x To fill the extraction unit to top up the test liquid proceed as fol lows ü Start the Fill system procedure in the user interface and fol low the instructions Level 1 liter 1 Owing to the design of the unit the level sensor in the con tainer does not capture the container bottom As a result a container content of 1 liter is always displayed in the user in terfac...

Page 93: ...valve 6 Attach the filling hose to the ball valve and turn the ball valve to the Vent position 7 Start the Fill system menu item in the user interface ð The extraction unit is filled Overfilling is not possible the software automatically stops filling after the maximum filling quantity has been reached 8 Turn the ball valve in Operation position 9 Remove the filling hose from the ball valve 10 Att...

Page 94: ...ing of test liquids such as water with G60 Spezial or Fero clean L261 results in the formation of an emulsion Sampling with an emulsion results in non representative faulty measurement re sults 7 6 Checking the screwed and plug connections Screwed and plug connections can become loose due to shaking or vibrations Check all the screwed and plug connections regu larly for correct seating 7 7 Visual ...

Page 95: ...Assembly paste to assemble the screwed fittings The extraction unit will be contaminated the analyses will become unusable uDo not use any assembly paste to assemble the screwed fit tings To replace the hoses the plastic pipe you will need the following tool Hose cutter Fork wrench 14 mm Fork wrench 17 mm Fork wrench 19 mm Always use original spare parts which have the corresponding conductivity w...

Page 96: ...upling 2 Hose connection 3 Diffuser 4 Upper part of the filter membrane holder ü The test liquid in the analysis chamber is extracted fully ü Shut the ball valve on the filter membrane holder 1 Open the coupling 1 and remove the diffuser 3 2 Clean the diffuser 3 by blowing it out with compressed air 3 Put the diffuser in the filter membrane holder and tighten the coupling 1 by hand O The cleaning ...

Page 97: ...e flushing pressure to 2 bar ü Have a measuring beaker that can hold a volume of 5 liters ready 1 Start a spray extraction with a flushing volume of 5Mess becherliters 2 Fill the measuring beaker using the spray gun nozzle until the set volume according to the user interface has been completely conveyed 3 Now check the conveyed volume on the scale on the mea suring beaker A deviation of 5 4 75 5 2...

Page 98: ...mmedi ately Mechanical wear includes for example Cuts and tears which re sult from burrs sharp edges on components and excessive wear through components with rough surfaces Chemical wear comes about as a result of for example perme ation For details refer to chapter Permeation time according to EN 374 3 99 Provided there is no mechanical damage to the surface the pro tective gloves can be used for...

Page 99: ...EN 374 3 Specification of the results Assuming permeation takes place the penetration time is given in minutes for each test sample The average penetration time for each type of material is also indicated The duration of testing is given if no penetration occurs This means that when the user is constantly exposed to the chem ical it takes a minimum of 1 µg minute x cm to permeate the glove and com...

Page 100: ...gloves without mechanical action at room temper ature There was full and continuous contact Since in practice other and or additional loads often occur which differ from labo ratory conditions this information can only be an orientation guide They do not replace suitability tests by the end user For this reason we do not assume any obligation or liability in con nection with the information in thi...

Page 101: ...ionally secure the protective gloves to the inlet opening Using electrostatically conductive protective gloves When replacing the protective gloves ensure that there is suffi cient electrostatic conductivity as specified in DIN EN 61340 5 1 Rg 2 0 x 10 8 Ω Make sure that the resistor Rg Ω to EPA ground or to a grounding point is between 7 5x10 5 Rg 1x10 12 for protective gloves and fingerstalls Re...

Page 102: ...traction unit with the main switch For de tails see Switching the extraction unit on off 54 2 Remove the side paneling see Dismounting Installing the side cover 90 7 15 1 Changing the filter element MRF1 E The chapter describes how to change the filter element on the fil ter housing MRF1 E 1x Allen wrench 6 mm 1x strap wrench 1x lint free cloth ü The following activities refer to a filter unit fil...

Page 103: ...owl and drain the filter housing fully with the help of the drain plug 6 mm on the floor of the filter housing The ca pacity is 2 liters Screw the drain plug again into the filter bowl after draining 2 Loosen the union nut 1 by turning it in the clockwise direc tion and then remove the filter bowl 2 NOTICE Use a strap wrench to remove the union nut 1 3 Remove the used filter element from the eleme...

Page 104: ...6 Check the O ring on the cover for damage and replace it if necessary 7 Coat the O ring on the filter bowl lightly with the operating medium 8 For easy installation of the filter element wet the O ring on the filter element with the operating medium 9 Apply pressure to the new filter element by screwing it in slightly upwards into the element mount NOTICE Do not use any striking tools 1 2 3 4 5 6...

Page 105: ...Stainless steel nut lubricant containing a slip additive MoS2 11 Screw the filter bowl over the union nut onto the filter head 2 in the counterclockwise direction 12 When doing this screw the union nut hand tight only 13 Fill the filter housing slowly to avoid pressure surges 14 Check the filter for leaks O The changing of the filter element is complete After the commissioning check the filter hou...

Page 106: ...em so that the test liquid enters the analysis chamber Fill the test liquid see Filling the test liquid Filling the extraction unit 92 The extraction unit is overfilled with the test liquid You have added more than the dis played volume in the analysis chamber Shut the ball valve above the filter membrane holder Open the filter membrane holder and place a suitable container under it to collect the...

Page 107: ...et pressure Connect the compressed air line to the extraction unit see Connecting the com pressed air connection 51 Set the pressure control valve to 6 5 bar The cable to the pressure sensor is broken Replace the faulty cable The pressure sensor is faulty Replace the pressure sen sor The solenoid valve is faulty Replace the solenoid valve The Venturi nozzle is faulty Replace the Venturi nozzle Flo...

Page 108: ...d air control is not work ing Cable break to the proportional valve Replace the faulty cable The proportional valve is faulty Replace the proportional valve The proportional valve is not receiv ing an impulse Contact HYDAC Service Level display skips 3 liters Cable break to the level sensor Replace the faulty cable The level sensor is faulty Replace the level sensor Tab 12 Eliminating errors 1 2 3...

Page 109: ...ng shut down permanently proceed as follows Empty the product fully including all the components before the shutdown Fully disconnect the product from the surrounding units Slacken or remove the electric pneumatic or hydraulic connec tions insofar as they are present 9 3 Disposal Recycling Dismount and recycle the product that cannot be used any more not as a whole unit but in individual parts and...

Page 110: ... 1 Test liquid Feroclean L261 CTF1300P F 30 liters 4434287 1 Air filters 1284372 1 Grating for analysis chamber of CTU10xx 3325329 1 Grating for analysis chamber of CTU12xx 3448167 1 Level sensor container B1 B2 6043546 2 Piston check valve V1 V2 V3 V4 6034256 4 3 2 directional valve Y10 6022777 1 2 2 directional valve Y90 Y91 CTU1xx0 6035574 2 2 2 directional valve Yxx CTU1xx0 6035537 11 2 2 dire...

Page 111: ...nt for additional module CTU1xxx x x A x 1346006 3 Filter element for additional module CTU1xxx x x F x 1346006 3 Proportional Valve 6066759 1 Hose in analysis chamber to spray gun 6414551 1 Tab 13 Spare parts list CTU1xxx On request Quantity installed Description Part no Qty Filter membrane 5 µm Ø 47 mm Color white surface smooth 1 pack 100 pieces 309376 1 Tab 14 Spare parts for the filter membra...

Page 112: ...pendix HYDAC FILTER SYSTEMS GMBH 112 124 BeWa CTU1x3x CTU1x4x 4093420f en us web Description Part no Qty O ring 604122 1 3 Tab 16 Spare parts for the filter membrane holder Ø 47 mm CTMH 1 2 3 4 5 6 7 8 9 A ...

Page 113: ...iquid used Designation Part no Quan tity Flat fan nozzle 6263519 1 Round nozzle Ø 2 5 mm 3918070 1 Round nozzle Ø 3 mm 3942320 1 Round nozzle Ø 4 mm 3259932 1 Round nozzle Ø 5 mm 3868777 1 Tab 17 Accessories list for water as test liquid Designation Part no Quan tity Flat fan nozzle 6275263 1 Round nozzle Ø 2 5 mm 4094689 1 Round nozzle Ø 3 mm 4207156 1 Tab 18 Accessories list for water or G60 L26...

Page 114: ...Hotline product support Customer Service Branches service partners for maintenance repair and spare parts can be found always updated on our homepagewww hydac com HYDAC SYSTEMS SERVICES GMBH Friedrichsthaler Str 15 Werk 13 66450 Neunkirchen Heinitz Germany Telephone 49 6897 509 01 Fax 49 6897 509 324 E mail service hydac com Homepage www hydac com Tab 19 HYDAC Service Germany 1 2 3 4 5 6 7 8 9 A ...

Page 115: ...x A BeWa CTU1x3x CTU1x4x 4093420f en us web 115 124 A 3 EC declaration of conformity The EC declaration of conformity can be found in the technical documentation that is part of the scope of delivery for the product 1 2 3 4 5 6 7 8 9 A ...

Page 116: ...n unit with a fork lift truck Example of a CTU 1xxx 40 Fig 12 Packaging the extraction unit 41 Fig 13 Moving using the handle 43 Fig 14 Resistors in the X2 terminal strip 44 Fig 15 Supply voltage of the PC monitor ultrasonic 45 Fig 16 Signal cable of the PC monitor keyboard etc 46 Fig 17 Suctioning the CTU1x3x 48 Fig 18 Suctioning the machine room of the CTU1x4x 49 Fig 19 Suctioning of the analysi...

Page 117: ...g the filter membrane holder 67 Fig 29 Variant A Add flushing 78 Fig 30 Variant F 79 Fig 31 Variant EA 81 Fig 32 Changing over vacuum 1 82 Fig 33 Changing over vacuum 2 82 Fig 34 External flushing connections 83 Fig 35 Option Sensor to signal that the collecting pan is full 84 Fig 36 Cleaning the diffuser 96 Fig 37 Preparing the protective gloves 101 ...

Page 118: ...filter membrane holder 67 Tab 9 Example Marking of filter membranes 76 Tab 10 Volume calculation 92 Tab 11 Protection index according to EN 374 3 99 Tab 12 Eliminating errors 106 Tab 13 Spare parts list CTU1xxx 110 Tab 14 Spare parts for the filter membrane holder Ø 47 mm all 111 Tab 15 Spare parts for the filter membrane holder Ø 47 mm can be screwed with clamp 111 Tab 16 Spare parts for the filt...

Page 119: ... of regulations rules information and principles to support companies and insured parties in the discharge of their obligations in the area of safety and health DIN EN ISO 8434 1 Metallic tube connections for fluid power and general use Part 1 Screwed con nections with 24 cone connectors These in accordance with DIN EN ISO 8434 1 and DIN 2353 standardized com ponents for hydraulic connection tech ...

Page 120: ...m user This is in tended to provide the user with the nec essary data and handling recommenda tions when handling substances and mixtures in order to be able to take the necessary measures for health protec tion safety at work and protection of the environment Test item Component for sampling component cleanliness analysis contamination test Test liquid Flushing fluid analysis fluid for spray extr...

Page 121: ... Control panel 38 Customer service 114 D Diffuser Cleaning the 96 Dimensions Analysis chamber 36 Extraction unit 31 35 Directives 2006 42 EC 86 2014 68 EU 86 VDA 19 28 Disposal Disposal 109 Recycling 109 Documentation Representative 2 Door Cleaning the 88 Electrostatically charged 89 Maintaining the 89 Opening Closing the 55 E EC declaration of conformity 27 115 Electrical circuit diagram 27 Exclu...

Page 122: ...cturer 2 N Negative control value Achievable 64 Determining the 64 Nominal power 31 Nominal voltage 31 O Operating elements 37 Owner information Containers under pressure 86 P Payload 29 31 Permeation time 100 Protective gloves Checking the 98 Conductivity 101 Installing the 100 Removing the 101 Publisher 2 R Regulations Industrial Safety Regulation 86 S Service life 32 shutdown Permanent 109 Temp...

Page 123: ...CTU1x3x CTU1x4x 4093420f en us web 123 124 Ageing characteristics 90 Changing the 90 Draining the 90 Filling quantity 31 Filling the 92 Permissible 31 U Ultrasonic Frequency 32 Power 32 Ultrasonic bath 61 W Warranty 13 Weight when empty 31 ...

Page 124: ...www hydac com ...
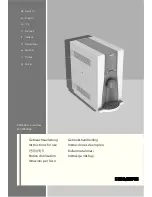
Reviews: