background image

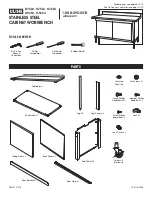
Adding 2 Drives to the

C1107 Series Jukebox

HP Part No.  C1158-90001

Printed in USA February, 1998

Edition 2  0298

*

 A utility to download the code - SCSI Pro from CoComp  or SCSI Toolbox from

*

A PC with a SCSI interface and appropriate cables

Important! Read This First

BEFORE starting this upgrade, obtain the following:

*

The downloadable code required for this upgrade. Obtain this code

 from www.hp.com/isgsupport/optical/fw/firmware.html

This upgrade requires code to be downloaded to the controller PCA and the drives.

   Peripheral Test Instruments (PTI).

Summary of Contents for C1107 Series

Page 1: ...I Toolbox from A PC with a SCSI interface and appropriate cables Important Read This First BEFORE starting this upgrade obtain the following The downloadable code required for this upgrade Obtain this code from www hp com isgsupport optical fw firmware html This upgrade requires code to be downloaded to the controller PCA and the drives Peripheral Test Instruments PTI ...

Page 2: ... Hewlett Packard Company 1998 ...

Page 3: ...es the product a C1107F G H configuration Before Upgrade using 1 2 or 3 drive upgrade kits 2 drives kit Upgraded to equivalent of of drives Half capacity configurations C1104F G H 4 drives 1 kit C1105F G H 6 drives a Full capacity configurations C1107F G H 6 drives C1108F G H 8 drives C1110F G H 10 drives 1 kit C1108F G H 8 drives C1110F G H 10 drives C1112F G H 12 drives C1107F G H 6 drives C1108...

Page 4: ...terminator C1108 61600 1 drive bracket air seal C1107 80604 10 M3x6 T10 screws 0515 2382 2 product upgrade label sheets Upgrade to 5181 9902 1 these instructions Note This document is not necessarily revised as each part number is revised In the above list an x is placed in service part numbers parts orderable from Support Materials Organization to designate that this digit increments when the par...

Page 5: ...o 3 Remove power from the jukebox 4 Disconnect the SCSI interface from the host Caution Do NOT switch off power to the jukebox until you are sure the SCSI bus is inactive Switching off the jukebox when the SCSI bus is active can cause data loss and or indeterminate bus states When doing this upgrade be sure that disk cartridges are not moved from their original slot locations If you need to remove...

Page 6: ...ou are adding two drives to a full configuration with 6 or 10 drives install the drives in the first available empty drive enclosure from the top DO NOT skip drive mounting locations See the right hand box in Figure 1 If you are upgrading to a 10 drive unit move the drives at position 3 down to position 5 move the fan at position 5 up to position 3 and add the new drives in position 6 Enclosure 3 ...

Page 7: ...7 Figure 1 Drive locations in 8 10 and 12 drive upgrades ...

Page 8: ...side panels have 2 T 20 screws on the bottom edge Start from the bottom panel first Figure 2 Screws on side and rear panels 2 Remove the two RFI panels There are 6 T 20 screws around the edge of each panel Figure 3 Lower and upper RFI panels ...

Page 9: ... the top cable access panel on the top rear of the drive enclosure The access panel will rotate out if the 2 T 10 mounting screws on either side of the enclosure are removed 5 Place the empty drive enclosure on its side and trim off the top half of the cable hole edge protec tor Use a utility knife to cut through the middle of each side of the edge protector Remove the top half See Figure 4 Cuttin...

Page 10: ...front of the drive Refer to Figure 5 for DIP switch location and orientation on the top of the drives Figure 5 Orientation of the drive DIP switches 7 Install drives in the drive enclosure a Mount the drive interface cable clips on the cable as shown in Figure 6 Figure 6 Attaching cable clips to the double drive interface cable ...

Page 11: ... outside of the enclo sure so that the taller folded end is inside the drive enclosure just behind the interface cable b Insert the double drive interface cable with clips attached c Insert the power cable behind the other two cables The two separate power plugs go inside the chassis Figure 7 Cables and one drive Figure 8 Mounting drives in the enclosure ...

Page 12: ... the drive enclosure Mount the cables to the drive similar to the lower drive except use the TOP drive interface cable Route the top and bottom power cables OVER the SCSI cable i Mount the upper drive in the drive enclosure using the 4 T 10 screws Note If you can t get the drive all the way into the enclosure loosen the T 10 screws that secure the bottom access panel one screw on each side panel T...

Page 13: ... were loosened 9 Install remove the sticky backing and attach the L shaped air seal on drive enclosure hole as indicated in Figure 8 The small square air seal should be attached over the air flow hole on the other side of the drive enclosure Note At this point verify that the cables are connected properly to the drives They are installed properly if they can be laid flat against the side of the dr...

Page 14: ...ortion on the bottom of the enclosure rides on the tabs on each side of the bottom of the enclosure tray Check this by looking into the front of the stack to make sure that the slots on the front bottom edges of the drive enclosure pass over the two tabs protruding from the sides of the drive stack Figure 12 Slots and tabs that support the drive enclosure lftdam gal ...

Page 15: ...g to an 8 drive jukebox Plug the capacitive load terminator into one of the lower two connectors on the lower interposer PCA Figure 13 Capacitive load terminator Note If you are upgrading this jukebox to a TOTAL of 8 drives or 10 drives you must plug a capacitive load terminator to one of the SCSI cable connectors on the lower interposer PCA If one already exists on that jukebox use that one do no...

Reviews: