background image

Honeywell

User Manual

SmartVFD HVAC

Variable Frequency Drives

for Constant and Variable

Torque Applications

63-2692-08

Summary of Contents for SmartVFD HVAC MR4

Page 1: ...Honeywell User Manual SmartVFD HVAC Variable Frequency Drives for Constant and Variable Torque Applications 63 2692 08 ...

Page 2: ...ke resistor cables 23 4 3 Control cables 23 4 4 Cable installation 24 4 4 1 Frames MR4 to MR7 24 4 4 2 Frames MR8 and MR9 31 4 4 3 Cable and motor insulation checks 39 5 Commissioning 40 5 1 Commissioning of the SmartVFD HVAC 41 5 2 Changing EMC protection class 42 5 2 1 Frames MR4 to MR7 42 5 2 2 Frame MR8 44 5 2 3 Frame MR9 45 6 Control unit 48 6 1 Control unit cabling 49 6 1 1 Control cable siz...

Page 3: ...Honeywell 1 7 1 3 Definitions of overloadability 63 7 2 SmartVFD HVAC technical data 64 7 2 1 Technical information on control connections 66 ...

Page 4: ...ad go out if no keypad is attached see the indicators on the cover Wait 5 more minutes before doing any work on the connections of the drive Do not open the cover before this time has expired After expiration of this time use a measur ing equipment to absolutely ensure that no voltage is present Always ensure absence of voltage before starting any electrical work The control I O terminals are isol...

Page 5: ...the drive is used as a part of a machine the machine manufacturer is responsible for providing the machine with a supply disconnecting device EN 60204 1 Only spare parts delivered by Honeywell can be used At power up power brake or fault reset the motor will start immediately if the start signal is active unless the pulse control for Start Stop logic has been selected Futhermore the I O functional...

Page 6: ...on properly 1 4 Running the motor MOTOR RUN CHECK LIST Do not perform any voltage withstand tests on any part of the drive There is a certain procedure according to which the tests shall be performed Ignoring this procedure may result in damaged product Before starting the motor check that the motor is mounted properly and ensure that the machine connected to the motor allows the motor to be start...

Page 7: ...Honeywell 5 SAFETY ...

Page 8: ...rive Attach the sticker on the side of the drive to avoid losing it Should the drive be later modified mark the change on the sticker Figure 1 Product modified sticker 2 2 Unpacking and lifting the drive The weights of the drives vary greatly according to the size You may need to use a piece of special lifting equipment to remove the drive from its package Note the weights of each indi vidual fram...

Page 9: ...after unpacking the product check that no signs of transport damages are to be found on the product and that the delivery is complete Should the drive have been damaged during the shipping please contact primarily the cargo insurance company or the carrier NOTE Place the lifting hooks symmetrically in at least two holes The lifting device must be able to carry weight of the drive NOTE The maximum ...

Page 10: ...VFDSD Honeywell SmartVFD HVAC 0 Drive Only or No Special Options HVFDSB Honeywell SmartVFD BYPASS 1 Auto Bypass 2 Auto Bypass and HOA Input Phase 3 Three Phase 3 in 3 out Contactors 0 Drive Only Nominal Voltage 1 Disconnect Only A 208 230 Vac Drive Alone 208 Vac Bypass 2 Two Contactor Bypass B 230 Vac Bypass 3 Three Contactor Bypass C 480 Vac D 575 Vac Enclosure Type 1 NEMA 1 Nominal Horsepower 2 ...

Page 11: ... in the delivery Rubber grommets sizes vary according to frame Power cable clamps for EMC grounding Screws for fixing the power cable clamps Control cable grounding clamps M4 screw for EMC level change in frame MR7 Additional grounding screw if necessary see chapter 1 3 Ferrite holder Optional plastic shield to prevent unintended contact with live parts from front MR8 and MR9 IP00 ...

Page 12: ...hat the mounting plane is relatively even The drive shall be fixed with four screws or bolts depending on the unit size 3 1 Dimensions 3 1 1 Wall mount MR4 MR7 Figure 3 SmartVFD HVAC dimensions MR4 wall mount 5 04 3 94 Ø 28 Ø 51 2 83 55 3 94 2 44 7 48 NEMA1 Ø 98 1 30 1 26 1 26 NEMA12 1 26 1 30 1 26 Ø 98 ...

Page 13: ...s MR6 wall mount Optional mounting holes for NX replacement 8 43 5 67 4 53 57 Ø 28 Ø 55 Ø 28 2 83 3 94 57 4 53 Ø 28 3 94 NEMA1 1 38 1 46 1 46 Ø1 30 Ø1 30 Ø 98 NEMA12 1 36 1 48 1 48 1 38 1 46 1 46 7 68 5 83 Ø 61 Ø 35 2 83 Ø 35 5 83 9 02 2 01 1 83 1 83 NEMA1 Ø1 57Ø1 30 Ø1 57 1 42 1 42 2 40 2 01 1 83 NEMA12 ...

Page 14: ...1 2 Wall mount MR8 and MR9 Figure 7 AC drive dimensions MR8 NEMA1 and NEMA12 10 20 Ø 79 9 33 7 48 Ø 35 Ø 63 Ø2 01 NEMA1 2 72 2 72 1 38 1 38 NEMA12 Ø 98 Ø1 97 2 72 2 72 1 77 1 77 Ø 98 3 x 1 50 Ø2 36 2 46 6 46 11 42 Ø 87 Ø 43 Ø 35 13 50 8 54 Ø 35 Ø 35 26 46 27 32 8 50 37 64 9 25 ...

Page 15: ...recessed into the cabinet wall or similar surface A special flush mount option is available for this purpose For an example of a flush mounted drive see Figure 9 Figure 9 Example of flush mount frame MR9 Ø 35 18 90 15 75 Ø 35 14 17 11 50 Ø 87 14 37 13 98 14 17 Ø 35 Ø 35 Cabinet wall or similar IP21 IP54 Cabinet wall or similar ...

Page 16: ...depth dimen sions of the drives with the flush mount option Figure 10 Flush mount cutout dimensions for MR4 to MR6 Table 3 Flush mount cutout dimensions for MR4 to MR6 in Frame A B C D E F MR4 12 20 5 39 13 27 5 67 4 33 12 44 MR5 16 06 5 98 17 09 6 30 5 20 16 30 MR6 21 02 7 99 22 05 8 31 7 24 21 30 A C F Opening outline Drive outline TOP ...

Page 17: ...Honeywell 15 MOUNTING Figure 11 MR4 to MR6 flush mount depth dimensions MR4 MR5 MR6 3 03 4 45 7 48 8 43 4 49 3 94 4 17 4 84 9 02 ...

Page 18: ...re 13 the dimensions of the drives with the flush mount option Figure 12 Flush mount cutout dimensions for MR7 to MR9 Table 4 Flush mount cutout dimensions for MR7 to MR9 in Frame A B C D E MR7 25 79 9 45 26 85 10 55 53 MR8 33 82 11 73 34 96 14 13 67 MR9 38 39 19 09 41 34 20 87 2 13 C A E Drive outline Opening outline TOP ...

Page 19: ...Honeywell 17 MOUNTING Figure 13 MR7 to MR9 flush mount depth dimensions 4 33 5 87 MR7 MR8 9 17 MR9 Ø 87 4 25 9 72 ...

Page 20: ...ir does not exceed the maximum ambient tem perature of the converter Table 5 Min clearances around drive Figure 14 Installation space A clearance around the drive see also B B distance from one drive to another or distance to cabinet wall C free space above the drive D free space underneath the drive Min clearance in NEMA1 Type A Min clearances A and B for drives with IP54 enclosure is 0 in B C D ...

Page 21: ...see Figure 15 Moreover the outlet air used for cooling by the lower unit must be directed away from the air intake of the upper unit Figure 15 Installation space when drives are mounted on top of each other Table 6 Required cooling air Type Cooling air required cfm MR4 26 MR5 44 MR6 112 MR7 109 MR8 197 MR9 366 C D ...

Page 22: ...ic mains voltage MCMK or similar recommended See Figure 16 3 Symmetrical power cable equipped with compact low impedance shield and intended for the specific mains voltage MCCMK EMCMK or similar recommended Recom mended cable transfer impedance 1 30MHz max 100mohm m See Figure 16 360º grounding of the shield with cable glands in motor end needed for EMC level C2 4 Screened cable equipped with comp...

Page 23: ...e for use on a circuit capable of delivering not more than 100 000 rms sym metrical amperes 600V maximum 4 1 1 Cable dimensioning and selection Table 8 shows the minimum dimensions of the Cu Al cables and the corresponding fuse sizes Recommended fuse types are gG gL These instructions apply only to cases with one motor and one cable connection from the drive to the motor In any other case ask the ...

Page 24: ... F Use only cables with concentric copper shield Max number of parallel cables is 9 When using cables in parallel NOTE HOWEVER that the requirements of both the cross sectional area and the max number of cables must be observed For important information on the requirements of the grounding conductor see standard Underwriters Laboratories UL508C For the correction factors for each temperature see t...

Page 25: ...of parallel cables is 9 When using cables in parallel NOTE HOWEVER that the requirements of both the cross sectional area and the max number of cables must be observed For important information on the requirements of the grounding conductor see standard Underwriters Laboratories UL508C For the correction factors for each temperature see the instructions of standard Underwriters Labora tories UL508...

Page 26: ...low The given distances also apply between the motor cables and signal cables of other systems The maximum lengths of motor cables are 328 ft MR4 492 ft MR5 and MR6 and 656 ft MR7 to MR9 The motor cables should cross other cables at an angle of 90 degrees If cable insulation checks are needed see chapter Cable and motor insulation checks Start the cable installation according to the instructions b...

Page 27: ...10 Cables stripping lengths in Figure 18 Frame A1 B1 C1 D1 C2 D2 E MR4 59 1 38 39 79 28 1 38 Leave as short as pos sible MR5 79 1 57 39 1 18 39 1 57 MR6 79 3 54 59 2 36 59 2 36 MR7 79 3 15 79 3 15 79 3 15 2 Open the cover of the drive ...

Page 28: ...ure 19 Figure 20 3 Remove the screws of the cable protection plate Do not open the cover of the power unit 4 Insert the cable grommets included in the delivery in the openings of the cable entry plate included as shown in the picture ...

Page 29: ...mmet openings wider than what is neces sary for the cables you are using IMPORTANT NOTE FOR NEMA12 INSTALLATION To meet the requirements of the enclosure class NEMA12 the connection between the grommet and the cable must be tight Therefore lead the first bit of the cable out of the grommet straight before letting it bend If this is not possible the tightness of the connection must be ensured with ...

Page 30: ...POWER CABLING Honeywell 28 4 Figure 22 Figure 23 6 Detach the cable clamps and the grounding clamps Figure 22 and place the cable entry plate with the cables in the groove on the drive frame Figure 23 ...

Page 31: ...all three cables into pigtails and make a grounding connection with a clamp as shown in Figure 24 3 Make the pigtails just long enough to reach and be fixed to the terminal not longer Frame Type Tightening torque Nm lb in Power and motor terminals Tightening torque Nm lb in EMC grounding clamps Tightening torque Nm lb in Grounding terminals Nm lb in Nm lb in Nm lb in MR4 C 0015 C 0075 0 5 0 6 4 5 ...

Page 32: ... the grounding cable to the motor and the drive terminals marked with NOTE Two protective conductors are required according to standard EN61800 5 1 See Figure 25 and chapter Grounding and ground fault protection Use an M5 size screw and tighten it to 2 0 Nm 17 7 lb in 9 Re mount the cable protection plate Figure 26 and the cover of the drive M5 2Nm ...

Page 33: ...cables Table 12 Cables stripping lengths in 1 Strip the motor and mains cables as advised below Frame A1 B1 C1 D1 C2 D2 E MR8 1 57 7 09 98 11 81 98 11 81 Leave as short as possible MR9 1 57 7 09 98 11 81 98 11 81 D1 B1 C1 A1 D2 C2 Earth conductor MAINS MOTOR Earth conductor E ...

Page 34: ...POWER CABLING Honeywell 32 4 Figure 28 Figure 29 2 MR9 only Remove the main cover of the AC drive 3 Remove the cable cover 1 and the cable fitting plate 2 MR9 1 2 ...

Page 35: ...Honeywell 33 POWER CABLING Figure 30 Figure 31 4 MR9 only Loosen the screws and remove the sealing plate 5 Locate the terminals OBSERVE the exceptional placement of motor cable ter minals in MR8 MR9 ...

Page 36: ...for the cables you are using 7 Place the grommet with the cable so that the frame end plate fits in the groove on the grommet see Figure 33 To meet the requirements of the enclosure class NEMA12 the connection between the grommet and the cable must be tight Therefore lead the first bit of the cable out of the grommet straight before letting it bend If this is not possible the tightness of the conn...

Page 37: ...upply brake and motor cables into their respective terminals a Form the rest of the cable shield of all cables into pigtails and make a grounding connection as shown in Figure 35 b using the clamp from the Accessories bag Note also correct position of the ferrite holder c AFTER the cable strip ping in MR8 and EMC class C2 only Note If you use several cables on one connector observe the position of...

Page 38: ...Tightening torque Nm lb in Power and motor terminals Tightening torque Nm lb in EMC grounding clamps Tightening torque Nm lb in Grounding terminals Nm lb in Nm lb in Nm lb in MR8 C 1000 C 1500 20 40 Cable clamping Ouneva Pressure Terminal Connector 177 354 1 5 13 3 20 177 MR9 C 2000 C 2500 20 40 177 354 1 5 13 3 20 177 L1 L2 L3 DC DC R R b a MR8 c U W V Cable lug Cable lug Connector ...

Page 39: ...l 37 POWER CABLING Figure 37 Figure 38 10 Expose the shield of all three cables in order to make a 360 degree connection with the cable clamp 11 Re attach first the cable fitting plate and then the cable cover ...

Page 40: ... of the earth cable to the motor and the AC drive terminals marked with NOTE Two protective conductors are required according to standard EN61800 5 1 See chapter Grounding and ground fault protection Connect the protective conductor using a cable shoe and an M8 screw included in the Accessories bag on either of the screw connectors as advised in Figure 40 ...

Page 41: ...connect the mains cable from terminals L1 L2 and L3 of the drive and from the mains Measure the insulation resistance of the mains cable between each phase conductor as well as between each phase conductor and the protective ground conductor The insula tion resistance must be 1MΩ at ambient temperature of 68 F 3 Motor insulation checks Disconnect the motor cable from the motor and open the bridgin...

Page 42: ...lay outputs and other I O terminals may have a dangerous control voltage present even when the drive is disconnected from mains Do not make any connections to or from the drive when it is connected to the mains After disconnecting the drive from the mains wait until the fan stops and the indicators on the keypad go out if no keypad is attached see the indicators on the cover Wait 5 more minutes be...

Page 43: ...nected to protective ground marked with check the tightening torques of all terminals the wires do not touch the electrical components of the drive the common inputs of digital input groups are connected to 24V or ground of the I O terminal or the external supply 3 Check the quality and quantity of cooling air chapter 3 2 and Table 6 4 Check the inside of the drive for condensation 5 Check that al...

Page 44: ...ow 5 2 1 Frames MR4 to MR7 Figure 41 Locations of the EMC jumpers in frames MR4 to MR7 Figure 42 Removing the jumper MR5 as example Warning Do not perform any modifications on the drive when it is con nected to mains 1 Remove the main cover frames MR4 to MR7 and the cable cover frame MR7 of the AC drive see pages 25 and 26 and locate the jumpers connecting the built in RFI filters to ground See Fi...

Page 45: ...COMMISSIONING Figure 43 MR7 Detaching the DC grounding busbar from frame 3 Additionally for MR7 locate the DC grounding busbar between connectors R and U and detach the busbar from the frame by undoing the M4 screw ...

Page 46: ...to modify the EMC protection of the AC drive of frame MR8 to EMC level T Figure 44 Figure 45 1 Remove the main cover of the AC drive and locate the jumper Push down the grounding arm See Figure 44 2 Locate the EMC jumper under the cover and remove it using long nose pliers or similar ...

Page 47: ...he Molex connector in the accessories bag Remove the main cover of the AC drive and locate the place for the connector next to the fan Push the Molex connector in its place See Figure 46 2 Further remove the extension box cover 1 the touch shield 2 the I O plate 4 with I O grommet plate 3 Locate the EMC jumper on the EMC board see mag nification below and remove it Molex connector ...

Page 48: ...at the EMC pro tection class settings of the drive are appropriately made NOTE After having performed the change write EMC level modified on the stick er included with the drive delivery see below and note the date Unless already done attach the sticker close to the name plate of the drive ...

Page 49: ...Honeywell 47 COMMISSIONING ...

Page 50: ...he re lay terminals the general wiring diagram and the control signal descriptions The control board can be powered externally 24VDC 10 by connecting the external pow er source to terminal 30 see page 52 This voltage is sufficient for parameter setting and for keeping the control unit active Note however that the measurements of the main circuit e g DC link voltage unit temperature are not availab...

Page 51: ...in Tables 15 to 17 Figure 49 6 1 1 Control cable sizing The control cables shall be at least 0 5 mm2 screened multicore cables see Table 7 The max imum terminal wire size is 2 5 mm2 for the relay and other terminals Find the tightening torques of the control and relay board terminals in Table 14 below Table 14 Control cable tightening torques Terminal screw Tightening torque Nm lb in All I O and r...

Page 52: ...nce output 2 AI1 Analogue input voltage or current 3 AI1 Analogue input com mon current 4 AI2 Analogue input voltage or current 5 AI2 Analogue input com mon current 6 24Vout 24V aux voltage 7 GND I O ground 8 DI1 Digital input 1 9 DI2 Digital input 2 10 DI3 Digital input 3 11 CM Common for DI1 DI6 Digital inputs can be disconnected from ground see chapter 6 1 2 2 12 24Vout 24V aux voltage 13 GND I...

Page 53: ...nal Signal 21 RO1 1 NC Relay output 1 22 RO1 2 CM 23 RO1 3 NO 24 RO2 1 NC Relay output 2 25 RO2 2 CM 26 RO2 3 NO 32 RO3 1 CM Relay output 3 33 RO3 2 NO Relay board 2 Terminal Signal 21 RO1 1 Relay output 1 22 RO1 2 23 RO1 3 24 RO2 1 Relay output 2 25 RO2 2 26 RO2 3 28 TI1 Thermistor input 29 TI1 From Basic I O board From term 13 From term 6 or 12 RUN From Basic I O board From term 13 From term 12 ...

Page 54: ...ppropriate selections for your requirements Figure 50 Dip switches 6 1 2 2 Disconnecting digital inputs from ground The digital inputs terminals 8 10 and 14 16 on the basic I O board can be disconnected from ground by removing a jumper on the control board See Figure 51 Lift the plastic lid to expose the jumper and apply long nose pliers or similar to remove it Figure 51 Remove this jumper to disc...

Page 55: ... left to the control keypad See Figure 52 Figure 52 6 2 1 Prepare for use through ethernet Figure 53 1 Connect the Ethernet cable see specification on page 55 to its terminal and run the cable through the conduit as shown in Figure 53 Ethernet connector Ethernet cable run conduit I O terminal see larger picture Grounding bar DIP switches 32 33 12 13 14 15 16 17 18 19 30 B A RS485 terminals 21 22 2...

Page 56: ...ual of the fieldbus you are using 2 Cut free the opening on the drive cover for the Ethernet cable protection class IP21 3 Remount the drive cover NOTE When planning the cable runs remember to keep the distance between the Ethernet cable and the motor cable at a mini mum of 12 inch Ethernet cable ...

Page 57: ... for the last device Leave no more than 40 in of the cable outside the terminal block and strip the cables at about 20 in to fit in the terminals See picture below Also strip the cable now at such a distance from the terminal that you can fix it to the frame with the grounding clamp Strip the cable at a maximum length of 60 in Do not strip the aluminum cable shield 2 Then connect the cable to its ...

Page 58: ...g the cable clamp included in the delivery of the drive ground the shield of the RS485 cable to the frame of the drive B 20 A 11 8 9 10 12 B 13 1415 16 1718 19 20 A 1 11 2 3 4 5 6 7 8 9 10 21 22 23 24 2526 2829 RS485 terminals A and B Cable clamp ...

Page 59: ...and turn the switch for the RS485 bus termination resistor to position ON Biasing is built in the termination resistor See also step 7 on page 58 5 Unless already done for the other control cables cut free the opening on the drive cover for the RS485 cable protection class IP21 RS485 AO1 AI2 AI1 OFF ON Current Voltage Current Voltage Current Voltage Bus termination resistor ...

Page 60: ...us termination must be set for the first and the last device of the fieldbus line See picture below See also step 4 on page 57 We recommend that the first device on the bus and thus terminated was the Master device Connector 2 5 mm2 Cable type STP Shielded Twisted Pair type Belden 9841 or similar Cable length Depends on the used fieldbus See respective bus manual RS485 cables BACnet MS TP Bus term...

Page 61: ...me Clock RTC requires that a battery is installed in the Smart VFD HVAC drive The place for the battery can be found in all frames left to the control keypad see Figure 57 Detailed information on the functions of the Real Time Clock RTC can be found in the Appli cation Manual Figure 57 Real Time Clock battery MR4 ...

Page 62: ... galvanically isolated from the I O ground The relay outputs are addition ally double isolated from each other at 300VAC EN 50178 Figure 58 Galvanic isolation barriers L1 L2 L3 U V W RO1 1 RO1 2 RO1 3 RO2 3 RO2 2 RO2 1 10Vref GND GND 24V AI1 AI2 AI2 DI1 DI6 CM DI1 DI6 CM AO1 AO1 nk6_15 TI1 TI1 24Vin RS485 AI1 ControlI O ground Digital input group Analogue output Control board Control keypad Power ...

Page 63: ...MR5 A 0050 18 0 19 8 4 0 5 0 A 0075 24 0 26 4 5 5 7 5 A 0100 Given low loadabilities valid for 230V drives at a switching frequency of 4kHz Table 20 Power ratings supply voltage 208 240V NOTE The rated currents in given ambient temperatures in Table 21 are achieved only when the switching frequency is equal to or less than the fac tory default 31 0 34 1 7 5 10 0 MR6 A 0150 48 0 52 8 11 0 15 0 A 02...

Page 64: ...A 10 overload 104 F kW 10 overload 104 F HP MR4 C 0015 3 4 3 7 1 1 1 5 C 0020 4 8 5 3 1 5 2 0 C 0030 5 6 6 2 2 2 3 0 C 0050 8 0 8 8 3 0 5 0 C 0075 Given low loadabilities valid for 480V drives at a switching frequency of 4kHz 12 0 13 2 5 5 7 5 MR5 C 0100 16 0 17 6 7 5 10 C 0150 23 0 25 3 11 0 15 0 C 0200 31 0 34 1 15 0 20 0 MR6 C 0250 38 0 41 8 18 5 25 0 C 0300 46 0 50 6 22 0 30 0 C 0400 61 0 67 1...

Page 65: ...ation at rated output current IL the converter is fed with 110 IL for 1 min followed by a period of IL Example If the duty cycle requires 110 rated current IL for 1 min in every 10 min the remaining 9 min must be at rated current or less Figure 59 Low overload IL IL 110 1 min 9 min IL 110 Current Time ...

Page 66: ...tching frequency derating in case of overheating Frequency reference Analogue input Panel reference Resolution 0 1 10 bit accuracy 1 Resolution 0 01 Hz Field weakening point 8 320 Hz Acceleration time 0 1 3000 sec Deceleration time 0 1 3000 sec Ambient conditions Ambient operating temperature IL 10 C no frost 40 C Storage temperature 40 F 158 F Relative humidity 0 to 95 RH non condensing non corro...

Page 67: ...deliv ered with class C2 EMC filtering if not oth erwise specified Honeywell Smart VFD HVAC can be modi fied for IT networks See chapter 5 2 Emissions Average noise level cooling fan sound power level in dB A MR4 65 MR7 77 MR5 70 MR8 86 MR6 77 MR9 87 Safety EN 61800 5 1 2007 CE cUL see unit nameplate for more detailed approvals Control connections See chapter 7 2 1 Protections Overvoltage trip lim...

Page 68: ...cuit protected 7 I O ground Ground for reference and controls connected internally to frame ground through 1M 8 Digital input 1 Positive or negative logic Ri min 5k 18 30V 1 9 Digital input 2 10 Digital input 3 11 Common A for DIN1 DIN6 Digital inputs can be disconnected from ground see chapter 6 1 2 2 12 24V aux voltage 24VDC 10 max volt ripple 100mVrms max 250mA Dimensioning max 1000mA control b...

Page 69: ...2 Switching capacity24VDC 8A 250VAC 8A 125VDC 0 4A Min switching load5V 10mA 25 26 32 Relay output 3 Switching capacity24VDC 8A 250VAC 8A 125VDC 0 4A Min switching load5V 10mA 33 Relay board 2 Relay board with two Type 8A STST and standard thermistor input 5 5 mm isolation between channels External interface connector See chapter 6 Terminal Signal Technical information 21 Relay output 1 If 230VAC ...

Page 70: ...rol Solutions Honeywell International Inc 1985 Douglas Drive North Golden Valley MN 55422 customer honeywell com U S Registered Trademark 2011 Honeywell International Inc 63 2692 08 M S Rev 11 11 Printed in United States ...

Page 71: ...Honeywell Application Manual SmartVFD HVAC Variable Frequency Drives for Constant and Variable Torque Applications 63 2692 08 ...

Page 72: ...0 3 2 Example of control connections 21 3 3 HVAC Application Quick setup parameter group 23 3 4 Monitor group 25 3 4 1 Multimonitor 25 3 4 2 Basic 25 3 4 3 Timer functions monitoring 27 3 4 4 PID1 controller monitoring 27 3 4 5 PID2 controller monitoring 27 3 4 6 Pump and Fan Cascade PFC 28 3 4 7 Maintenance timers 28 3 4 8 Fieldbus data monitoring 28 3 5 HVAC Application Application parameter lis...

Page 73: ...up 3 14 Pump and Fan Cascade 62 3 5 17Group 3 15 Maintenance counters 63 3 5 18Group 3 16 Fire mode 64 3 6 HVAC Application Additional parameter information 65 3 7 HVAC Application Fault tracing 87 3 7 1 Fault appears 87 3 7 2 Fault history 87 3 7 3 Fault codes 88 3 8 Fieldbus process data out 91 ...

Page 74: ...n options in menu and to change value OK button Confirm selection with this button Back Reset button Pressing this button you can return to the previous question in the Wizard If pressed at the first question the Startup Wizard will be cancelled Once you have connected power to the drive follow these instructions to easily set up your drive 1 Language selection Suomi Deutsch English Svenska 2 Dayl...

Page 75: ...ckup submenu M6 5 OR with parameter M1 19 in the Quick setup menu 7 Choose your process Pump Fan 8 Set value for Motor Nominal Speed according to nameplate Range 24 19 200 rpm 9 Set value for Motor Nominal Cur rent according to nameplate Range Varies 10 Set value for Minimum Frequency Range 0 00 50 00 Hz 11 Set value for Maximum Frequency Range 0 00 320 00 Hz Startup Wizard 1 No Yes STOP NotRDY Ke...

Page 76: ...e input signals is selected the question 9 appears Otherwise you will be taken to question 11 If either of the options Keypad Setpoint 1 or 2 is chosen the question 10 will appear If option Yes is selected you will be prompted for three more values 1 Process unit selection Several selections See par M3 12 1 4 2 Process unit min 3 Process unit max 4 Process unit decimals 0 4 5 Feedback 1 source sel...

Page 77: ...ee questions will appear If Autochange will not be used the Wizard jumps directly to question 21 After this the keypad will show the digital input and relay output configuration recommended by the application Write these values down for future reference 14 Wake up level 1 Range depends on selected pro cess unit 15 Number of motors 1 4 16 Interlock function 0 Not used 1 Enabled 17 Autochange 0 Disa...

Page 78: ...STARTUP Honeywell 6 ...
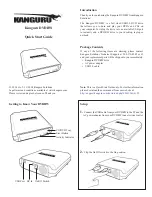
Page 79: ...the user sees information about his present location in the menu structure and the item displayed 2 2 1 Main menu The data on the control keypad are arranged in menus and submenus Use the Up and Down arrows to move between the menus Enter the group item by pressing the OK button and return to the former level by pressing the Back Reset button See Figure 1 The Location field indicates your current ...

Page 80: ... Parameters 12 STOP READY I O ID M1 5 Monitor Location field Status field Parameter ID number Main Menu Quick Setup 17 Parameters 12 STOP READY I O ID M1 5 Monitor Activated group item Press OK to enter Number of items in the group STOP RUN Status field READY NOT READY FAULT Control place PC IO KEYPAD FIELDBUS ALARM and current menu location Number of items in the group Direction BACK RESET OR Sta...

Page 81: ... Change of control place from Remote to Local keypad 1 Anywhere in the menu structure push the Loc Rem button 2 Push the Arrow up or the Arrow down button to select Local Remote and confirm with the OK button 3 On the next display select Local or Remote and again confirm with the OK button 4 The display will return to the same location as it was when the Loc Rem button was pushed LOC REM OK OK ID ...

Page 82: ...rmation is also available for faults alarms and the startup wizard Figure 3 Help text example LOC REM OK OK OK ID Choose action STOP Ready Keypad ID 1805 Local Remote Control page Change direction STOP READY Keypad 6 Keypad Reference 0 00 Hz Output Frequency 0 00Hz Motor Current 0 00A Motor Torque 0 00 0 00 Motor Power ID 184 Keypad 0 00 Hz Output Frequency 0 00Hz Motor Current 0 00A Motor Torque ...

Page 83: ...may want to add them to a folder called Favourites where they can easily be reached To remove an item from the Favourites see chapter 2 4 7 Figure 4 Adding item to Favourites STOP READY I O Basic Settings Motor Nom Voltg 230 00 V Motor Nom Freq 50 00 Hz Motor Nom Speed 1430 rpm STOP READY I O Motor Nom Freq was added to favorites Press OK to continue STOP READY I O Edit Help Add to favorites Motor...

Page 84: ...itor Multi monitor Basic Timer functions PID Controller 1 PID Controller 2 Multi Pump Fieldbus data Parameters See chapter 3 Diagnostics Active faults Reset faults Fault history Total counters Trip counters Software info I O and hard ware Basic I O Slot D Slot E Real time clock Keypad RS 485 Ethernet User settings Language selections Application selection Parameter backup Favourites See chapter 2 ...

Page 85: ...nd the Real Time Clock See chapter 3 4 3 PID Controller 1 Monitoring of PID controller values See chapters 3 4 4 and 3 4 5 PID Controller 2 Monitoring of PID controller values See chapters 3 4 4 and 3 4 5 Multi Pump Monitoring of values related to the use of several drives See chapter 3 4 6 Fieldbus data Fieldbus data shown as monitor values for debugging purposes at e g fieldbus commissioning See...

Page 86: ...gnal from the I O terminal or fieldbus or by choos ing Reset faults see below The memory of active faults can store the maximum of 10 faults in the order of appearance Menu Function Note Reset faults In this menu you can reset faults For closer instructions see chapter 3 7 1 CAUTION Remove external Con trol signal before resetting the fault to prevent unintentional restart of the drive Menu Functi...

Page 87: ...able 4 Diagnostics menu Software info parameters Code Parameter Min Max Unit Default ID Description M4 5 1 Energy counter Varies 2296 Resettable energy counter M4 5 3 Operating time a d hh min 2299 Resettable Code Parameter Min Max Unit Default ID Description M4 6 1 Software package M4 6 4 System load 0 100 2300 Load on control unit CPU ...

Page 88: ... digital input signal M5 1 5 Digital input 5 0 1 Status of digital input signal M5 1 6 Digital input 6 0 1 Status of digital input signal M5 1 7 Analog input 1 mode 1 5 Analog input signal mode M5 1 8 Analog input 1 0 100 Status of analog input signal M5 1 9 Analog input 2 mode 1 5 Analog input signal mode M5 1 10 Analog input 2 0 100 Status of analog input signal M5 1 11 Analog output 1 mode 1 5 ...

Page 89: ...5 4 3 Day dd mm 2202 Current date M5 4 4 Year yyyy 2203 Current year M5 4 5 Daylight saving 0 3 0 2204 Daylight saving rule 0 Off 1 EU 2 US 3 Russia Code Parameter Min Max Unit Default ID Description M5 6 1 Timeout time 0 60 min 0 Time after which the display returns to main menu M5 6 2 Contrast 30 70 50 Set contrast of the display 30 70 M5 6 3 Backlight time 0 60 min 5 Set the time until the back...

Page 90: ...h 2 Suomi 3 Deutsch 4 Svenska M6 2 Application selection M6 5 Parameter backup See chapter 2 4 6 1 below M6 7 Drive name Give name of drive if needed Code Parameter Min Max Unit Default ID Description M6 5 1 Restore factory defaults Restores default parameter values and initiates the Startup Wizard M6 5 2 Save to keypad 0 1 0 Save parameter values to keypad to e g copy them to another drive 0 No 1...

Page 91: ...rs or monitoring signals from any of the keypad menus You can add items or parameters to the Favourites folder see chapter 2 3 5 To remove an item or a parameter from the Favourites folder do the following Motor Nom Freq 50 00 Hz Favourites STOP READY I O Help Motor Nom Freq STOP READY I O Monitor Rem from favorites ...

Page 92: ...alues Run interlock input Damper interlock Drive will not start before this input is activated Different pre heat modes used to avoid condensation problems Maximum output frequency 320Hz Real time clock and timer functions available optional battery required Possible to program 3 time channels to achieve different functions on the drive e g Start Stop and Preset frequencies External PID controller...

Page 93: ... DI2 Digital input 2 Start REV 10 DI3 Digital input 3 Fault 11 CM Common A for DIN1 DIN6 Digital inputs can be disconnected from ground See Installation Manual 12 24Vout 24V aux voltage 13 GND I O ground 14 DI4 Digital input 4 Preset freq select 1 15 DI5 Digital input 5 Preset freq select 2 16 DI6 Digital input 6 Fault reset 17 CM Common A for DIN1 DIN6 18 AO1 Analog signal output OP freq 19 AO GN...

Page 94: ... 3 NO 24 RO2 1 NC Relay output 2 FAULT 25 RO2 2 CM 26 RO2 3 NO 32 RO3 1 CM Relay output 3 READY 33 RO3 2 NO Relay board 2 Terminal Signal 21 RO1 1 NC Relay output 1 RUN 22 RO1 2 CM 23 RO1 3 NO 24 RO2 1 NC Relay output 2 FAULT 25 RO2 2 CM 26 RO2 3 NO 28 TI1 Thermistor input 29 TI1 From Basic I O board From term 13 From term 12 RUN From Basic I O board From term 13 From term 6 or 12 RUN 220 VAC ...

Page 95: ... 1 00 0 80 120 Find this value on the rating plate of the motor M1 6 Motor nominal power 0 00 Varies kW Varies 116 Find this value In on the rat ing plate of the motor M1 7 Motor current limit Varies Varies A Varies 107 Maximum motor current from AC drive M1 8 Minimum frequency 0 00 M3 3 1 Hz Varies 101 Minimum allowed frequency reference M1 9 Maximum frequency M3 3 1 320 00 Hz 60 00 102 Maximum a...

Page 96: ...HVAC APPLICATION Honeywell 24 Table 13 Quick setup parameter group M1 18 Multi Pump Wizard 0 1 0 0 Inactive 1 Activate See chapter 1 3 M1 19 Startup Wizard 0 1 0 0 Inactive 1 Activate See chapter 1 1 ...

Page 97: ... to motor M2 2 2 Frequency reference Hz 25 Frequency reference to motor control M2 2 3 Motor speed rpm 2 Motor speed in rpm M2 2 4 Motor current A 3 M2 2 5 Motor torque 4 Calculated shaft torque M2 2 7 Motor shaft power 5 Total power consumption of AC drive M2 2 8 Motor shaft power kW hp 73 M2 2 9 Motor voltage V 6 M2 2 10 DC link voltage V 7 M2 2 11 Unit temperature C 8 Heatsink temperature M2 2 ...

Page 98: ...presents the status of one digital input 6 digital inputs at every slot are read Word 1 starts from input 1 in slot A bit0 and goes to input 4 in slot C bit15 M2 2 21 DIN Status Word 2 57 16 bit word where each bit represents the status of one digital input 6 digital inputs at every slot are read Word 2 starts from input 5 in slot C bit0 and goes to input 6 in slot E bit13 Monitoring value Unit ID...

Page 99: ...e on timer if active M2 3 8 Timer 2 s 1448 Remaining time on timer if active M2 3 9 Timer 3 s 1449 Remaining time on timer if active M2 3 10 Real time clock 1450 Monitoring value Unit ID Description M2 4 1 PID1 setpoint Varies 20 Process units selected with parameter M2 4 2 PID1 feedback Varies 21 Process units selected with parameter M2 4 3 PID1 error value Varies 22 Process units selected with p...

Page 100: ...ence M2 8 3 FB data in 1 876 Raw value of process data in 32 bit signed format M2 8 4 FB data in 2 877 Raw value of process data in 32 bit signed format M2 8 5 FB data in 3 878 Raw value of process data in 32 bit signed format M2 8 6 FB data in 4 879 Raw value of process data in 32 bit signed format M2 8 7 FB data in 5 880 Raw value of process data in 32 bit signed format M2 8 8 FB data in 6 881 R...

Page 101: ...f process data in 32 bit signed format M2 8 18 FB data out 6 871 Raw value of process data in 32 bit signed format M2 8 19 FB data out 7 872 Raw value of process data in 32 bit signed format M2 8 20 FB data out 8 873 Raw value of process data in 32 bit signed format Monitoring value Unit ID Description ...

Page 102: ...ol reference settings Frequency reference setup Group 3 4 Ramp Brakes Setup Acceleration Deceleration setup Group 3 5 I O Configuration I O programming Group 3 6 Fieldbus Data Mapping Process data in out mapping Group 3 7 Prohibit Frequencies Prohibit frequencies programming Group 3 8 Limit supervisions Programmable limit controllers Group 3 9 Protections Protections configuration Group 3 10 Autom...

Page 103: ...2 3 5 2 1 Example programming The selectable values of the programmable parameters are of type DigIN SlotA 1 in which DigIN stands for digital input Slot_ refers to the board A and B are basic boards D and E are option boards see Figure 6 The parameter signal is not connected to any terminal i e it is not used if instead of a letter the word Slot is followed by a 0 for example DigIN Slot0 1 The nu...

Page 104: ...References 18 Parameters I O Config 4 Ramps and Brakes 7 ID M3 5 STOP READY Keypad I O Config Digital Inputs 26 Analog Inputs 36 Analog Inputs Digital Outputs 1 ID M3 5 1 STOP READY Keypad Digital Inputs Ctrl Signal 1 A Ctrl Signal 2 A DigIn Slot0 1 DigIn Slot0 1 DigIn SlotA 1 Ctrl Signal 1 B ID 404 M3 5 1 2 STOP READY Keypad Main Menu Quick Setup 17 5 Monitor ID M3 Parameters 12 STOP READY Keypad...

Page 105: ...320 00 Hz 60 00 111 Find this value fn on the rat ing plate of the motor M3 1 1 3 Motor nominal speed 24 19200 rpm 1720 112 Find this value nn on the rat ing plate of the motor M3 1 1 4 Motor nominal current Varies Varies A Varies 113 Find this value In on the rat ing plate of the motor M3 1 1 5 Motor Cos Phi 0 30 1 00 0 80 120 Find this value on the rating plate of the motor M3 1 1 6 Motor nomina...

Page 106: ...e currents in the cable M3 1 2 3 Motor preheat function 0 3 0 1225 0 Not used 1 Always in stop state 2 Controlled by DI 3 Temperature limit heat sink NOTE Virtual digital input can be activated by RTC M3 1 2 4 Motor preheat temper ature limit 20 80 C 0 1226 Motor preheat is switched on when the heatsink tem perature goes below this level if par M3 1 2 3 is set to Temperature limit If limit is e g ...

Page 107: ... M3 2 4 Start function 0 1 0 505 0 Ramping 1 Flying start M3 2 5 Stop function 0 1 0 506 0 Coasting 1 Ramping M3 2 6 I O A start stop logic 0 3 0 300 CtrlSgn 1 0 Start fwd 1 Start fwd pulse 3 wire 2 Start fwd pulse 3 AI1 threshold CrtlSgn 2 0 Start fwd 1 Stop pulse 3 wire 2 Start fwd pulse 3 AI1 threshold M3 2 7 I O B start stop logic 0 3 0 363 See above M3 2 8 AI1 start threshold 3 00 100 00 5 00...

Page 108: ...only be forced active with digital input M3 5 1 5 M3 3 5 Keypad Ctrl Refer ence selection 1 8 2 121 Selection of ref source when control place is keypad 1 Preset Frequency 0 2 Keypad 3 Fieldbus 4 AI1 5 AI2 6 AI1 AI2 7 PID 1 reference 8 Motor potentiometer M3 3 6 Keypad reference 0 00 M3 3 2 Hz 0 00 184 The frequency reference can be adjusted on the keypad with this parameter M3 3 7 Keypad directio...

Page 109: ...tion 0 1 M3 3 15 Preset frequency 4 M3 3 1 M3 3 2 Hz 25 00 127 Select with digital input Preset frequency selection 2 M3 5 1 18 M3 3 16 Preset frequency 5 M3 3 1 M3 3 2 Hz 30 00 128 Select with digital inputs Preset frequency selection 0 2 M3 3 17 Preset frequency 6 M3 3 1 M3 3 2 Hz 40 00 129 Select with digital inputs Preset frequency selection 1 2 M3 3 18 Preset frequency 7 M3 3 1 M3 3 2 Hz 50 0...

Page 110: ...ompared to fre quency output from ramp generator 0 Not in use Ramp 2 can also be forced with a digital input M3 4 5 Ramp 2 shape 0 0 10 0 s 0 0 501 See M3 4 1 M3 4 6 Acceleration time 2 0 0 300 0 s 10 0 502 See M3 4 2 M3 4 7 Deceleration time 2 0 0 300 0 s 10 0 503 See M3 4 3 M3 4 8 Ramp time optimizer 0 1 Varies 1808 0 Disable 1 Enable M3 4 9 Ramp optimizing per centage 0 0 50 0 10 0 1809 Defines...

Page 111: ...nt injected into the motor during DC braking 0 Disabled M3 4 15 Frequency to start DC braking at ramp stop 0 10 10 00 Hz 1 50 515 The output frequency at which the DC braking is applied M3 4 16 Flux braking 0 1 0 520 0 Disabled 1 Enabled M3 4 17 Flux braking current 0 Varies A Varies 519 Defines the current level for flux braking ...

Page 112: ...DigIN SlotA 6 414 Resets all active faults M3 5 1 10 Run enable DigIN Slot0 2 407 Must be on to set drive in Ready state M3 5 1 11 Run interlock 1 DigIN Slot0 1 1041 Drive may be ready but start is blocked as long as interlock is on Damper interlock M3 5 1 12 Run interlock 2 DigIN Slot0 1 1042 As above M3 5 1 13 Acceleration Decelera tion time selection DigIN Slot0 1 408 Used for switching between...

Page 113: ...2 interlock DigIN Slot0 1 427 FALSE Not active TRUE Active M3 5 1 28 Motor 3 interlock DigIN Slot0 1 428 FALSE Not active TRUE Active M3 5 1 29 Motor 4 interlock DigIN Slot0 1 429 FALSE Not active TRUE Active M3 5 1 30 Motor potentiometer UP DigIN Slot0 1 418 FALSE Not active TRUE Active Motor potentiometer refer ence INCREASES until the contact is opened M3 5 1 31 Motor potentiometer DOWN DigIN S...

Page 114: ...signal to the analog input of your choice with this parameter Programmable M3 5 2 14 AI3 signal filter time 0 00 300 00 s 0 1 142 Filter time for analog input M3 5 2 15 AI3 signal range 0 1 0 143 0 0 10V 0 20mA 1 2 10V 4 20mA M3 5 2 16 AI3 custom min 160 00 160 00 0 00 144 20 4 20 mA 2 10 V M3 5 2 17 AI3 custom max 160 00 160 00 100 00 145 Custom range max setting M3 5 2 18 AI3 signal inversion 0 ...

Page 115: ...AnIN Slot0 1 199 See M3 5 2 13 Programma ble M3 5 2 32 AI6 signal filter time 0 00 300 00 s 0 1 200 See M3 5 2 14 M3 5 2 33 AI6 signal range 0 1 0 201 0 0 10V 0 20mA 1 2 10V 4 20mA M3 5 2 34 AI6 custom min 160 00 160 00 0 00 202 See M3 5 2 16 M3 5 2 35 AI6 custom max 160 00 160 00 100 00 203 See M3 5 2 17 M3 5 2 36 AI6 signal inversion 0 1 0 209 See M3 5 2 18 ...

Page 116: ... chnl 3 control 20 FB ControlWord B13 21 FB ControlWord B14 22 FB ControlWord B15 23 PID1 in Sleep mode 24 Reserved 25 PID1 supervision limits 26 PID2 supervision limits 27 Motor 1 control 28 Motor 2 control 29 Motor 3 control 30 Motor 4 control 31 Reserved Always open 32 Reserved Always open 33 Reserved Always open 34 Maintenance alarm 35 Maintenance fault M3 5 3 2 2 Basic R01 ON delay 0 00 320 0...

Page 117: ...0 InMotor 6 Motor torque 0 TnMotor 7 Motor power 0 PnMotor 8 Motor voltage 0 UnMotor 9 DC link voltage 0 1000V 10 PID1 output 0 100 11 PID2 output 0 100 12 ProcessDataIn1 13 ProcessDataIn2 14 ProcessDataIn3 15 ProcessDataIn4 16 ProcessDataIn5 17 ProcessDataIn6 18 ProcessDataIn7 19 ProcessDataIn8 NOTE For ProcessDataIn e g value 5000 50 00 M3 5 4 1 2 AO1 filter time 0 00 300 00 s 1 00 10051 Filteri...

Page 118: ...nalog outputs Table 32 Slot D E analog outputs Code Parameter Min Max Unit Default ID Description Application dynamic output list Shows only parameters for existing outputs in slot D E Selections as in Basic AO1 Not visible if no analog out put exists in slot D E ...

Page 119: ...ection 0 35000 2 853 Select Process Data Out with parameter ID P3 6 3 Fieldbus data out 3 selection 0 35000 3 854 Select Process Data Out with parameter ID P3 6 4 Fieldbus data out 4 selection 0 35000 4 855 Select Process Data Out with parameter ID P3 6 5 Fieldbus data out 5 selection 0 35000 5 856 Select Process Data Out with parameter ID P3 6 6 Fieldbus data out 6 selection 0 35000 6 857 Select ...

Page 120: ...range 1 high limit 0 00 320 00 Hz 0 00 510 0 Not used M3 7 3 Prohibit frequency range 2 low limit 0 00 320 00 Hz 0 00 511 0 Not used M3 7 4 Prohibit frequency range 2 high limit 0 00 320 00 Hz 0 00 512 0 Not used M3 7 5 Prohibit frequency range 3 low limit 0 00 320 00 Hz 0 00 513 0 Not used M3 7 6 Prohibit frequency range 3 high limit 0 00 320 00 Hz 0 00 514 0 Not used M3 7 7 Ramp time factor 0 1 ...

Page 121: ...ink voltage 6 Analog input 1 7 Analog input 2 M3 8 2 Supervision 1 mode 0 2 0 1432 0 Not used 1 Low limit supervision output active over limit 2 High limit supervision output active under limit M3 8 3 Supervision 1 limit 200 000 200 000 Varies 25 00 1433 Supervision limit for selected item Unit appears automati cally M3 8 4 Supervision 1 limit hysteresis 200 000 200 000 Varies 5 00 1434 Supervisio...

Page 122: ...r ature factor 20 0 100 0 C 40 0 705 Ambient temperature in C M3 9 8 Motor thermal zero speed cooling 5 0 150 0 Varies 706 Defines the cooling factor at zero speed in relation to the point where the motor is run ning at nominal speed with out external cooling M3 9 9 Motor thermal time constant 1 200 min Varies 707 The time constant is the time within which the calculated thermal stage has reached ...

Page 123: ...ll active the drive will trip to fault M3 10 5 Number of trials 1 10 4 759 NOTE Total number of trials irrespective of fault type M3 10 6 Autoreset Undervoltage 0 1 1 720 Autoreset permitted 0 No 1 Yes M3 10 7 Autoreset Overvoltage 0 1 1 721 Autoreset permitted 0 No 1 Yes M3 10 8 Autoreset Overcurrent 0 1 1 722 Autoreset permitted 0 No 1 Yes M3 10 9 Autoreset AI low 0 1 1 723 Autoreset permitted 0...

Page 124: ...hod described in chapter 3 5 2 Go to menu Parameters M3 further down to menu I O config M3 5 and Digital inputs M3 5 1 Locate the parameter Preset frequency selection 0 M3 5 1 15 Change the value of this parameter to TimeChannel 1 Now the function Preset frequency selection 0 is activated at 08 00 on Monday and deactivated at 16 00 the same day The status of the Intervals and Time channels can be ...

Page 125: ...3 11 4 4 To day 0 6 0 1482 See Interval 1 M3 11 4 5 Assign to channel 0 3 0 1483 See Interval 1 3 11 5 INTERVAL 5 M3 11 5 1 ON time 00 00 00 23 59 59 hh mm ss 00 00 00 1484 See Interval 1 M3 11 5 2 OFF time 00 00 00 23 59 59 hh mm ss 00 00 00 1485 See Interval 1 M3 11 5 3 From day 0 6 0 1486 See Interval 1 M3 11 5 4 To day 0 6 0 1487 See Interval 1 M3 11 5 5 Assign to channel 0 3 0 1488 See Interv...

Page 126: ...ue during 1 00 s causes the controller output to change by 10 00 M3 12 1 4 Process unit selection 1 40 1 1036 Select unit for actual value M3 12 1 5 Process unit min Varies Varies Varies 0 1033 M3 12 1 6 Process unit max Varies Varies Varies 100 1034 M3 12 1 7 Process unit decimals 0 4 2 1035 Number of decimals for pro cess unit value M3 12 1 8 Error inversion 0 1 0 340 0 Normal Feedback Set point...

Page 127: ...OTE ProcessDataIn use two decimals M3 12 2 5 Setpoint 1 minimum 200 00 200 00 0 00 1069 Minimum value at analog sig nal minimum M3 12 2 6 Setpoint 1 maximum 200 00 200 00 100 00 1070 Maximum value at analog signal maximum M3 12 2 7 Sleep frequency limit 1 0 00 320 00 Hz 0 00 1016 Drive goes to sleep mode when the output frequency stays below this limit for a time greater than that defined by param...

Page 128: ...074 Maximum value at analog signal maximum M3 12 2 14 Sleep frequency limit 2 0 00 320 00 Hz 0 00 1075 See M3 12 2 7 M3 12 2 15 Sleep delay 2 0 3000 s 0 1076 See M3 12 2 8 M3 12 2 16 Wake up level 2 Varies 0 0000 1077 See M3 12 2 9 M3 12 2 17 Setpoint 2 boost 2 0 2 0 x 1 0 1078 See M3 12 2 10 ...

Page 129: ...ed 1 AI1 2 AI2 3 AI3 4 AI4 5 AI5 6 AI6 7 ProcessDataIn1 8 ProcessDataIn2 9 ProcessDataIn3 10 ProcessDataIn4 11 ProcessDataIn5 12 ProcessDataIn6 13 ProcessDataIn7 14 ProcessDataIn8 AI s and ProcessDataIn are handled as 0 00 100 00 and scaled accord ing to Feedback min and max NOTE ProcessDataIn use two decimals M3 12 3 4 Feedback 1 minimum 200 00 200 00 0 00 336 Minimum value at analog sig nal mini...

Page 130: ...nction 1 9 1 1059 See M3 12 3 1 M3 12 4 2 Feedforward function gain 1000 1000 100 0 1060 See M3 12 3 2 M3 12 4 3 Feedforward 1 source selection 0 14 0 1061 See M3 12 3 3 M3 12 4 4 Feedforward 1 mini mum 200 00 200 00 0 00 1062 See M3 12 3 4 M3 12 4 5 Feedforward 1 maxi mum 200 00 200 00 100 00 1063 See M3 12 3 5 M3 12 4 6 Feedforward 2 source selection 0 14 0 1064 See M3 12 3 6 M3 12 4 7 Feedforwa...

Page 131: ...portionally to the frequency Setpoint compensation Max compensation FreqOut MinFreq Max Freq MinFreq M3 12 6 3 Enable setpoint 2 0 1 0 1191 See M3 12 6 1 M3 12 6 4 Setpoint 2 max com pensation Varies Varies Varies Varies 1192 See M3 12 6 2 Code Parameter Min Max Unit Default ID Description M3 12 7 1 Enable soft fill 0 1 0 1094 0 Disable 1 Enable M3 12 7 2 Soft fill frequency M3 3 1 M3 3 2 Hz 0 00 ...

Page 132: ... Varies Varies 100 1665 M3 13 1 9 Process unit decimals 0 4 2 1666 M3 13 1 10 Error inversion 0 1 0 1636 M3 13 1 11 Dead band hysteresis Varies Varies Varies 0 0 1637 M3 13 1 12 Dead band delay 0 00 320 00 s 0 00 1638 Code Parameter Min Max Unit Default ID Description M3 13 2 1 Keypad setpoint 1 0 00 100 00 Varies 0 00 1640 M3 13 2 2 Keypad setpoint 2 0 00 100 00 Varies 0 00 1641 M3 13 2 3 Setpoin...

Page 133: ... minimum M3 13 3 5 Feedback 1 maximum 200 00 200 00 100 00 1654 Maximum value at analog signal maximum M3 13 3 6 Feedback 2 source selection 0 14 2 1655 M3 13 3 7 Feedback 2 minimum 200 00 200 00 0 00 1656 Minimum value at analog signal minimum M3 13 3 8 Feedback 2 maximum 200 00 200 00 100 00 1657 Maximum value at analog signal maximum Code Parameter Min Max Unit Default ID Description M3 13 4 1 ...

Page 134: ...ock function 0 1 1 1032 Enable Disable use of inter locks Interlocks are used to tell the system if a motor is connected or not 0 Disabled 1 Enabled M3 14 3 Include FC 0 1 1 1028 Include the drive in the autochange and interlocking system 0 Disabled 1 Enabled M3 14 4 Autochange 0 1 0 1027 Disable enable rotation of starting order and priority of motors 0 Disabled 1 Enabled M3 14 5 Autochange inter...

Page 135: ...es when to trig a main tenance alarm for Counter 1 0 Not used M3 15 3 Counter 1 fault limit 0 80000 h revs 0 1106 Defines when to trig a main tenance fault for Counter 1 0 Not used M3 15 4 Counter 1 reset 0 1 0 1107 Changing parameter value from 0 to 1 resets counter M3 15 5 Counter 2 mode 0 2 0 1108 0 Not used 1 Hours 2 Revs 1000 M3 15 6 Counter 2 alarm limit 0 80000 h revs 0 1109 Defines when to...

Page 136: ...S ACTIVATED There is also a differ ent password for test mode to be used for testing the Fire Mode without the warranty becoming void Table 52 Fire mode parameters Code Parameter Min Max Unit Default ID Description M3 16 1 Fire Mode password 0 9999 0 1599 1001 Enabled 1234 Test mode M3 16 2 Fire Mode activation DigIN Slot0 2 1596 FALSE Fire Mode active TRUE No action M3 16 3 Fire Mode frequency 0 ...

Page 137: ...OP FUNCTION M3 2 6 I O A START STOP LOGIC Values 0 2 offer possibilities to control the starting and stopping of the drive with digital signal connected to digital inputs CS Control signal Selection number Selection name Description 0 Coasting The motor is allowed to stop on its own inertia The control by the drive is discontinued and the drive current drops to zero as soon as the stop command is ...

Page 138: ... frequency Stop function M3 2 5 coasting FWD REV Stop function M3 2 5 ramp Ctrl signal 2 A B Ctrl signal 1 A B 1 2 3 t 100K16 REV Output frequency Stop function M3 2 5 Coasting If Start and Stop pulses are simultaneous the Stop pulse overrides the Start pulse Start Stop FWD Ctrl signal 1 Ctrl signal 2 ...

Page 139: ...uency parameters to define certain frequency references in ad vance These references are then applied by activating inactivating digital inputs connected to parameters M3 5 1 16 M3 5 1 17 and M3 5 1 18 Preset frequency selection 0 Preset fre quency selection 1 and Preset frequency selection 2 Two different logics can be selected M3 3 11 TO M3 3 18 PRESET FREQUENCIES 1 TO 7 The values of the preset...

Page 140: ...ged Figure 10 Acceleration Deceleration S shaped M3 4 8 RAMP TIME OPTIMIZER If the ramp time optimizer is enabled the deceleration time will be increased by the percentage defined in parameter M3 4 9 Ramp optimizing percentage every time we hit the overvoltage controller during deceleration or acceleration time when hitting the current limit during acceler ation There is also a parameter for setti...

Page 141: ...tor damage M3 5 1 10 RUN ENABLE Contact open Start of motor disabled Contact closed Start of motor enabled The drive is stopped according to the selected function at M3 2 5 The follower drive will always coast to stop M3 5 1 11 RUN INTERLOCK 1 M3 5 1 12 RUN INTERLOCK 2 The drive cannot be started if any of the interlocks are open The function could be used for a damper interlock preventing the dri...

Page 142: ...rm 6 Reversed The reverse command has been selected 7 At speed The output frequency has reached the set reference 8 Motor regulator activated One of the limit regulators e g current limit torque limit is activated 9 Preset frequency active The preset frequency has been selected with digital input 10 Keypad control active Keypad control mode selected 11 I O control B active I O control place B sele...

Page 143: ...n info message is shown The same will happen if the bands are not reasonable 18 RTC timer 2 control Time channel 2 is used 19 RTC timer 3 control Time channel 3 is used 20 FB Control WordB 13 21 FB Control WordB 14 22 FB Control WordB 15 23 PID1 in Sleep mode 24 Reserved 25 PID1 supervision limits PID1 feedback value is beyond supervision limits 26 PID2 supervision limits PID2 feedback value is be...

Page 144: ...e the motor is running at nominal speed without external cooling The default value is set assuming that there is no external fan cooling the motor If an external fan is used this parameter can be set to 90 or even higher If you change the parameter M3 1 1 4 Motor nominal current this parameter is automatically restored to the default value Setting this parameter does not affect the maximum output ...

Page 145: ... t6 time t6 is the time in seconds the motor can safely operate at six times the rated current is known given by the motor manufacturer the time constant parameter can be set basing on it As a rule of thumb the motor thermal time constant in minutes equals to 2 t6 If the drive is in stop stage the time constant is internally increased to three times the set pa rameter value The cooling in stop sta...

Page 146: ...ppearing during the time set with this parameter If the number of faults during the trial time exceed the value of parameter M3 10 5 a permanent fault is generated Otherwise the fault is cleared after the trial time has elapsed and the next fault start the trial time count again Parameter M3 10 5 determines the maximum number of automatic fault reset attempts during the trial time set by this para...

Page 147: ...N Figure 16 Automatic reset function 100K15 fh11 Fault trigger Autoreset Trial time Wait time Par 3 10 3 Reset 1 Reset 2 Trial time Par 3 10 4 Fault active Alarm Number of trials M3 10 5 2 Wait time Par 3 10 3 Wait time Par 3 10 3 ...

Page 148: ... output is locked if the actual value stays within the deadband area around the reference for a predefined time This function will prevent unnecessary movement and wear on actuators e g valves Figure 17 Dead band 100K18 fh11 Dead band M3 12 1 9 Reference Dead band delay M3 12 1 10 Output locked Actual value ...

Page 149: ...ard part does not use any feedback measurements of the actual controlled process value water level in the example on page 78 The feedforward control uses other measurements which are indirectly affecting the controlled process value Example 1 Controlling the water level of a tank by means of flow control The desired water level has been defined as a setpoint and the actual level as feedback The co...

Page 150: ...r starts counting up towards the Delay M3 12 5 4 When the actual value is within the allowed area the same counter counts down instead Whenever the counter is higher than the Delay an alarm or fault depending on the selected response is generated PID LT FT 100K20 fh11 FFW Level ref Level control Outflow control 100K21 fh11 Regulating mode Upper limit M3 12 5 2 Lower limit M3 12 5 3 Actual value De...

Page 151: ...ts the best place for the sensor would probably be halfway down the pipe Position 2 However sensors might for example be placed directly after the pump This will give the right pressure directly after the pump but farther down in the pipe the pressure will drop depending on the flow Pressure No flow Pipe length PT PT Position 1 Position 2 ...

Page 152: ... farther down in the pipe This can be com pensated by raising the setpoint as the flow increases In this case the flow is estimated by the output frequency and the setpoint is linearly increased with the flow as in the figure below Figure 22 Enable setpoint 1 for pressure loss compensation PT PT Position 1 Position 2 100K23 fh11 Pressure No flow Pipe length Setpoint Max Freq and Flow Min Freq and ...

Page 153: ...at the Soft fill frequency M3 12 7 2 until the actual value reaches the Soft fill level M3 12 7 3 After this the drive starts to regulate If the Soft fill level isn t reached within the Soft fill timeout M3 12 7 4 an alarm or fault is triggered according to the Soft fill supervision response M3 9 16 NOTE The Soft fill function is disabled if parameter M3 12 1 8 Error inversion is set to Inverted 1...

Page 154: ...nning at a close to min frequency 2 Hz Conditions above are fulfilled for a time longer than the bandwidth delay There are more motors running than the regulating one M3 14 2 INTERLOCK FUNCTION Interlocks can be used to tell the Multi Pump system that a motor is not available e g because of the motor is removed from the system for maintenance or bypassed for manual control Enable this function to ...

Page 155: ...is updated to its original order 1 2 3 4 5 M3 14 3 INCLUDE FC WIRING There are two different ways to make the connections depending on whether selection 0 or 1 is set as parameter value Selection 0 Disabled The drive or the regulating motor is not included in the autochange or interlocks logic The drive is directly connected to motor 1 as in Figure 25 below The other motors are auxiliary ones con ...

Page 156: ...con nection according to Figure 26 below Every motor is controlled with one relay but the contactor logic takes care that the first connect ed motor is always connected to the drive and next to the mains M M M K2 K3 K2 K3 100K25 fh11 Motor 1 Motor 2 Motor 3 Motor 1 control from relay Motor 2 control from relay Motor 3 control from relay NOT USED Mains ...

Page 157: ...26 M M M K1 K1 1 K2 K2 1 K3 K3 1 100K26 fh11 K1 K1 1 K1 1 K1 K2 K3 K2 K3 K2 K2 1 K2 1 K2 K1 K3 K1 K3 K3 K3 1 K3 1 K3 K2 K1 K2 K1 Mains Motor 1 Motor 2 Motor 3 Motor 1 control from relay Motor 2 control from relay Motor 3 control from relay ...

Page 158: ...run if interlocks have been removed and added again but the priority order is always restored after a stop 1 Enabled The priority is changed at certain intervals to get an equal wear on all motors The intervals of the auto change can be changed M3 14 5 You can also set a limit of how many motors are allowed to run M3 14 7 as well as for the maximum frequency of the regulating drive when the autoch...

Page 159: ...y because of a fault condition always write down all texts and codes on the keypad display 3 7 1 Fault appears When a fault appears and the drive stops examine the cause of fault perform the actions ad vised here and reset the fault either 1 with a long 1 s press on the Reset button on the keypad or 2 by entering the Diagnostics Menu M4 entering Reset faults M4 2 and selecting Reset faults paramet...

Page 160: ...ware fault Check motor cables and motor 5 Charging switch The charging switch is open when the START command has been given faulty operation component failure Fault ID 40 Hardware fault Reset the fault and restart Should the fault re occur con tact the distributor near to you 7 Saturation Various causes defective component brake resistor short circuit or over load Fault ID 60 Hardware fault Cannot...

Page 161: ...erature measured in power unit s heatsink or board Heatsink tem perature is over 100 C Fault ID 120 Fault 121 Alarm Check the correct amount and flow of cooling air Check the heatsink for dust Check the ambient tempera ture Make sure that the switching frequency is not too high in relation to ambient tempera ture and motor load 15 Motor stalled Motor stall protection has tripped Fault ID 140 Fault...

Page 162: ...mit 1303 Maintenance counter 2 alarm Maintenance counter has reached the alarm limit 1304 Maintenance counter 2 fault Maintenance counter has reached the fault limit 1305 Maintenance counter 3 alarm Maintenance counter has reached the alarm limit 1306 Maintenance counter 3 fault Maintenance counter has reached the fault limit 69 1310 Fieldbus map ping error Non existing ID number is used for map p...

Page 163: ...Out Data Value Scale Process Data Out 1 Output frequency 0 01 Hz Process Data Out 2 Motor speed 1 rpm Process Data Out 3 Motor current 0 1 A Process Data Out 4 Motor torque 0 1 Process Data Out 5 Motor power 0 1 Process Data Out 6 Motor voltage 0 1 V Process Data Out 7 DC link voltage 1 V Process Data Out 8 Last active fault code ...

Page 164: ...rol Solutions Honeywell International Inc 1985 Douglas Drive North Golden Valley MN 55422 customer honeywell com U S Registered Trademark 2011 Honeywell International Inc 63 2692 08 M S Rev 11 11 Printed in United States ...

Reviews: